
Lunar Images 24 March 2021 with TEC140 and Celestron C925 with ASI174M
A selection of four images I took with my two main telescopes on the evening of the 24th March 2021 with The Moon at 78% waxing gibbous phase to the South in the constellation of Leo.
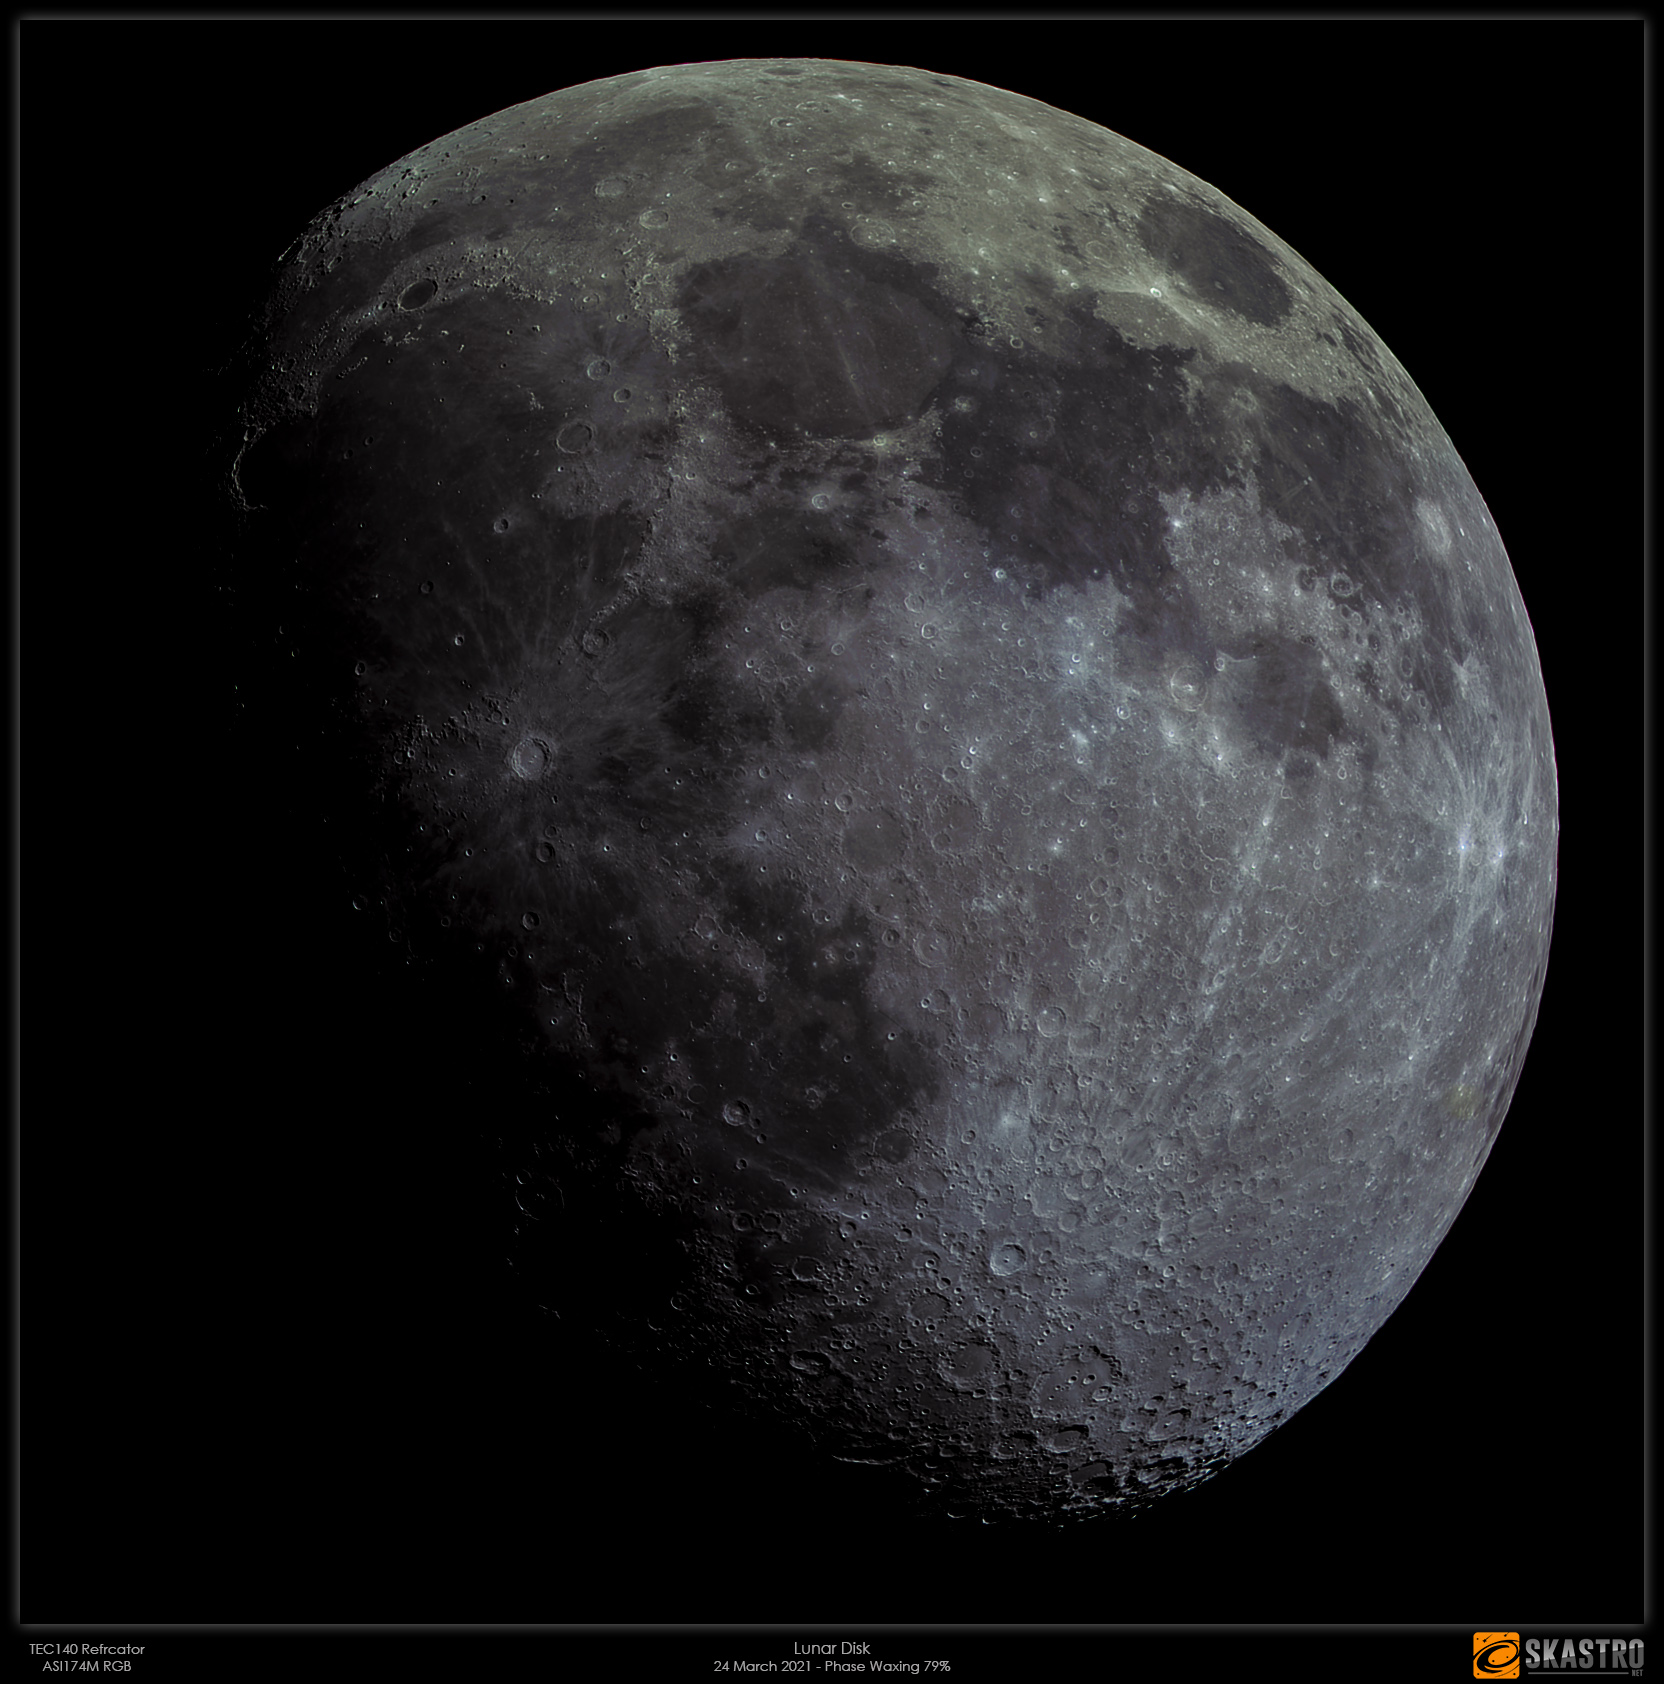
First up below is a main disk taken with TEC140 refractor. I shot RGB through those filters on my ASI174M camera and I took the luminance through a 7nm Ha filter. My field of view with the TEC140 and this camera is only half the disk and so I have to take sequence runs, one for the north and the other for the south and then combine them in Photoshop.
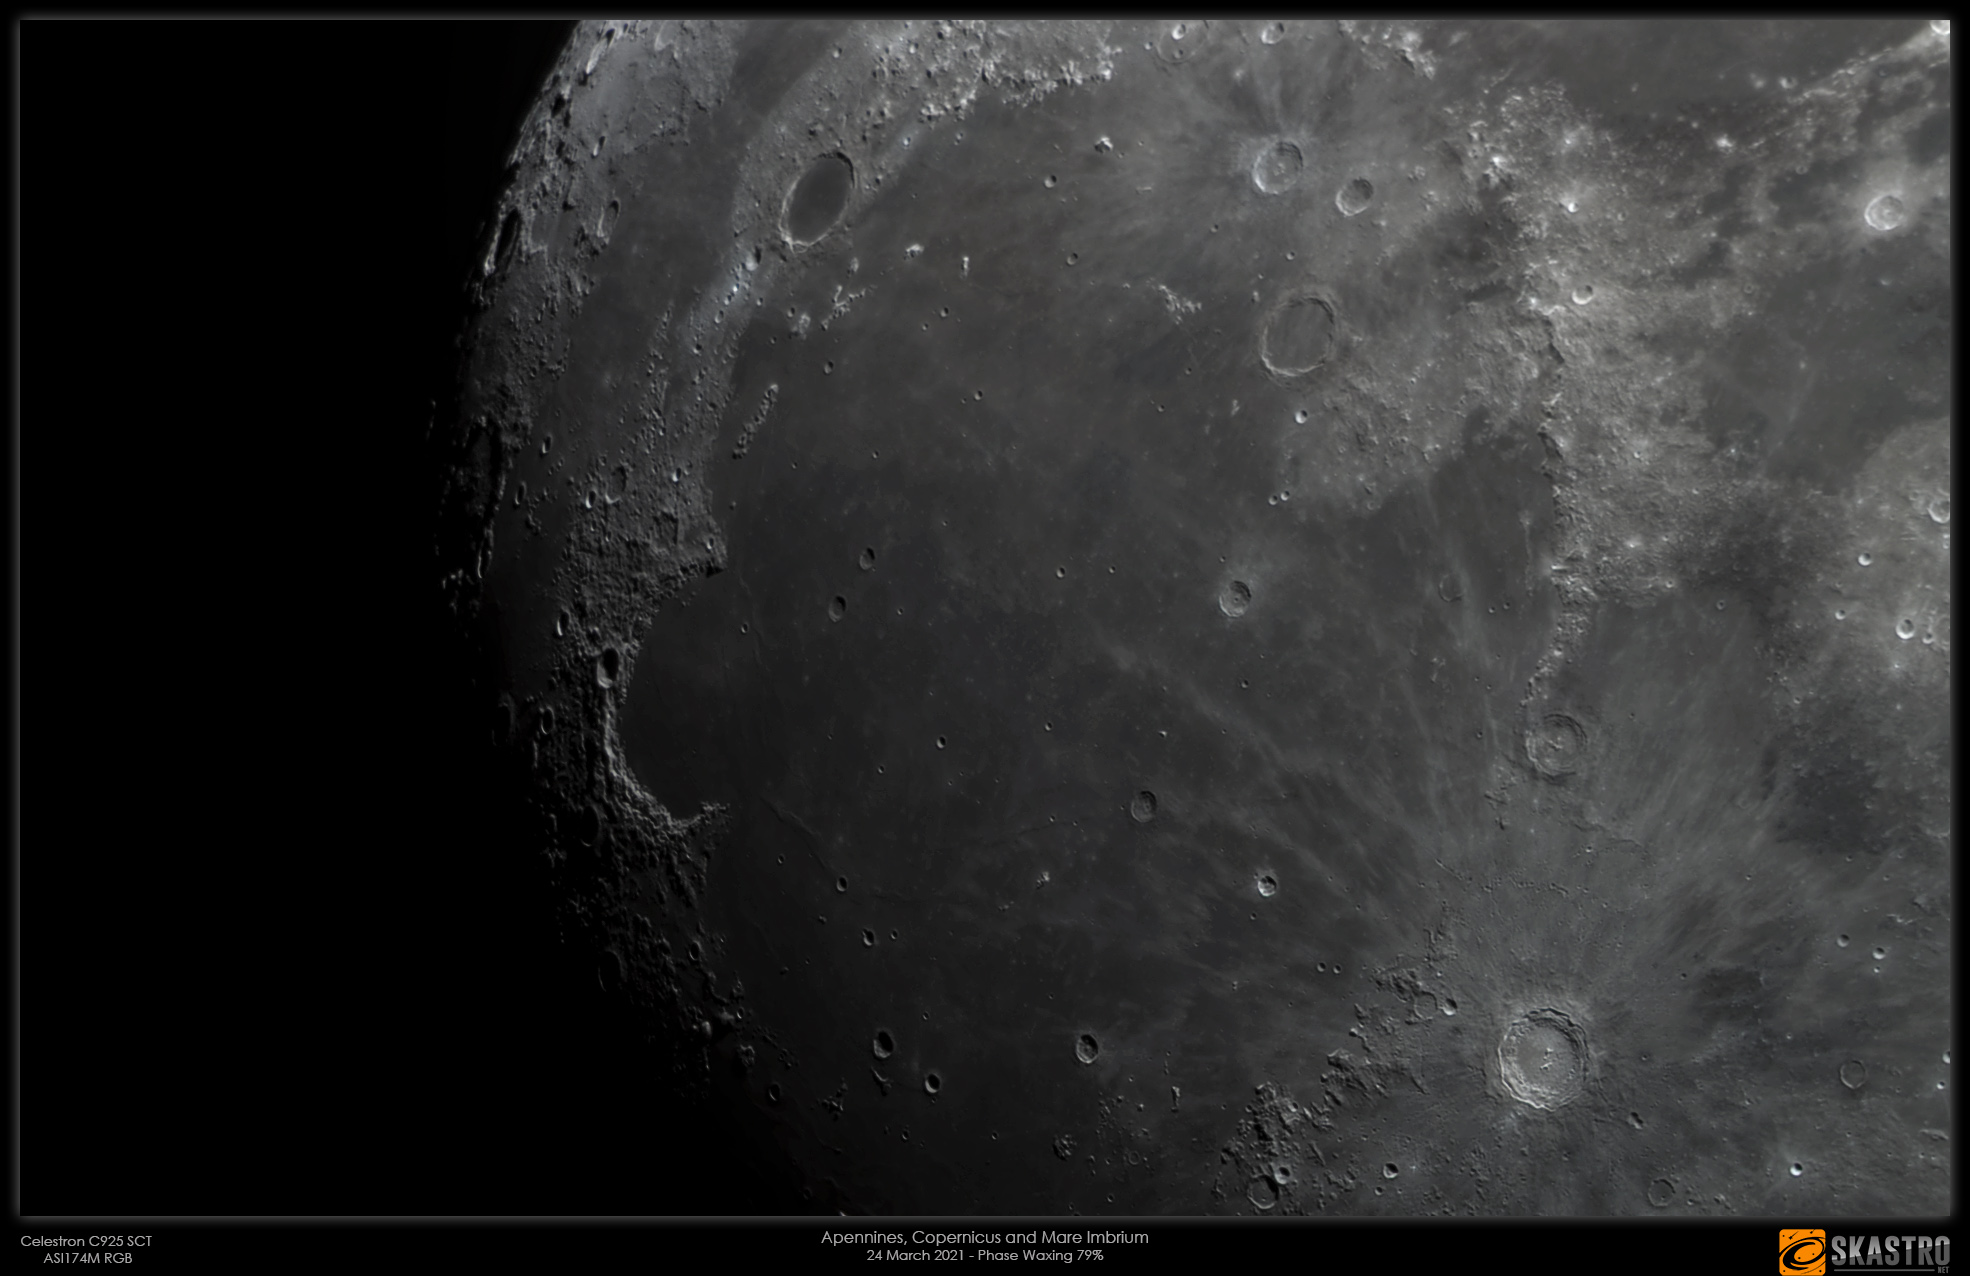
I then moved on to use my C925 SCT telescope again using the ASI174M in RGB mode. I did not capture a specific luminance channel this time and just used RGB and made a pseudo-luminance. The weather conditions were too windy to get a closer scale with the Barlow lens on this occasion.
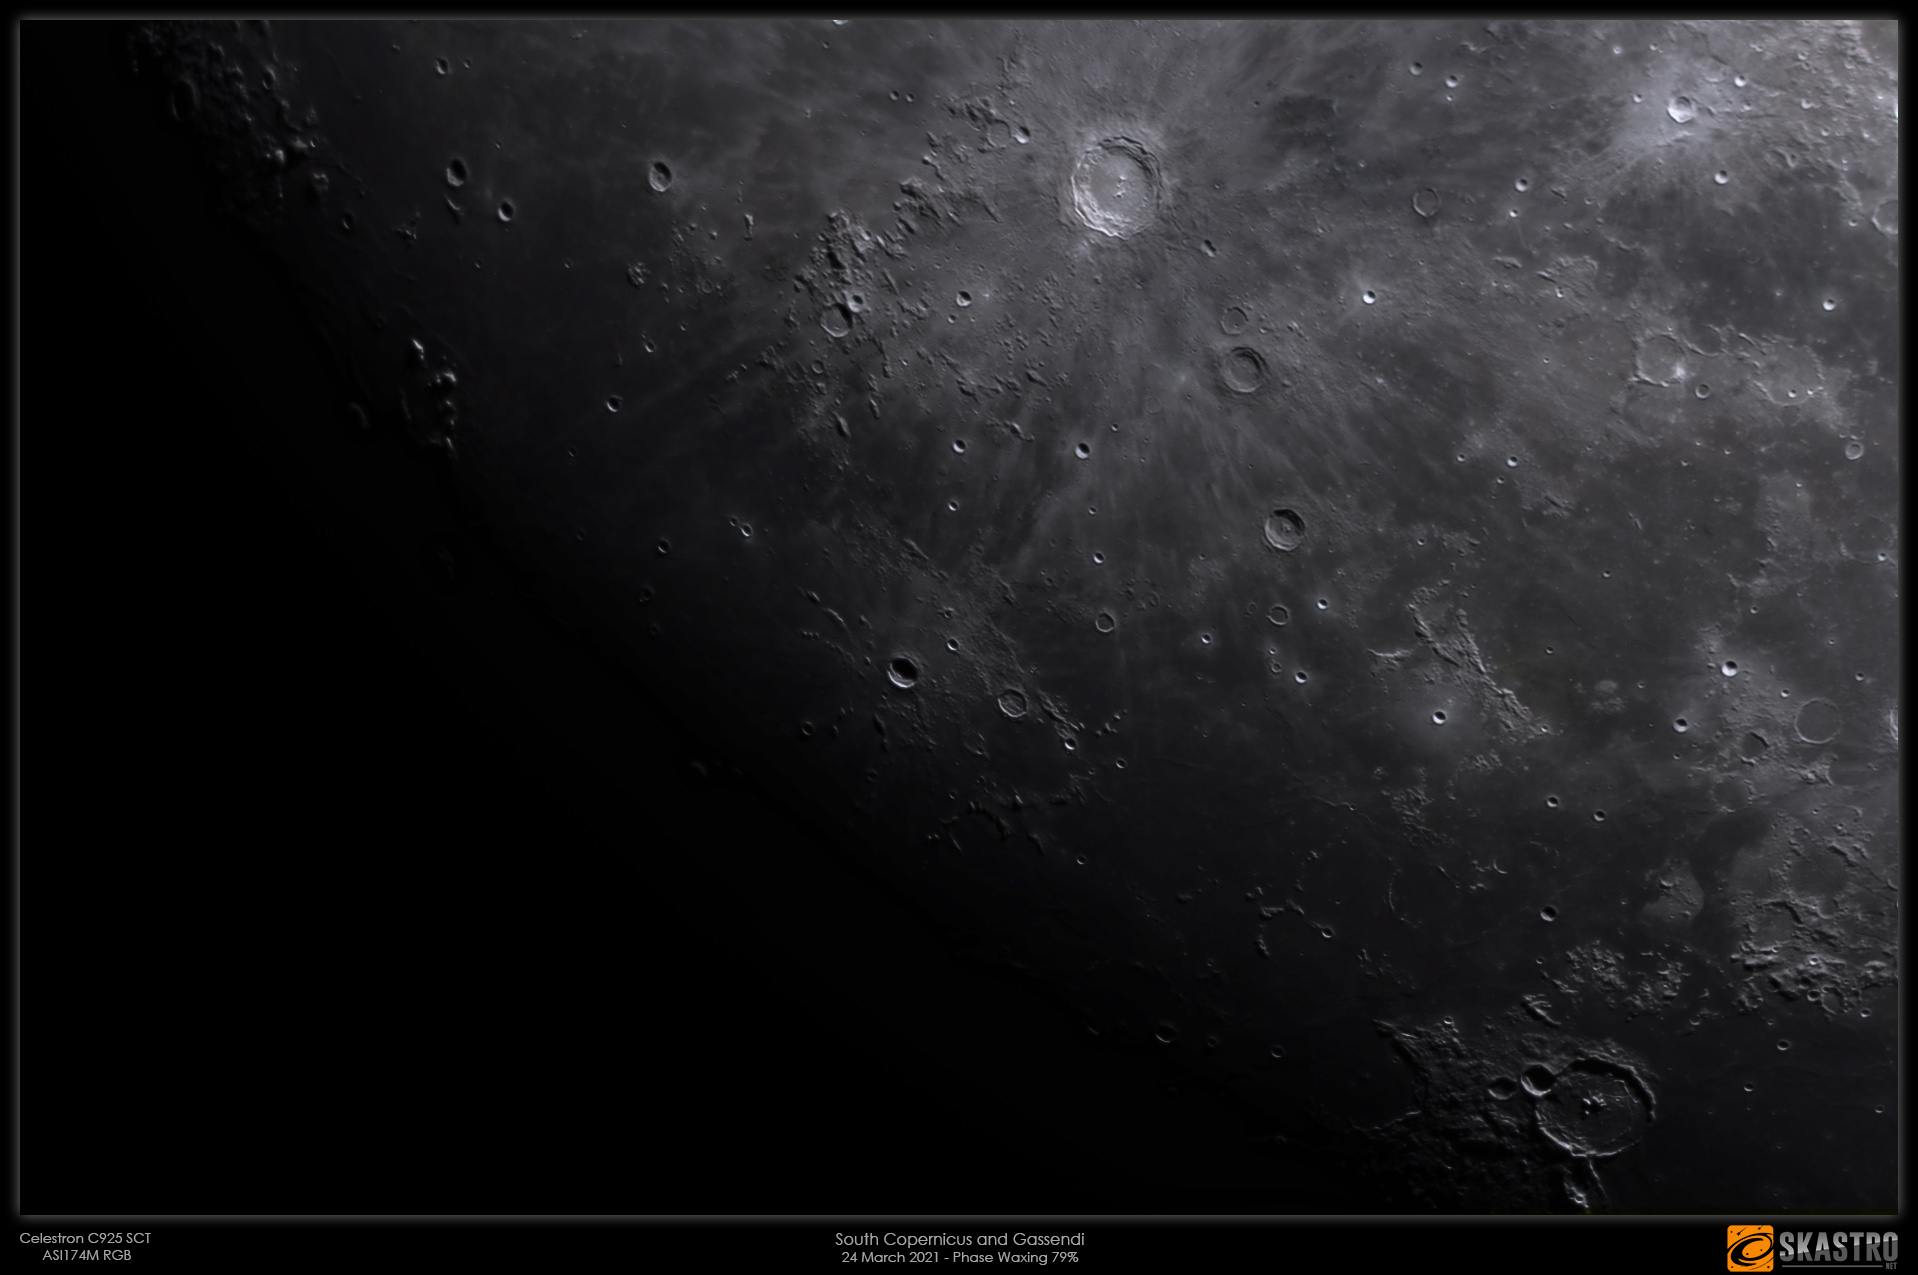
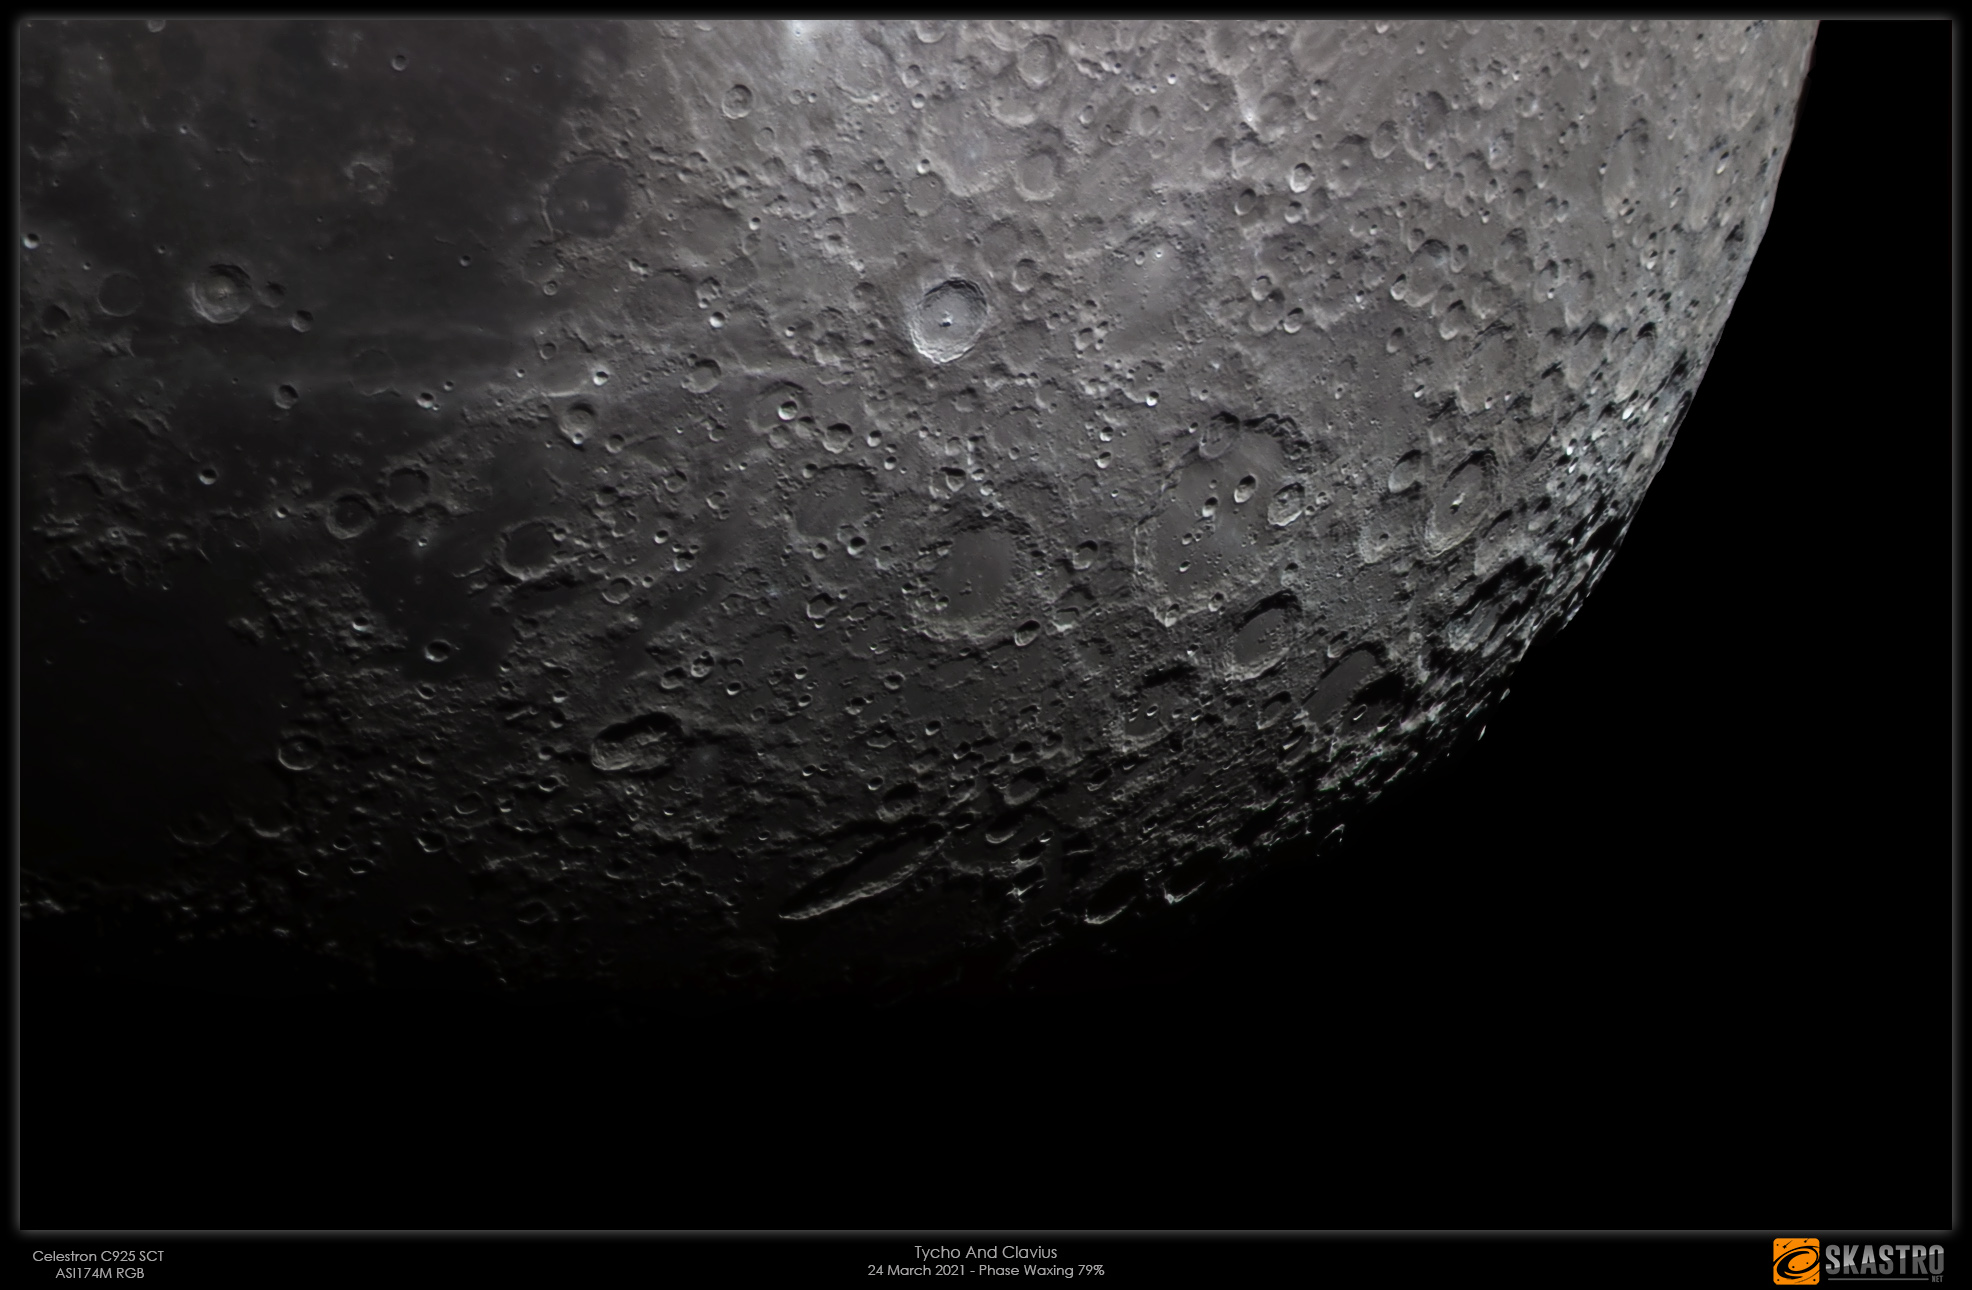
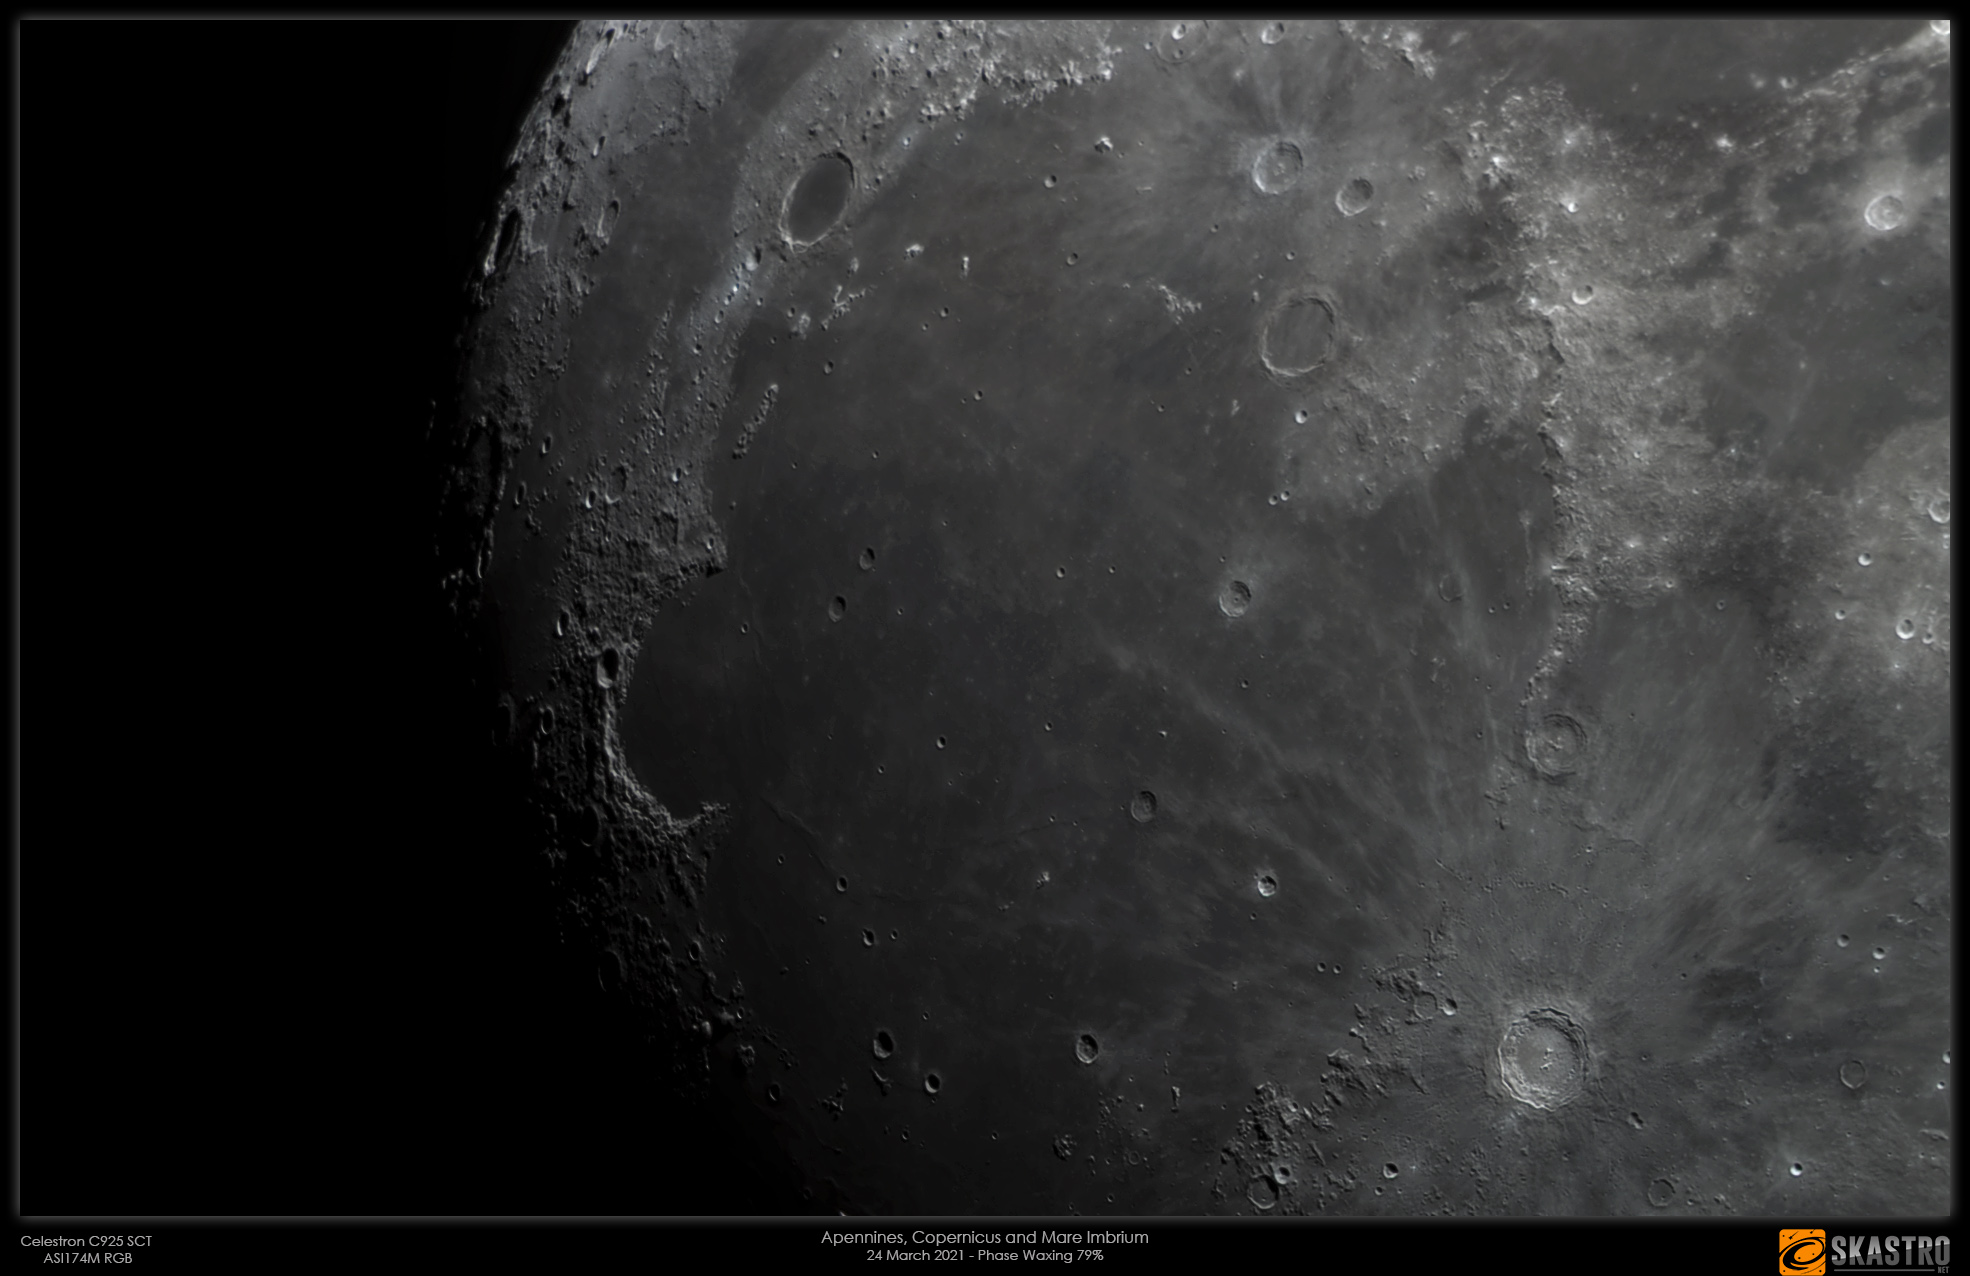
All images are RGB and captured with Firecapture software and then processed in Planetary System Stacker and then in PixInsight and Photoshop.

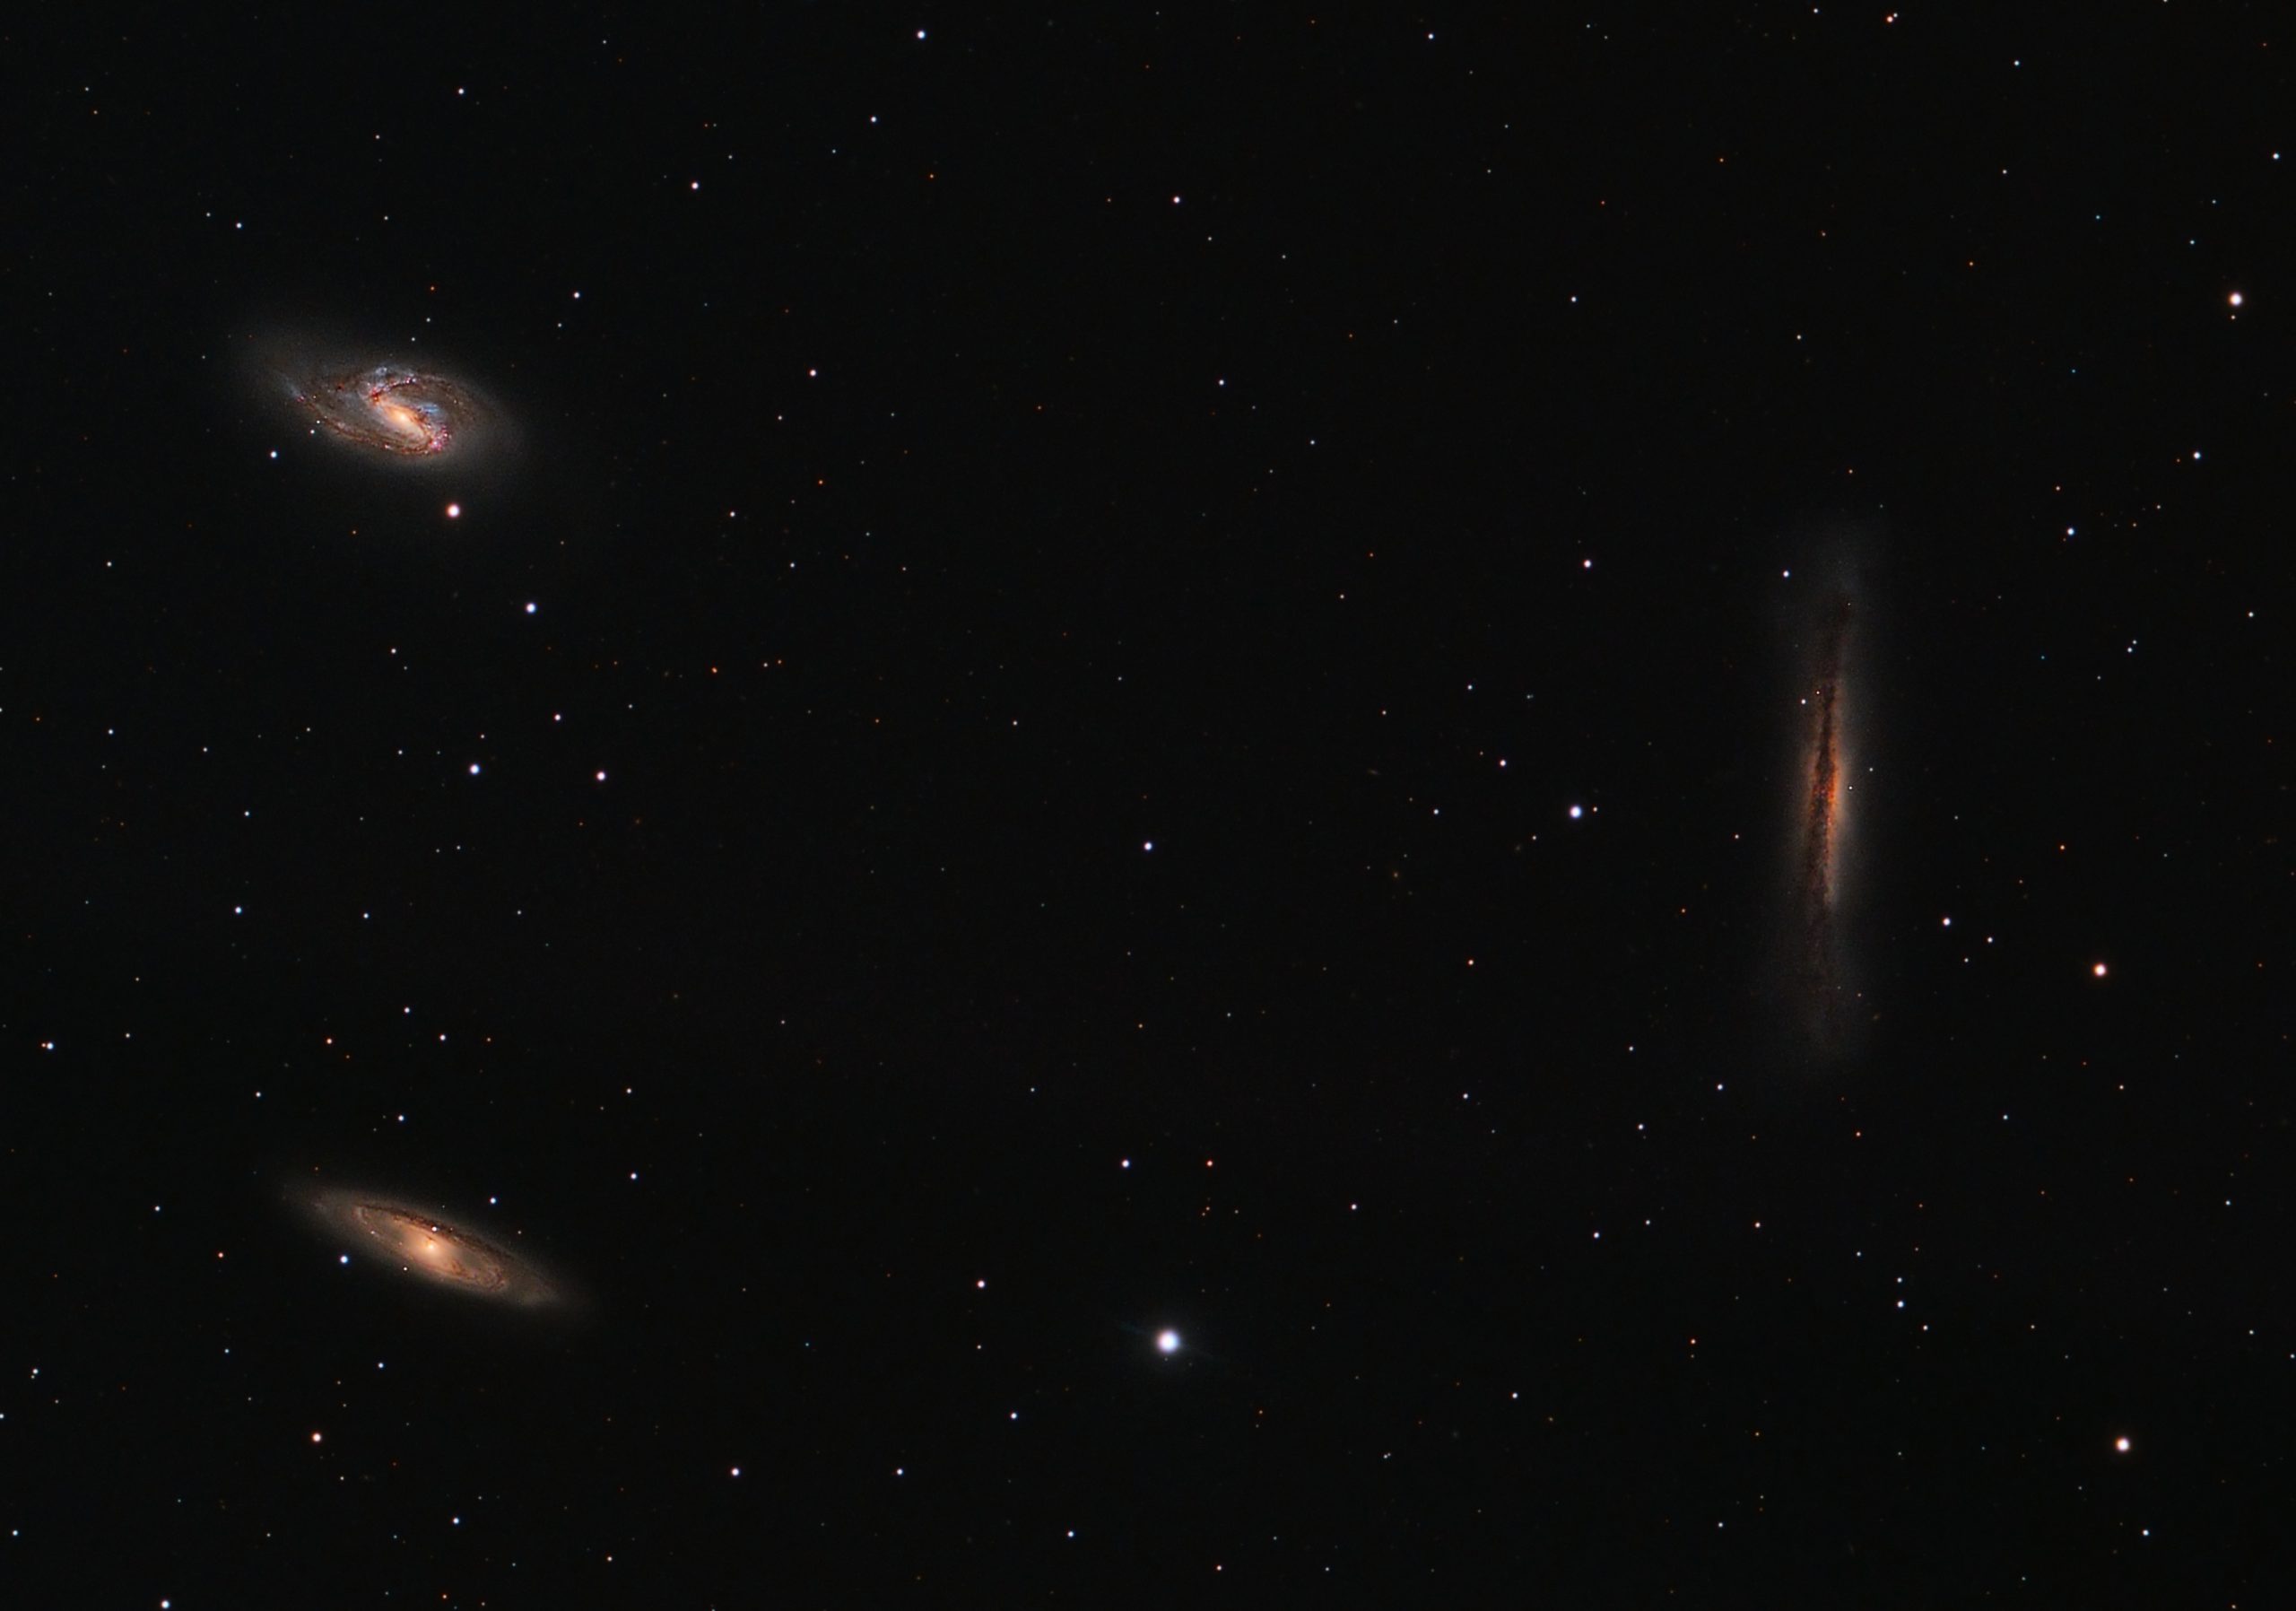
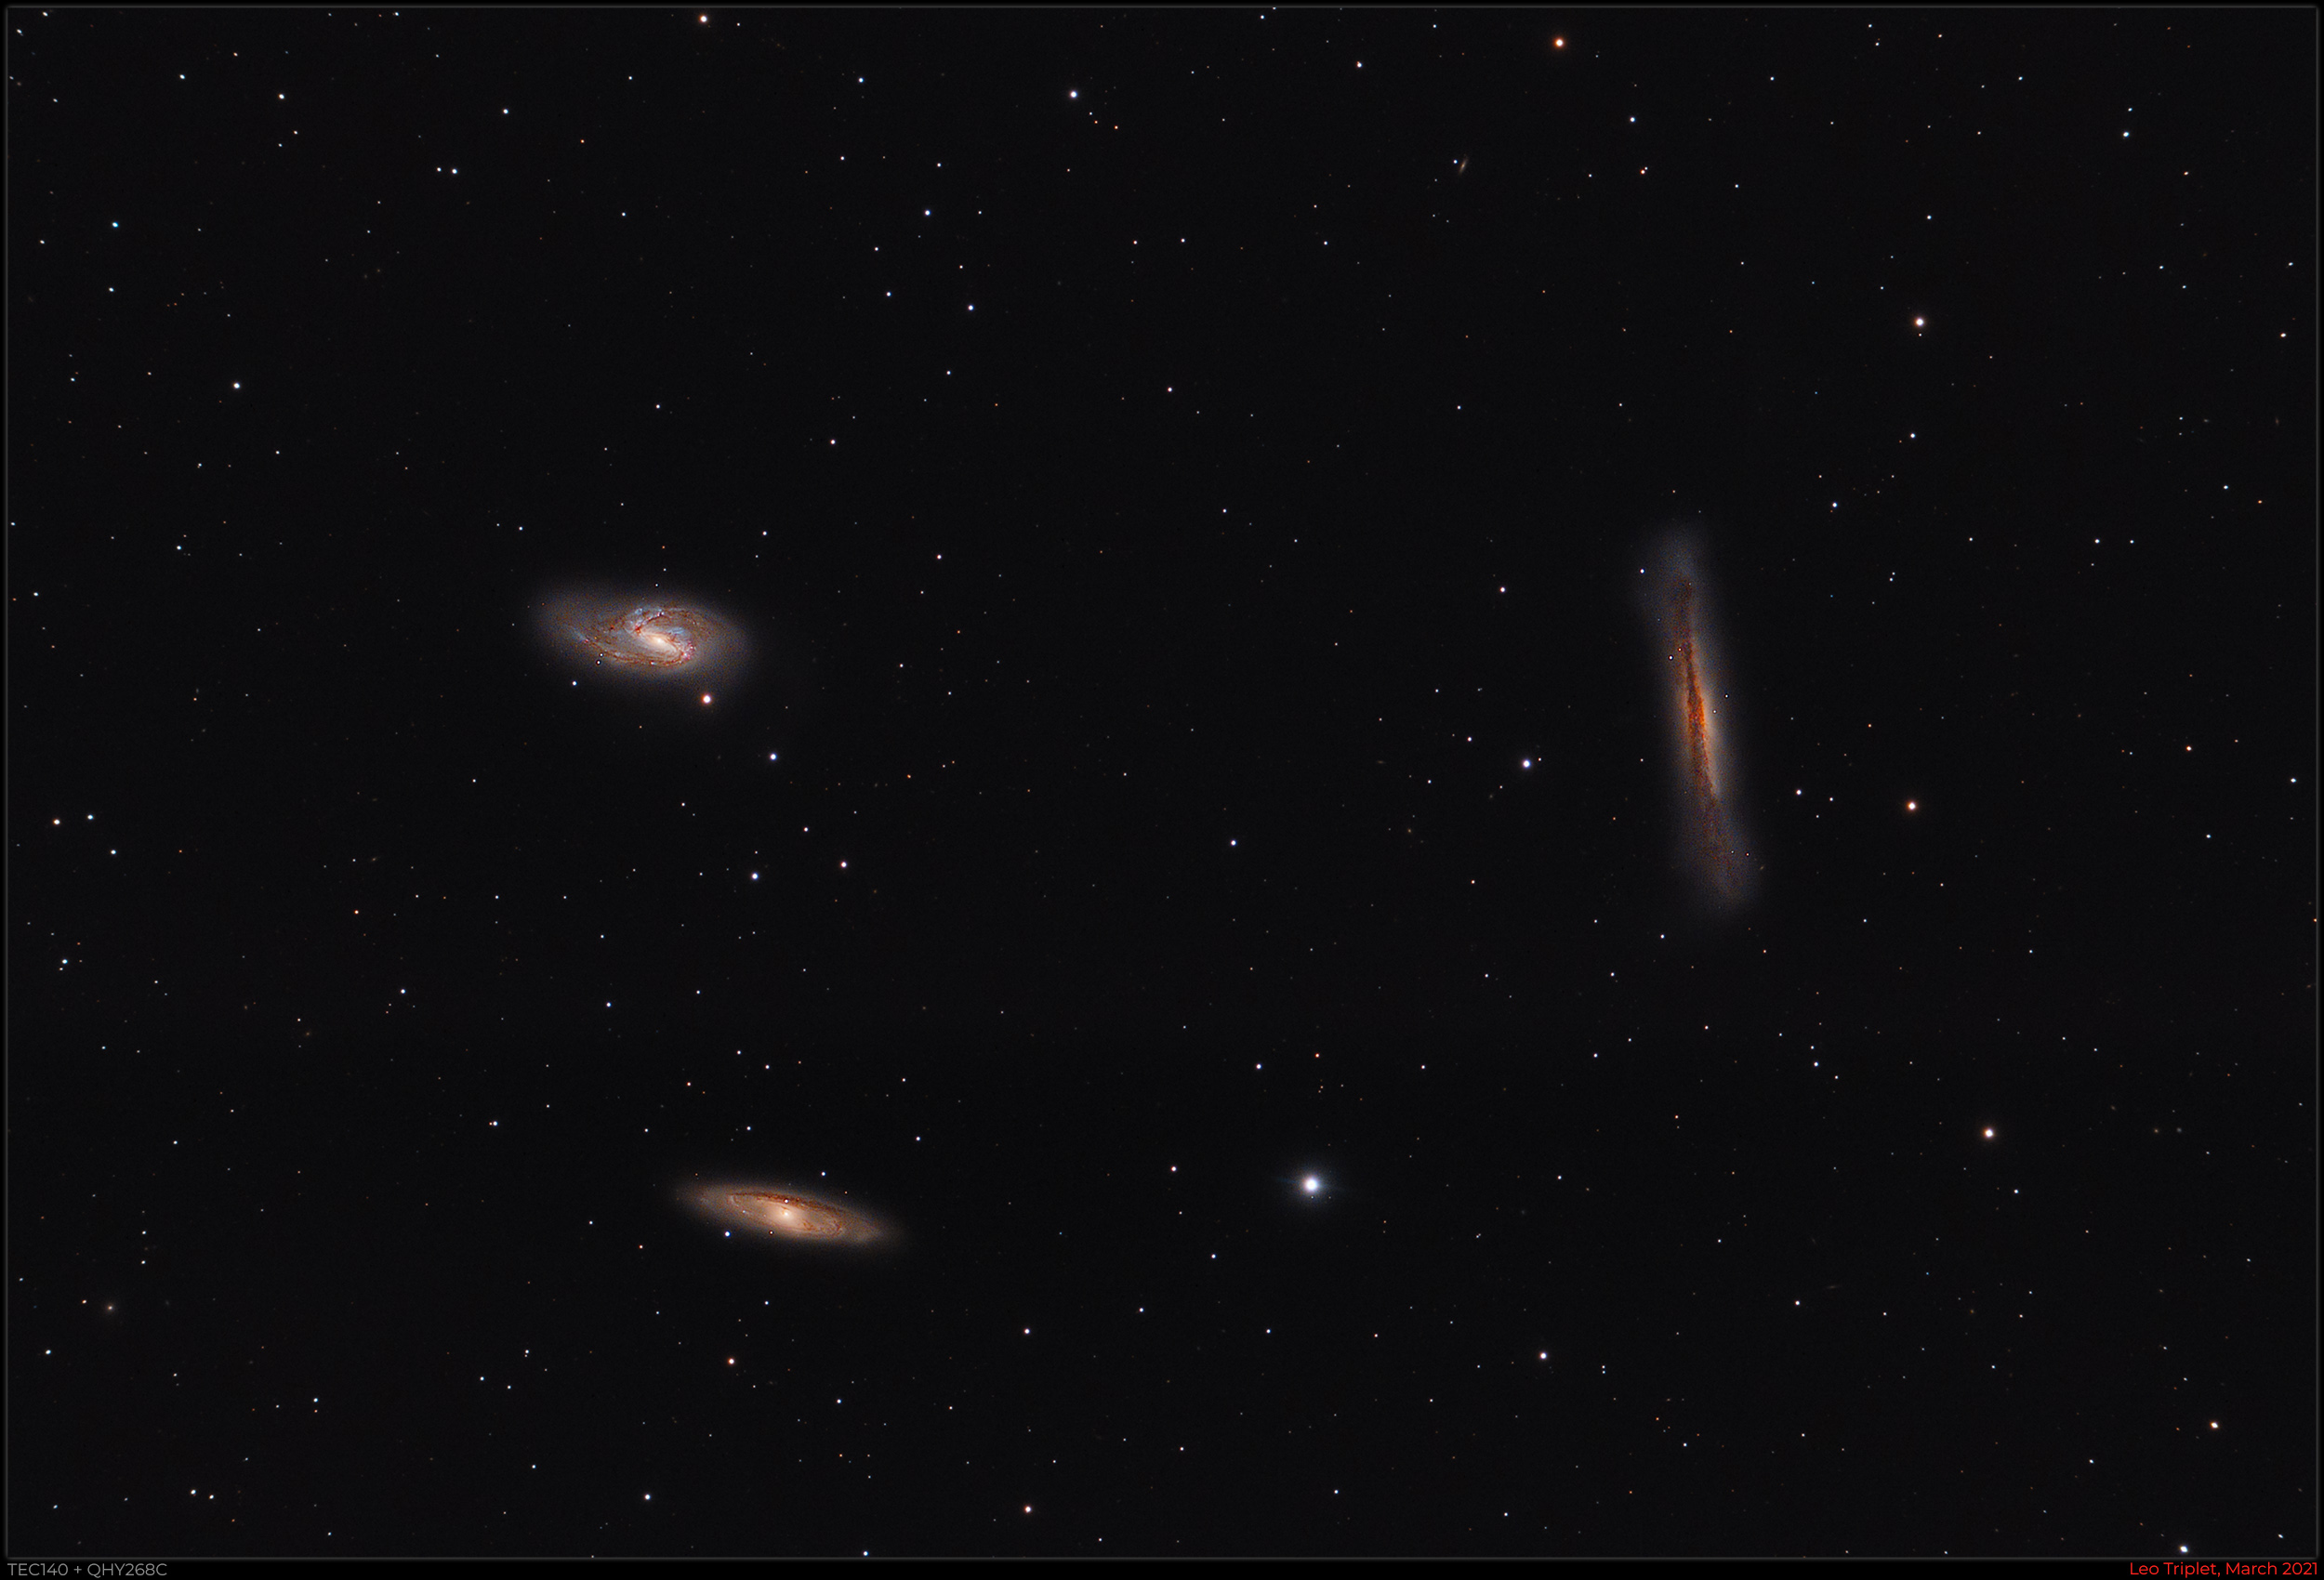
The Leo Triplet with TEC140 and QHY268C
The Leo Triplet is a popular and famous group of galaxies in the constellation of Leo, best viewed in late winter/early spring in the Northern Hemisphere. They are often imaged together like this as the triplet or as individual galaxies.
They are located about 35 million light years away and consists of the Messier galaxies M66 (top left in the image), M65 (bottom left ) and to the right we have NGC 3628, commonly called The Hamburger Galaxy.
The galaxies are easily visible in a small to mid-sized telescope as faint smudges in this isosceles triangular pattern. The galaxies are sometimes called the M66 Group but ask any astronomer and they will immediately know what you mean if you mention the Leo Triplet! Another famous galaxy group in Leo is the M96 group.

Technical Details
Image captured from my back yard observatory in Nottingham, UK on the 20th March 2021 just to the East of the Meridian line. I captured 40 x 180s exposures with my QHY268C One-Shot-Colour camera on my TEC140 refractor using off-axis guiding on my MESU 200 mount. The only filter I used was a LDAS Light pollution filter since I live in a residential area with Bortle 5 sky conditions.
Seeing and transparency were terrible and I debated with myself long and hard whether I bothered imaging at all on that night. However, since in the UK we have just endured the worst winter for cloud I can remember in 30 years of practical astronomy, I decided that beggars can't be choosers and I went ahead with it anyway. I am glad I did since the outcome is not too bad.
Ideally it could use more exposure time and I will add to this as and when we get some more clear sky time.
Images exposures captured with Sequence Generator Pro and processed with PixInsight and Photoshop CC.
The image above is a crop of the image below. I include this since some people my prefer the wider field.
The Importance Of A Properly Aligned Finder Device
One of the most important and overlooked matters to consider to prevent untold frustration in observational and imaging astronomy is being able to easily, quickly and reliably find the object you want to observe or image. The smaller the field of view of the telescope/camera/eyepiece combination, the more difficult and important this becomes. When you factor in the fact that the subject may not yet be in proper focus it is clear that just pointing the telescope in the direction of the moon, planet or object and hoping that it will be in the field of view (FoV) is a forlorn hope and leads to great frustration whilst you are hunting around trying to get the object both in focus and in the FoV. I’m a mild natured person and even I have been found cursing at the EP on many occasion trying to do this!

With the advent of relatively affordable and excellent telescopes of the Schmidt-Cassegrain (SCT) design from Celestron, Skywatcher and Meade, their long focal length presents challenges in getting the object in the FoV. You can be moving the telescope, either manually or via the handset/computer, seemingly for an age, trying to get the blasted object in the centre of the EP or camera! The more powerful the eyepiece, or smaller the chip of the camera, the more difficult this becomes. It doesn't take long, especially when cold, to become utterly exasperated by this process and I have been known to give up and storm off back inside the house in frustration!
A great example is in the case of planetary work. The planets are a great distance from us and as such present a tiny angular diameter on the sky. Rarely can any planet be more than 45 arc seconds in angular diameter and they are usually much smaller than this. For example, a popular target such as Mars is often as little as 10 arc seconds across, the equivalent of observing a US nickel or a UK five penny piece 300 metres away. By way of comparison, The Moon is 1800 arc secs across. Consequently, to get an image on the camera or be able to get the planet into a position to be able to see details on its surface requires a great deal of magnification along with good seeing with a long focal length telescope. Even then, it is not uncommon to combine this with a Barlow lens of power x2 or x3 (or more) to create a F20 or F30 optical system in order to see more detail. So it is no wonder that when imaging/observing with such a long focal length and at such high power, getting the image onto the chip or into a high-power eyepiece is a challenge and can be an exercise in frustration. The answer to this is an accurately aligned finder device so that you can get the object into the FoV of the low powered finder with an assurance that it will then be visible in the main telescope.
Even though you may be impatient to get observing as soon as possible, getting the finder properly set up and aligned is well worth your time.
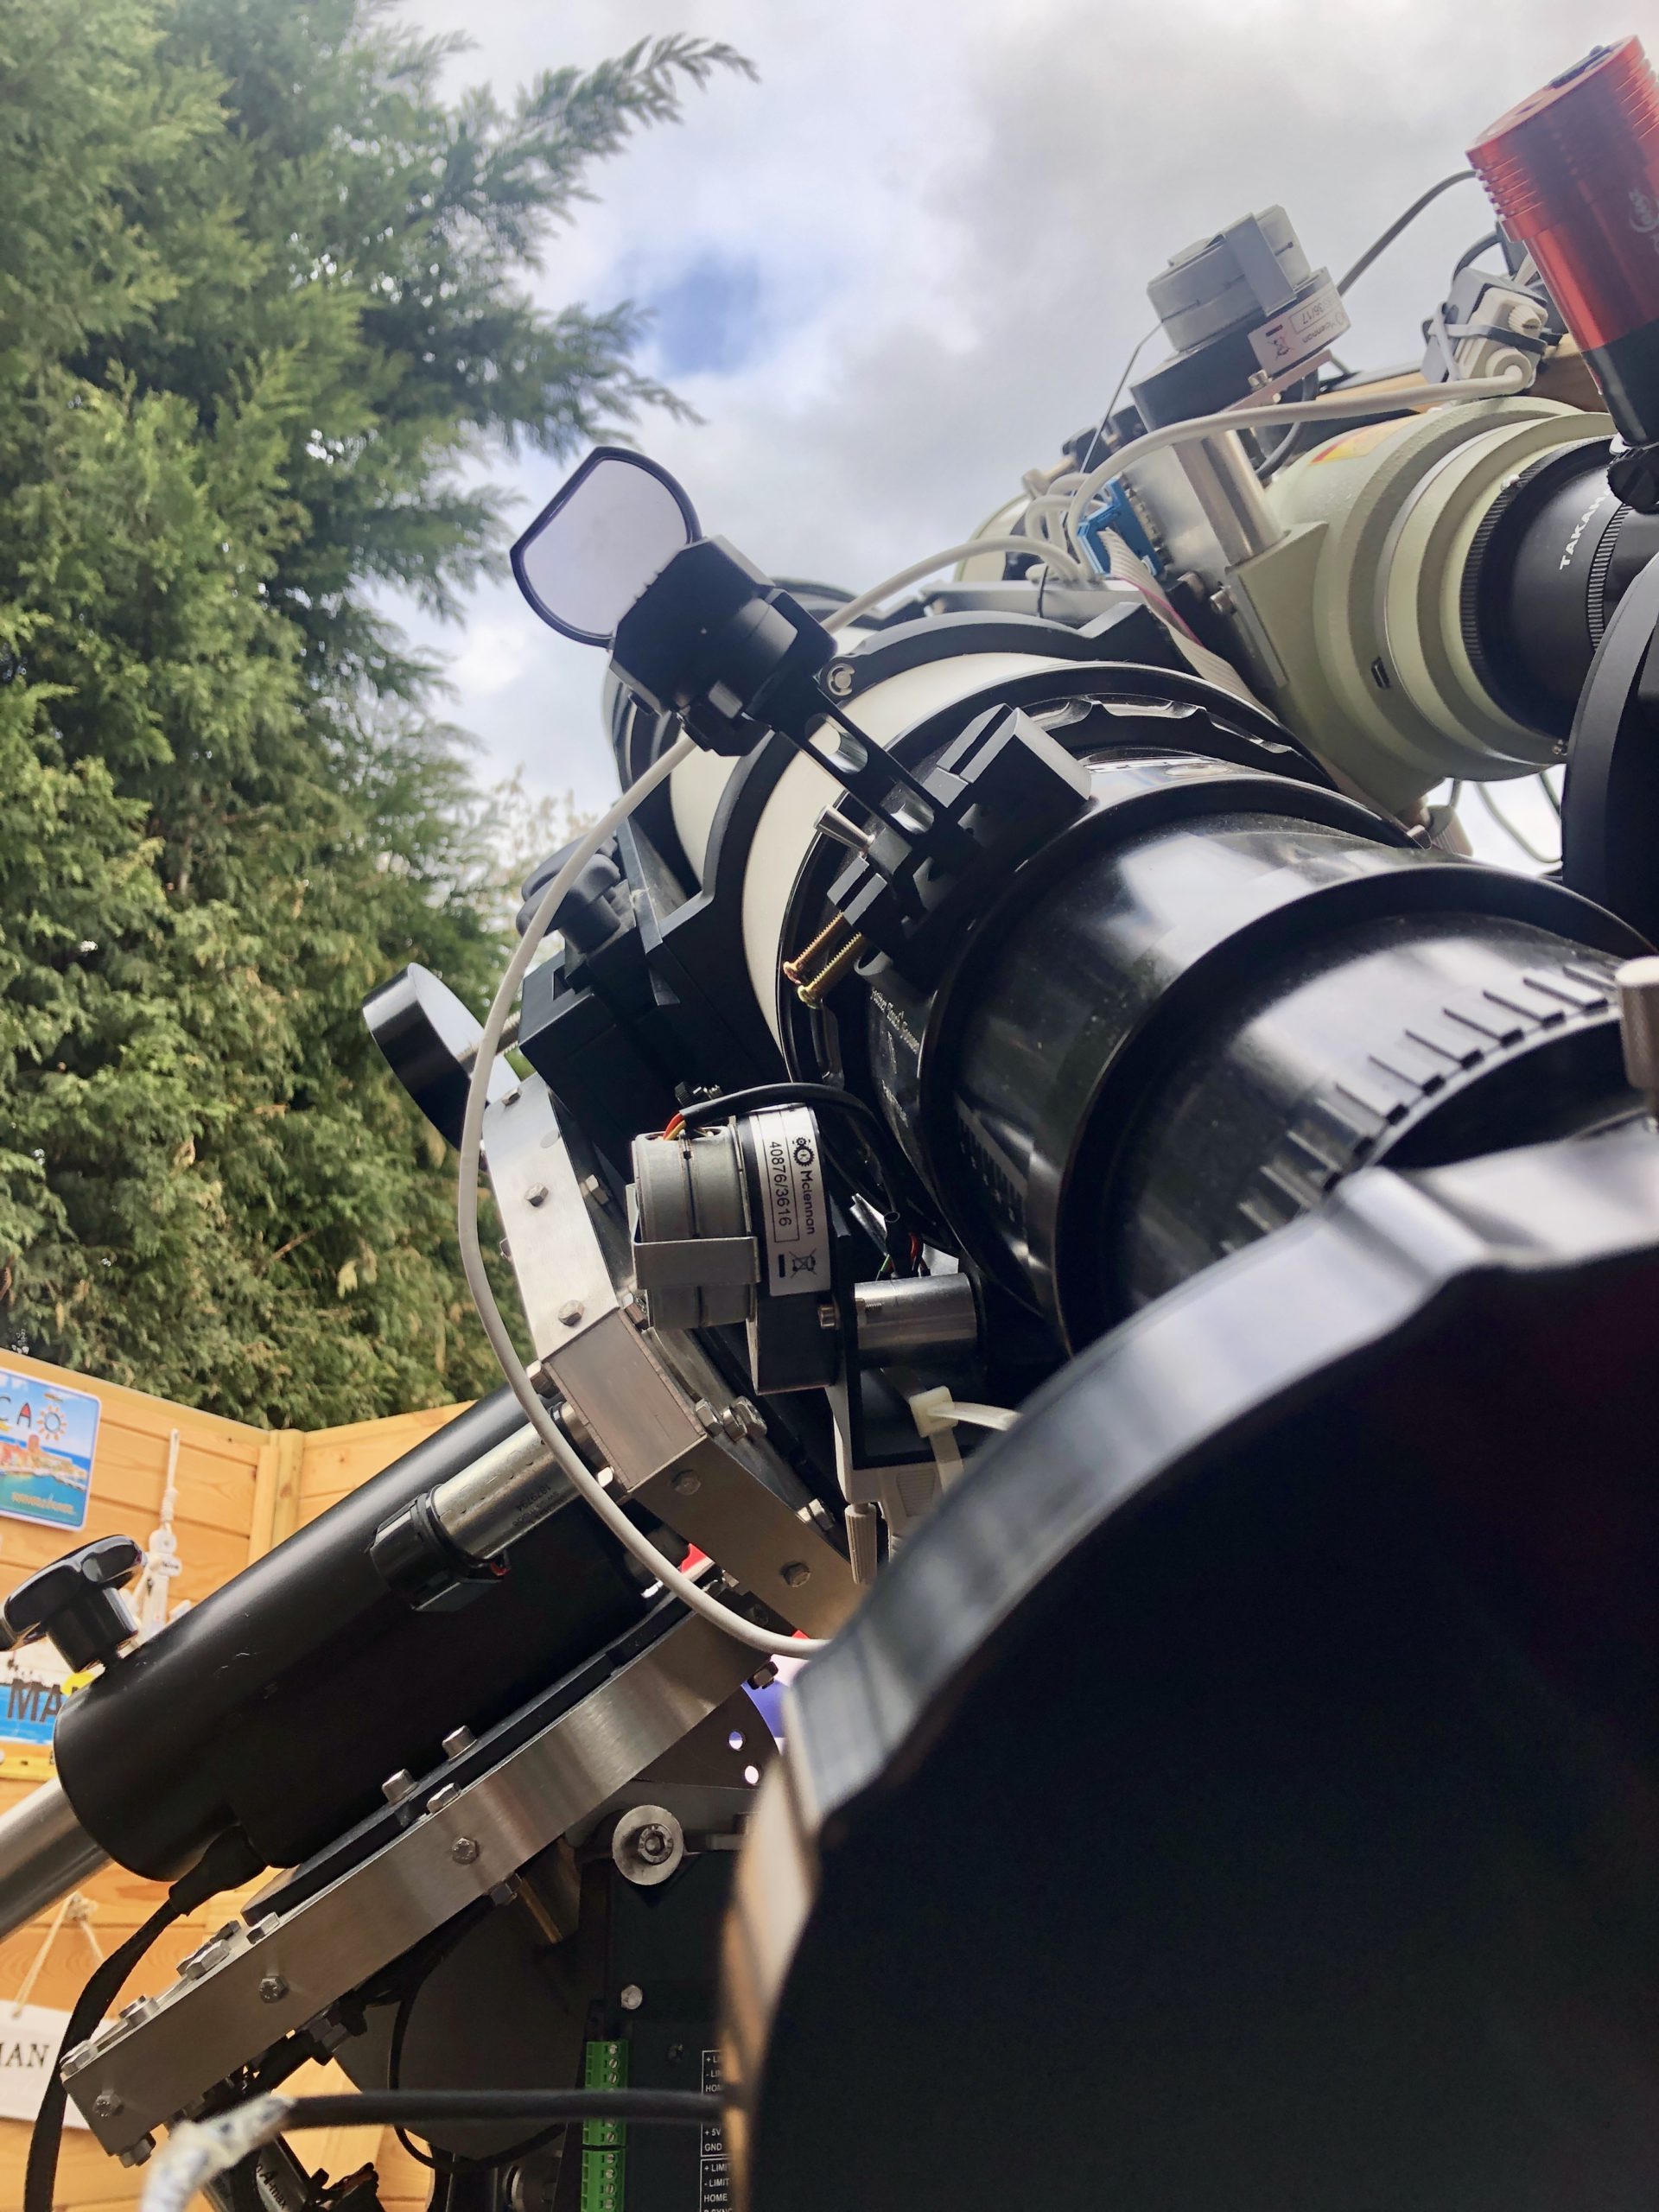
People use and prefer different types of finder scopes. Whatever type you use - I prefer Telrad's and red dot finders - getting them aligned with the optical axis of the telescope is the important factor, as discussed.
How accurately do you need to align it? That depends on what you want to generally observe. If you are using plate-solving for deep sky astro imaging and never use the scope visually then you may need no finder at all and you can leave the iterative plate solving process to automatically align the scope. However, for planetary observing and imaging you need to get the finder as accurately aligned as possible.
Here is my procedure and it is the same whatever the type of finder device you use; Telrad, finder scope or red dot finder. And before you start make sure the finder scope is VERY sturdily mounted to the main scope. Any bump or movement of the finder with respect to the main scope will ruin the alignment of the finder with the optical axis. It is very frustrating to complete the procedure, congratulate yourself for a job well done, get ready to observe only then to inadvertently bang the finder out of alignment!! Doh...!
- Use a wide field EP and select a bright star and then get this star into the centre of the FoV of the telescope. It often helps to de-focus the star so you can see the concentric rings so as to judge the centre of the FoV. This is the most frustrating step of the whole procedure so take your time and remain calm! :)
- Now align the finder device - whatever type it happens to be (i.e. Telrad/Red-Dot/Finderscope) with its adjustment screws to get the same star centred into the FoV of the finder device. TIP. Do yourself a favour and be sure you are aligning on the same star that is in your main scope! Without kidding you, I have aligned the finder on a different star before and then wondered why I couldn't find anything!
- Put a mid powered EP into the main scope. You will often note that the star that you centred in step one is no longer centred or, in some occasions, has moved out of the FOV. this is because the higher power of this second EP amplifies any error of what you thought was an accurate centering in step one. The defocus of the star in step 1 will make it easier to see whether the star is outside the FoV so you can bring it back into the centre more easily.
- Now that you have the star in the FoV of the main scope readjust the finder a second time to get the star into the crosshairs or in the middle of the red rings or dot.
- Optionally repeat this procedure with a still higher power EP to further refine the finder's accuracy in alignment with the main scope. The more accurately you can get the finder aligned with the main telescope the more enjoyable and easy it will be to use your telescope. Trust me, it is worth this time you are spending here.
To give you an example. When I do this procedure with my Celestron C925 SCT scope, I will first use my Televue Panoptic 35mm EP in the telescope. Now, consider that with a Celestron C925 even this EP is quite a reasonable magnification of 67. Hence without the finder this can take some fiddling (and cursing) to get a star into the C925's FoV because the FoV of the EP - even though it is a wide-angle EP - is quite small with the C925's 2350mm focal length. I then get my Telrad finder aligned with this same star. I then move to my Radian 17mm EP (138 magnification) to further refine the guider then followed by the 17mm with a X2 Powermate (276 magnification) to finally refine it. I will do this procedure on my permanently mounted scope every six months or so. Clearly, any knock, bang or movement of the finder will ruin its alignment and the procedure will have to be repeated.
I have finders on all of my telescopes that I use. I use a Telrad on my C925 SCT and a Red-Dot Finder on my TEC140 and on my FSQ85. I also have another Telrad on my 12" Dob reflector scope. These devices are not expensive and are crucial to the enjoyment of your telescope.
I hope you found this article useful and that I have convinced you to invest the time in a properly aligned finder device!
Clear skies!
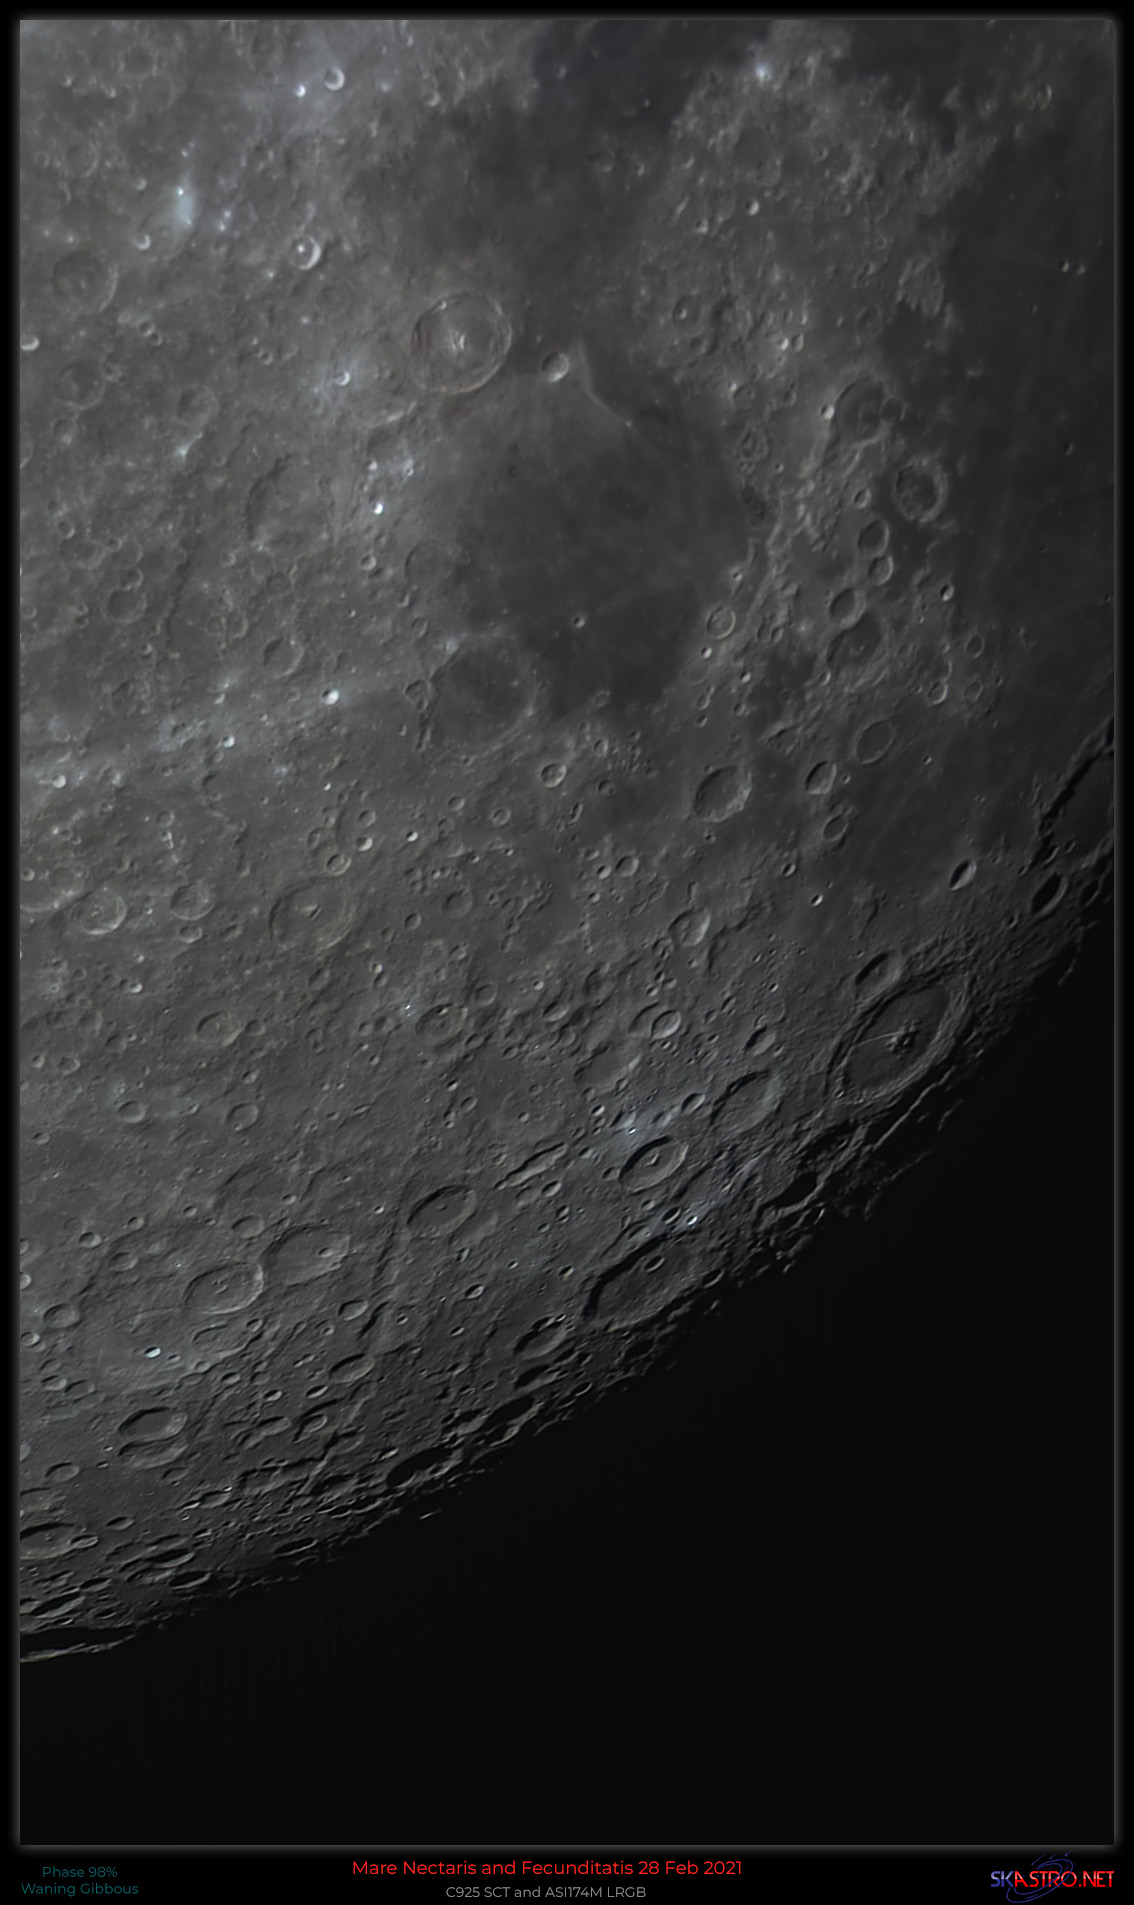
Lunar Images, February 2021 with C925
I have owned my Celestron C925 SCT telescope for many years but have only ever used it for visual purposes. I have always preferred the use of refractors for imaging. However, I have started to want to get much greater detail in my lunar images, having been bitten by the lunar imaging bug. I had some significant issues getting the C925 properly collimated, accurate enough for imaging purposes, a story I discuss here. After successfully collimating the scope these are my first two pictures taken with The Moon quite low down in the East with some slight mistiness.
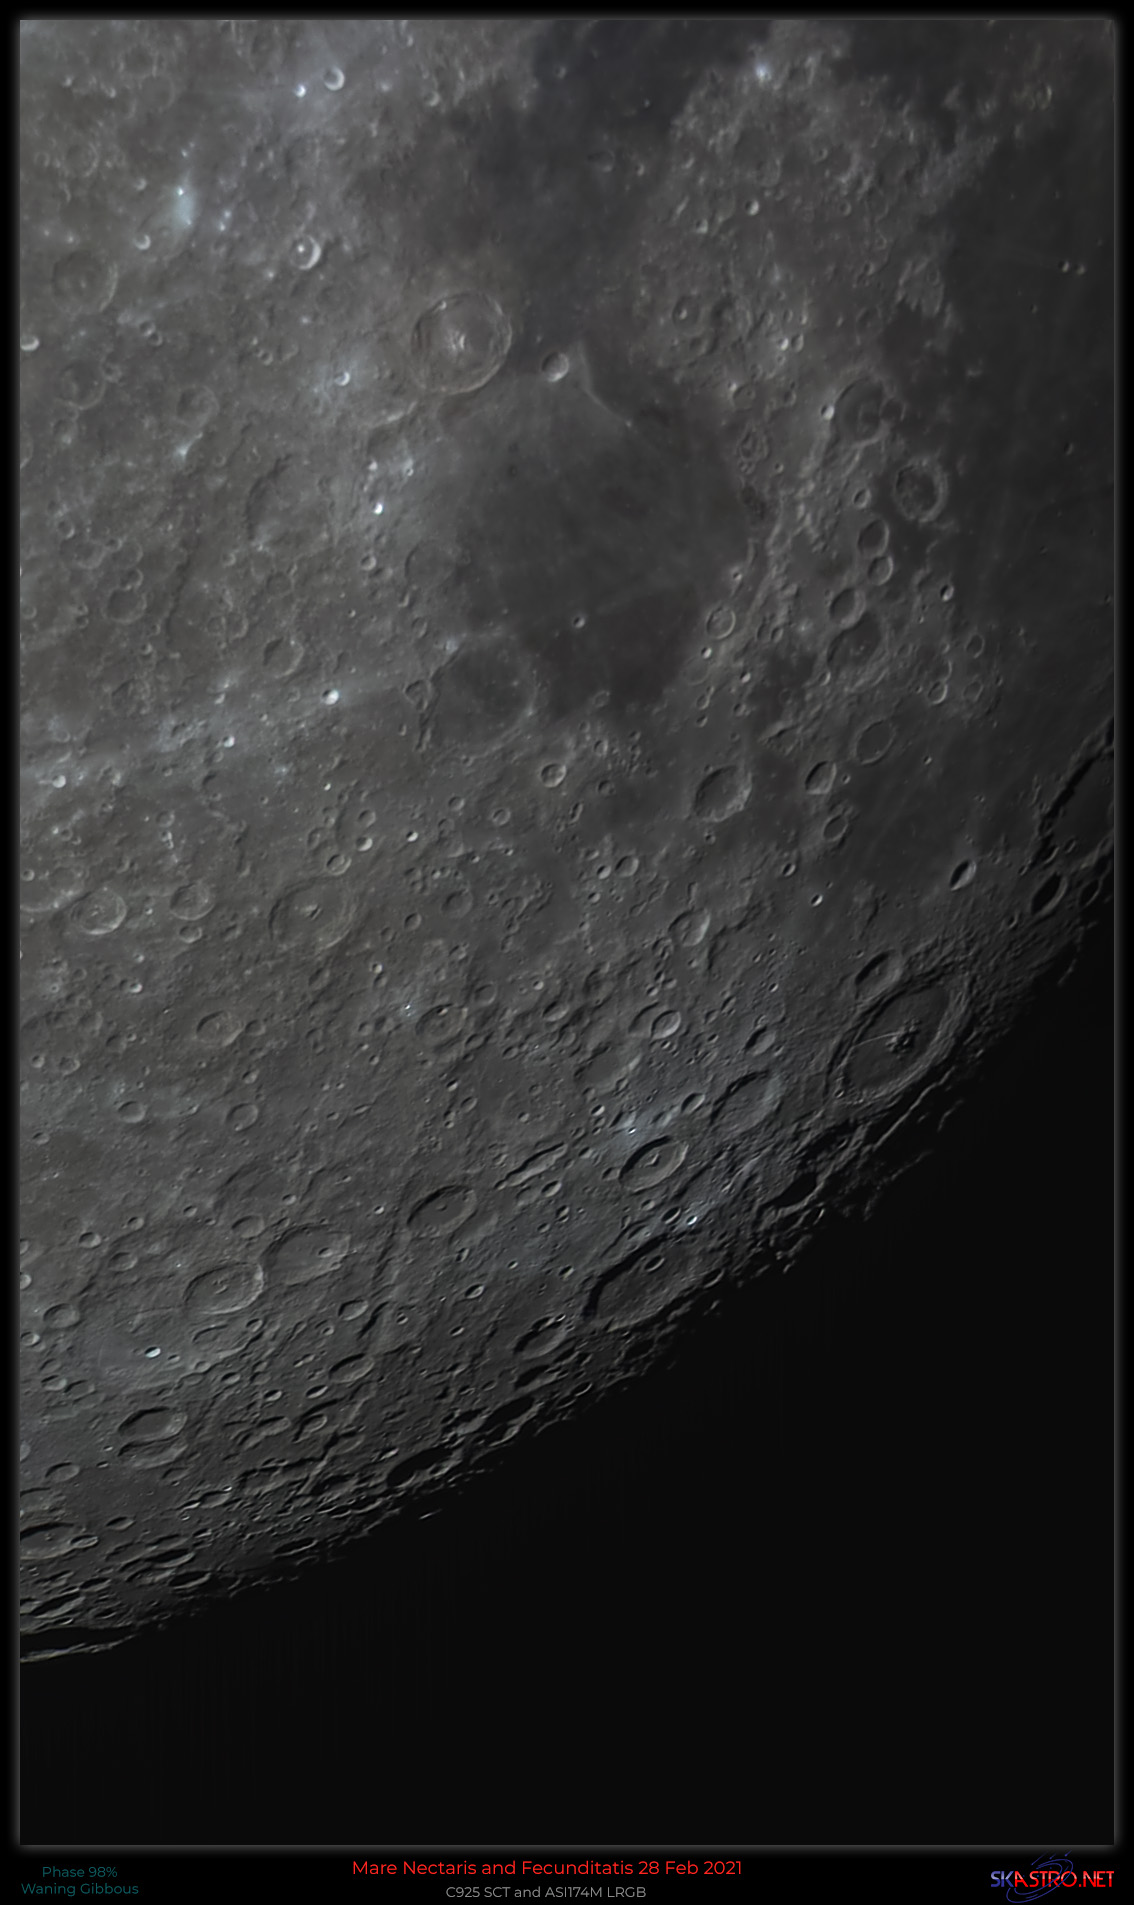
Above is the best 15% of 5000 frames in each of Red, Green and Blue. I collected the data with Sharpcap with ASI174M camera with Baader RGB filters. I created the master R,G,B files with PlanetarySystem Stacker and then used PixInsight and Photoshop to develop.
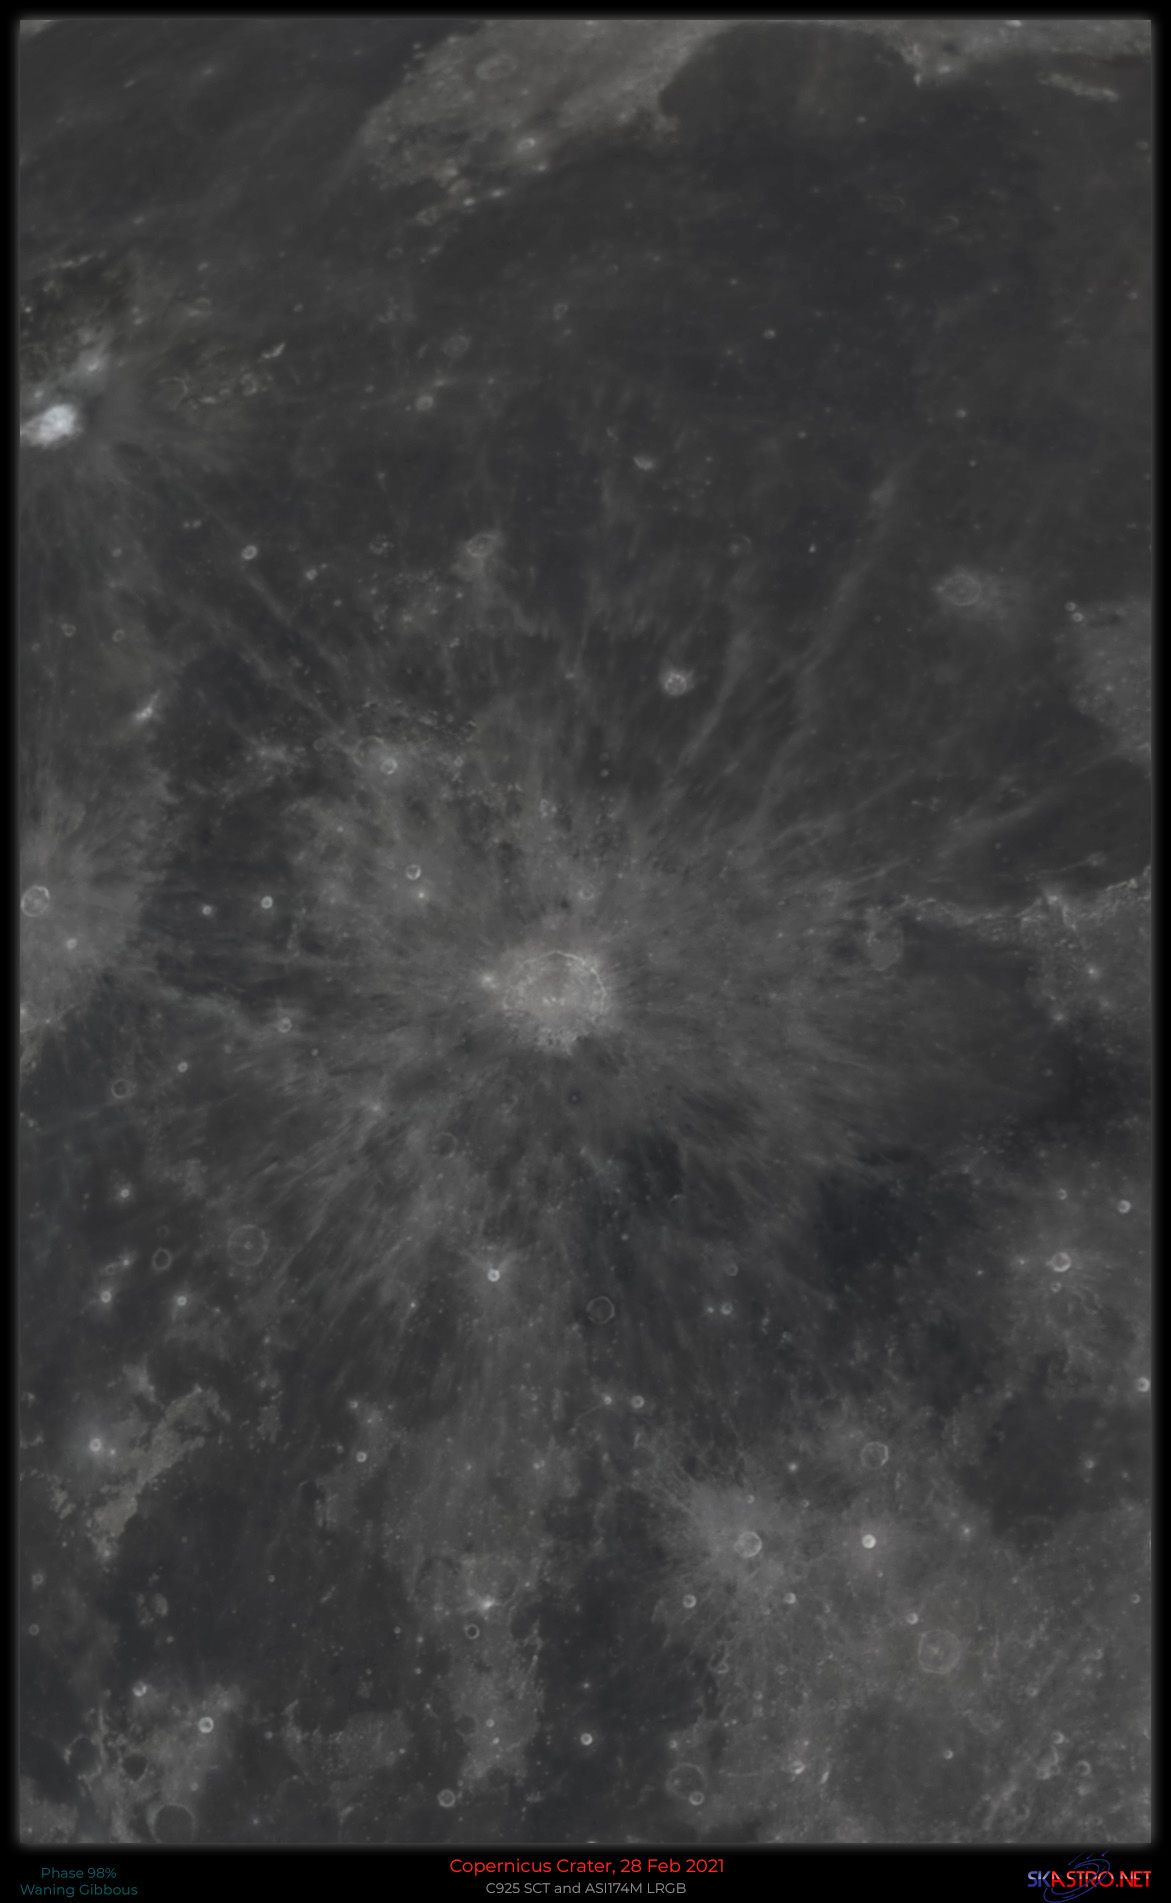
Above is Copernicus Crater and this time the best 15% of 3000 frames in each RGB filter. I used the same software and processes. However, you can see this does not quite have the same level of details as the top picture in this post due to lack of enough frames. There is always a balance of getting enough frames and the size of files and compute power to process them.
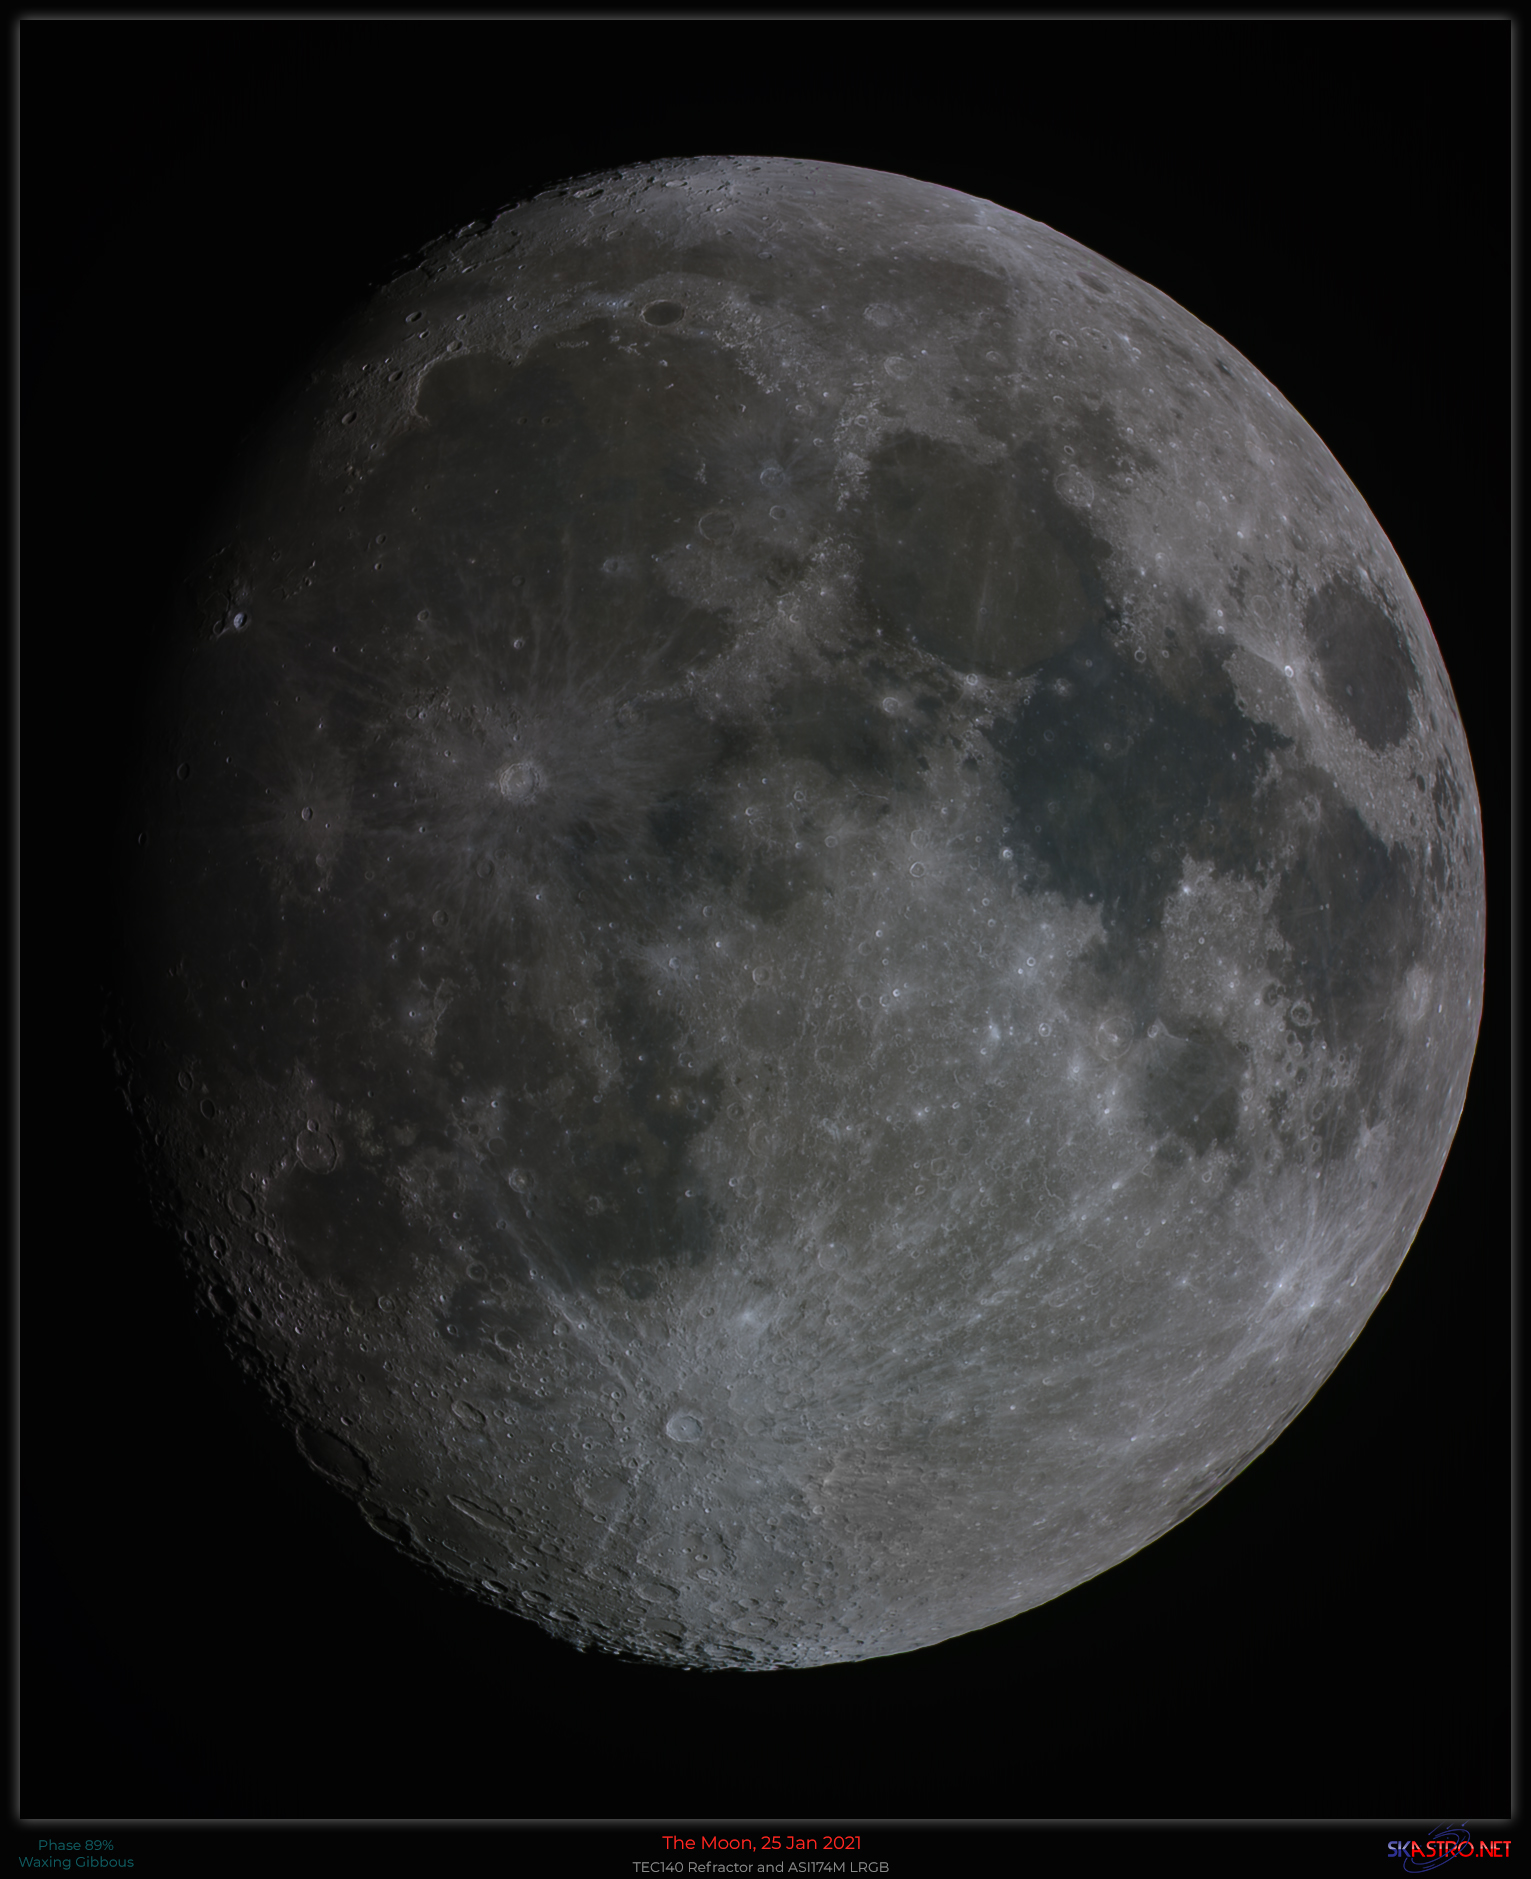
Lunar Images, 25th Jan 2021
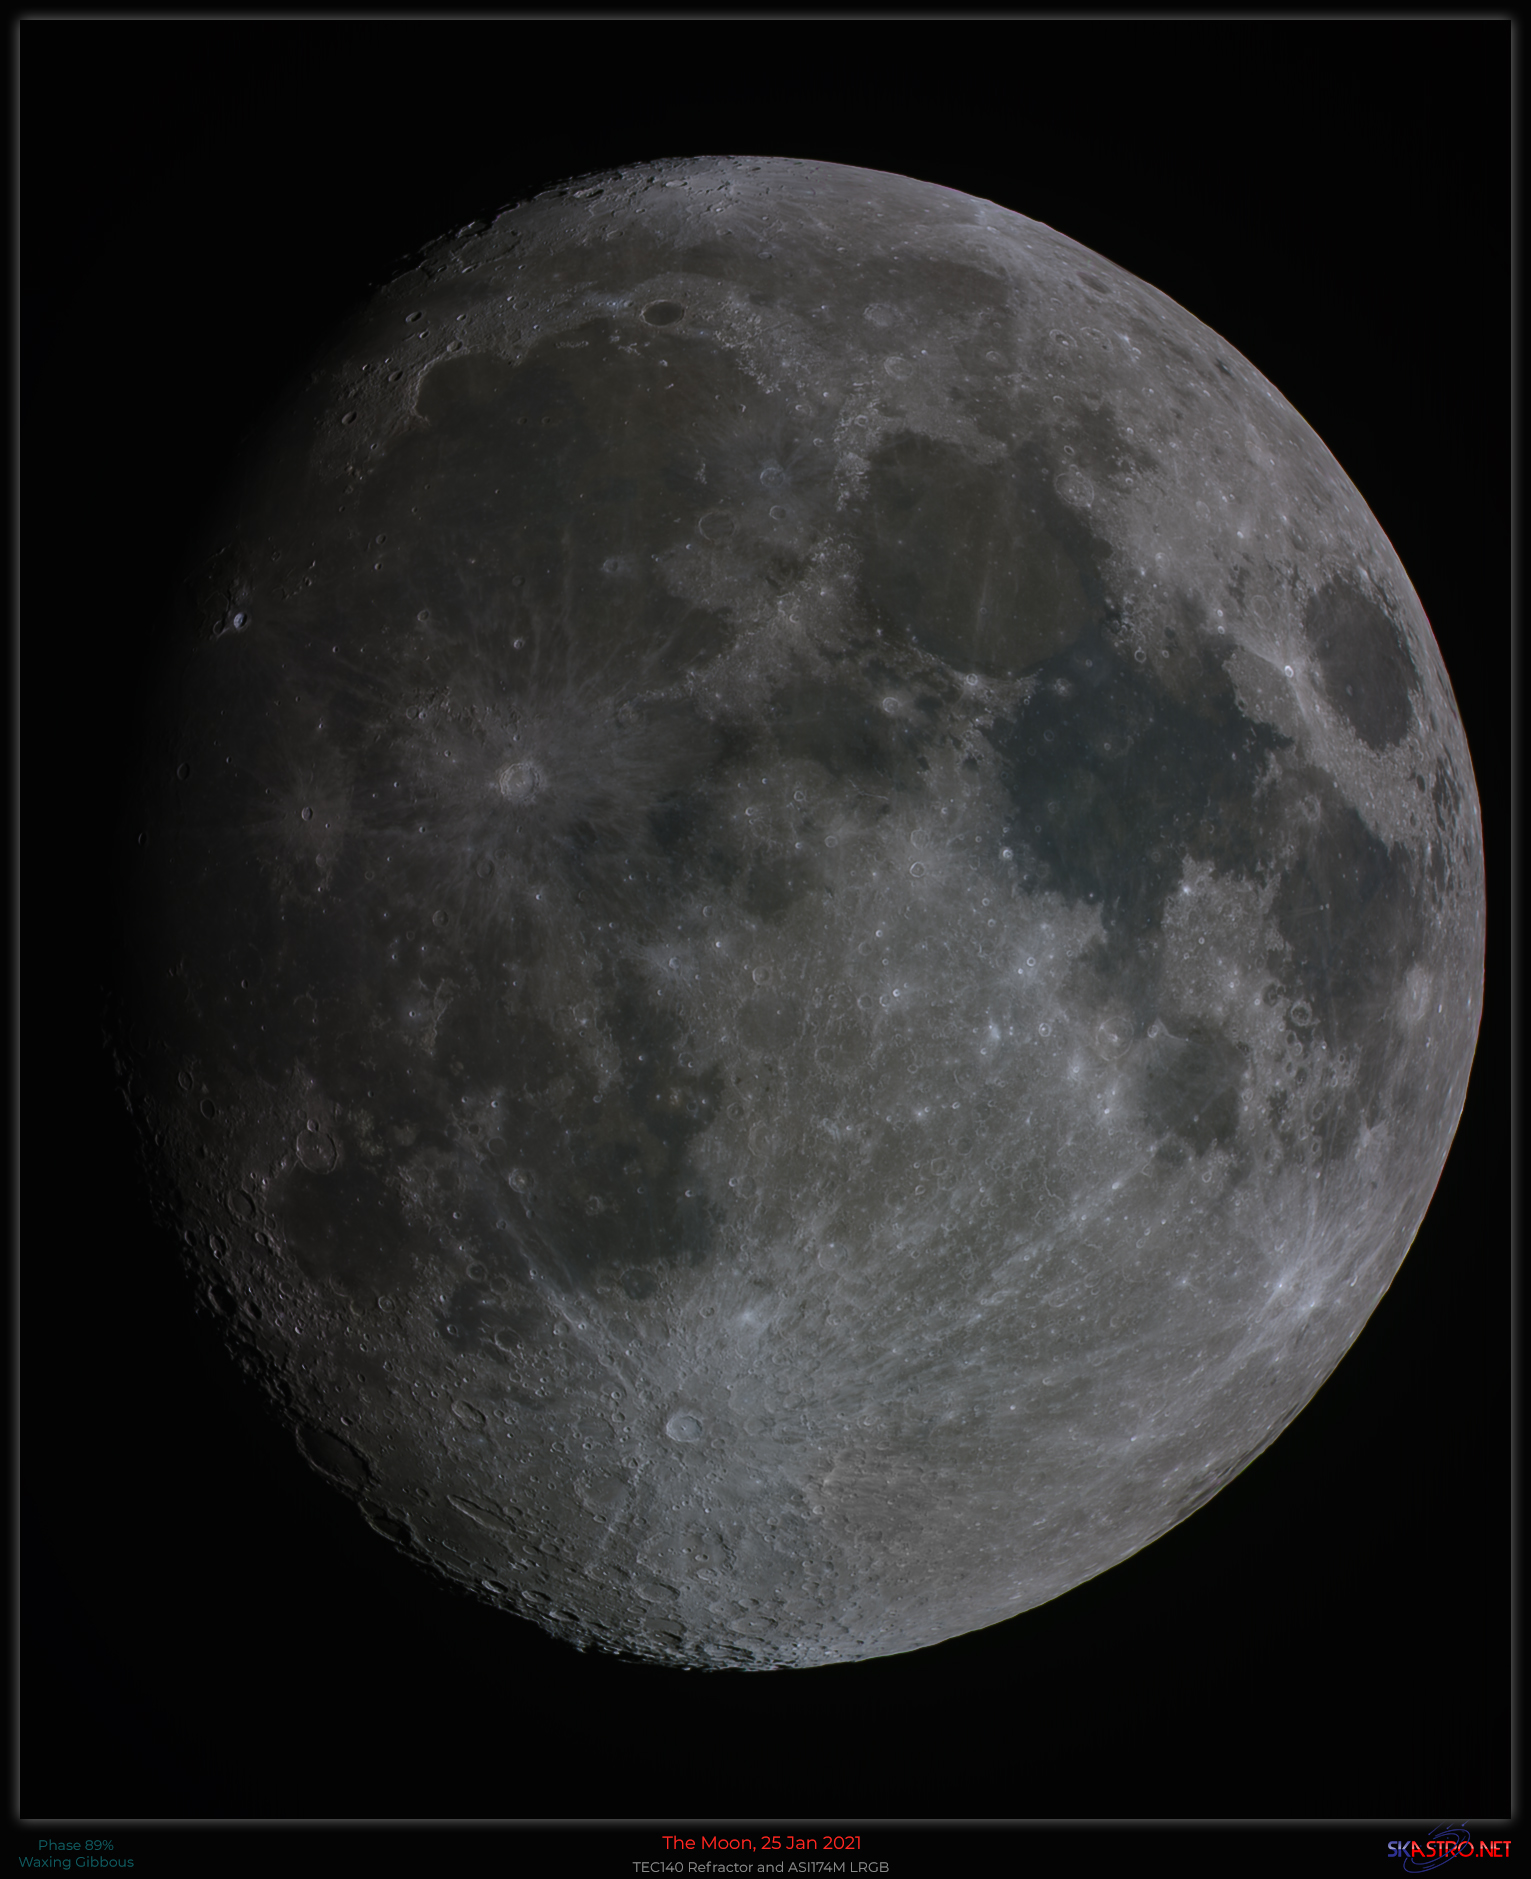
The Moon on 25th January 2021 at 89% in Gemini. It was freezing cold, snow on the ground with reasonable skies and seeing conditions. The full disk below is the best 20% in each of the R,G and B filters out of 10000 frames. I used Planetary System Stacker software to process the raw .SER files from the camera and then used PixInsight and Photoshop for processing. I used my TEC140 refractor and ASI174M high speed camera with Baader RGB filters.
I no longer capture a separate luminance channel and instead make a synthetic luminance from the RGB data and then sharpen that and use as a luminance layer in Photoshop.
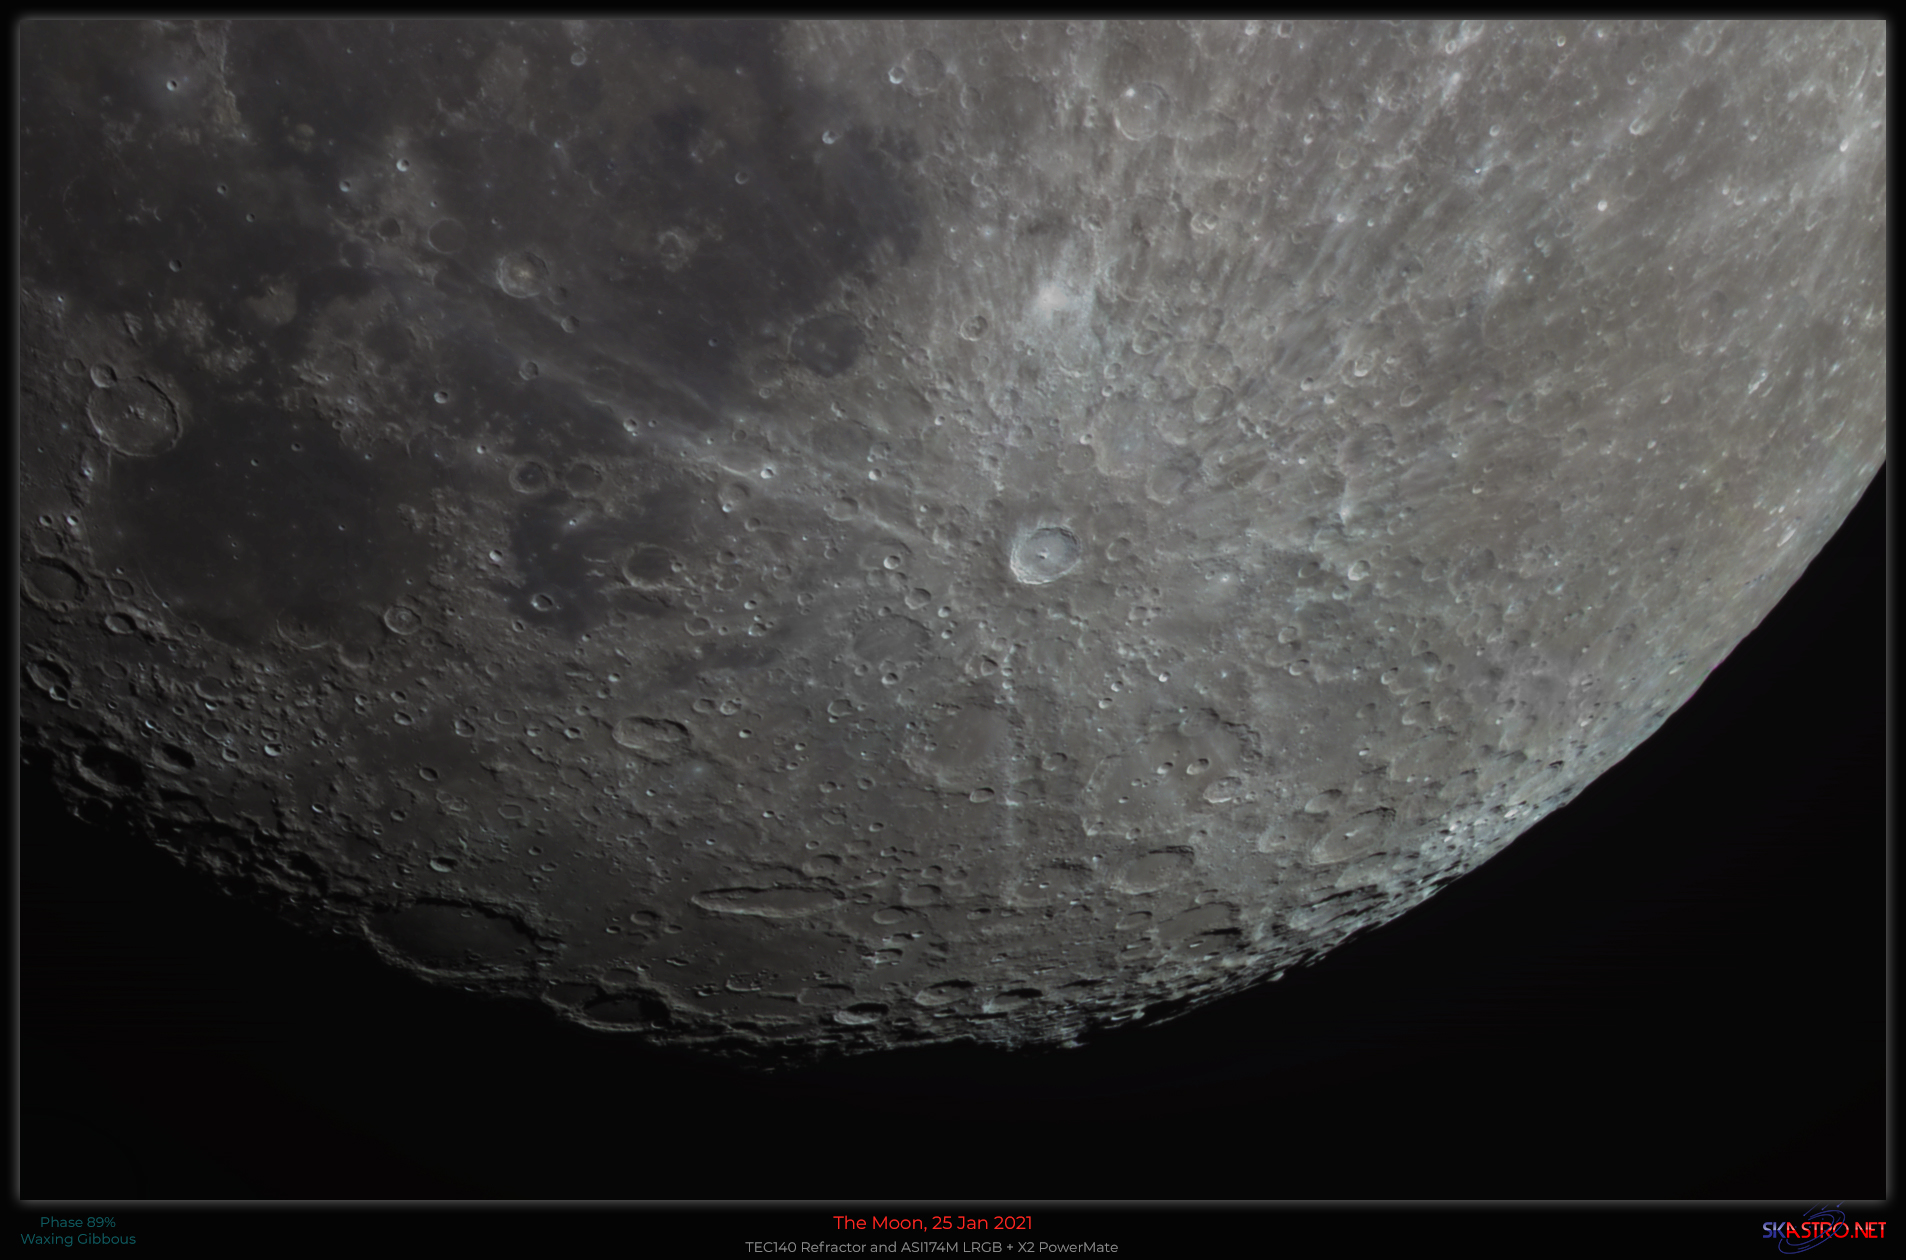
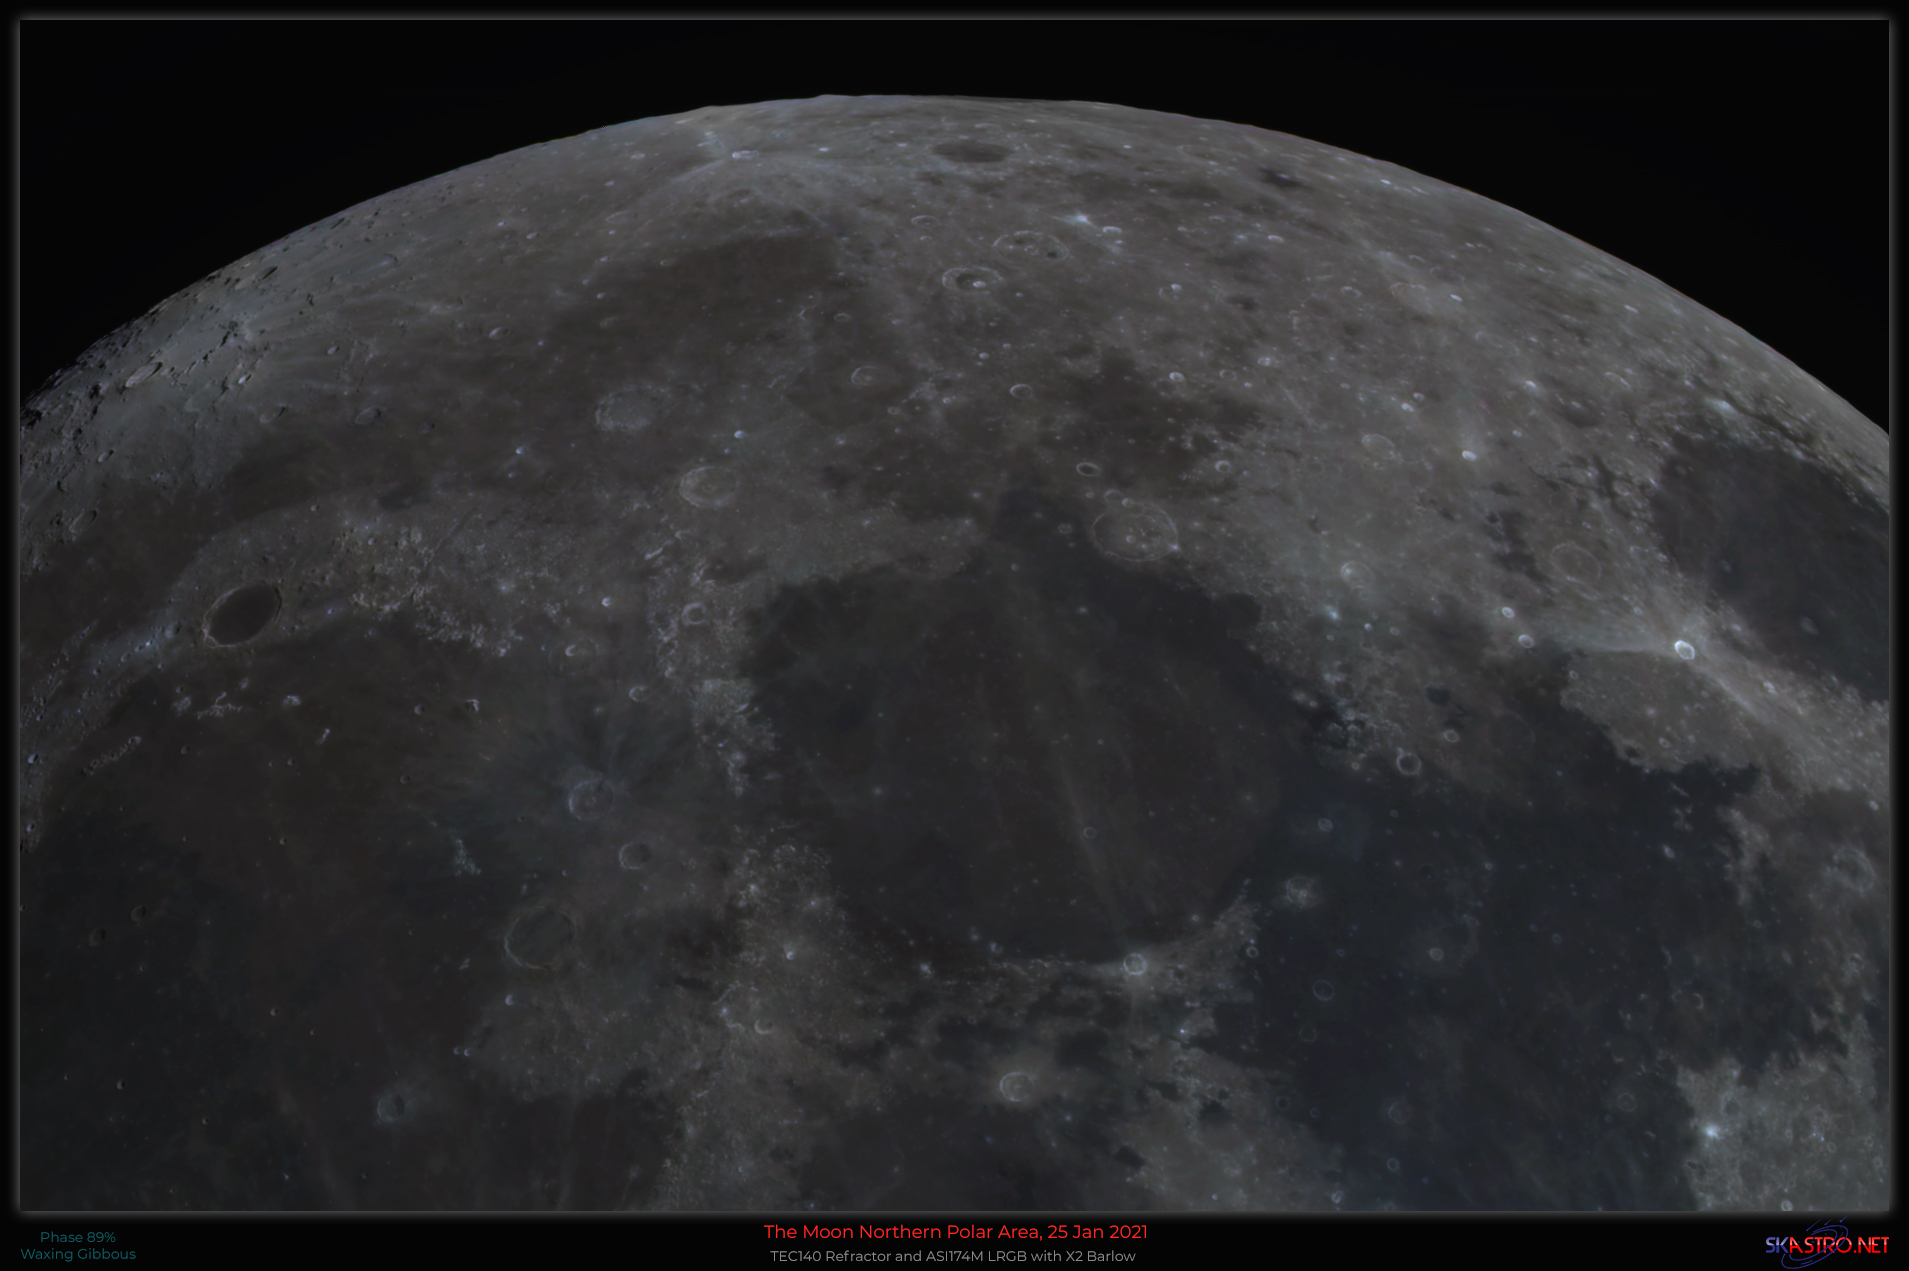
For the two images below I used my Televue 2" Powermate X2 in order to double the TEC140 telescope's focal length to 1960mm. The processing and frame set is the same as the full disk at the top.
Lunar Images, 23rd Jan 2021
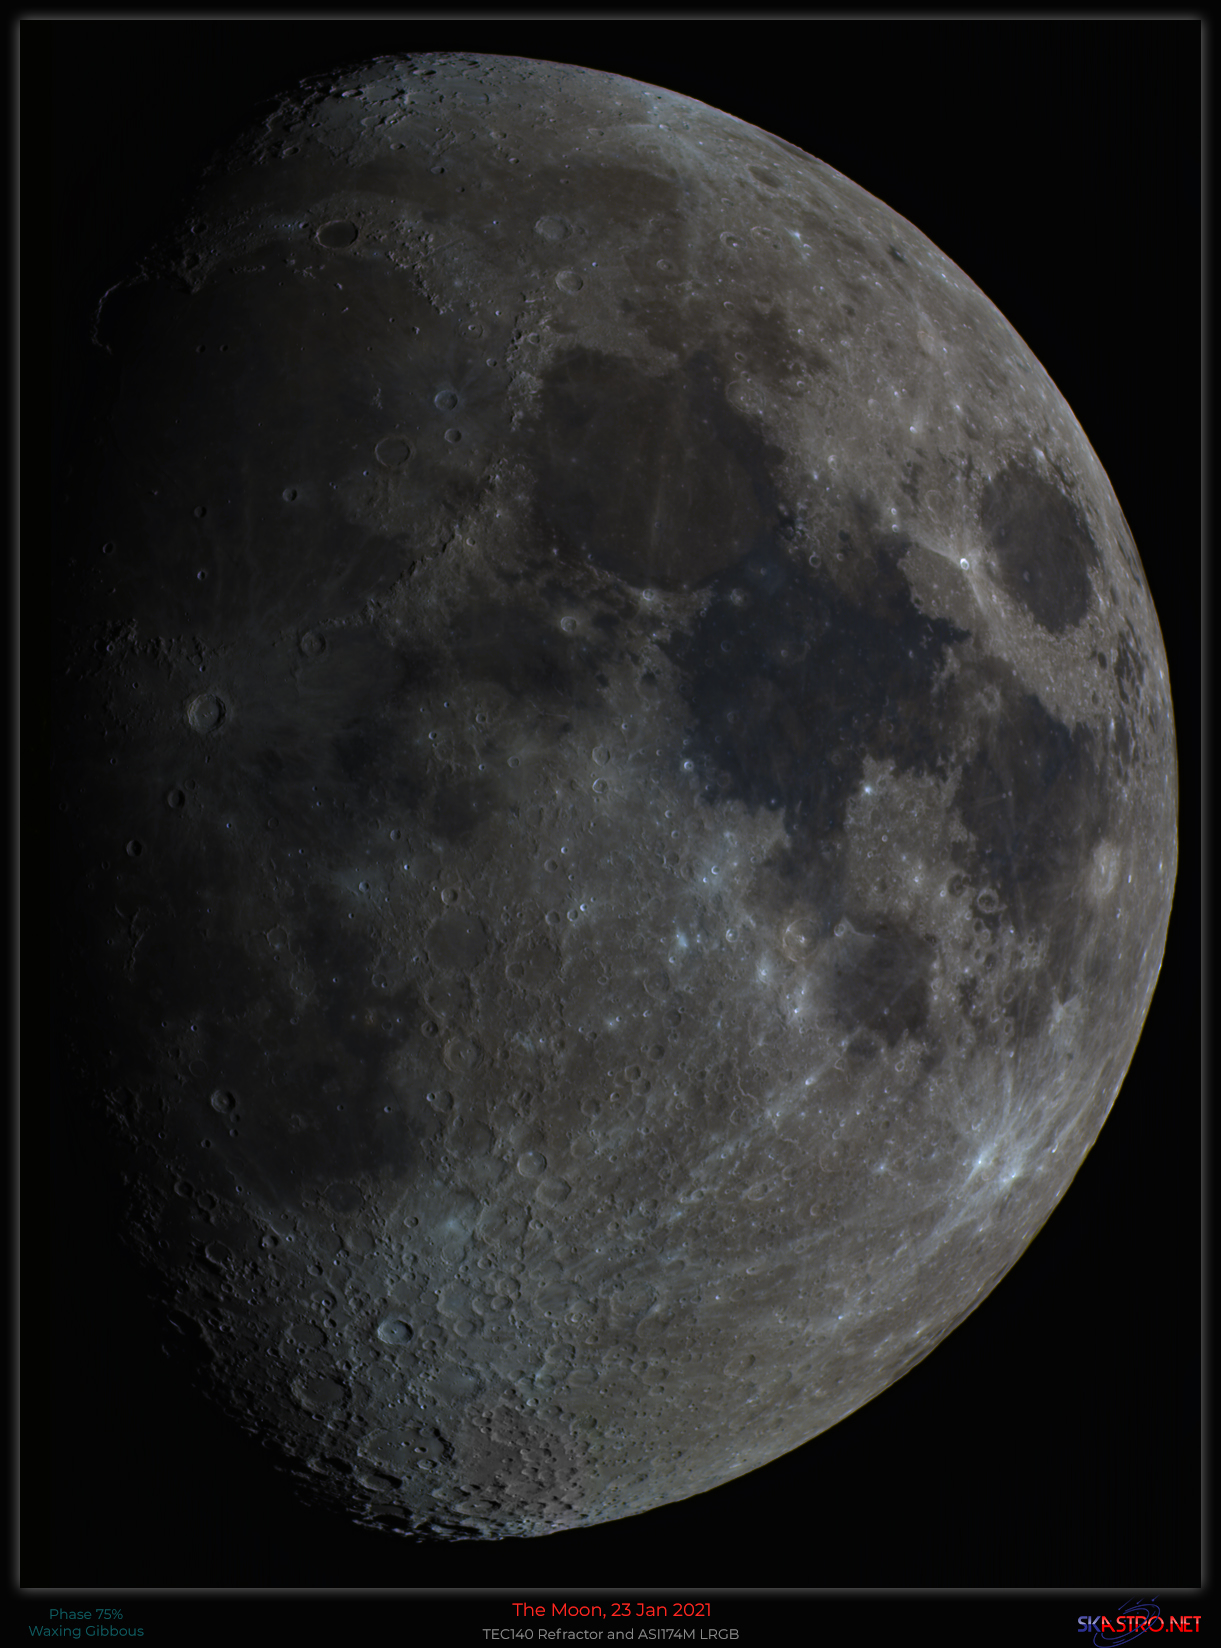
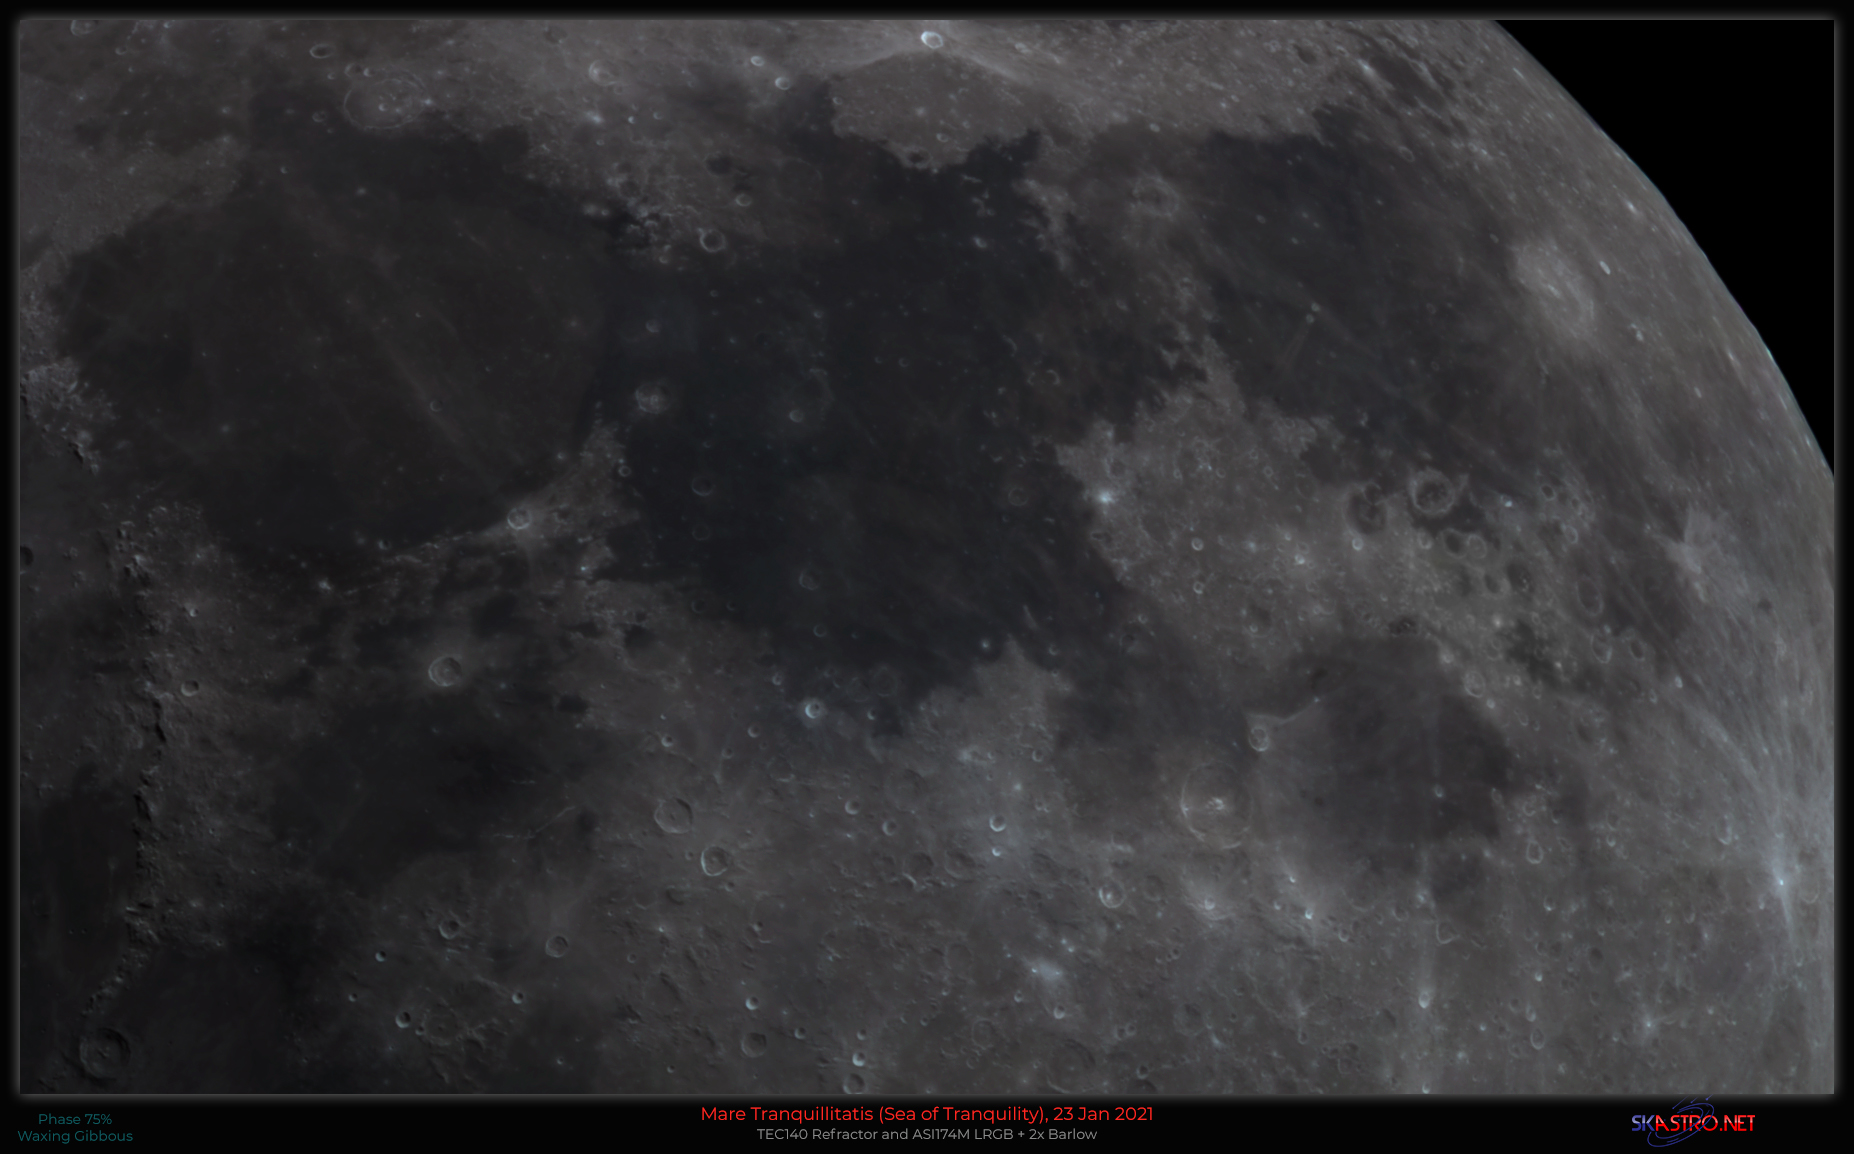
After months and months of cloud, The Moon shone down on us in Nottinghamshire on the 23rd January from high up in the sky in Gemini (my daughter's birthday!) It was at a phase of 74% waxing gibbous. I used my TEC140 scope, ASI174M camera and Baader RGB filters. The full disk image was with the telescope at its native focal length and with the two closer up views at the bottom I used a 2" Televue Powermate x2 in front of the filter wheel/camera assembly.
Above is best 25% of 20000 frames in each of RGB.
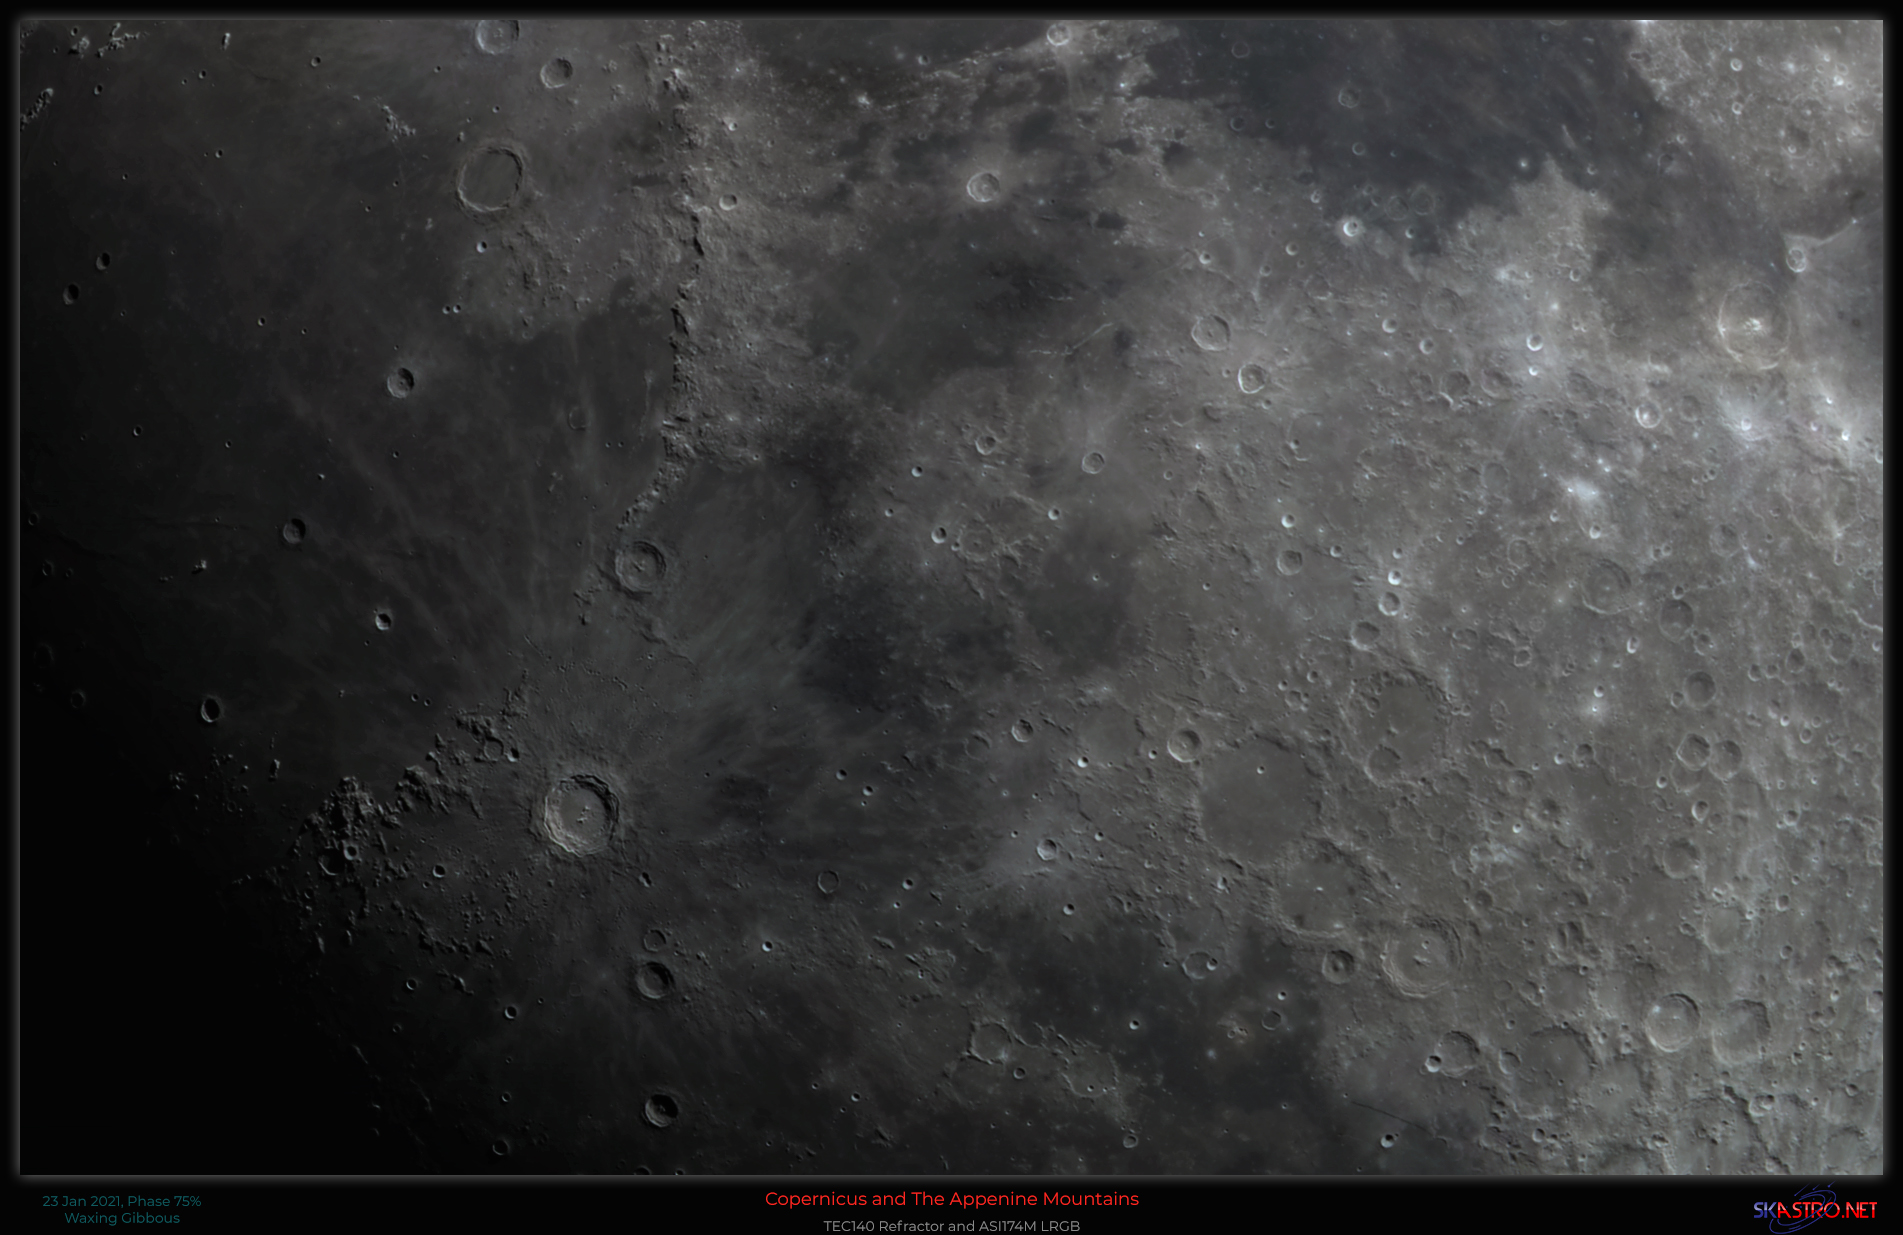
After the full disk image I inserted the Televue 2" x2 Powermate to get a more zoomed in view. Above is the Apennine Mountains and Copernicus crater to the left of centre. Best 15% of 5000 frames in LRGB.
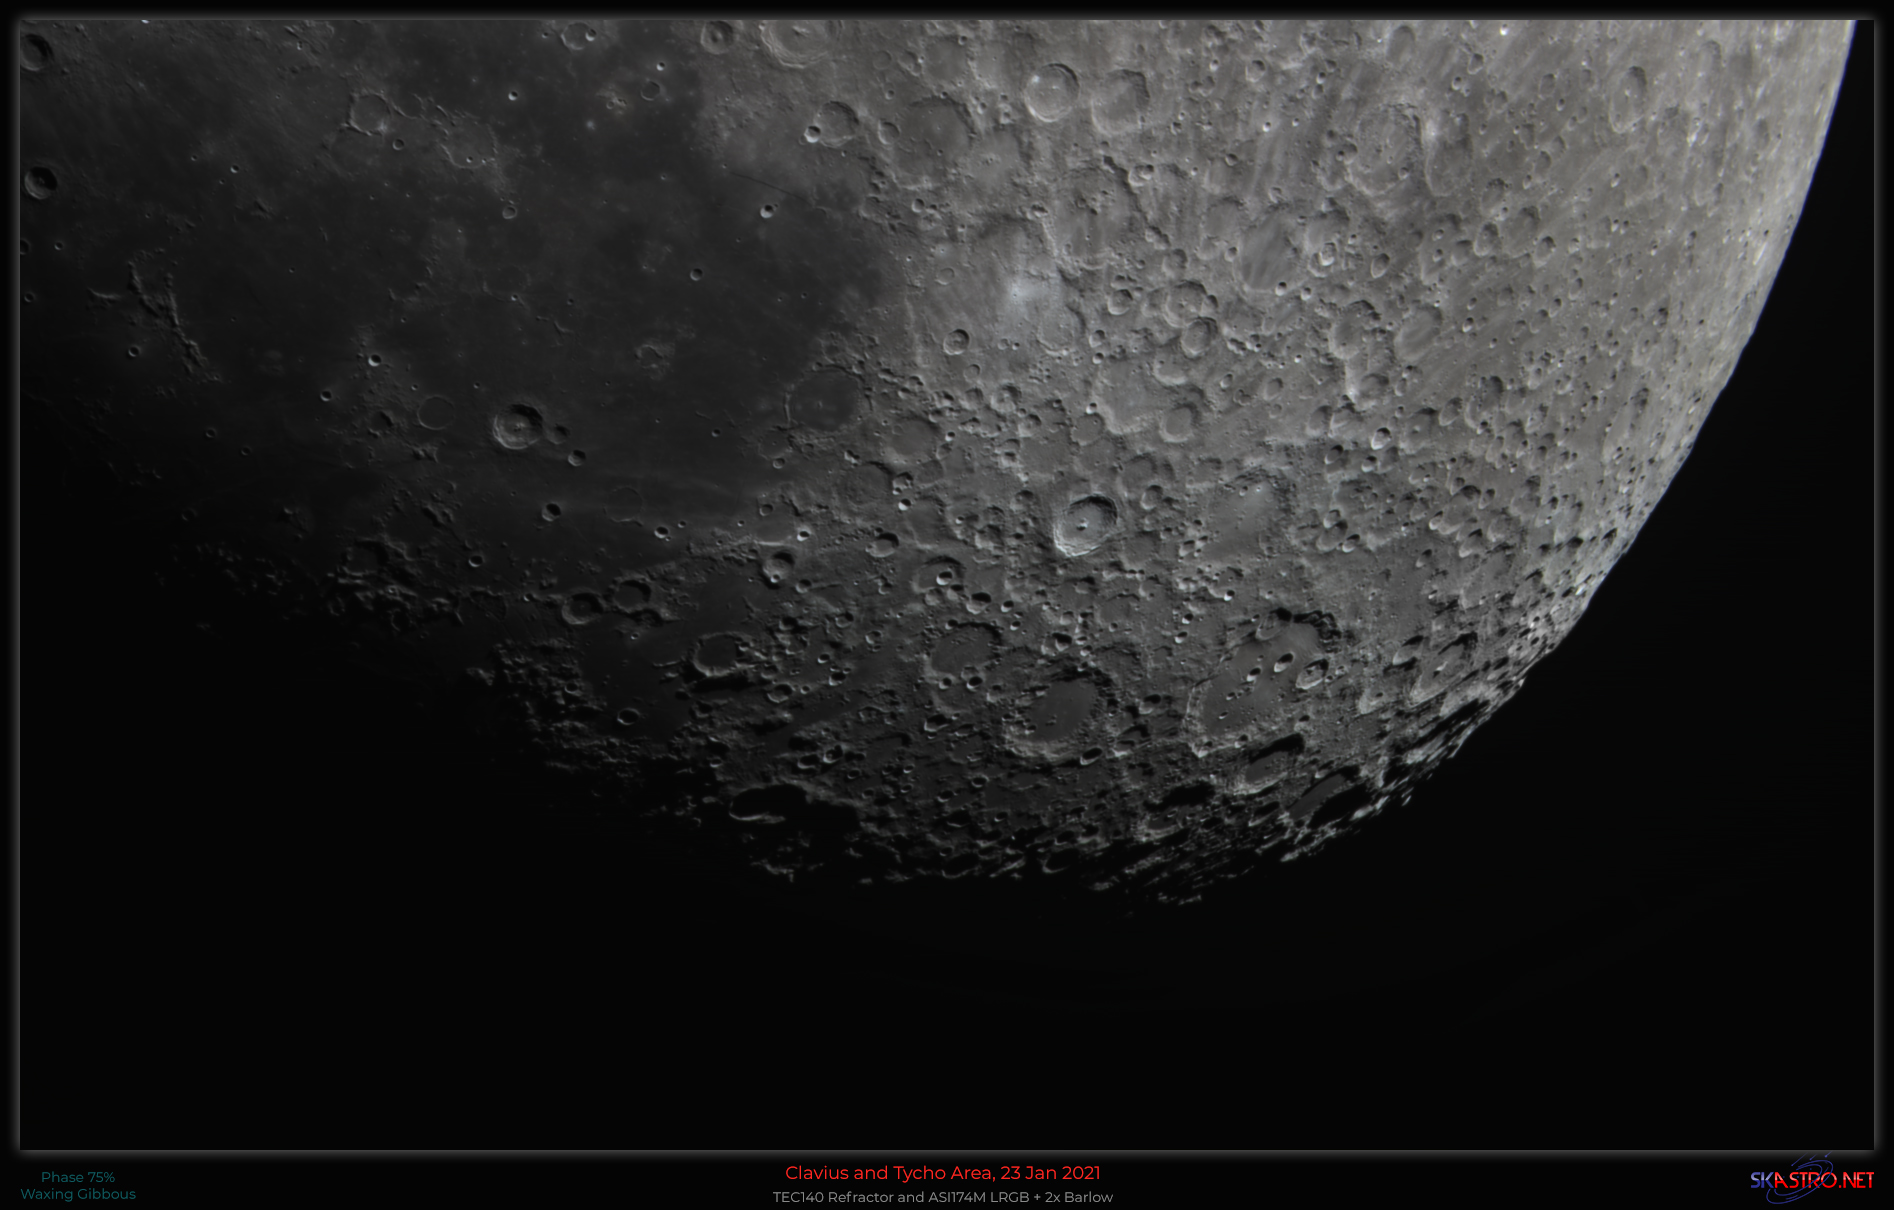
The below two images are the same telescope configuration Again, best 15% of 5000 frames in each of LRGB. To the left we have The Sea of Tranquillity (Apollo 11 landing area) and to the right Copernicus and the Apennine Mountains.
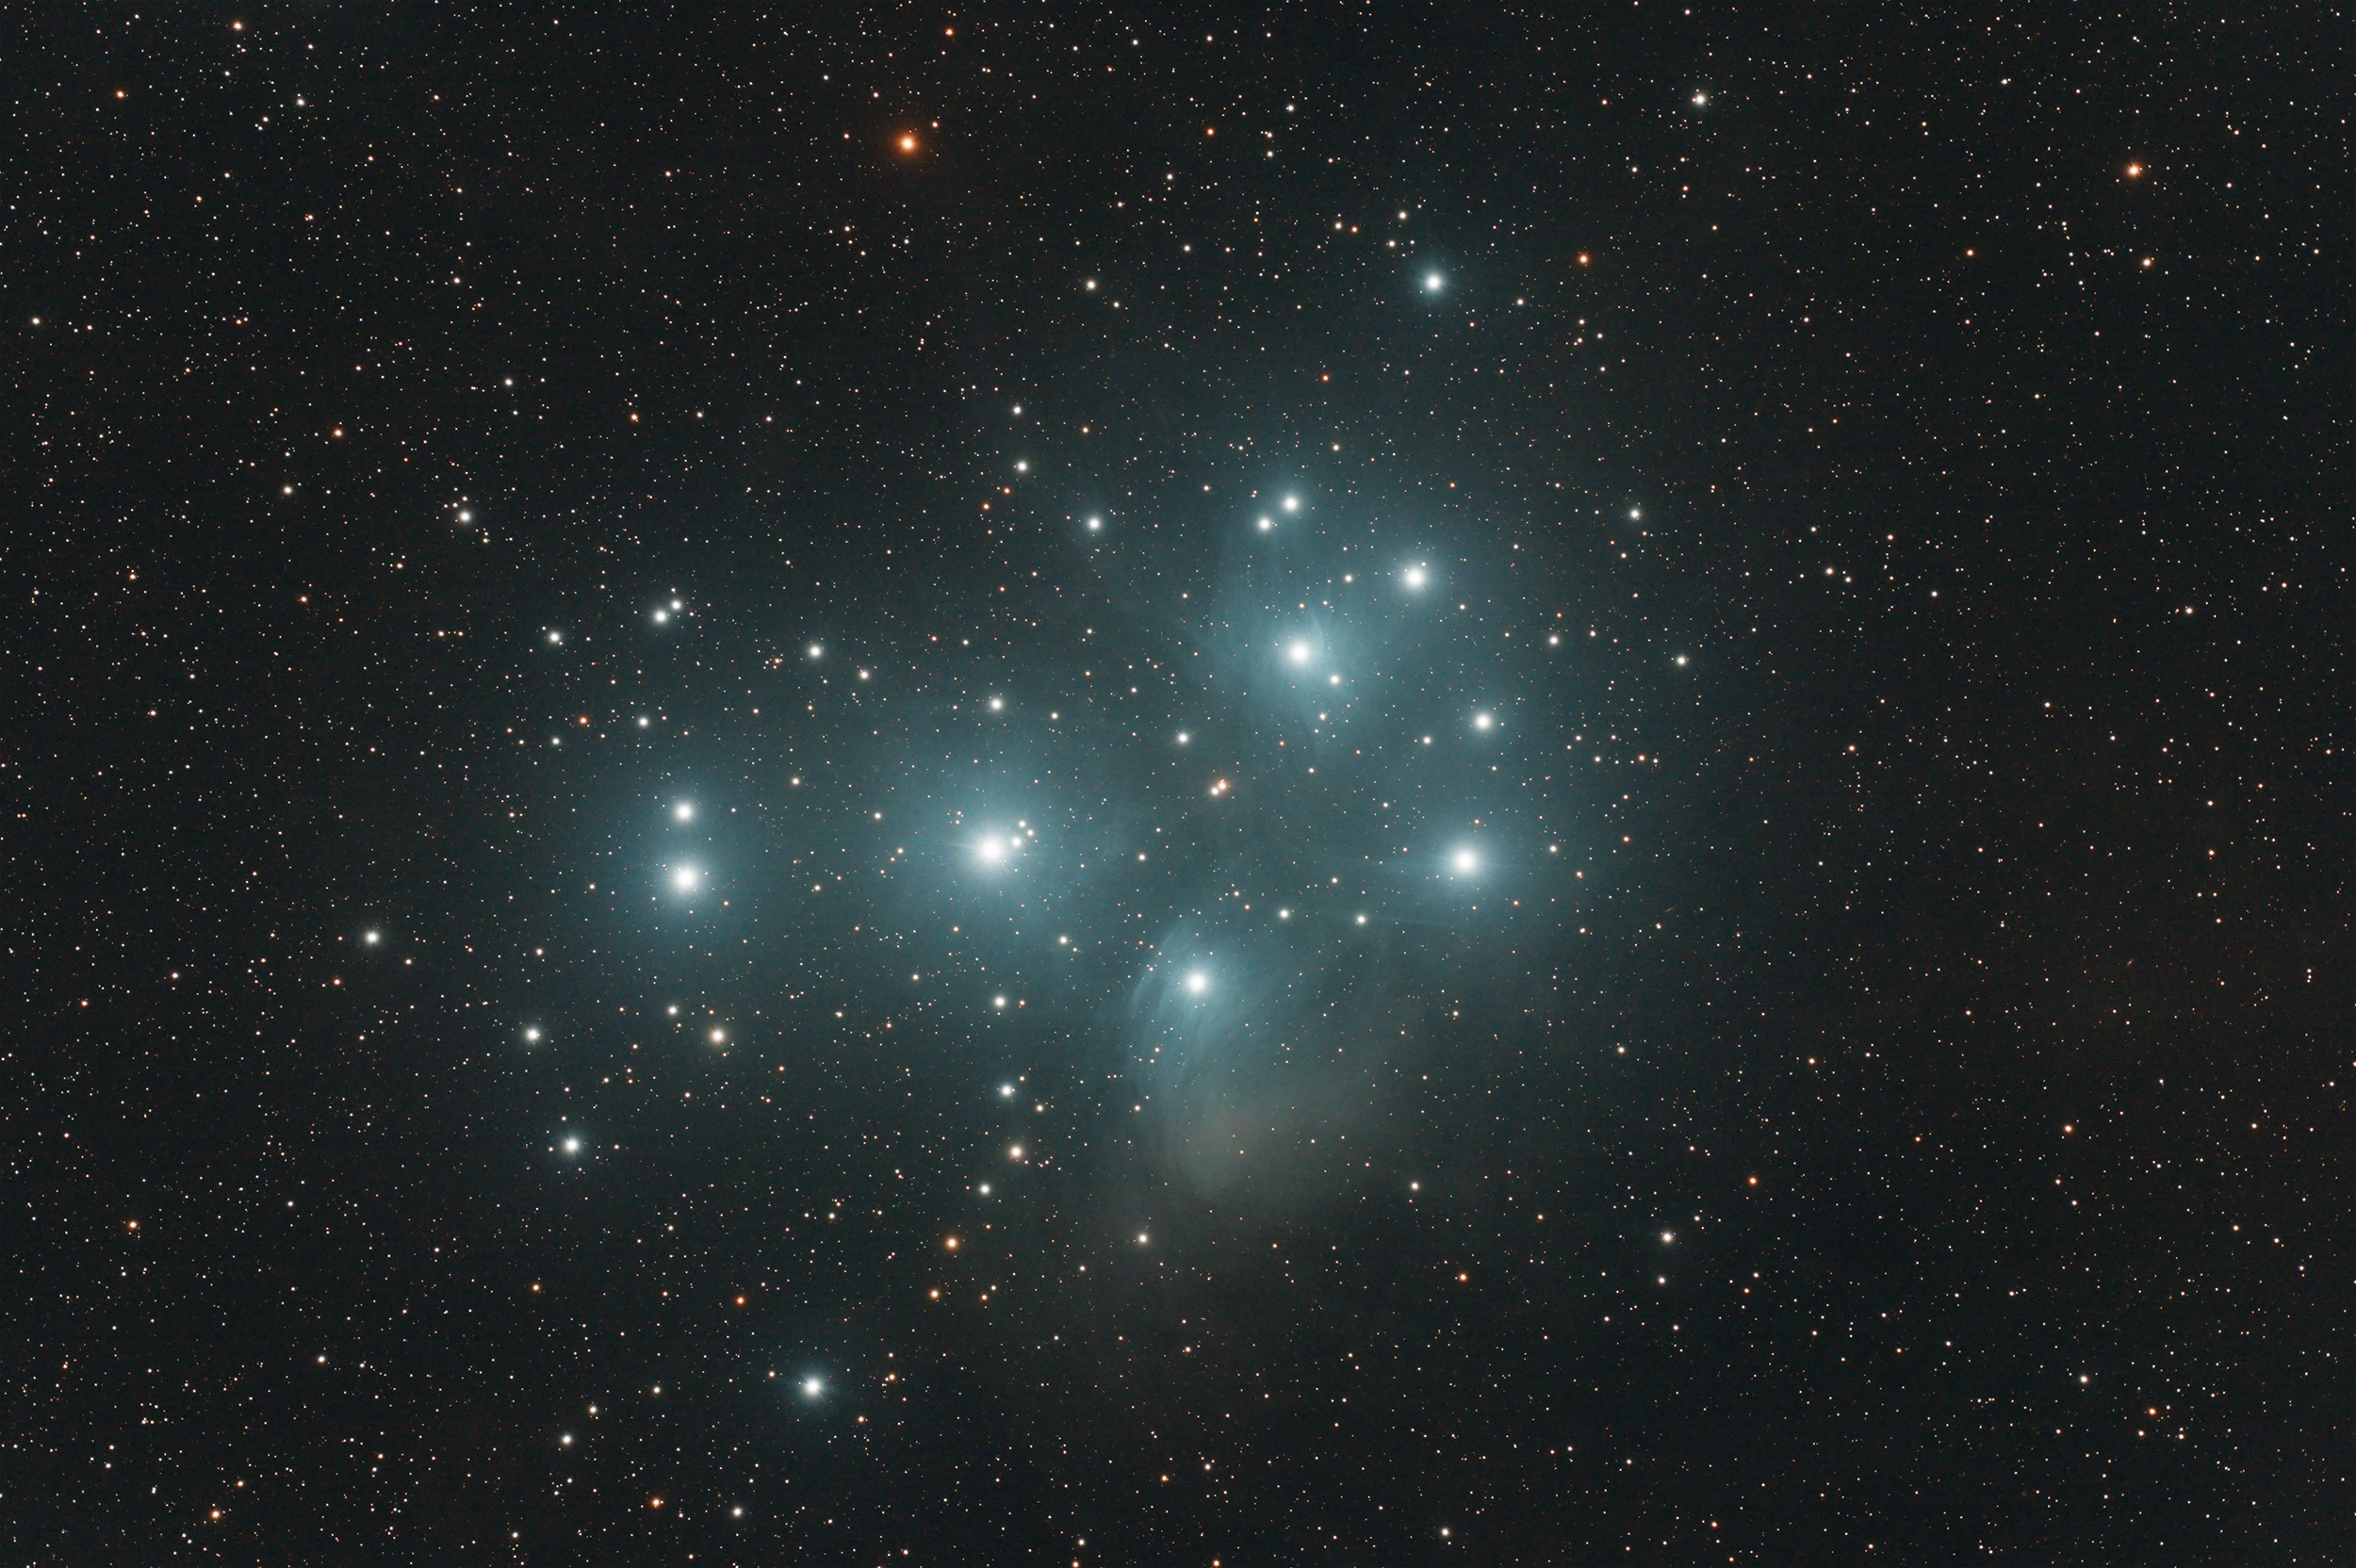
M45 - The Pleiades
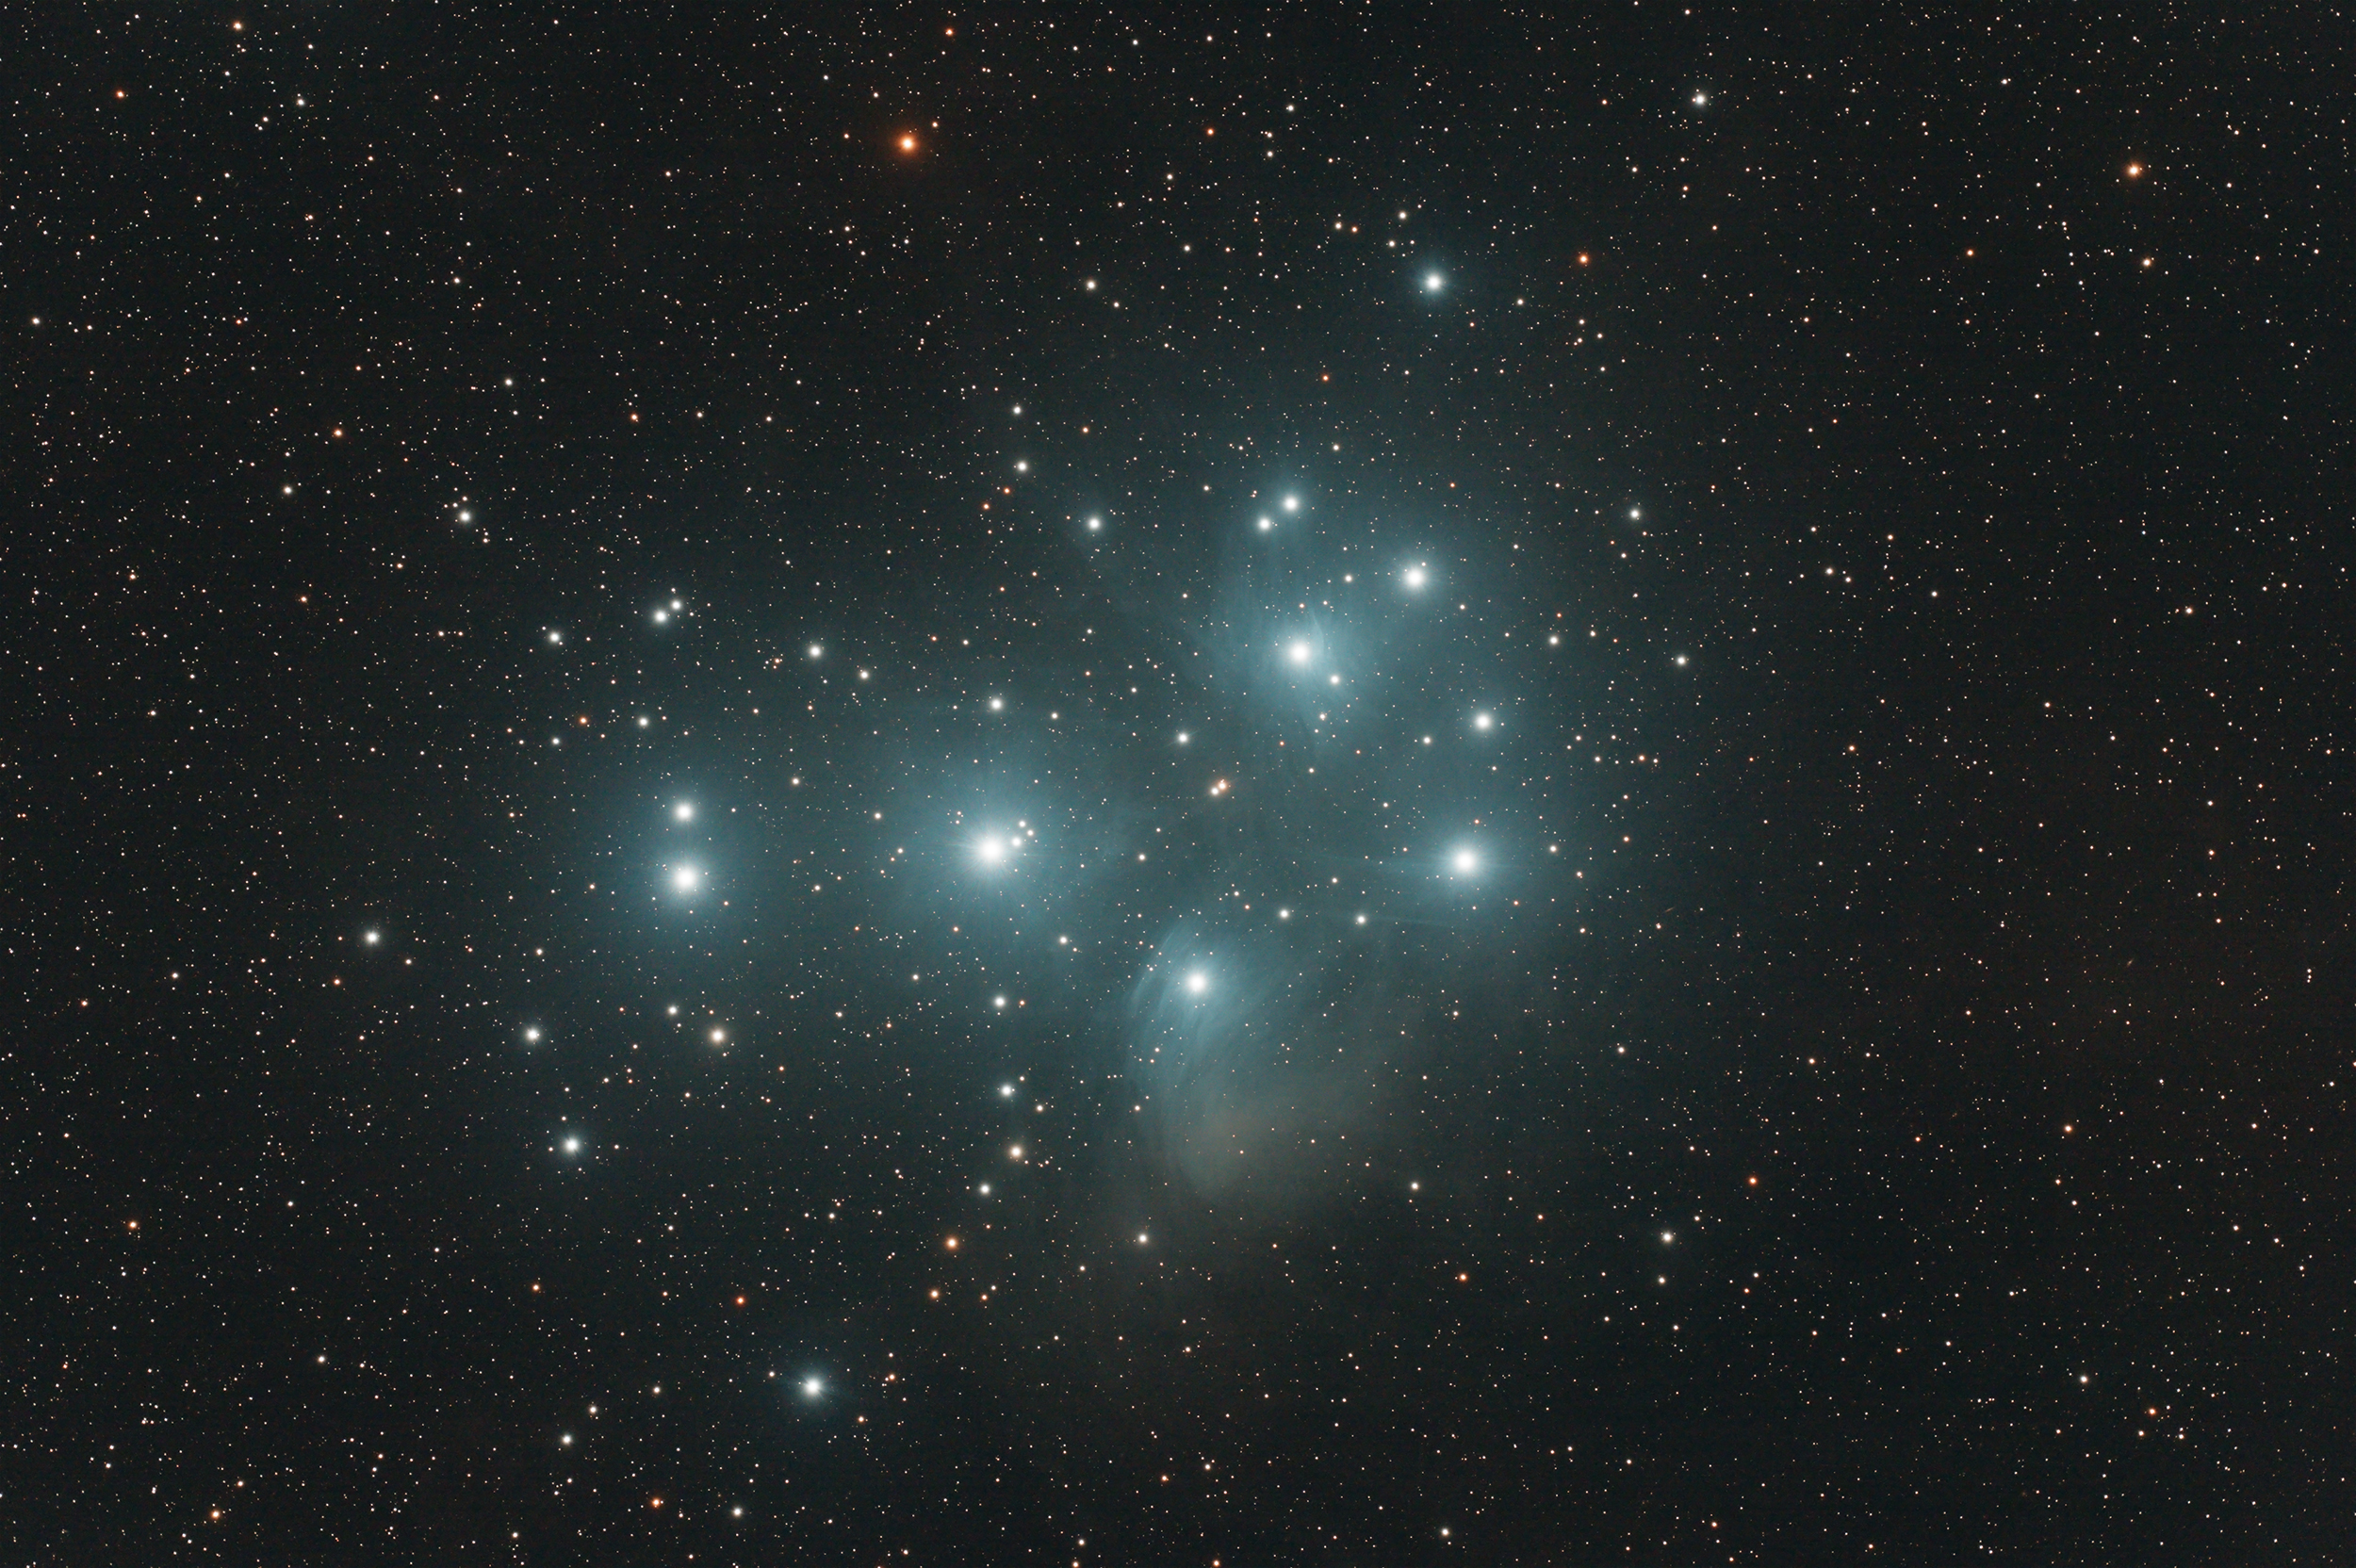
Easily visible with the naked eye, M45, The Pleiades - sometimes referred to as The Seven Sisters, is a well known and famous Open Cluster in the constellation of Taurus. IT has been known since ancient times due to its prominence. The cluster is located between 450-500 light years away and contains several hundreds member stars. The cluster is quite young by astronomy standards and the cluster is moving through a cloud of gas which is easily visible in images and can been seen visually in a dark sky as well.
Technical Details
Imaged from my backyard in Nottingham on Saturday 9th January 2021 when high to The South. A meridian flip occurred half way through the data acquisition. I used my Takahashi FSQ85 refractor and QHY268C One Shot Colour camera. The image was created with quite a small data set of only 38 x 180s exposures.
Data acquired with Sequence Generator Pro and processed with PixInsight and Photoshop CC 2021. Very little processing has been done other than some noise reduction and a stretch into the none-linear state and a bit of vibrance added to the colour.
I have imaged M45 before. In a close-up setting and also in a widefield setting.

The Grand Conjunction of Jupiter and Saturn
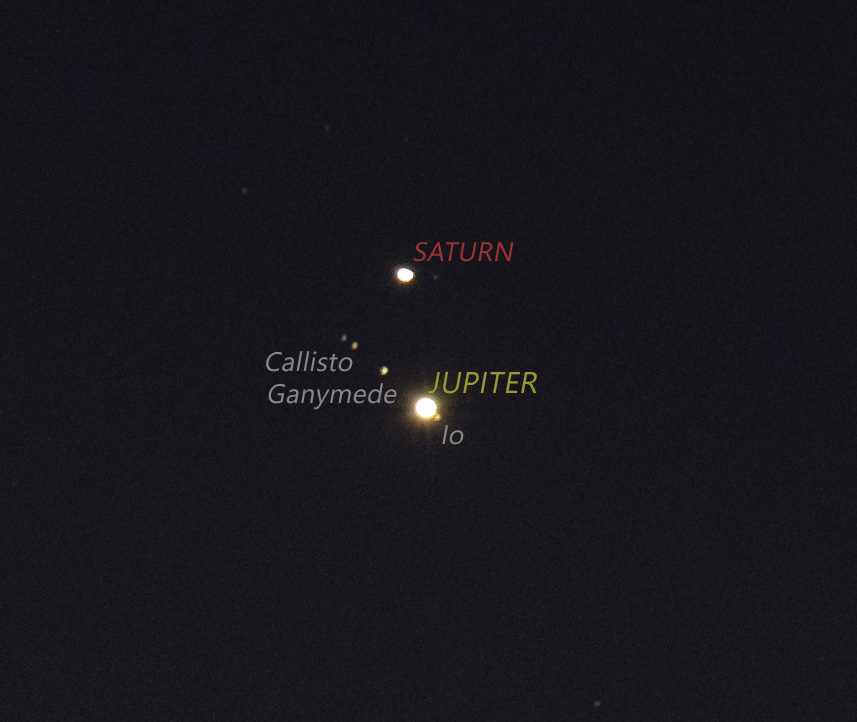
Imaged with a FujiFilm X-T2 and a 55-200m zoom lens (set to 200mm). Camera mounted on a Skywatcher Star Adventurer to prevent smearing of the image due to 7 second exposures at that focal length. Imaged at F4 and ISO 800.

This set of pictures was taken almost one day before the planets' closest approach and were taken on 20 December 2020 at 17:20. The closest approach itself was on the 21st December at 18:00 but that day was clouded out with very heavy rain where I live (as usual, most astronomy special events are clouded out in the UK - typical!).

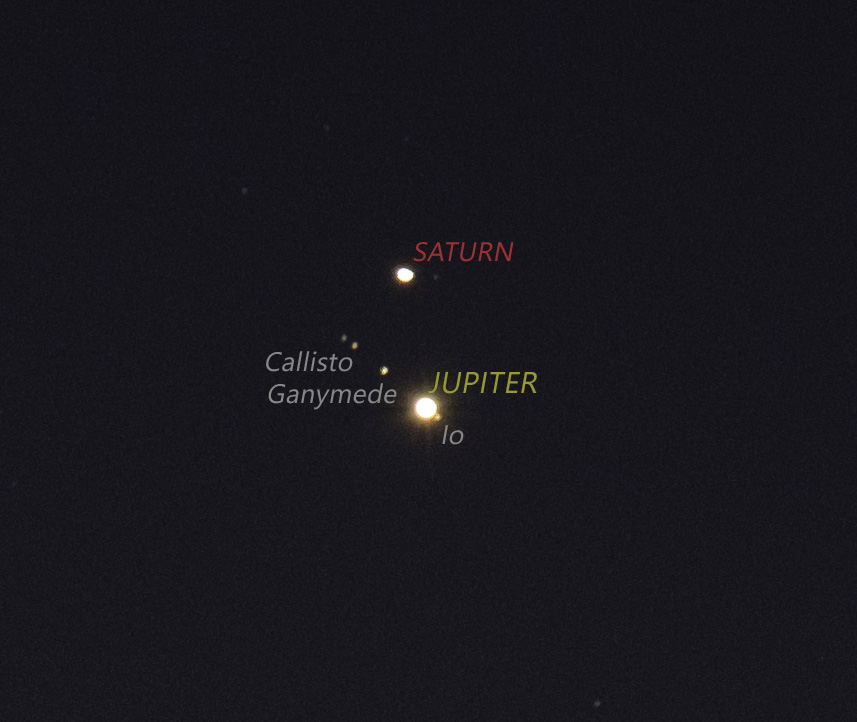
Jupiter and Saturn were around 32 arcminutes apart when this picture was taken, moving to their closest at around 30 arcminutes at their closest the following day. 30 arcminutes is about the same diameter of The Sun and The Moon.
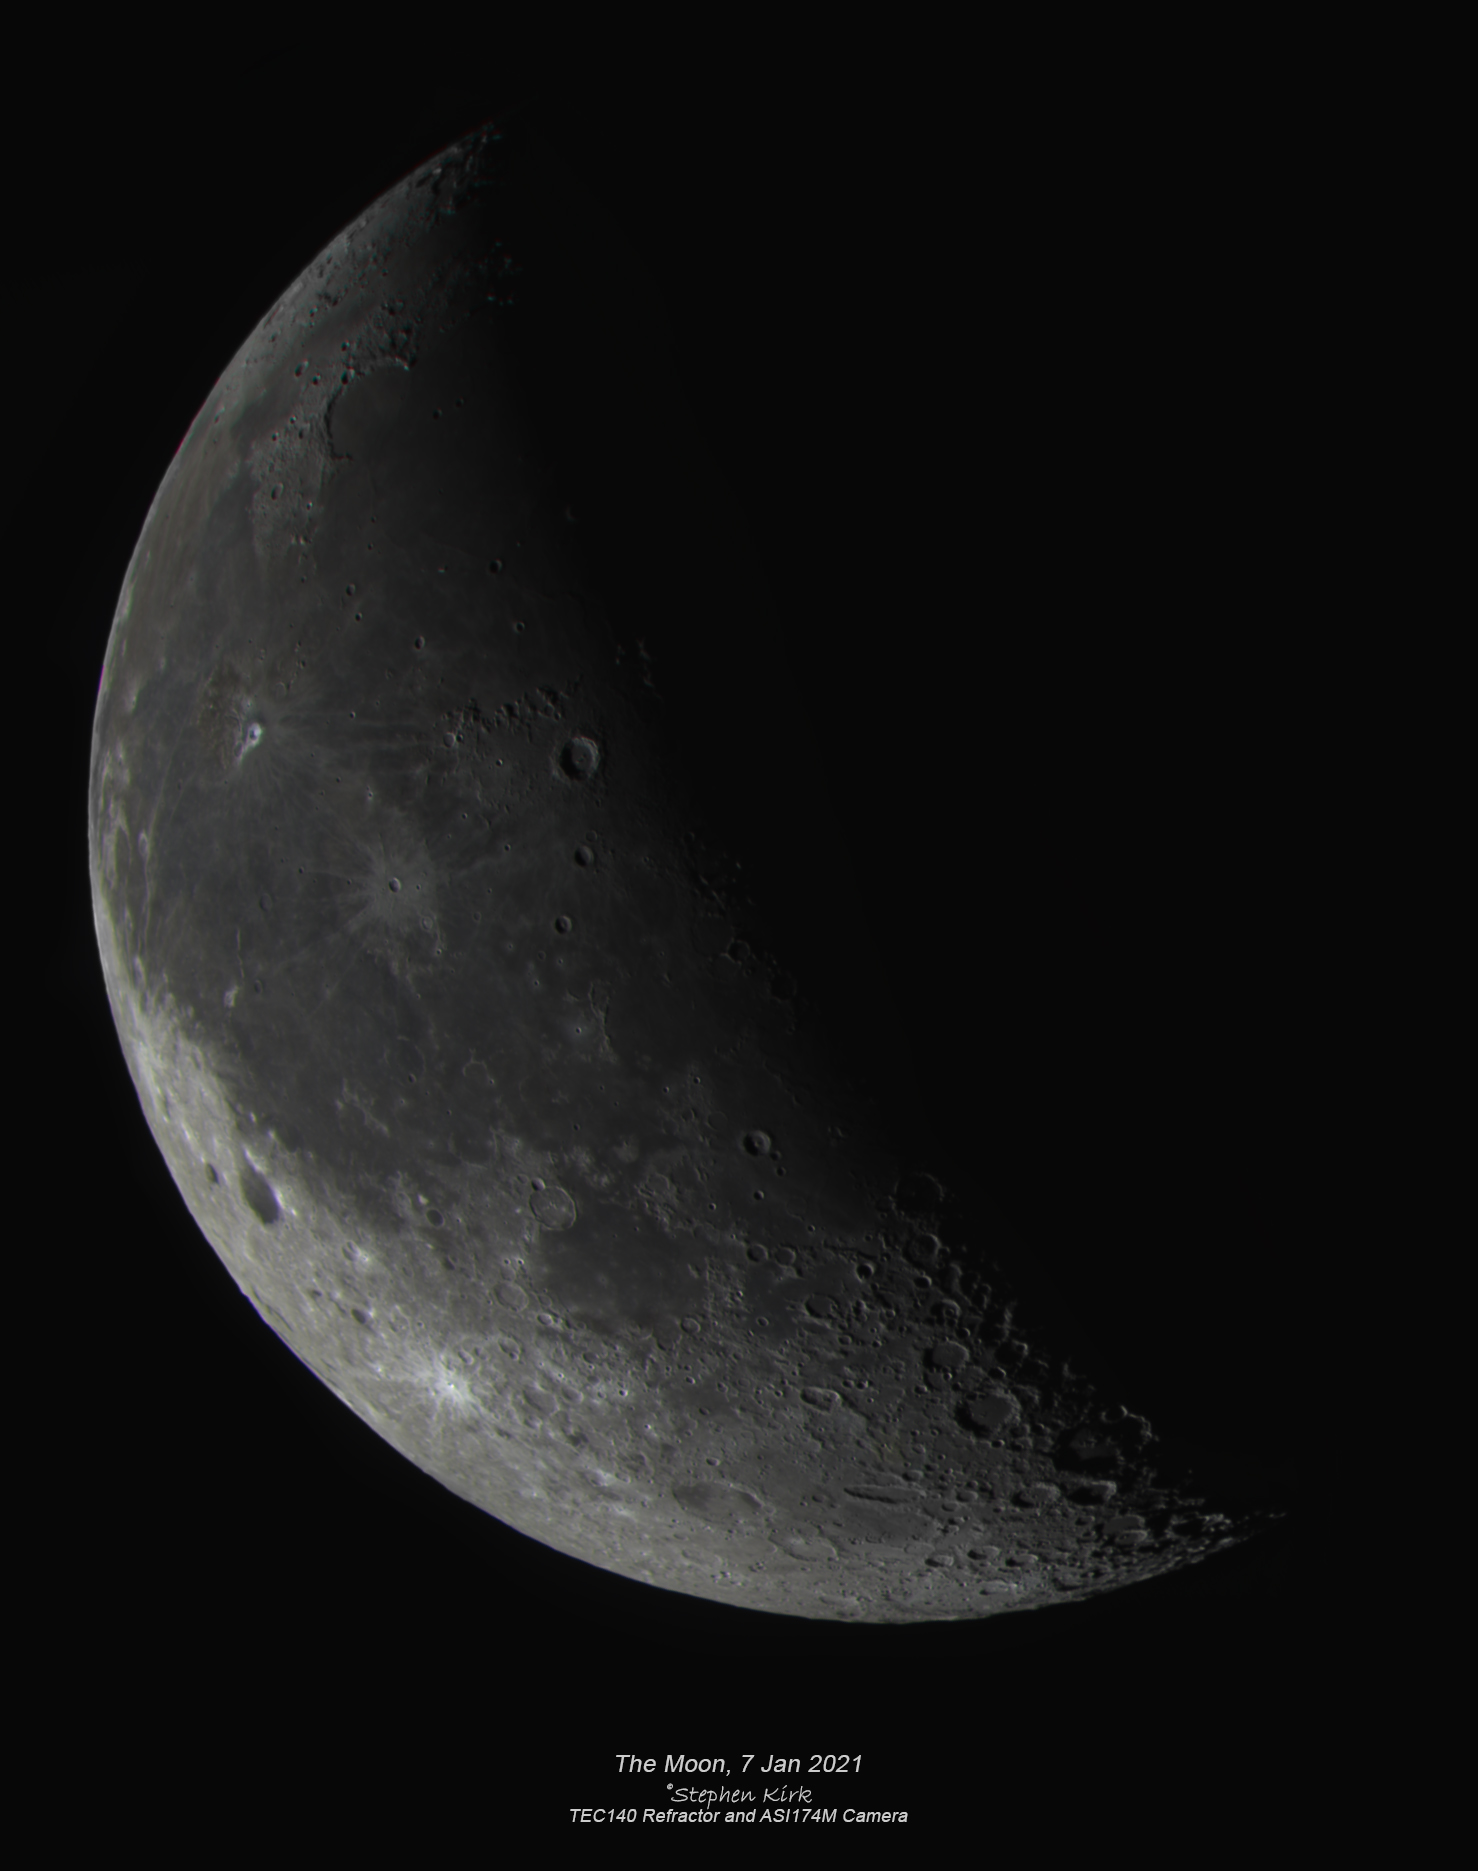
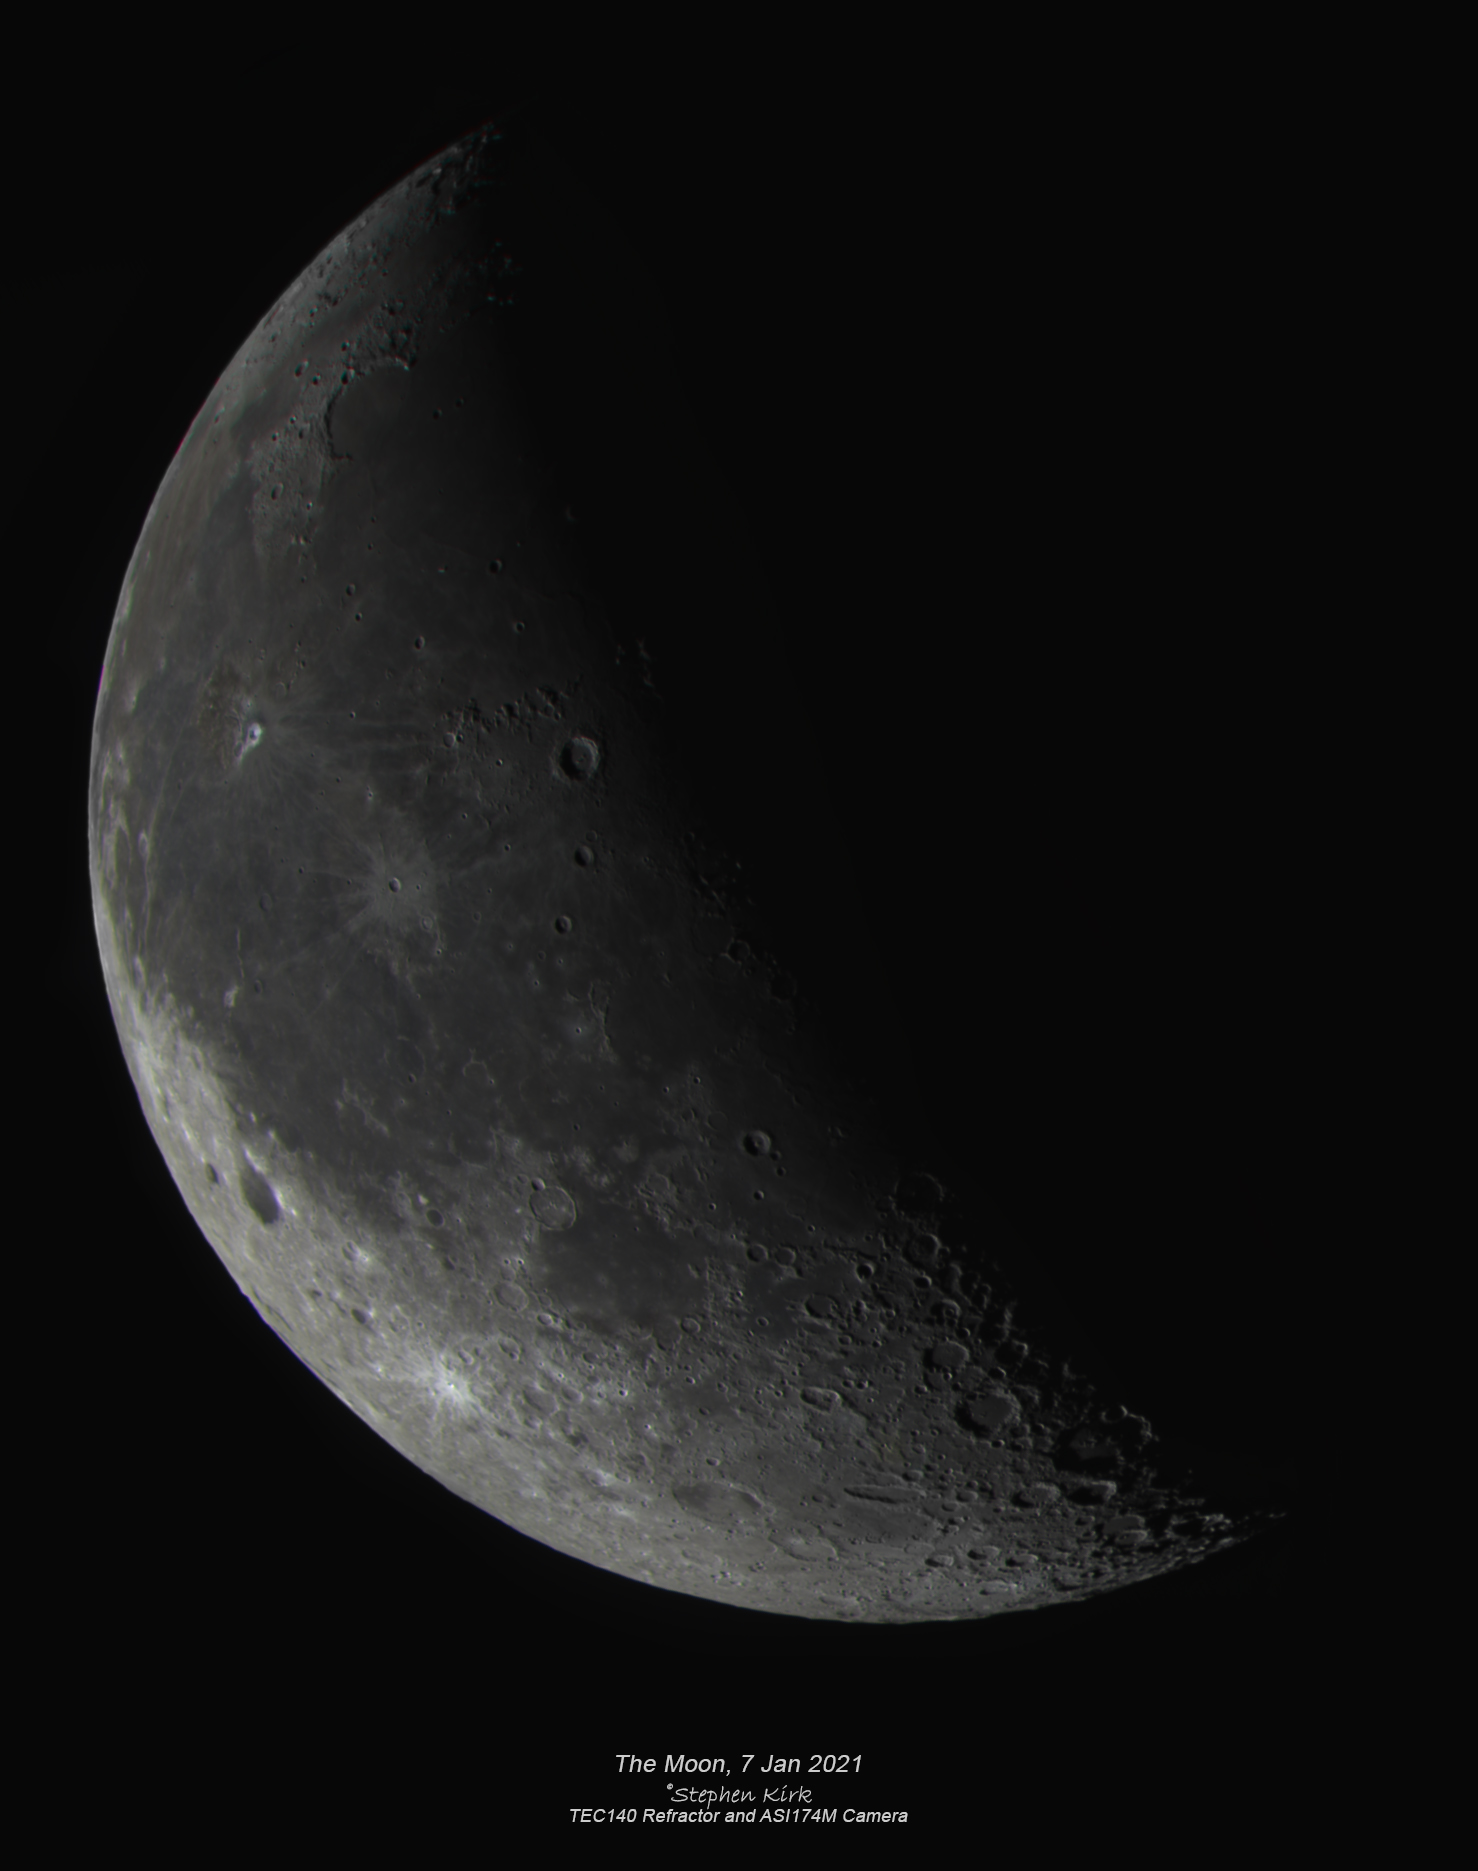
The Moon, 7 January 2021
I had to get up early in the morning to get this picture of The Moon. I set my alarm and got up at 05:00 which took considerable motivation, especially since it was -6C! I don't capture many last quarter and later moon pictures because the Moon is only ever visible in that phase early in the morning and working full time it is not easy to be getting up very early when you have to do lots of driving. However, conditions for astronomy in the UK have been exceptionally poor for the last six months of 2020 and I am desperate to be able to image anything at all!
Technical Details
The Moon was in Scorpio, low down to The South from my location, and seeing was average with the Moon at such a low altitude Phase is 38% waning.
Imaged from my back garden with my TEC 140 refractor and ASI174M camera with LRGB filters. I captured 10000 frames in each of R,G and B and 25000 in luminance. The .SER files were quite jumpy with The Moon being at quite a low altitude and so I used about 50% of the frames from each recording. I captured with Sharpcap and then processed with Autostakkert, PixInsight and Photoshop.
I hope you like it!
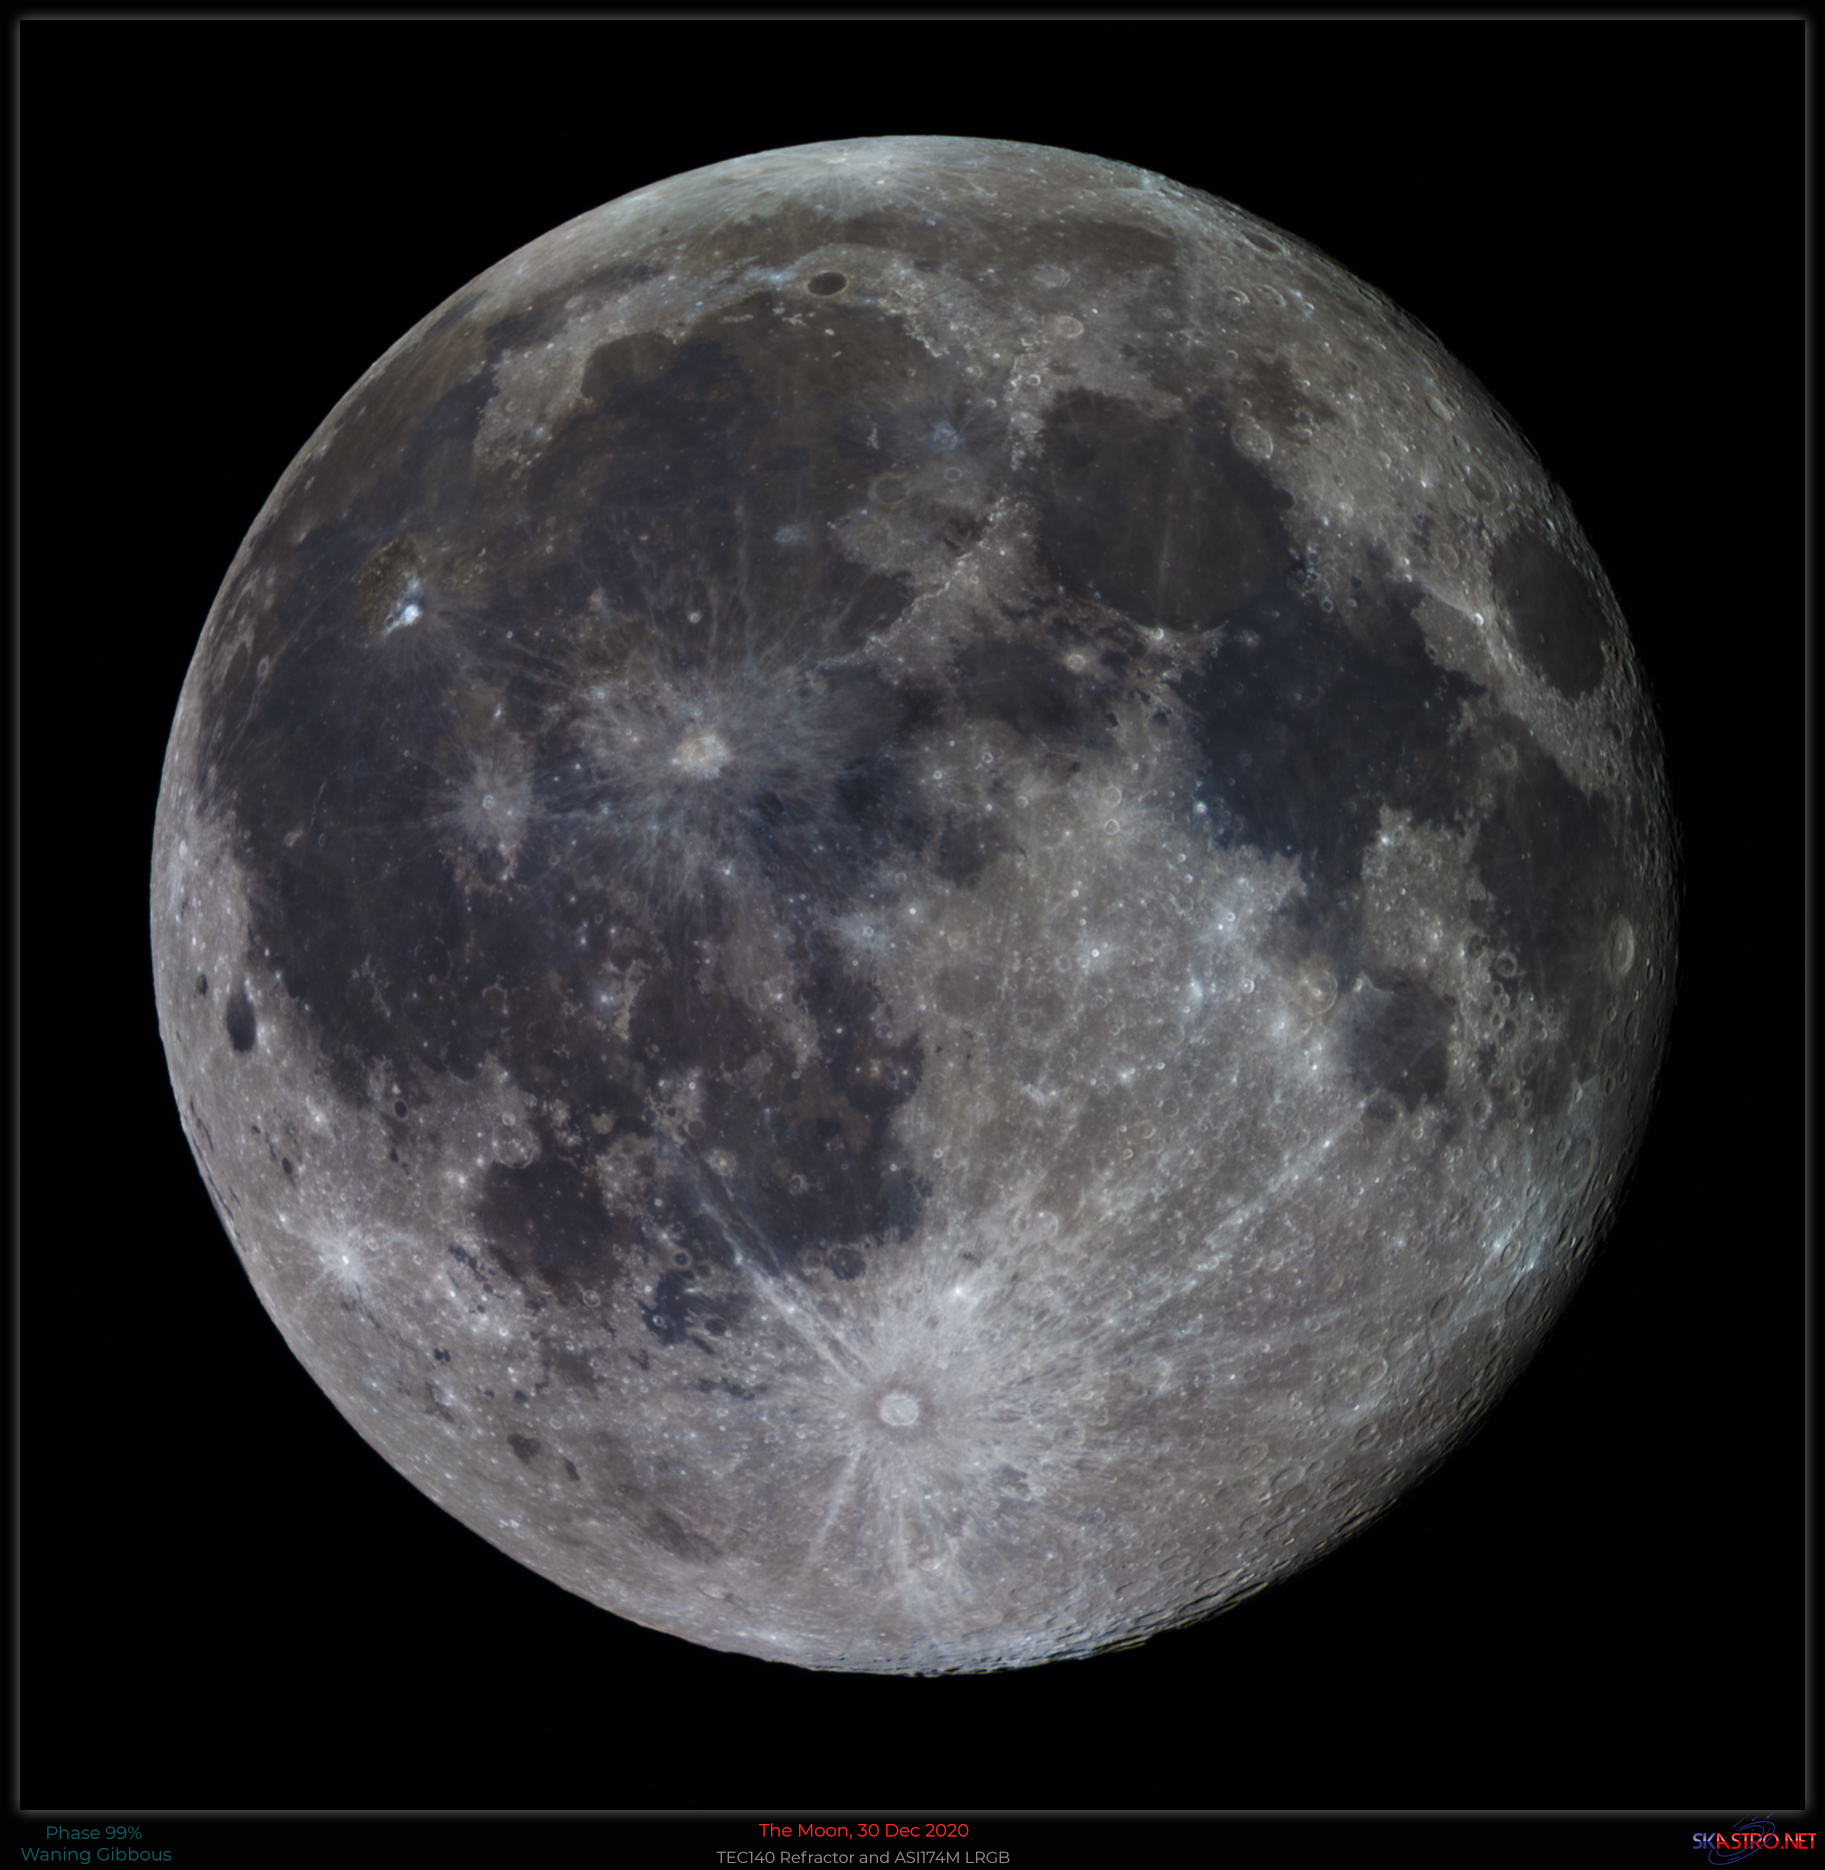
The Moon, 30 Dec 2020
The Moon at a 99% waning phase 30 Dec 2020 between 21:30 and 22:20. Note the bluish and tan colours of the mare (seas).
Technical Details
Imaged from my back garden in Nottingham, UK. The Moon was high up in the constellation of Cancer and seeing was very good - unusual in the UK. TEC140 refractor and ASI174M camera.
The image scale is such that I had to capture two runs with each filter to capture the North and The South parts of The Moon and then stitch the two together in Photoshop using the Merge tool. I used LRGB filters and captured 10000 frames in RGB and 20000 in luminance. Data set was in excess of 500 Gigabytes! I then used Autostakkert, Photoshop and PixInsight to process. Capture software in Sharpcap.