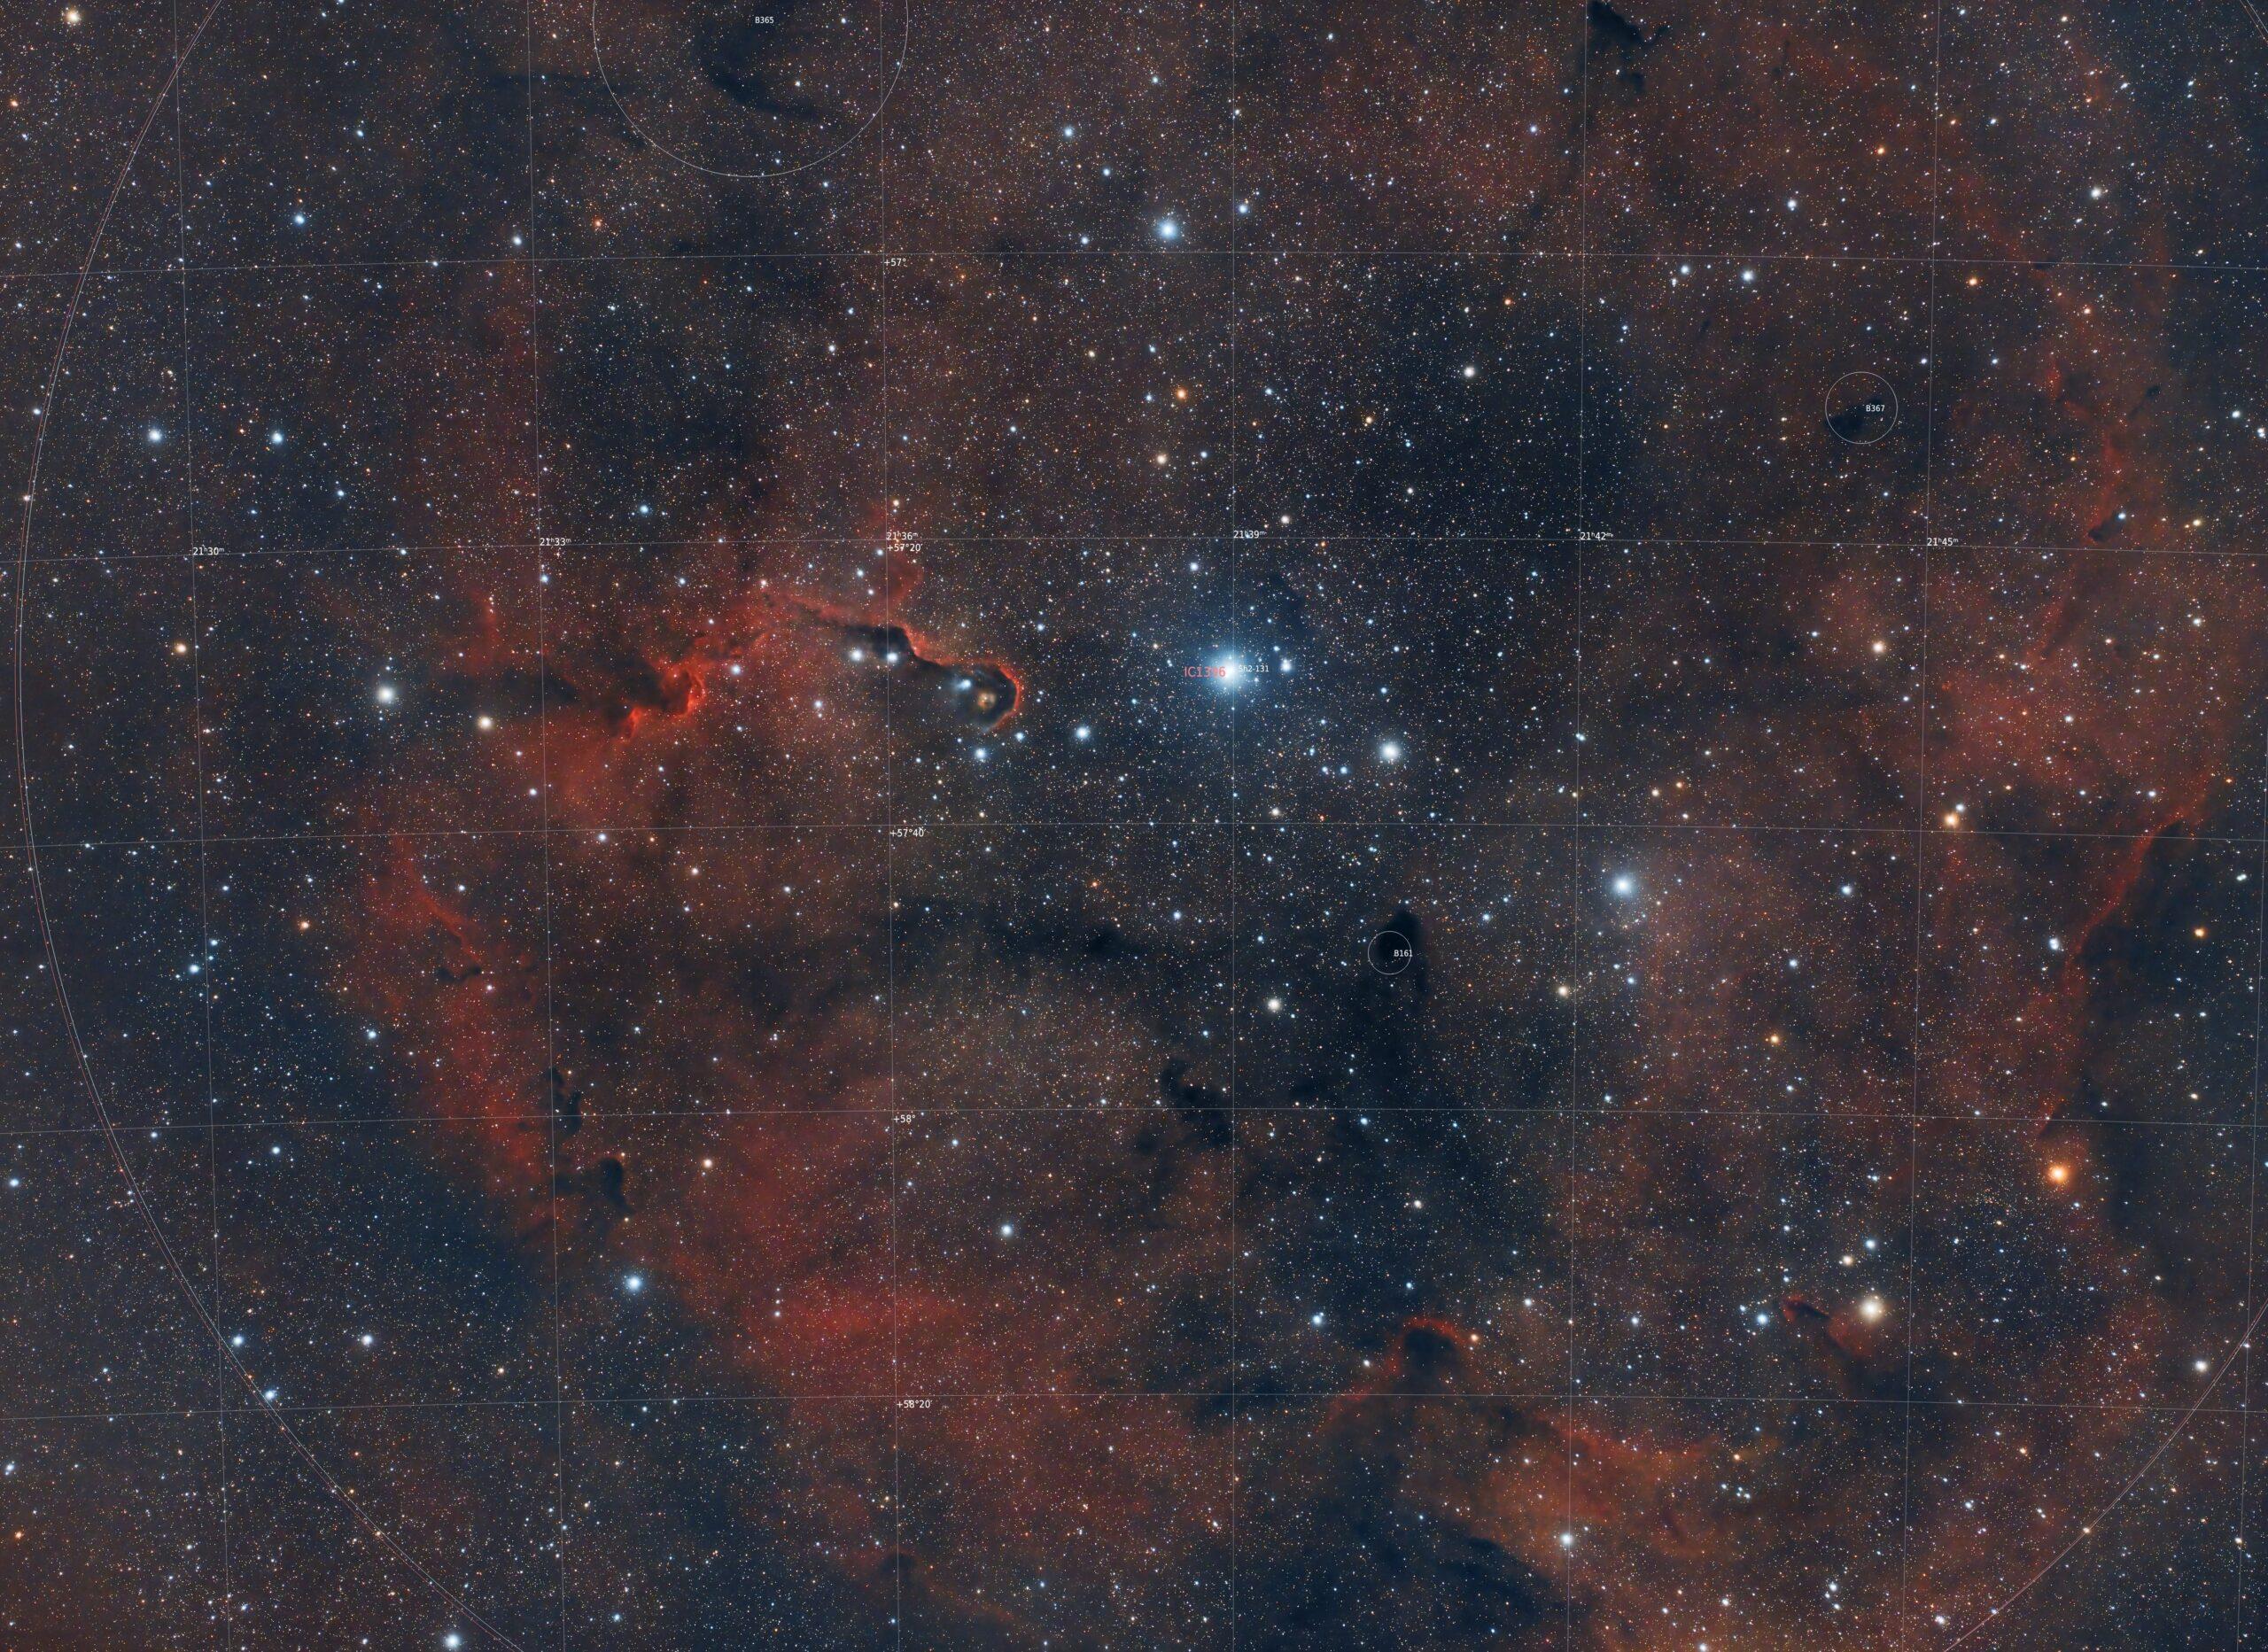
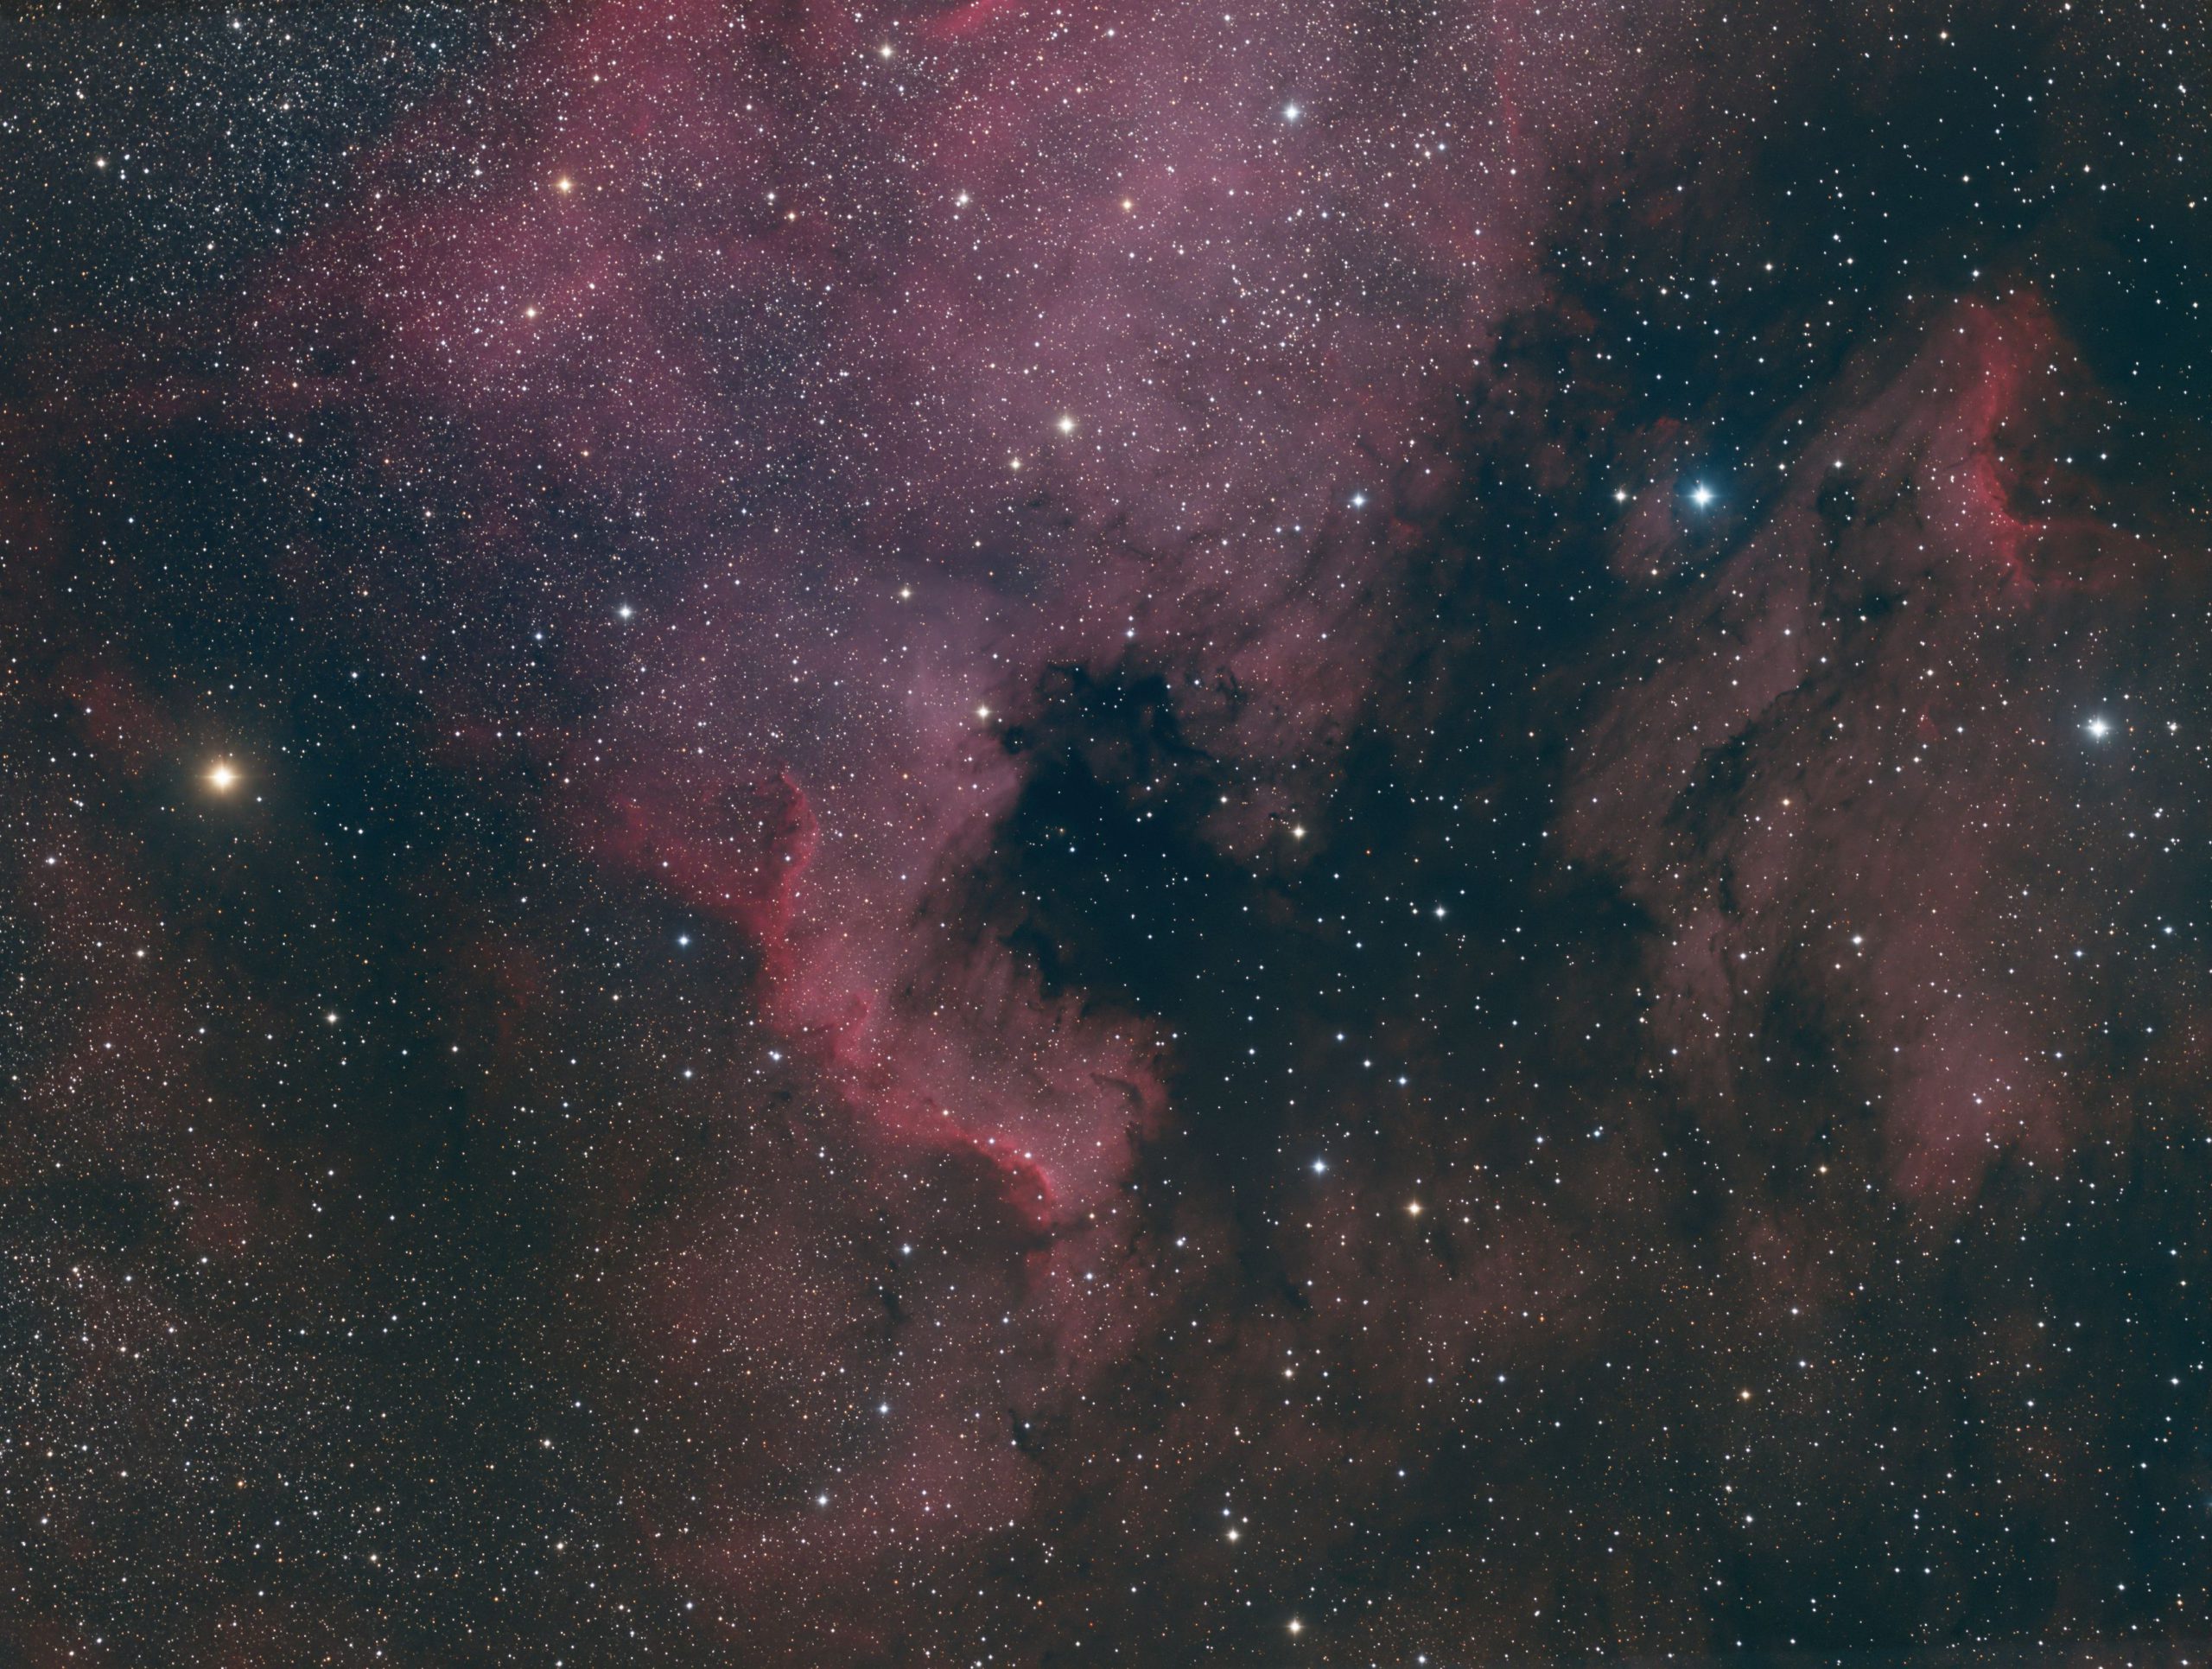
IC1396 is a fabulous and well known nebula complex in the Far Northern constellation of Cepheus and is about 2400 light years distant. It is comprised of a huge cloud of excited hydrogen gas known as a HII region (pronounced H-two). Some nice features include the Elephant’s Trunk nebula embedded in it.
Full resolution (8Meg) image here (opens in a new tab):
https://thekirkshouse.com/wp-content/uploads/2024/01/IC_1396_WF.jpg

Technical Details
Imaged from my back yard in Nottingham, UK on the nights of 15 and 16th October 2023 when almost directly overhead. It consist of 54 x 240s exposures with a QHYCCD One Shot Colour (OSC) camera with a gain of 30 and offset of 0 through a Takahashi FSQ85 telescope with the 0.67 focal reducer/flattener.
Sky conditions and transparency were both poor, as usual for the UK in all but the rarest nights of seeing.
I hope you like it 🙂
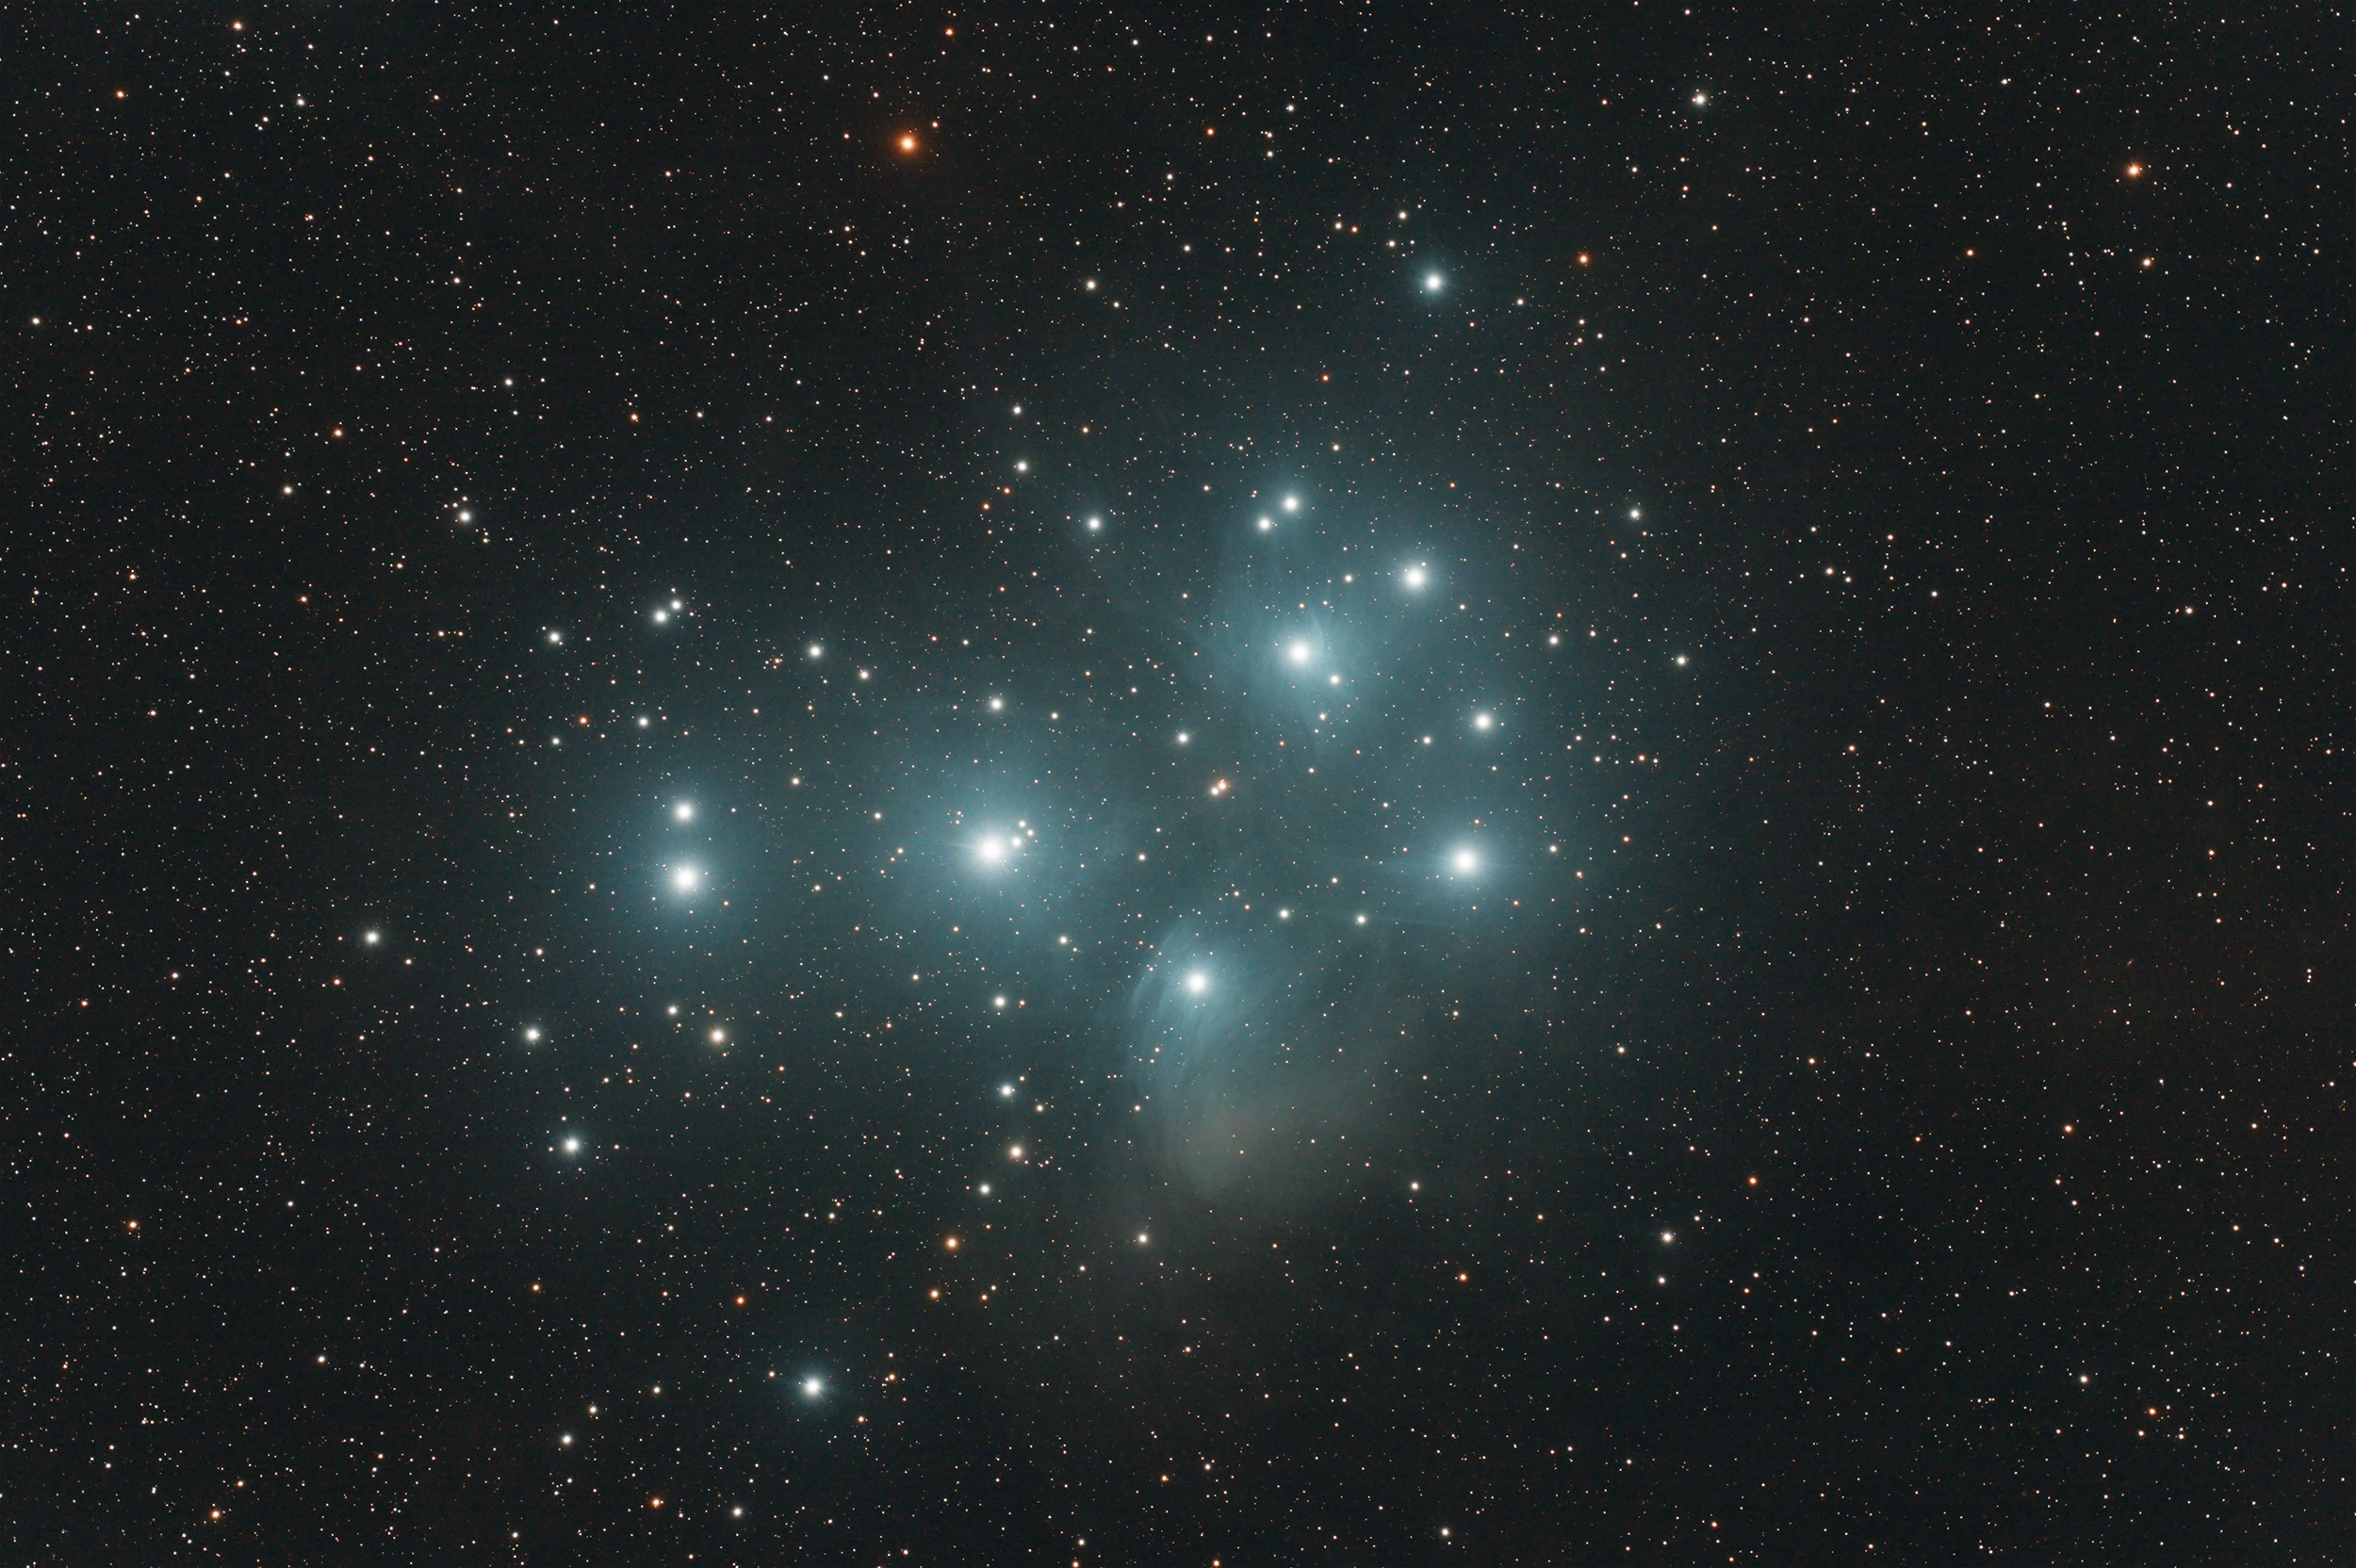
The magnificent Pleiades, known to many as the Seven Sisters, is an open cluster in the constellation of Taurus. The Pleiades have been known since the dawn of antiquity and even some cave paintings from 30000 years ago depict them on cave walls.
The cluster is 442 light years away and they are about 20 light years across. The exact distance has been a source of debate amongst astronomers for many years but the matter was recently settled using parallax data from the Gaia satellite.
Technical Data
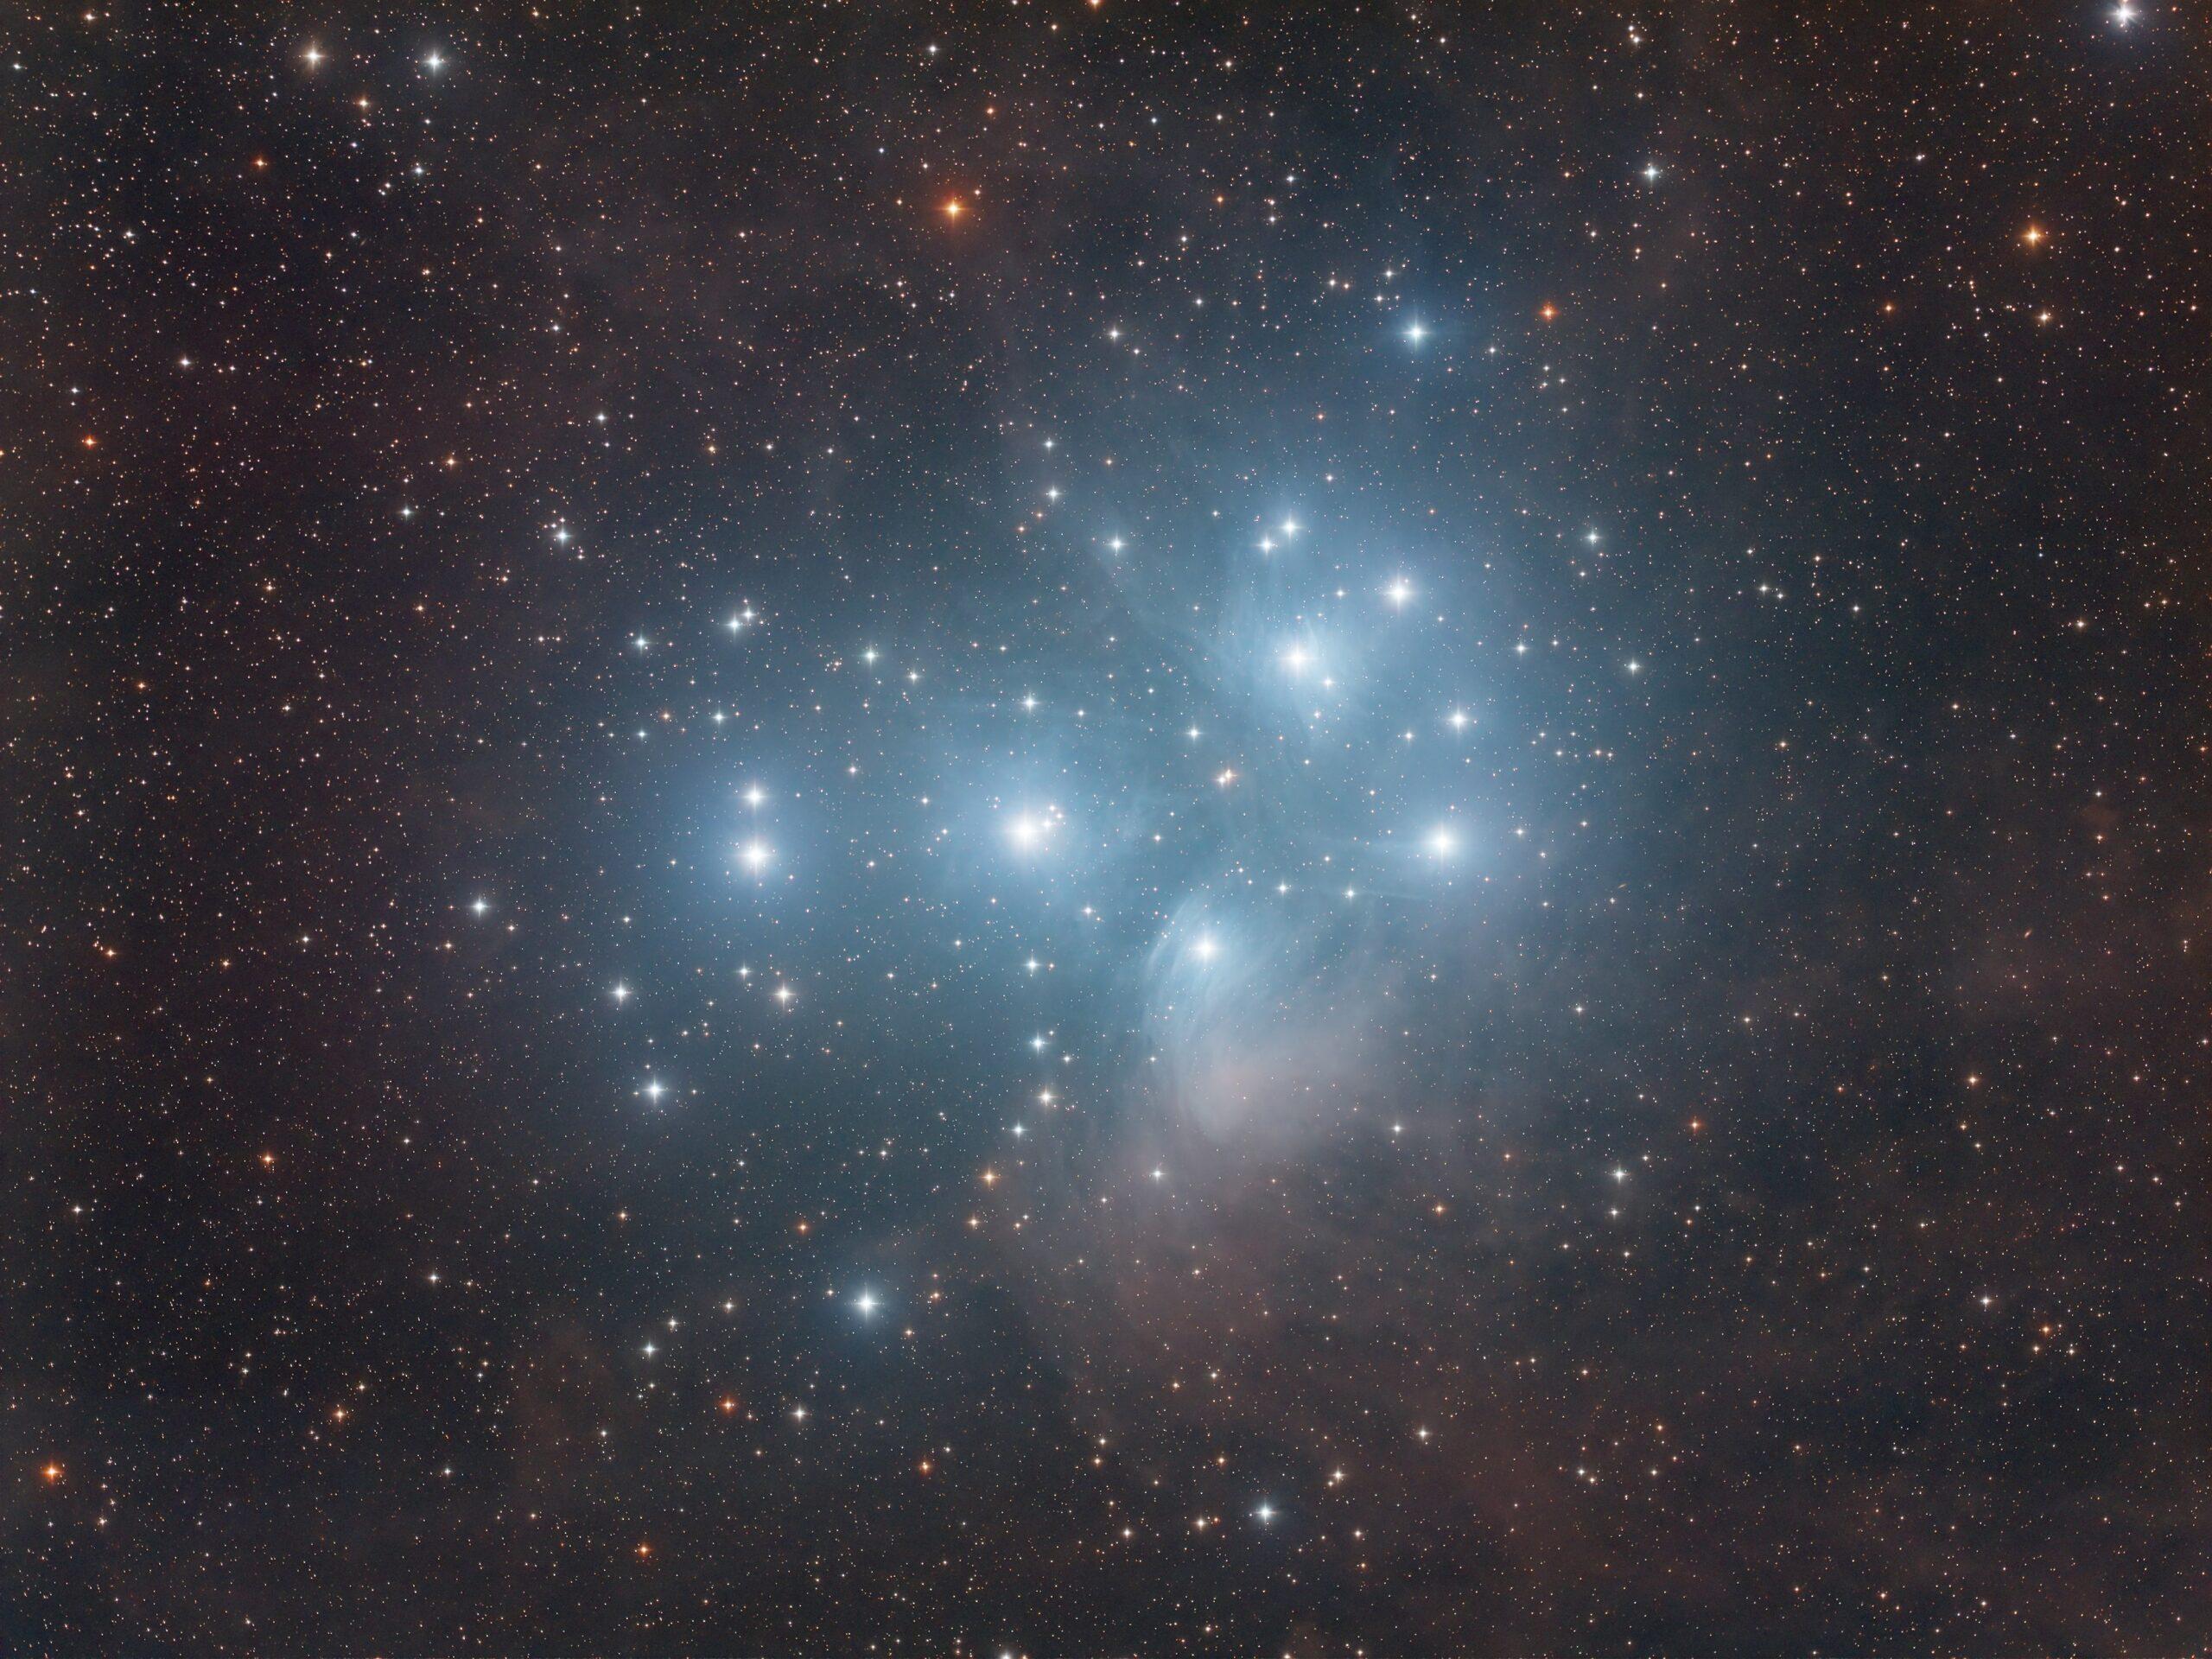
Imaged with Takahashi FSQ85 refractor and G2-8300 CCD camera with Astrodon E-series RGB filters. It consists of 20 x 300 second exposures in each of those filters to give over 90 minutes in each of the three channels for a combined integration of about four and a half hours. As is normal with any type of cluster, I did not bother with a separate luminance channel and instead bin the RGB all at 1×1. This amount of exposure is necessary to bring out the faint dust clouds through with the star cluster is moving.
Image data acquired on November 2021 with NINA imaging software and processing was done with PixInsight and Photoshop. Very little in the way of image processing was done on the image. After preprocessing all I did removed the background gradient, used a bit of deconvolution and then stretched the image. I then applied a bit of noise reduction and a tiny bit of colour saturation. This shows the importance of a good data set; you hardly need to push the data that hard in processing to get a good result.
I have imaged M45 before with the same equipment combination that you can see here. However, on that image my exposures were shorter and I did not get as much of the dusty background that I have managed to achieve with the picture on this page.
I hope you like it!
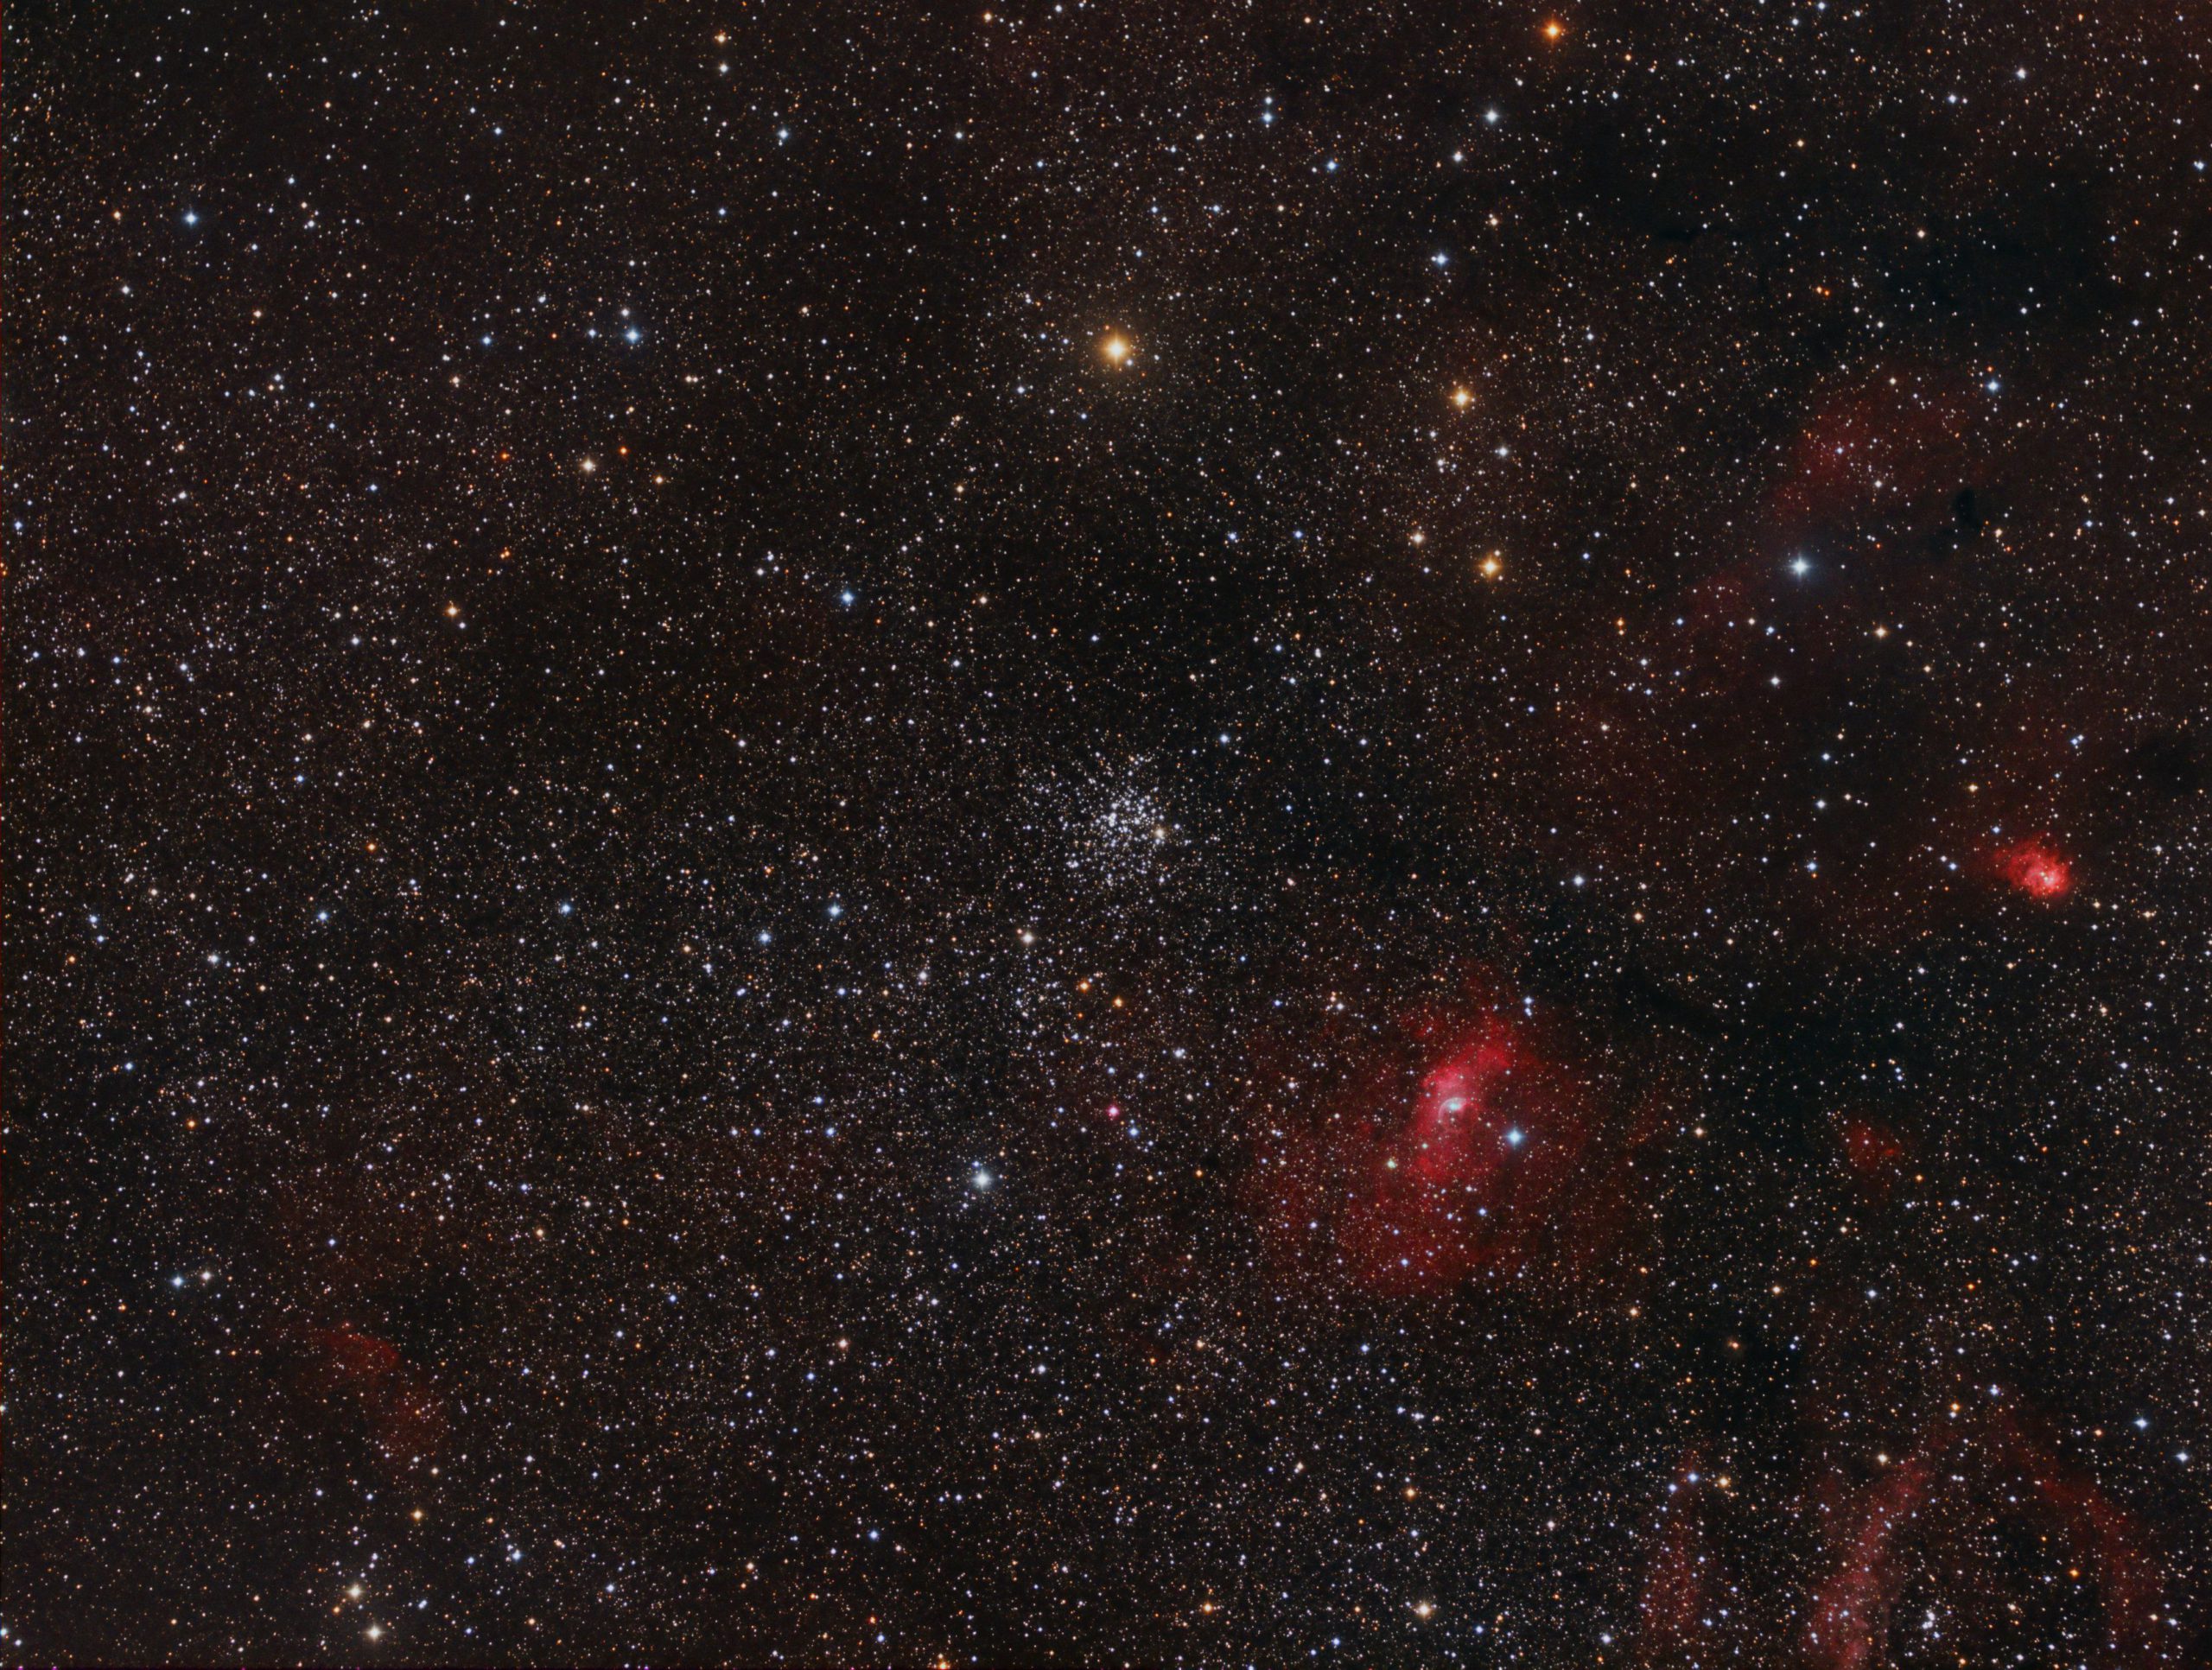
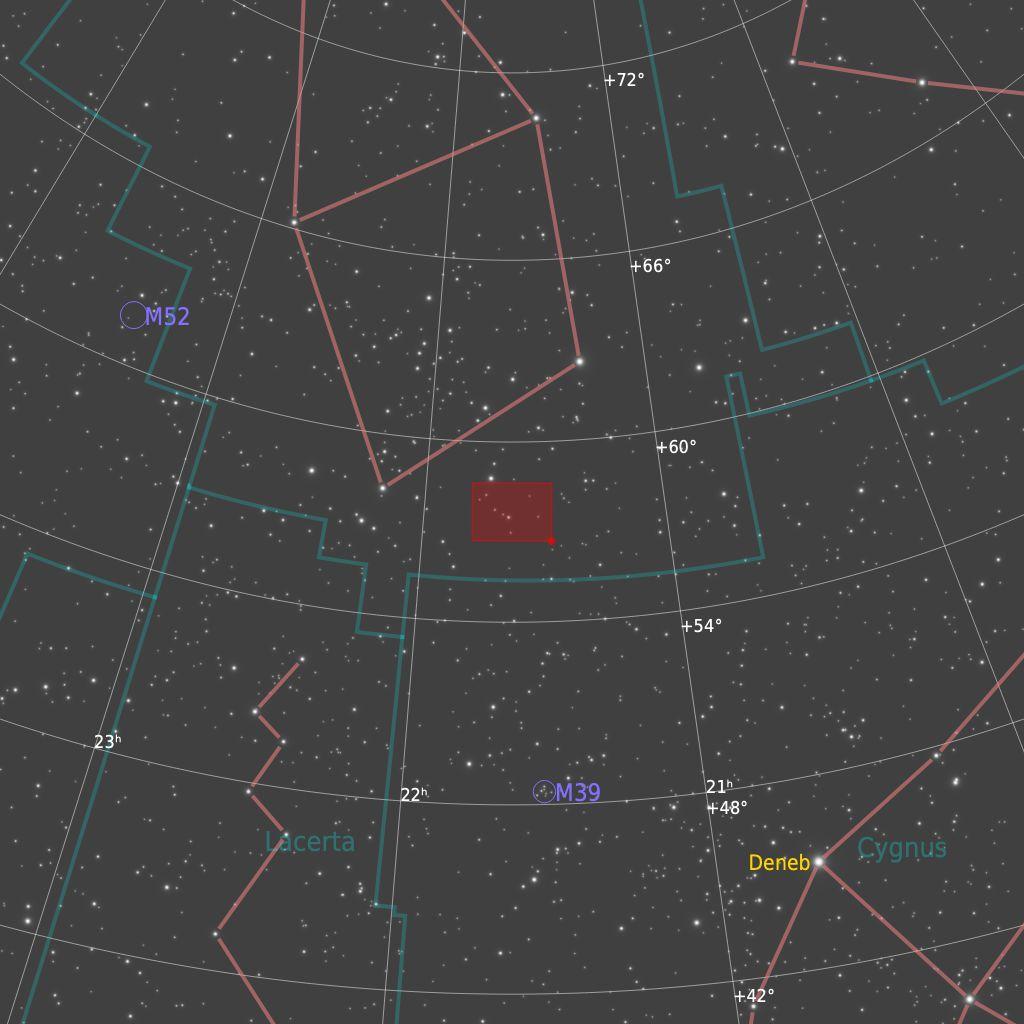
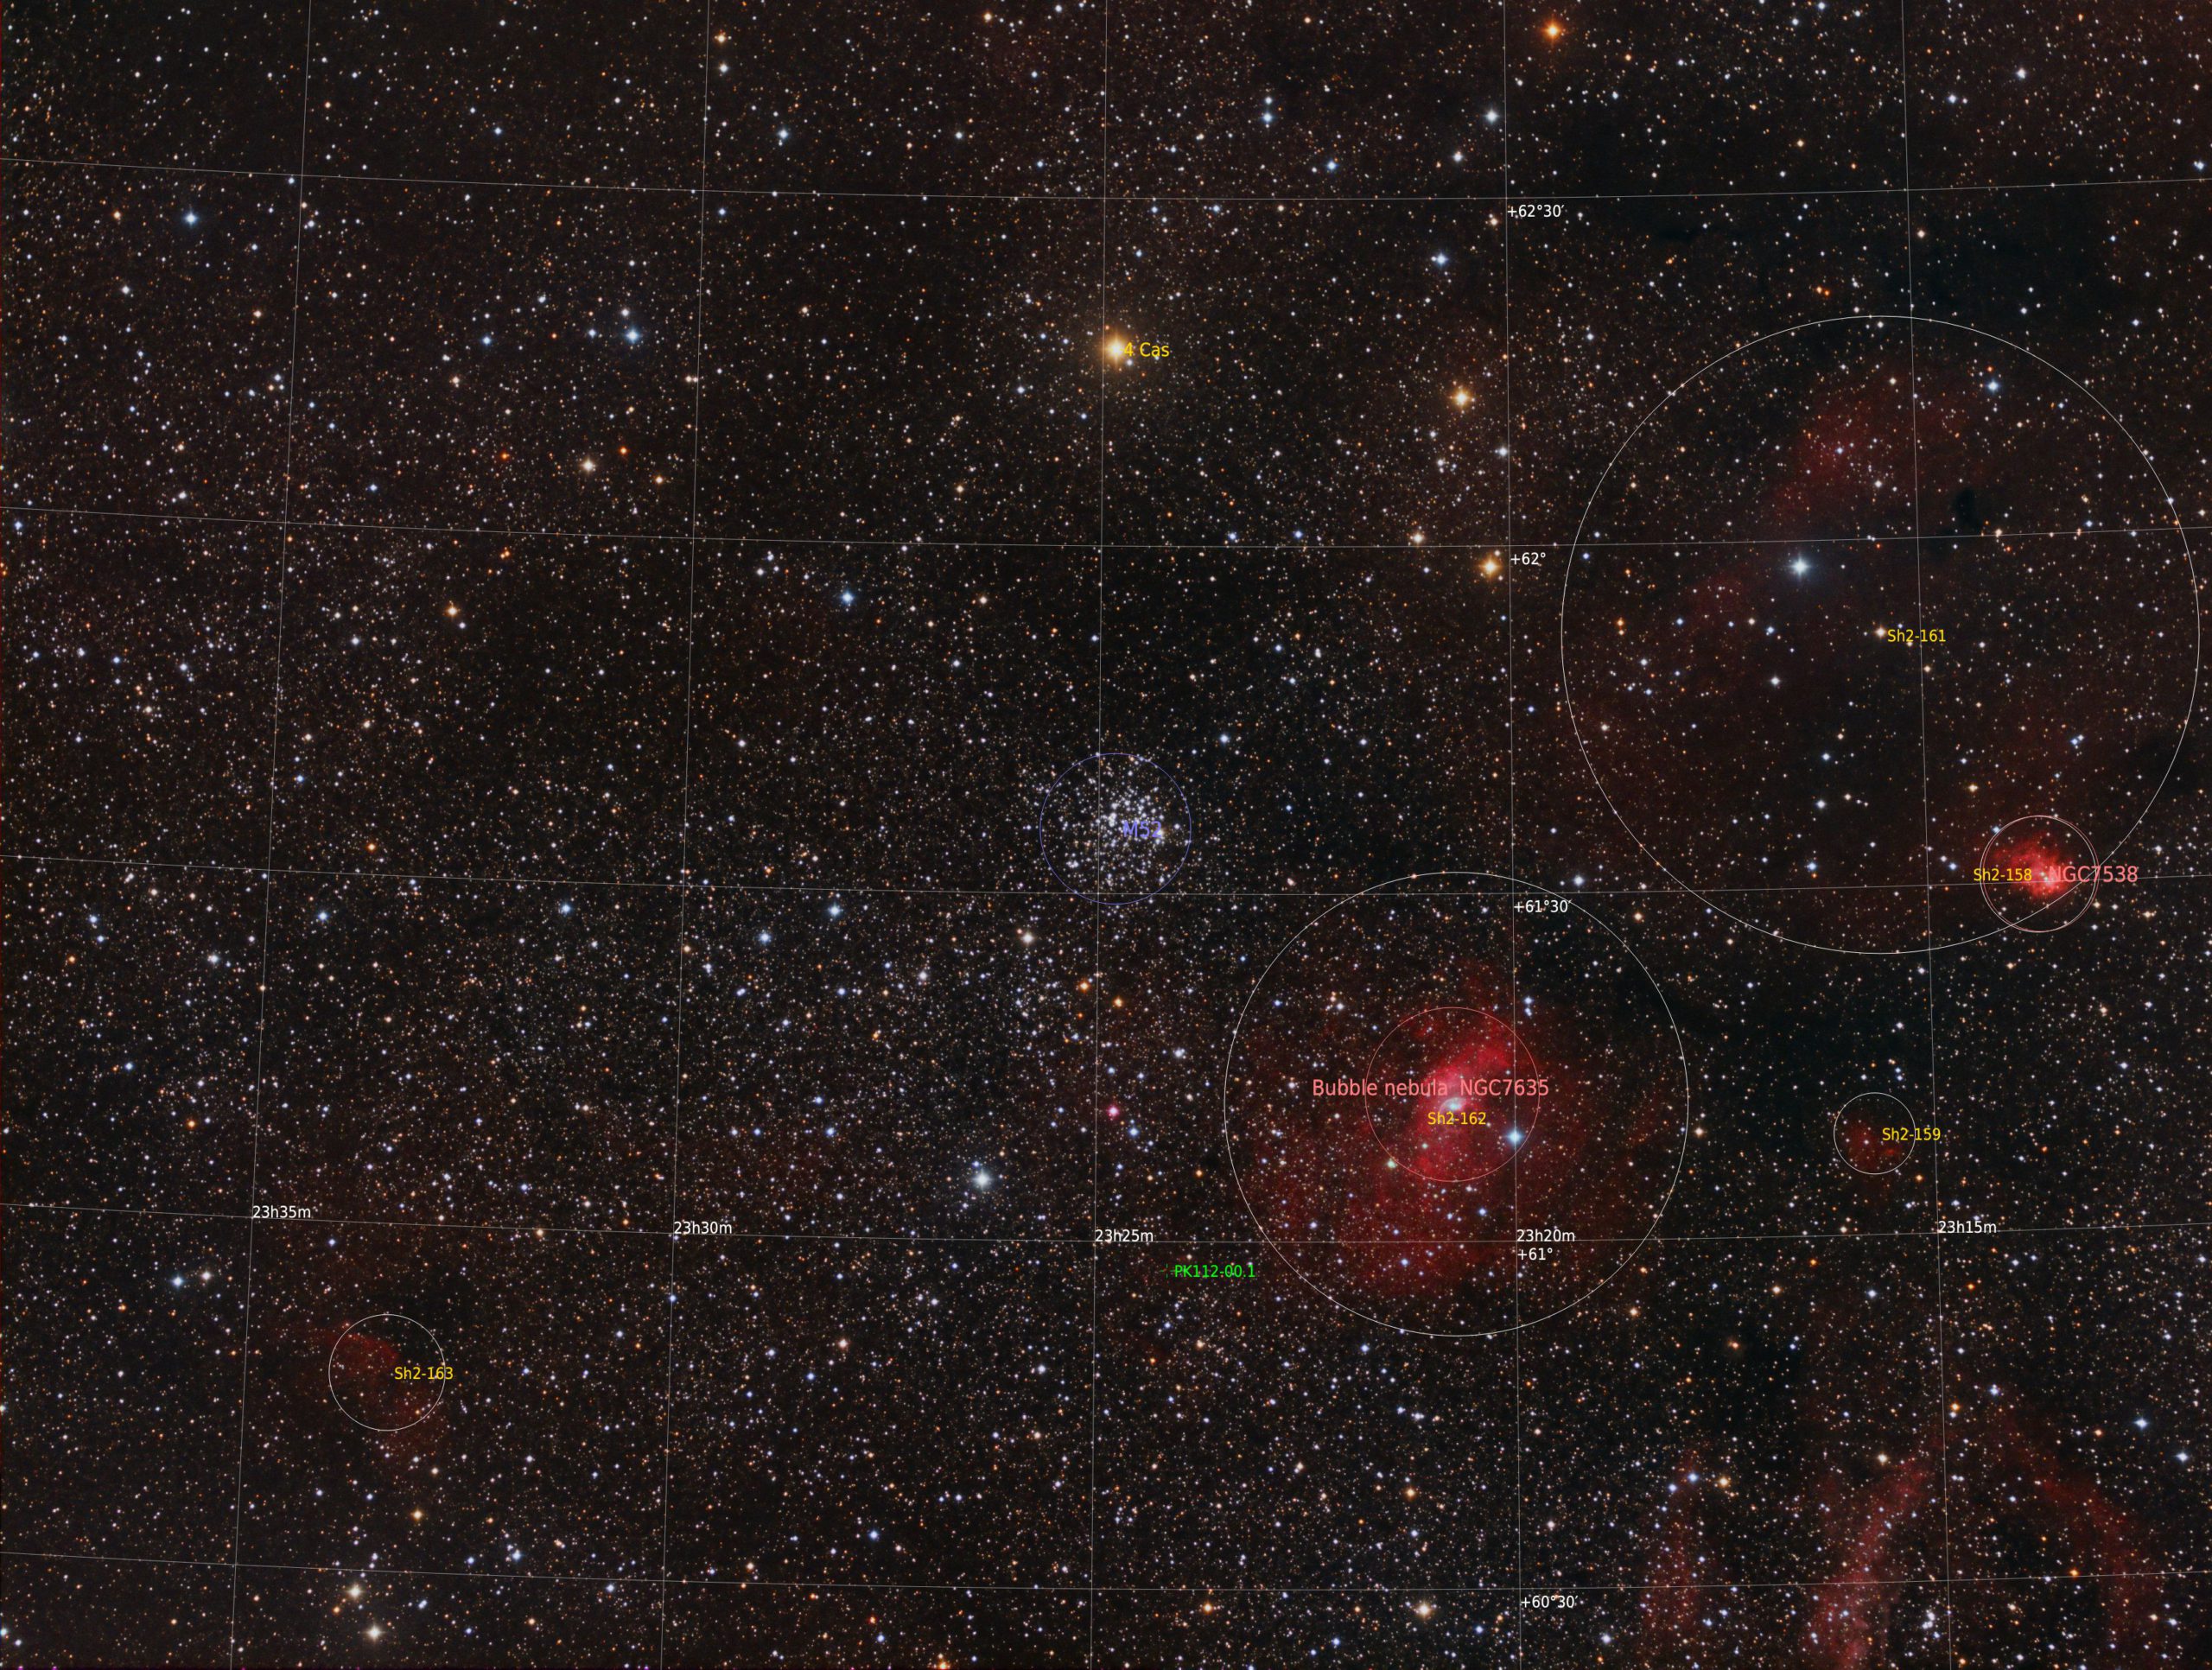
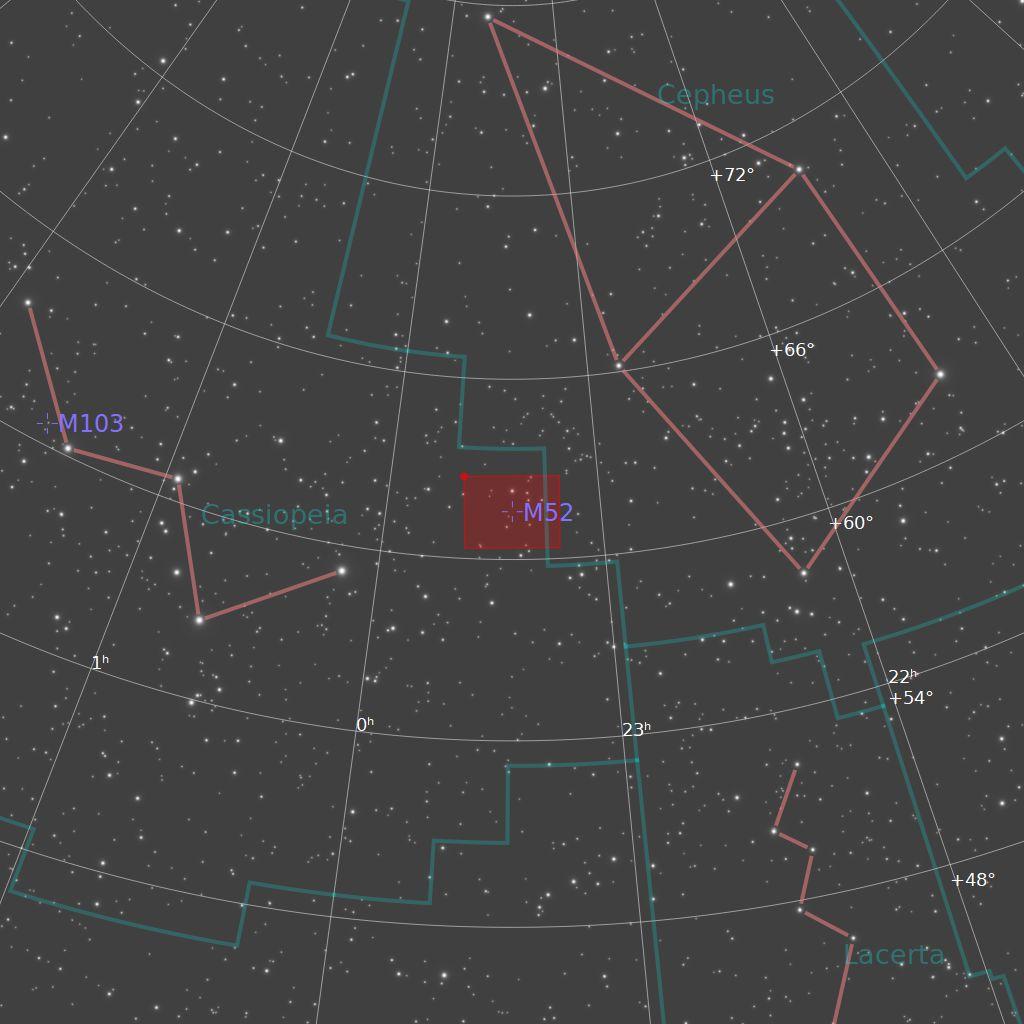
M52 is a fabulous open star cluster in Cassiopeia. It is set against a huge amount of nebulosity that spans across the constellations of Cassiopeia and Cepheus. In this image The Bubble Nebula can be seen at the four o’clock position with respect to M52 and many other objects in the Sharpless Catalogue of nebulae are also visible. These are detailed in the annotated version of the image below. The square red box on the finder chart on the right represents the image.
Full resolution image here (opens in a new tab).
Technical Information
Imaged from my backyard in Nottingham, UK on 28 November 2021 with a FSQ85 refractor and a Moravian G2-8300 cooled CCD camera with Astrodon HaRGB filters on my MESU200 mount guided with OAG.
All image data is binned 1×1: Note I do not capture a separate luminance when I bin all of the data channels is 1×1 in order to save some precious (In the UK) clear sky time. I do know purist swill say that it is best still to capture a luminance because that captures all of the light frequencies at the 1×1 level. I agree.
Ha> 9 x 300s ; Red > 9 x 300s ; Green 9 x 300s ; Blue > 9 x 300s
Image capture is with NINA and processing in PixInsight.
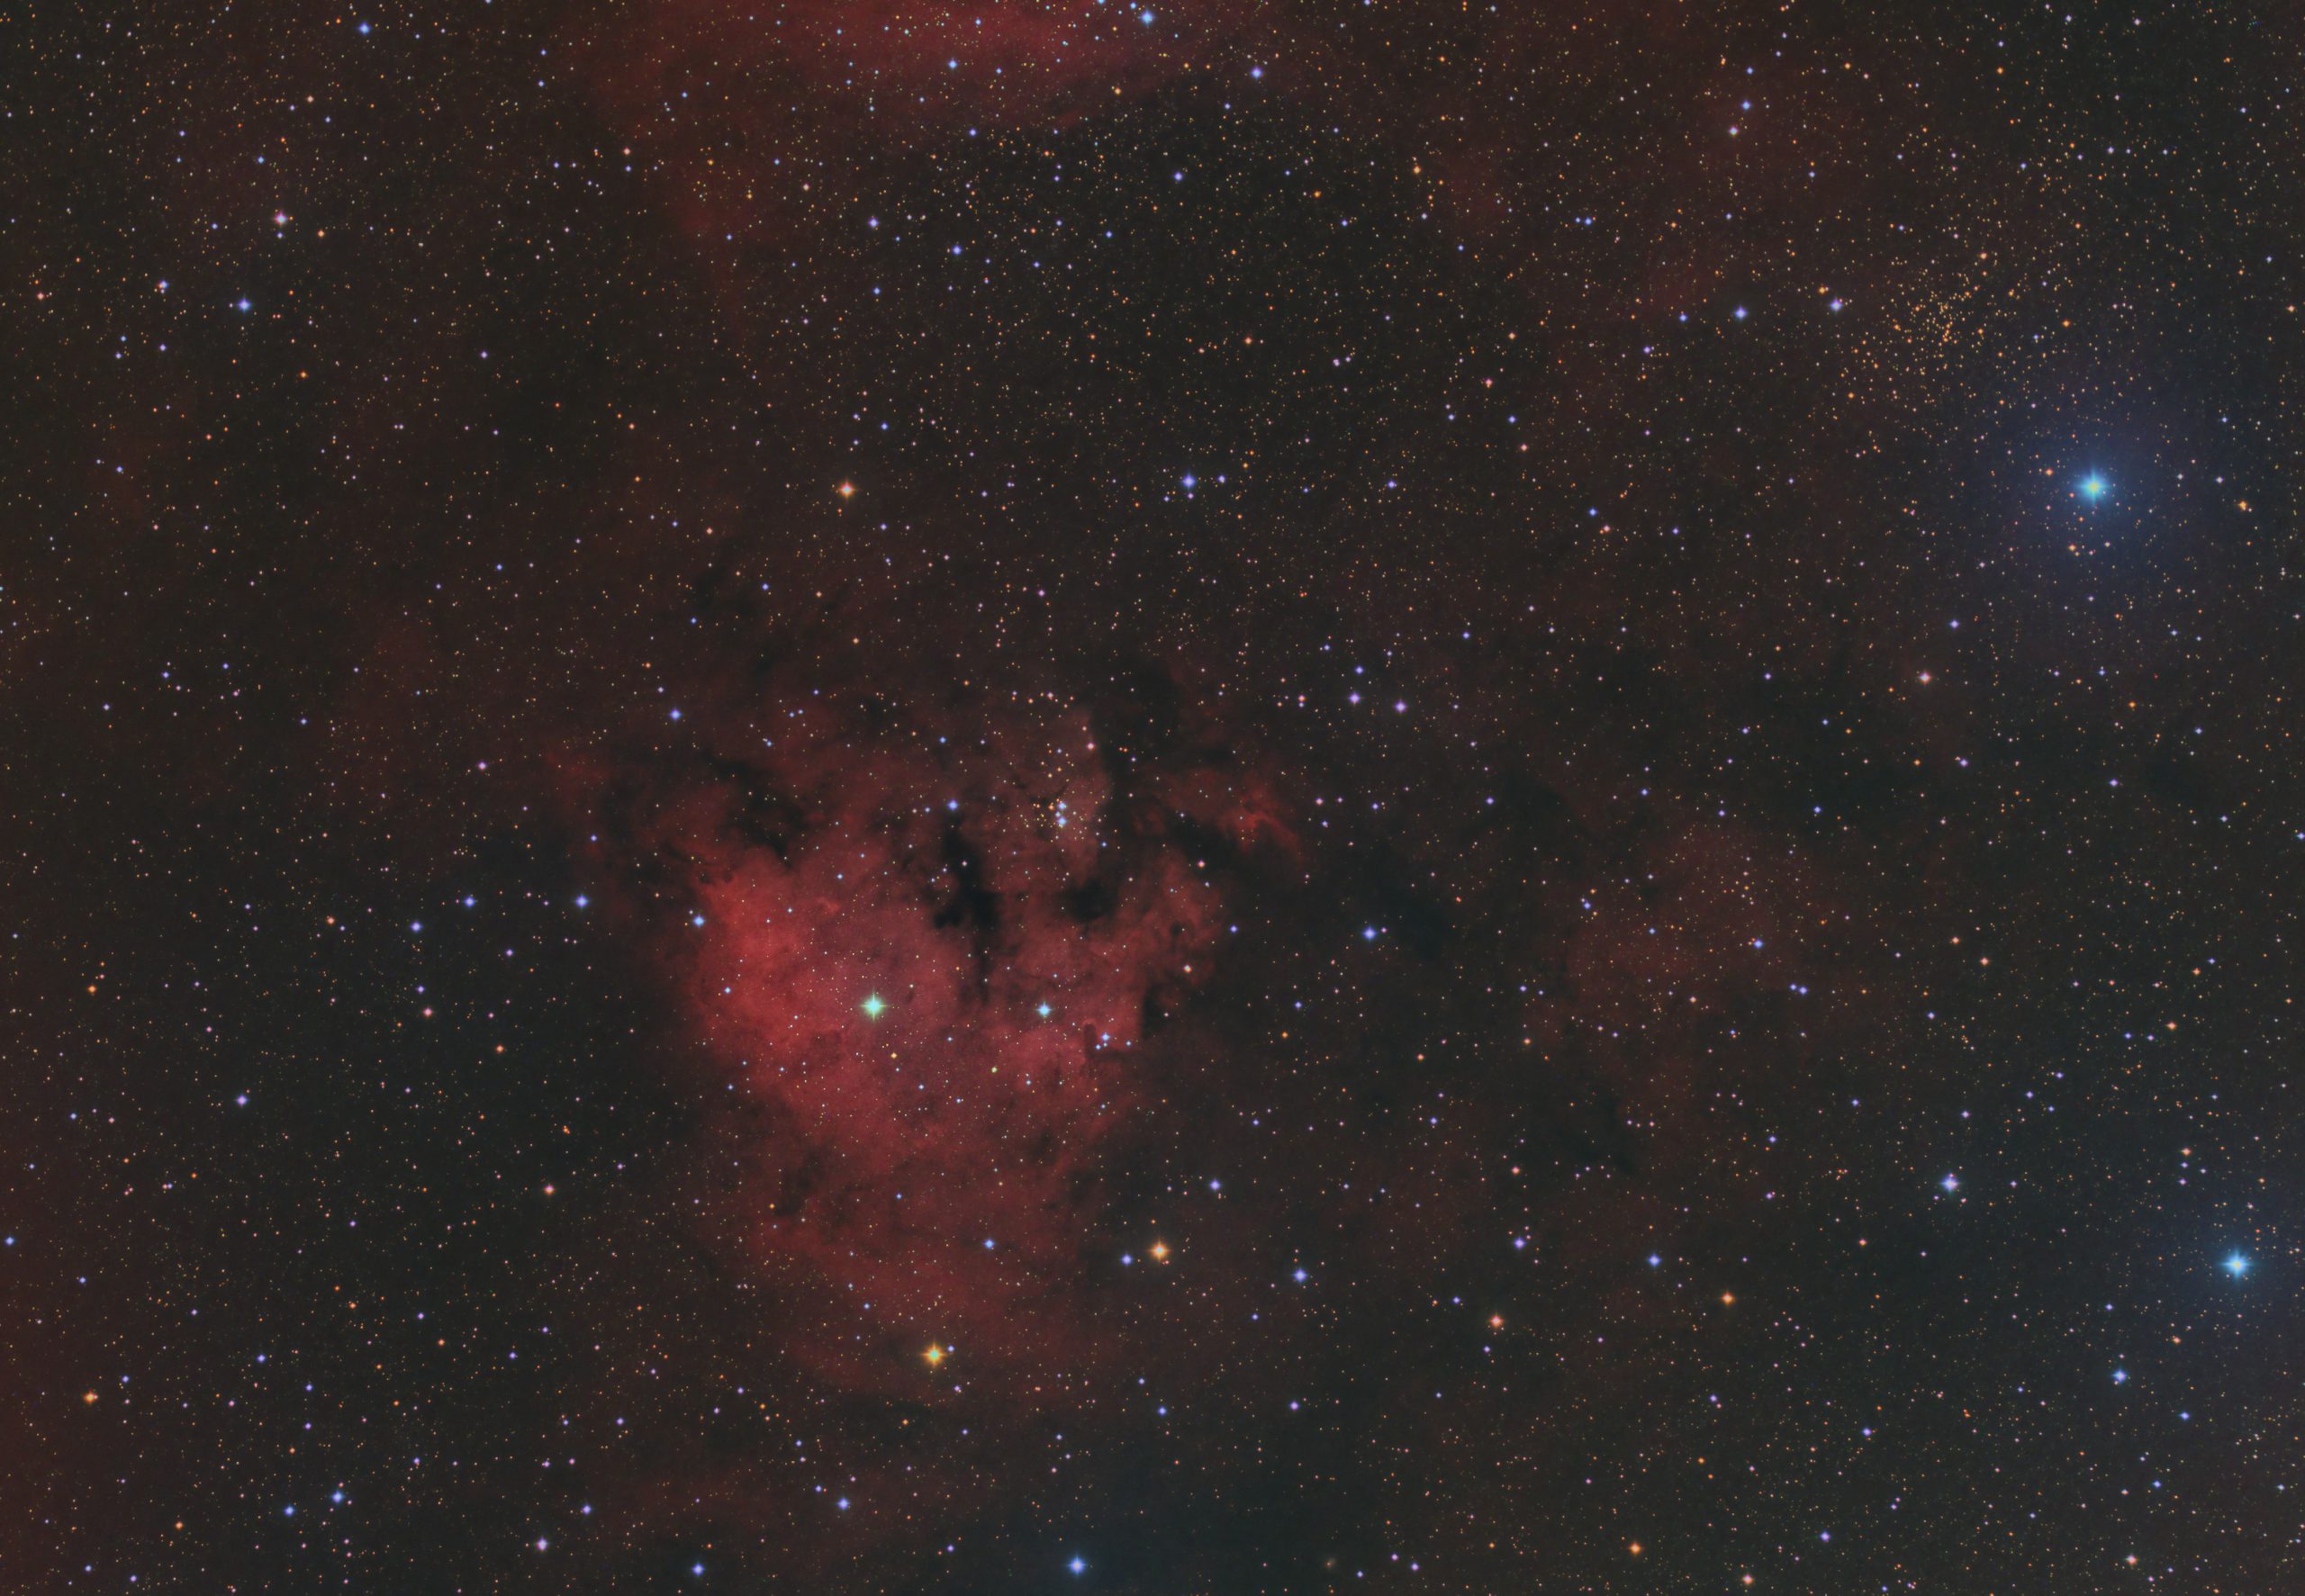
Sh2-171 is a star forming region in the constellation of Cepheus in the far northern hemisphere of the sky.
Imaged here with Takahashi FSQ85 and G2-8300 with Astrodon HaRGB filters.
M33 is a galaxy about 2.8 – 3 million light years away in the constellation of Triangulum. Along with M33, it is one of the Local Group of galaxies with which our own Milky Way galaxy shares the local universe. M33 is the most distant object that the human naked eye can see, appearing as a ghostly white smudge on a very dark night from clear skies. It is a magnificent spiral galaxy about half the size of our own galaxy and because of its close proximity to us it appears very large in our skies and is am oft-photographed object by many, myself included.
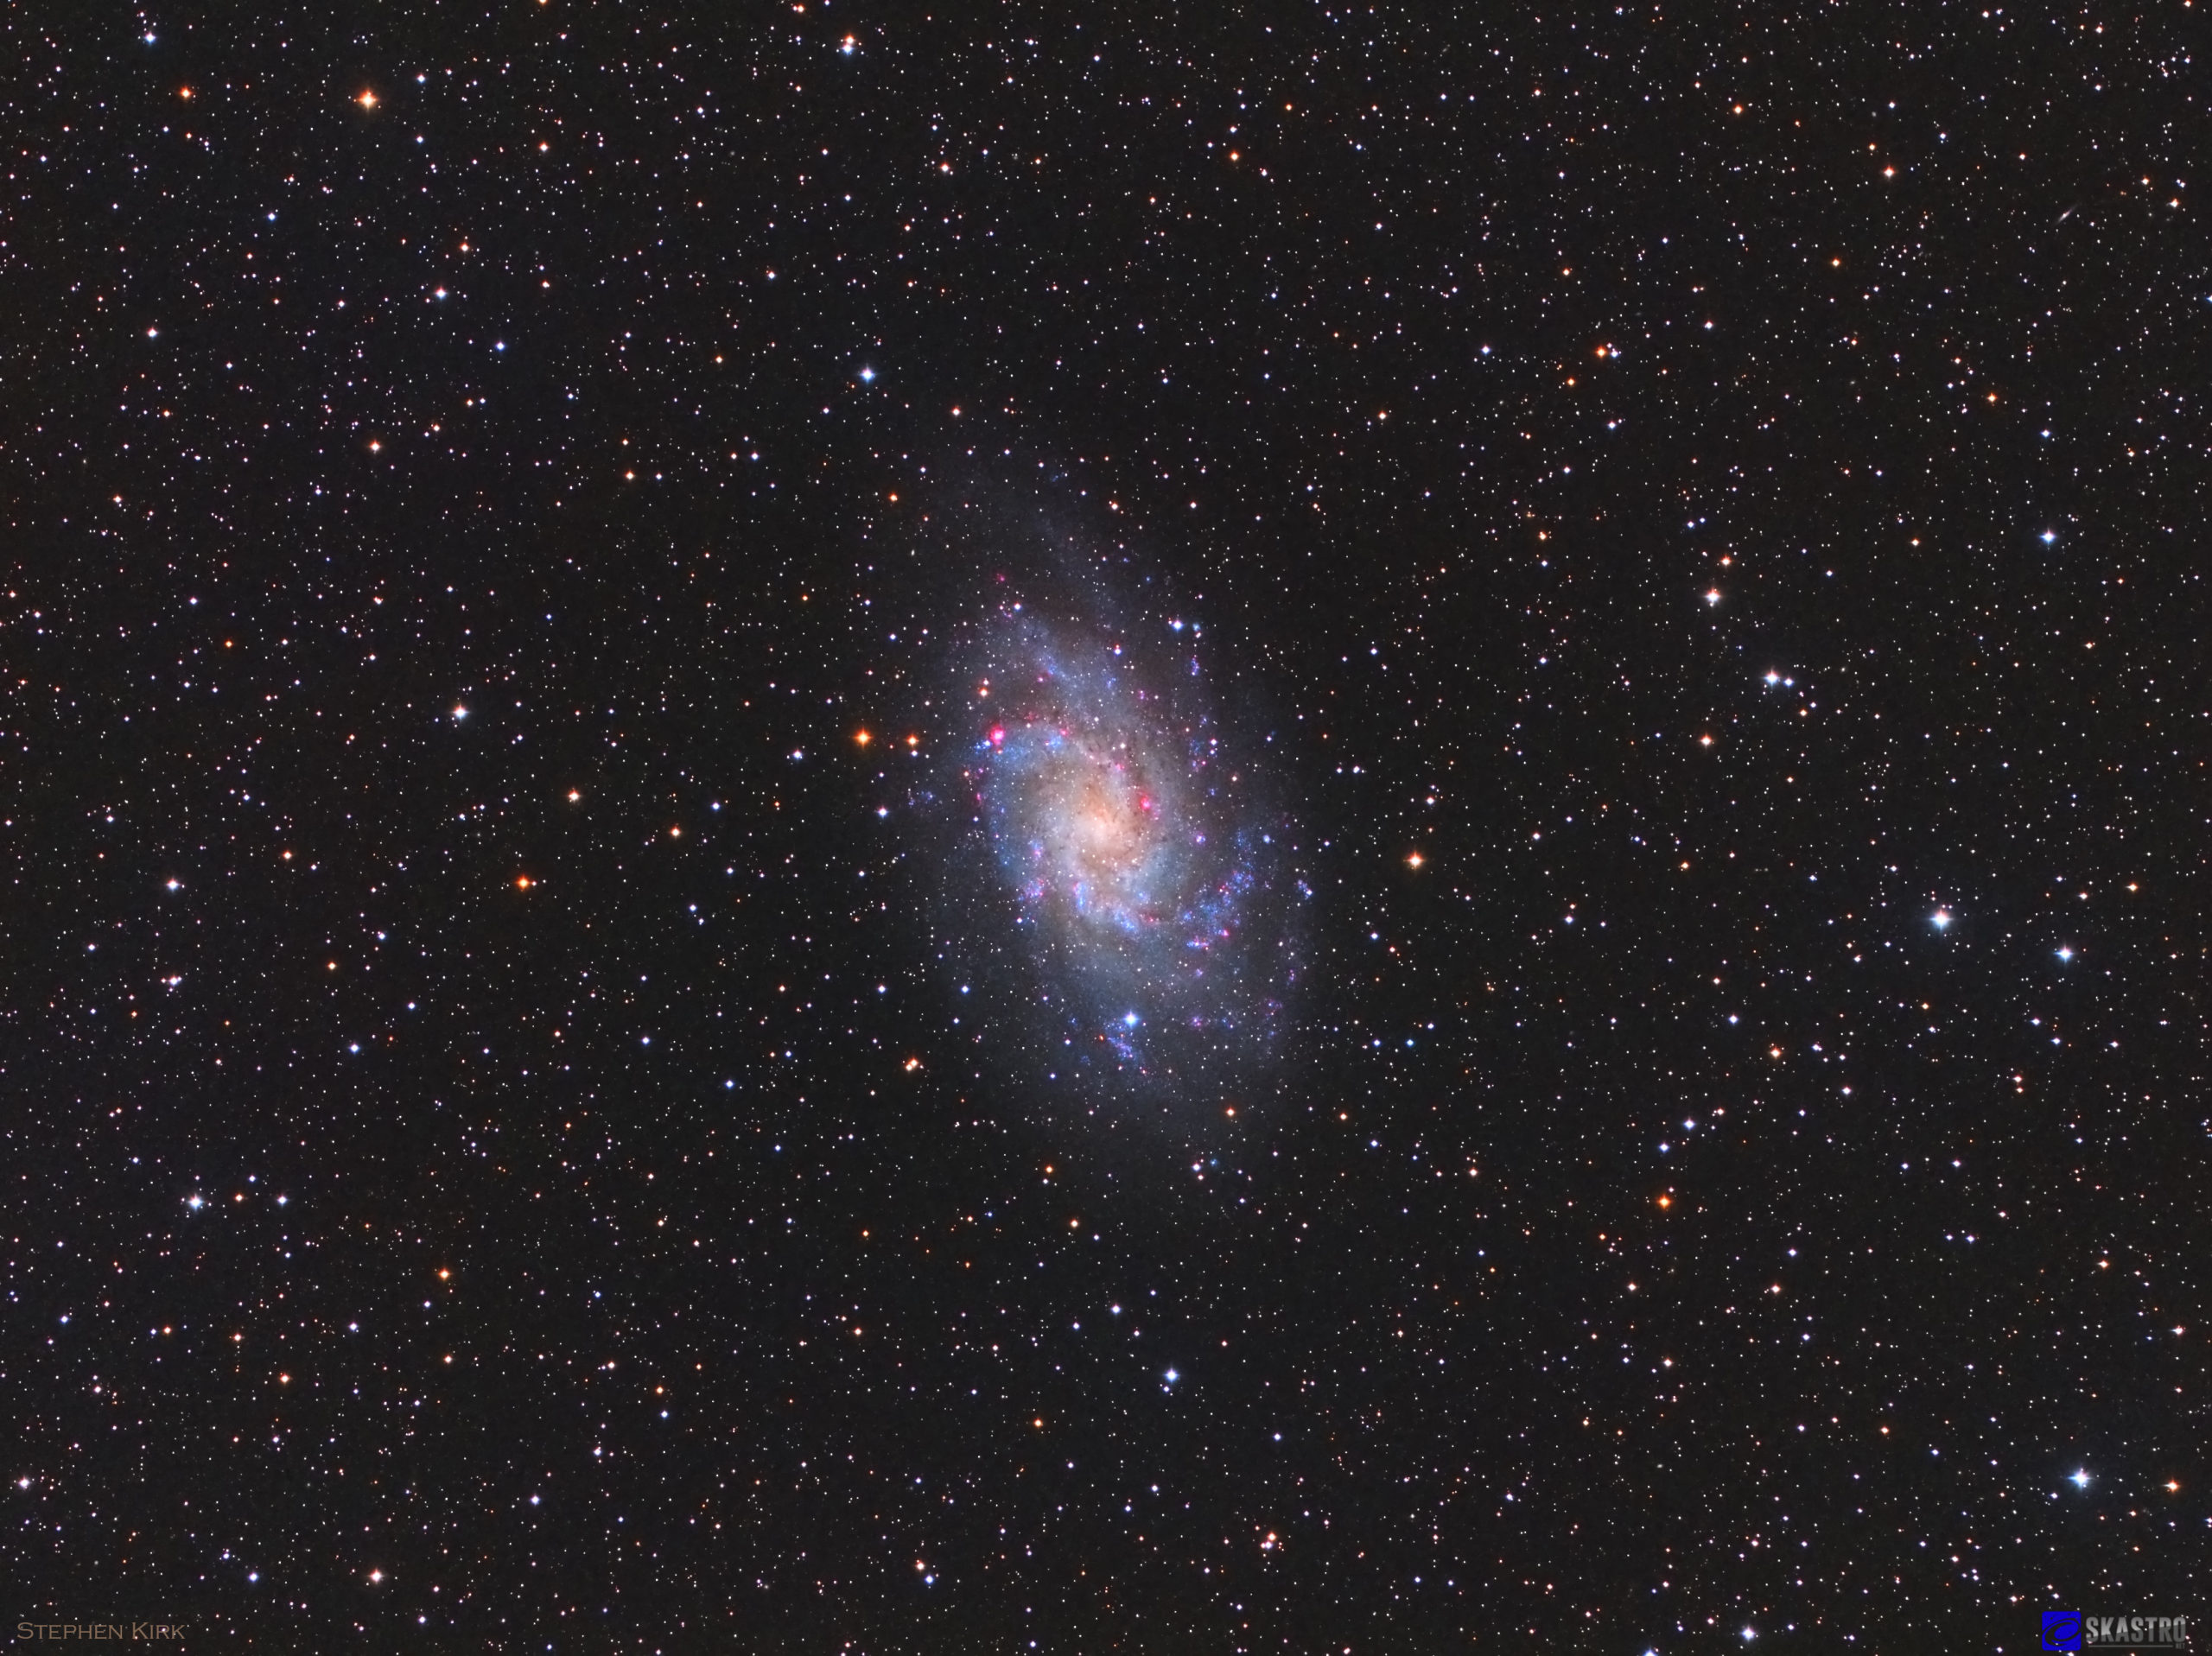
I’ve imaged M33 multiple times. For example, with the same FSQ85 telescope here and also at a closer image scale with the TEC140 refractor here.
This time I have set the galaxy in a slightly wider field by utilising the FSQ85 0.73 reducer. I used the Moravian G2-8300 CCD camera and Astrodon RGB filters all binned 1×1. I did not use a separate luminance channel.
The data collected for the image was collected from my backyard observatory in Nottingham, UK on 4/5 and 8th of November 2021 and is a modest data set of 15 x 300s exposures in each of the three filters to give a total integration of nearly four hours. However, because of the proximity of M33 and its brightness this data set has revealed a very pleasing, detailed and colourful result. What do you think?
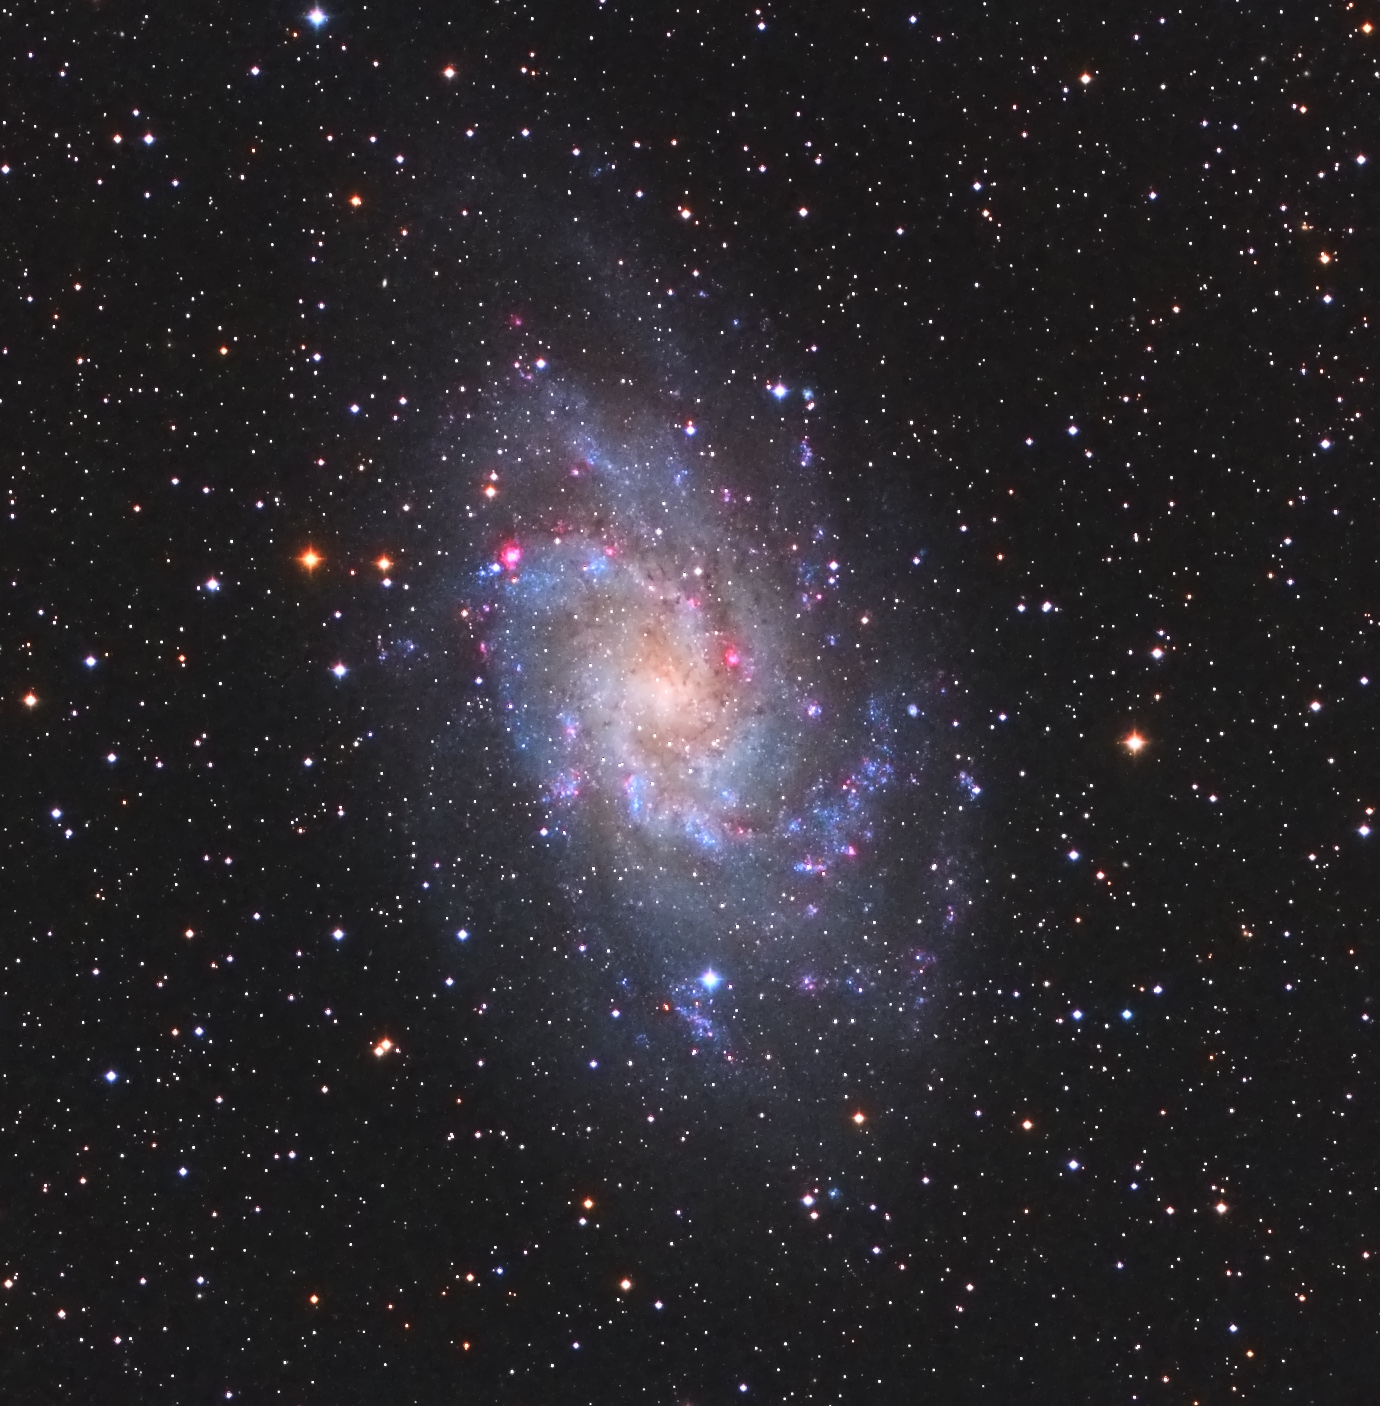
Image data captured with NINA automation software and processed in PixInsight.
M31 is one of the most favoured and popular imaging targets in the night sky; it is bright, large and very photogenic. I have imaged this galaxy numerous times, for example, in this LRGB version and in this OSC version. Since the galaxy is so large, each of these images is set in a wide field, one of 3 degrees horizontally and 2 degrees vertically across the field of view which equates to six times the diameter of the full moon. Many newcomers do not appreciate how large these objects are in the sky. Large but VERY dim!

The above image is at a resolution of 4.16arcsec/pixel. On such a large object as M31 this allows the entire galaxy to be imaged in one field of view on a wide field refractor such as the FSQ85 but does not allow for a “closer in” and more detailed image.
In order to do the latter, I created a mosaic of four panels to image the right hand side “west” of the galaxy at the greater resolution with my TEC140 and Atik 460. All I needed is the luminance data and then I could use this to blend with the lower resolution OSC data at the top of this post in Photoshop.
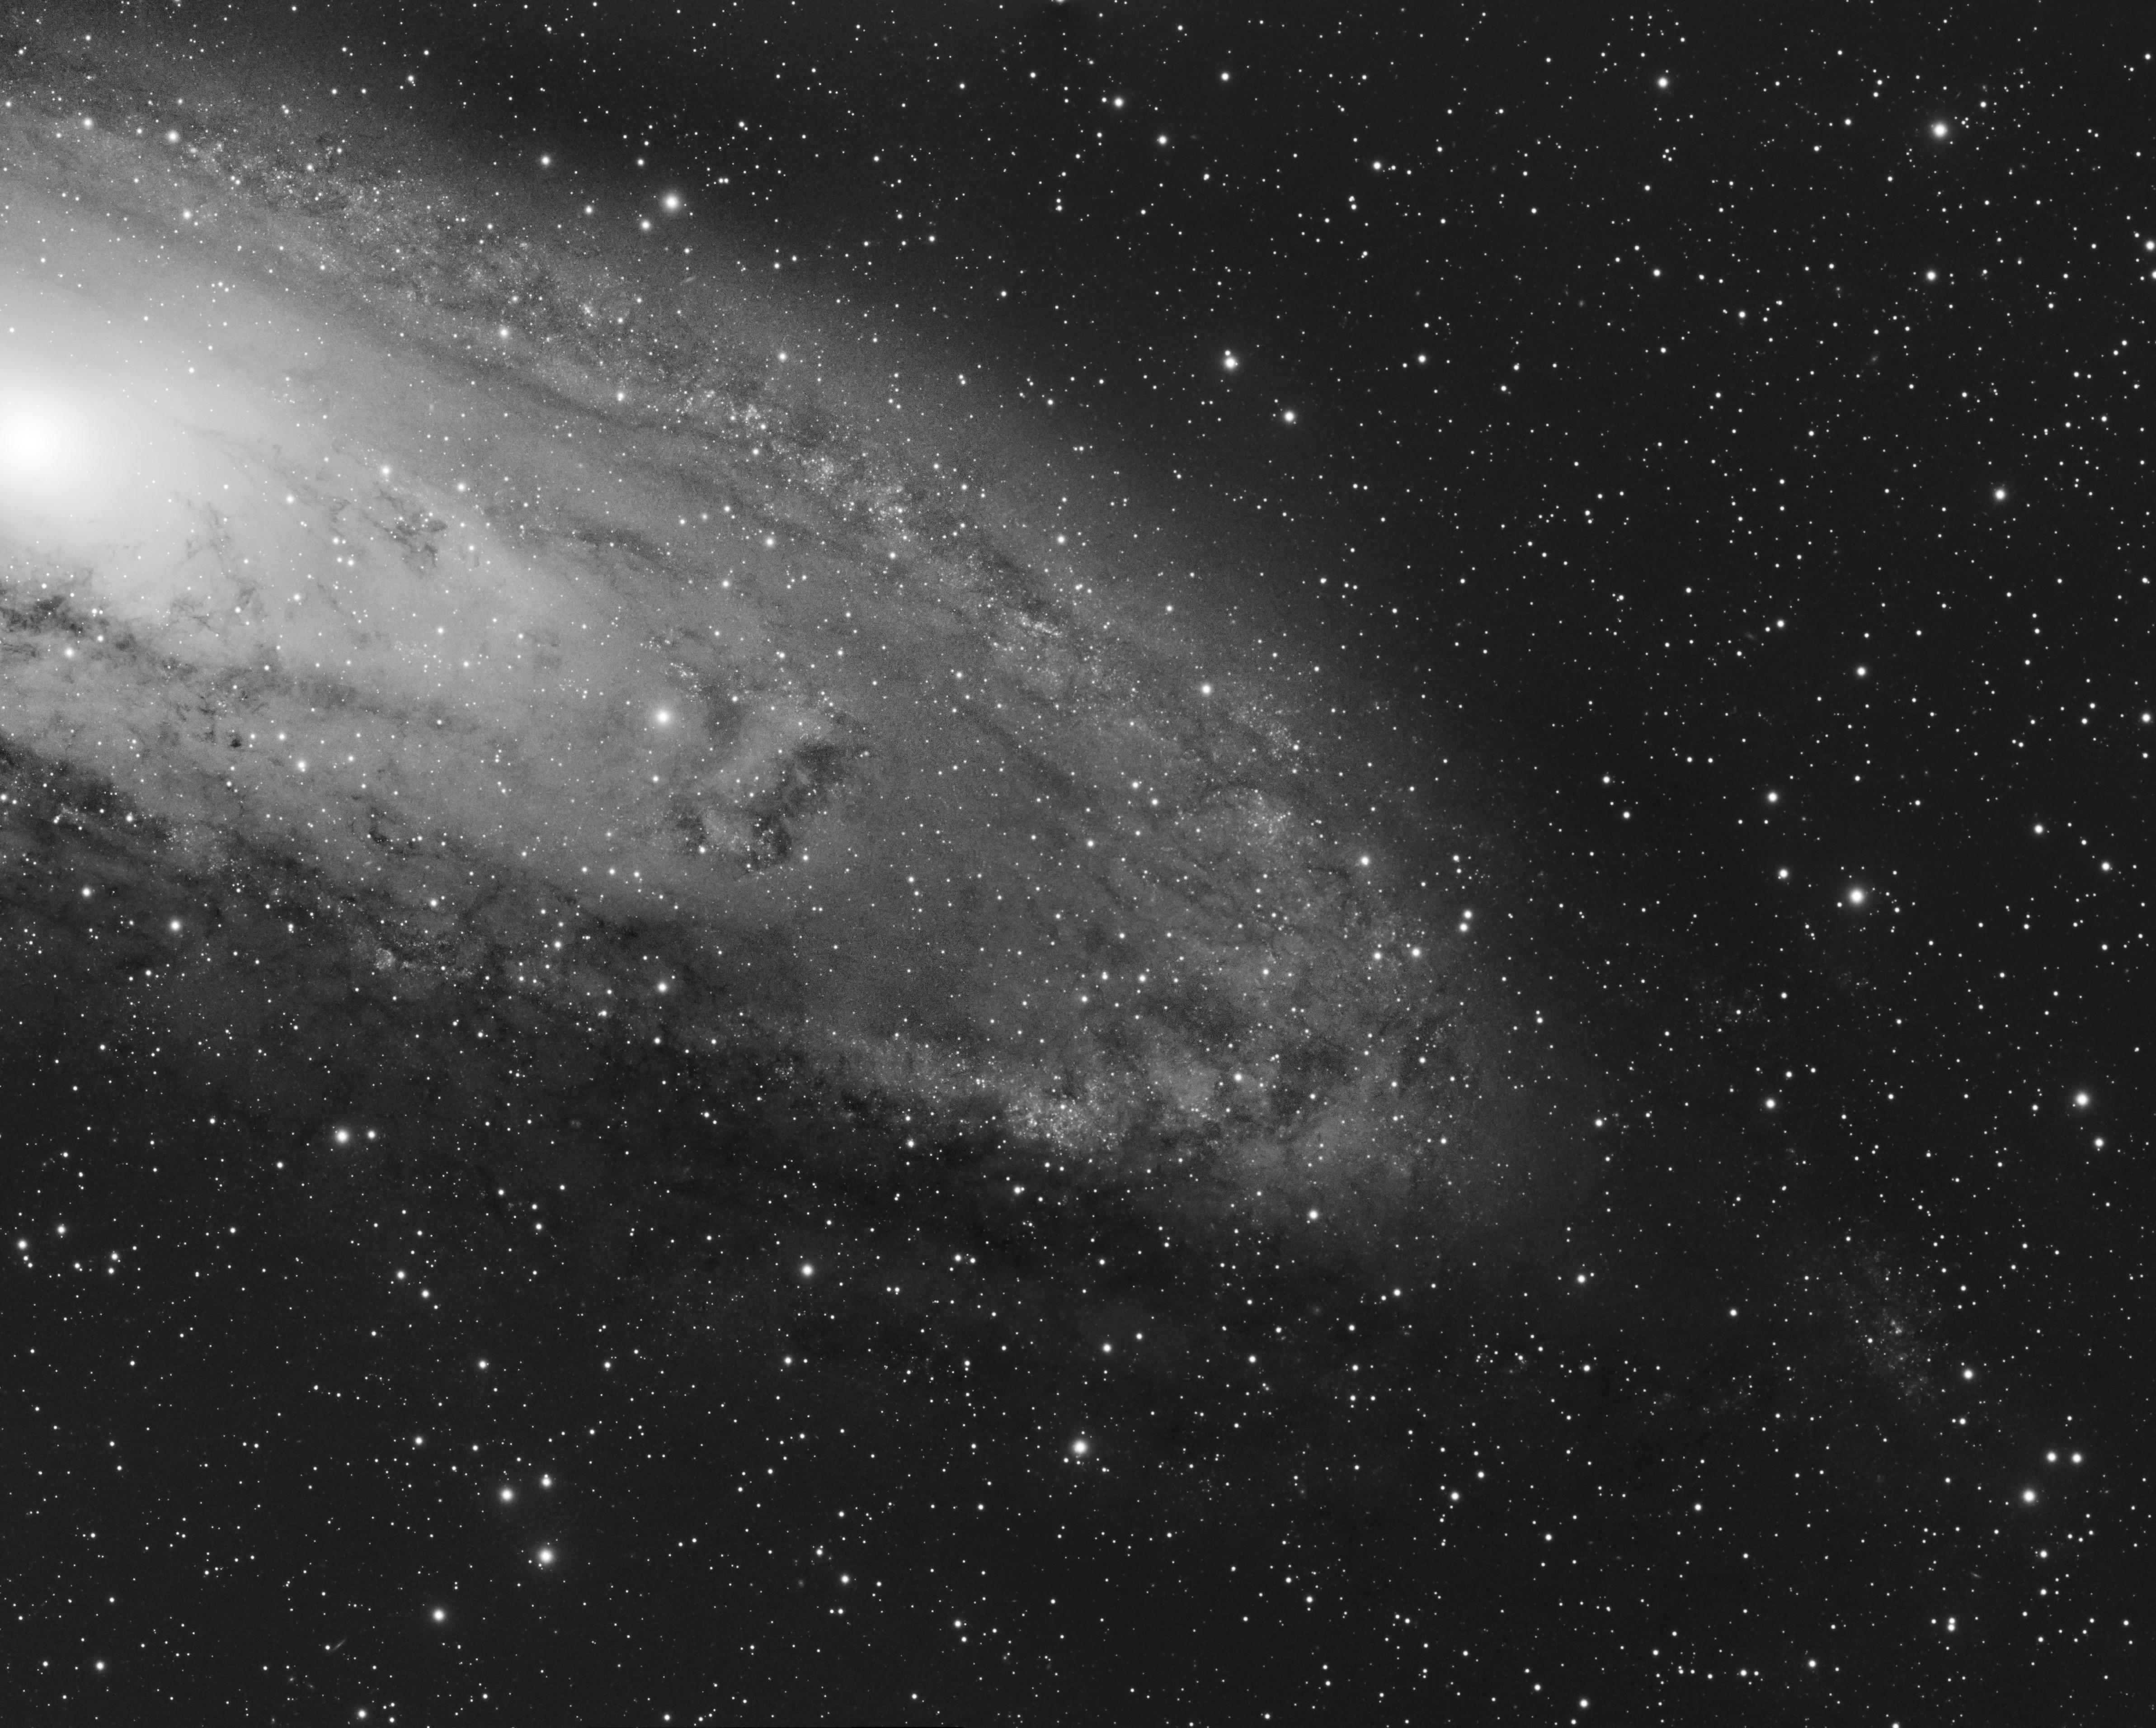
Each of the four luminance panels is a total of 90 minutes of 300 sec exposures captured with the TEC140 and Atik460 CCD camera with a Astrodon luminance filter. The luminance image above is a total of six hours of imaging time. I then processed these four images and knitted them together in PixInsight. I then registered this four-panel luminance with the OSC data at the top of the post and then used it as a luminance layer to give the best of both worlds; the colour of the OSC/FSQ85 wide field image with the detail of the TEC140/Atik460 image!

I hope you like it! 🙂
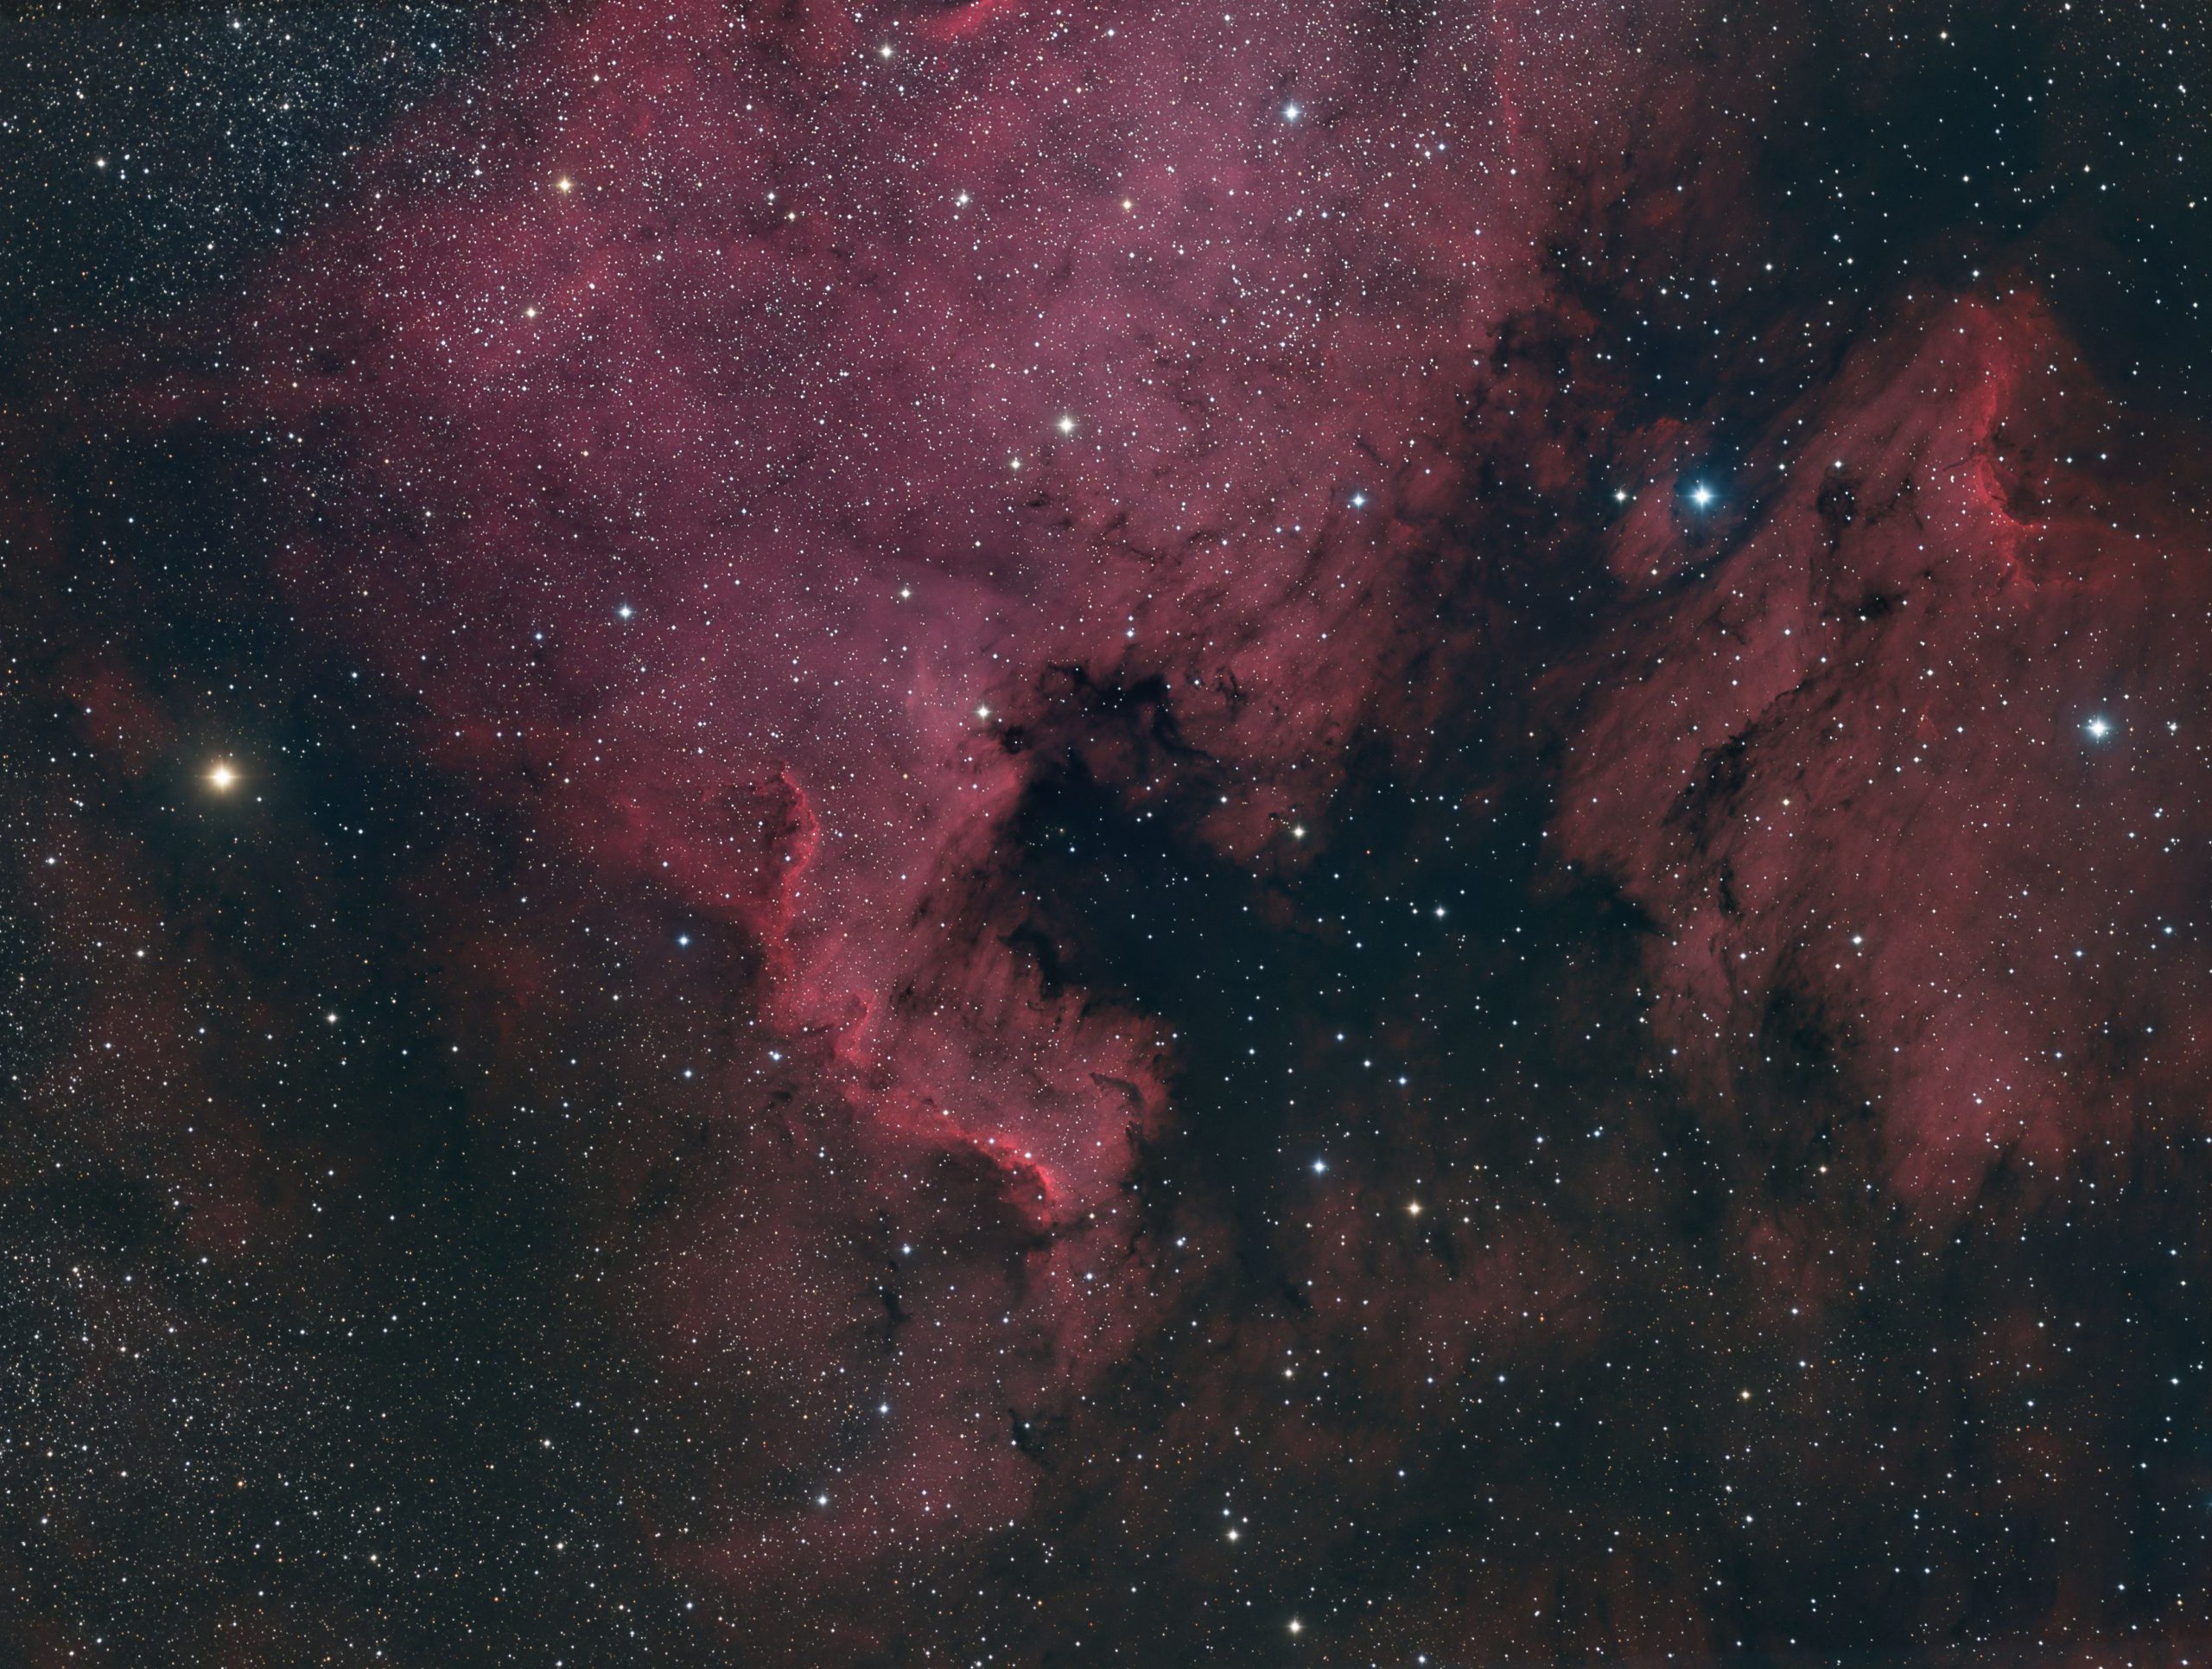
A perennial favourite object to image in the summer and autumn months in the Northern Hemisphere. I’ve imaged this target with multiple equipment combinations over the years. For example, in One Shot Colour (OSC), in widefield and in a very wide field.
As part of the image I used my existing Ha dataset from 2018/2019 which consists of 48 x 600 second exposures. I discuss capture of this image here.
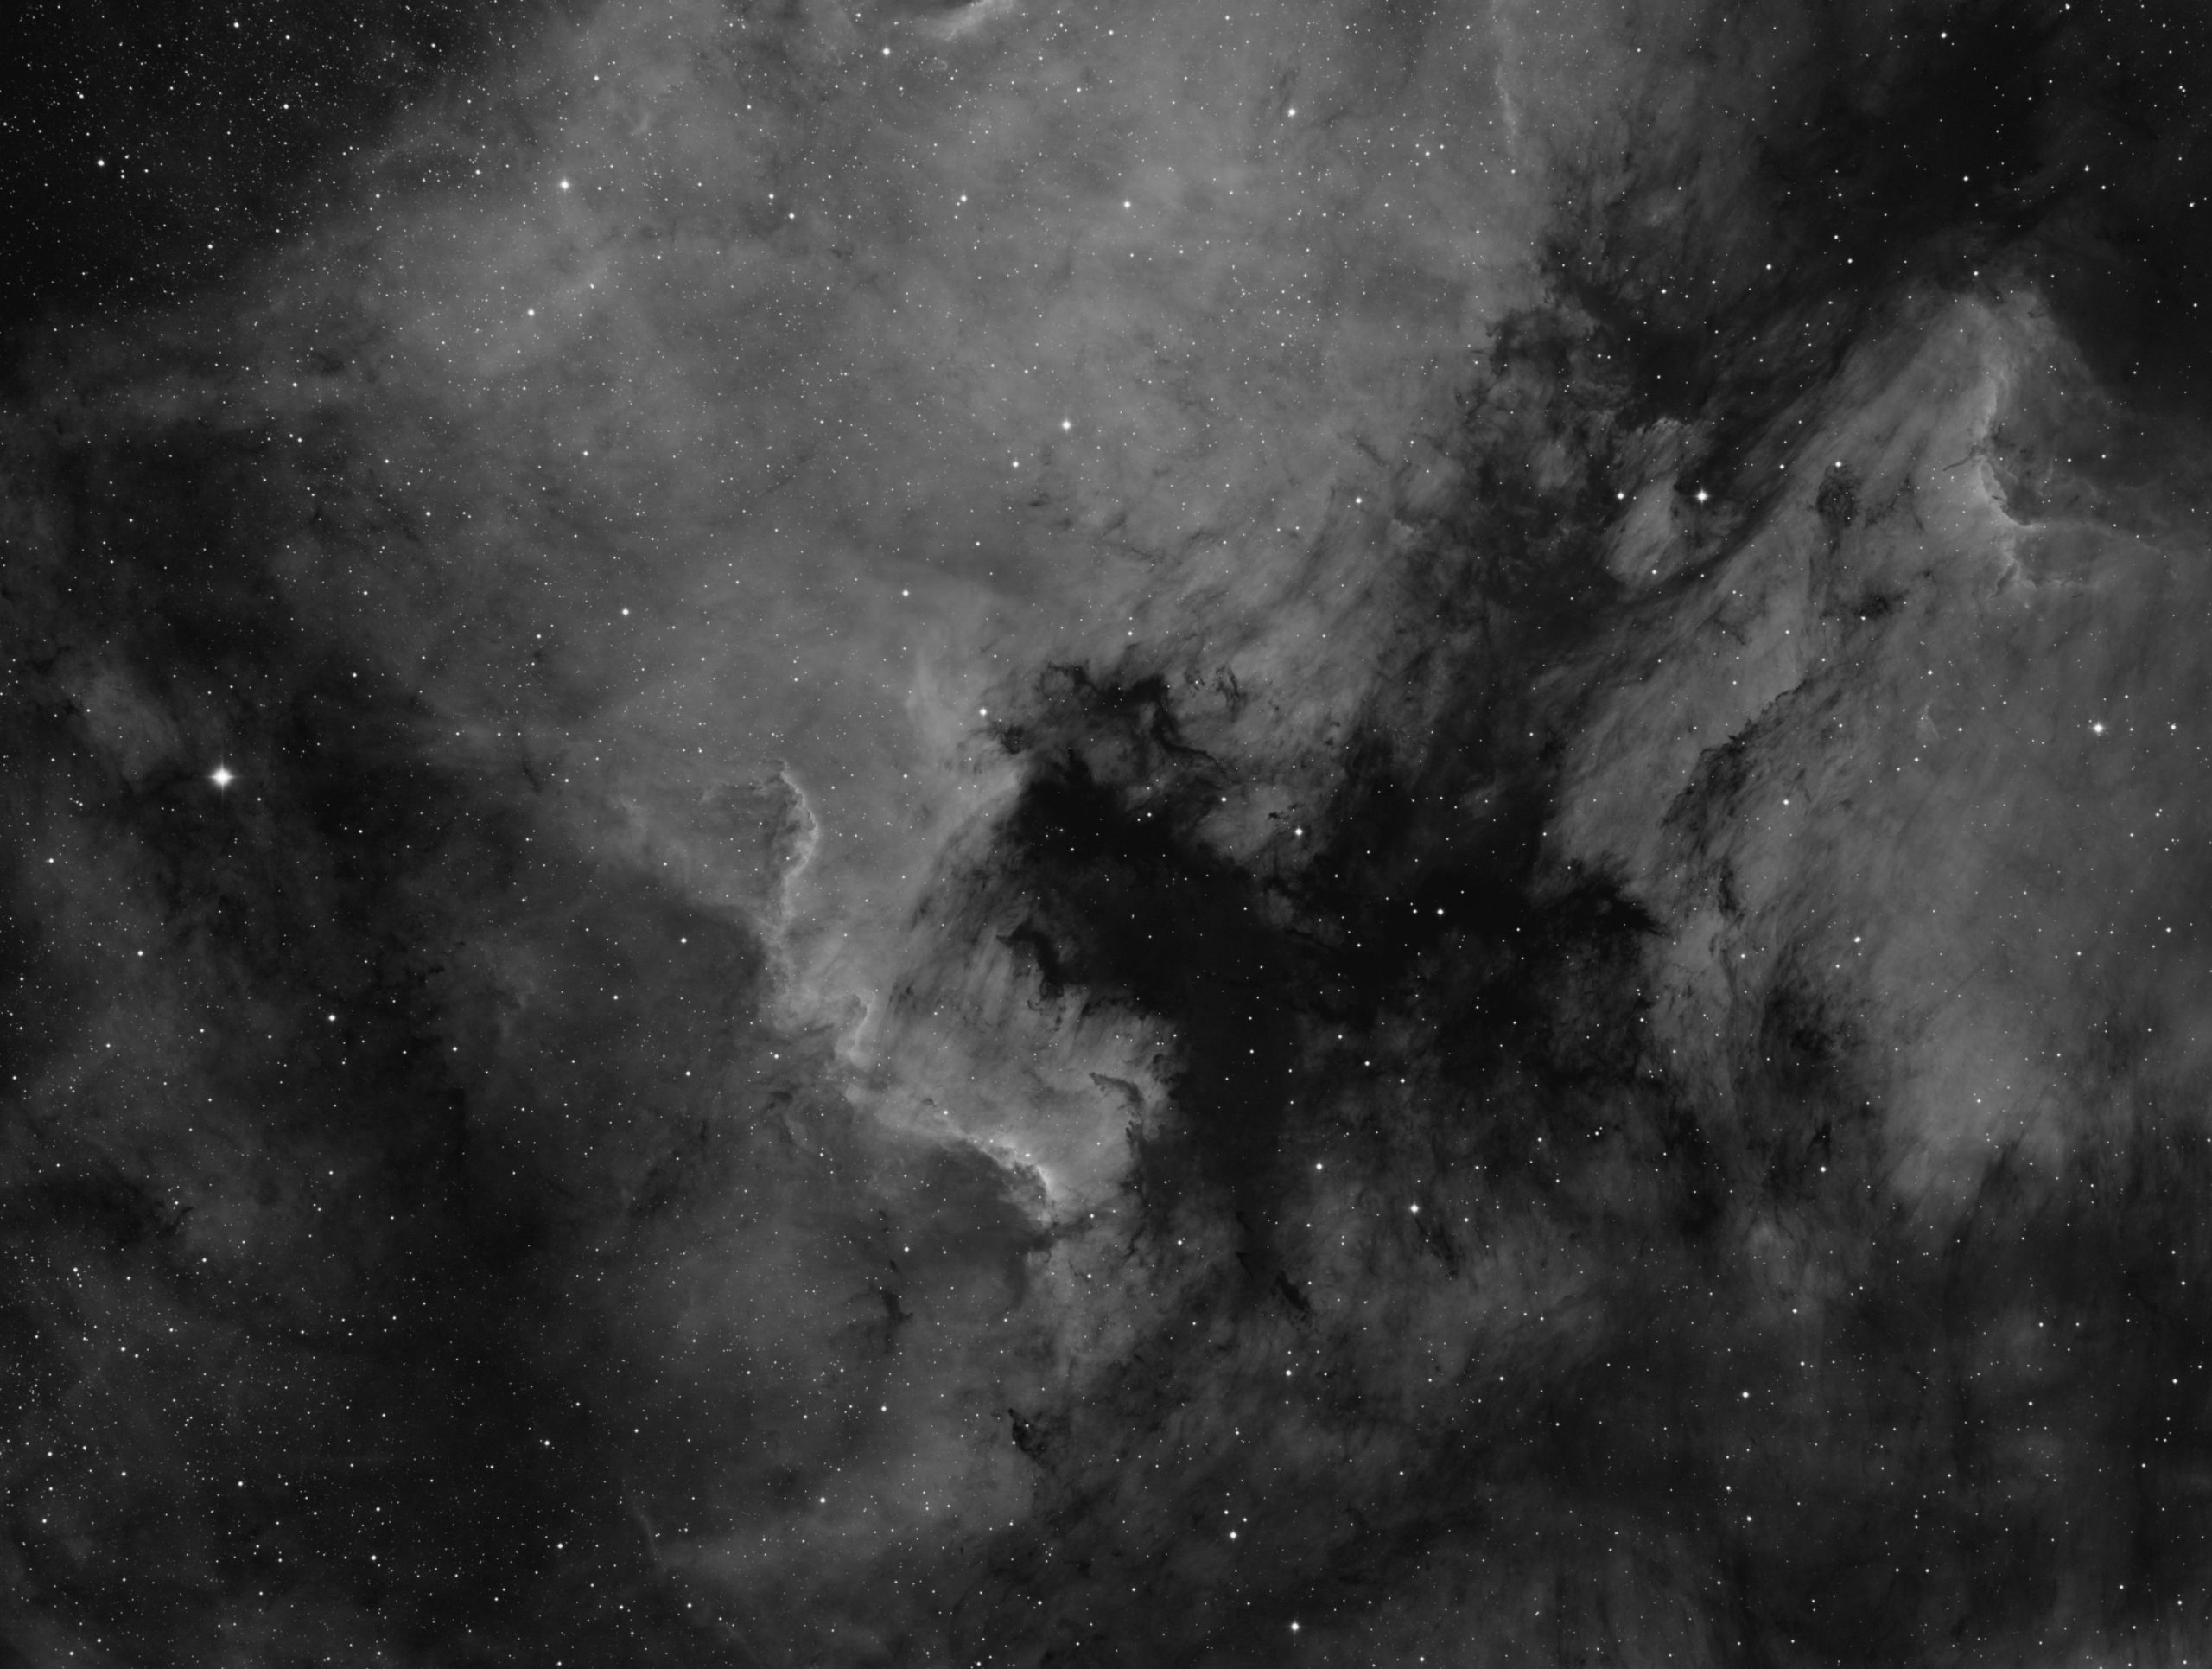
I then captured the RGB dataset in October 2021. This image is my first image set that I captured using the excellent NINA (Nighttime Imaging “N” Astronomy) imaging software. I captured four hours of RGB data through Astrodon 31mm E series Gen 2 filters binned at 1×1. This consisted of 300 second exposures. Seeing and transparency were not good but clear nights have been very infrequent in the UK in the past six months so I went for it regardless.
I am very impressed with the quality of the standard RGB image above. Since the data is binned 1×1, I did not feel the need to capture any luminance channel at all. Indeed the RGB alone is so good that the Ha data addition, whilst it does add some signal, adds so little to the final result that I question the time I spent capturing the Ha data. For sure, the Ha image is a pretty picture all on its own. However, it does add something to the picture as detailed below.
Despite the expense in time of gathering the Ha data, you can see that when it is blended with the RGB it brings out some fainter structures in the nebula. Whether or not a full eight hours is needed though, I doubt.
Easily visible with the naked eye, M45, The Pleiades – sometimes referred to as The Seven Sisters, is a well known and famous Open Cluster in the constellation of Taurus. IT has been known since ancient times due to its prominence. The cluster is located between 450-500 light years away and contains several hundreds member stars. The cluster is quite young by astronomy standards and the cluster is moving through a cloud of gas which is easily visible in images and can been seen visually in a dark sky as well.
Technical Details
Imaged from my backyard in Nottingham on Saturday 9th January 2021 when high to The South. A meridian flip occurred half way through the data acquisition. I used my Takahashi FSQ85 refractor and QHY268C One Shot Colour camera. The image was created with quite a small data set of only 38 x 180s exposures.
Data acquired with Sequence Generator Pro and processed with PixInsight and Photoshop CC 2021. Very little processing has been done other than some noise reduction and a stretch into the none-linear state and a bit of vibrance added to the colour.
I have imaged M45 before. In a close-up setting and also in a widefield setting.

This is a one shot colour picture of The Moon through my Takahashi FSQ85 telescope and my QHY268C colour camera. Seeing between bouts of cloud dodging was quite good with very little in the way of shimmering. This is the best 40% of 5000 frames captured with Fire Capture. I did not use the full resolution of the QHY268’s 6000×4000 sensor, I just captured the central 1600×1200. Unusual to see the FSQ85 used as a planetary or lunar scope but it does excel at this as well as deep sky astrophotography work. It is also a very good instrument for visual observations.
Processed with Autostakkert, PixInsight and Photoshop. I hope you like it. It could do with a bit more colour to bring out the colour in the Mare (sea) regions.
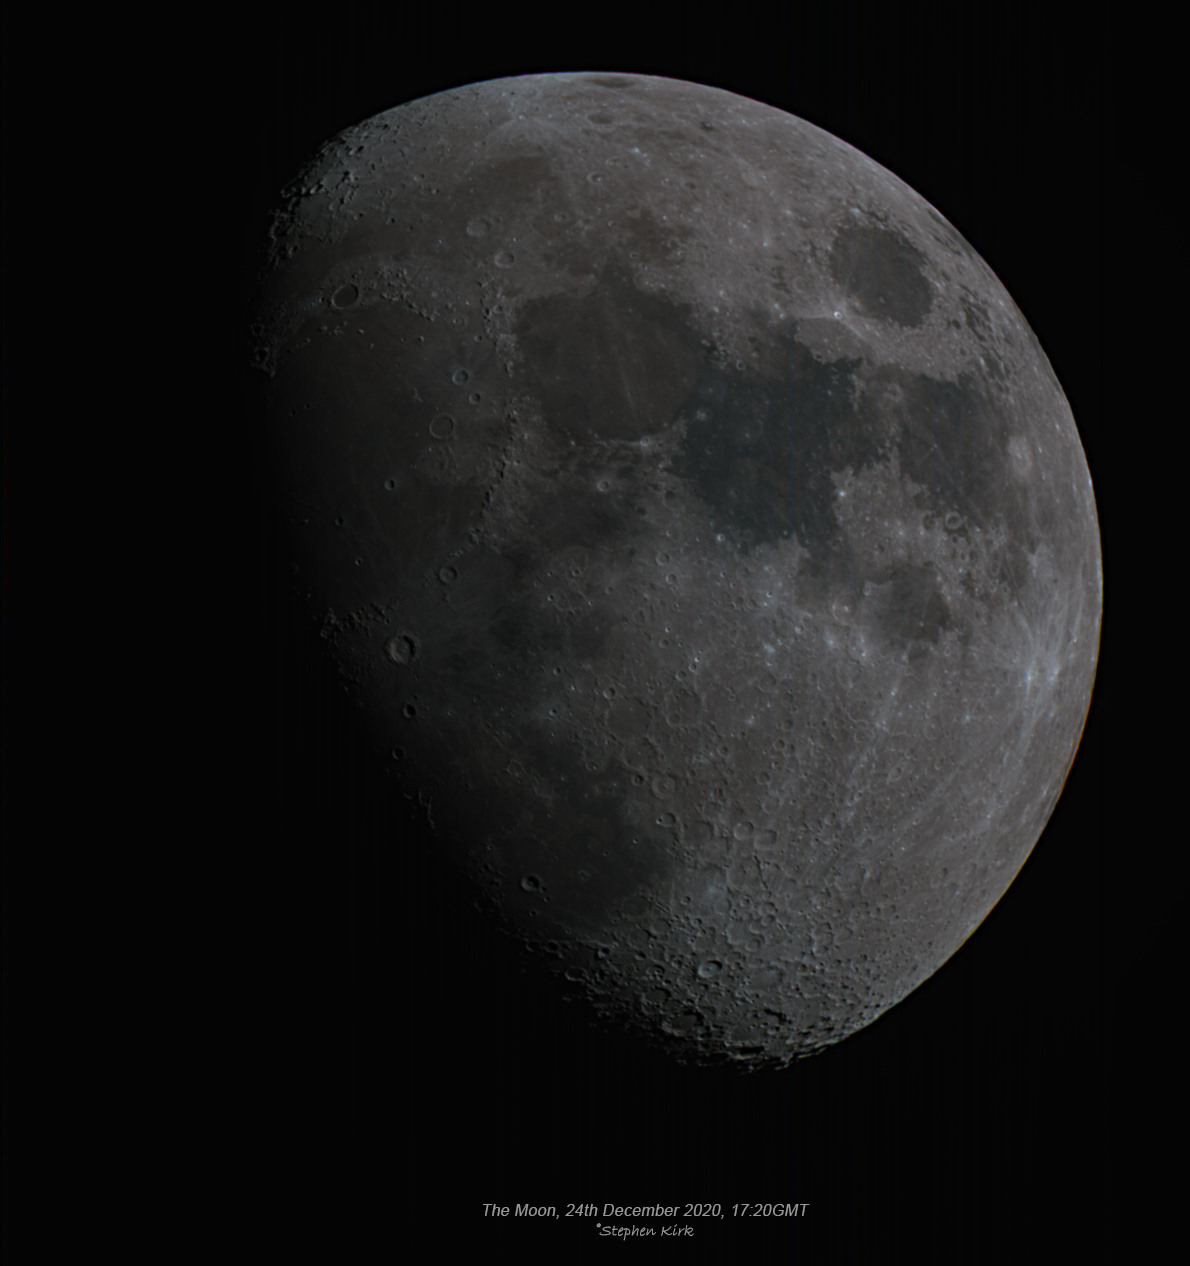
The Moon was at about first quarter when I captured this image. There are a lot of firsts in this image when capturing as I discuss below.
First up, this is the first time I used the QHY268C for planetary photography in video mode. Before now, I always used this camera in long exposure mode. I think the camera works very well and when I cropped the capture area down to 1600×1200 from its native 6000×4000, I was capturing16fps in Sharpcap, which is quite reasonable.
Secondly, this is the first time I used my Takahashi FSQ85 as a planetary/lunar scope. I think it worked our pretty well. I would normally have moved the camera over to the TEC140 or even the C925 SCT scope, however, I do not yuet have the adapters for the QHY268C to do that just yet.
Technical Details
As mentioned, imaged with FSQ85 and QHY268C. I used Lakeside motorfocus and captured 2000 frames in Sharpcap – another first use of this software (excellent) and utilised the best 35% of the frames in Autostakkert.
I used Photoshop to process the outputr from Autostakkert. Try as I might, and despite colour correction, I still think there is a slight green tinge to The Moon in this image so I will experiment with some different processing techniques.
EDIT: I am leaving the image as is but the reason for the green tinge is because I did not equalise the RGB channel intensities properly. There are several ways to achieve this. You can use linear fit in PixInsight and use the weakest median channel as the master with which to equalise the other two channels. Or, again with PixInsight, you could combine the RGB with channel combination with the channel intensities as they emerge from the stacking program and then do a colour combination to equalise the three channels. Or, you could use autocolour in Photoshop to achieve the colour calibration. Actually, there is a fourth way too, bu using Helmut Bornemann’s autocolour script in PixInsight.
http://www.skypixels.at/pixinsight_scripts.html