
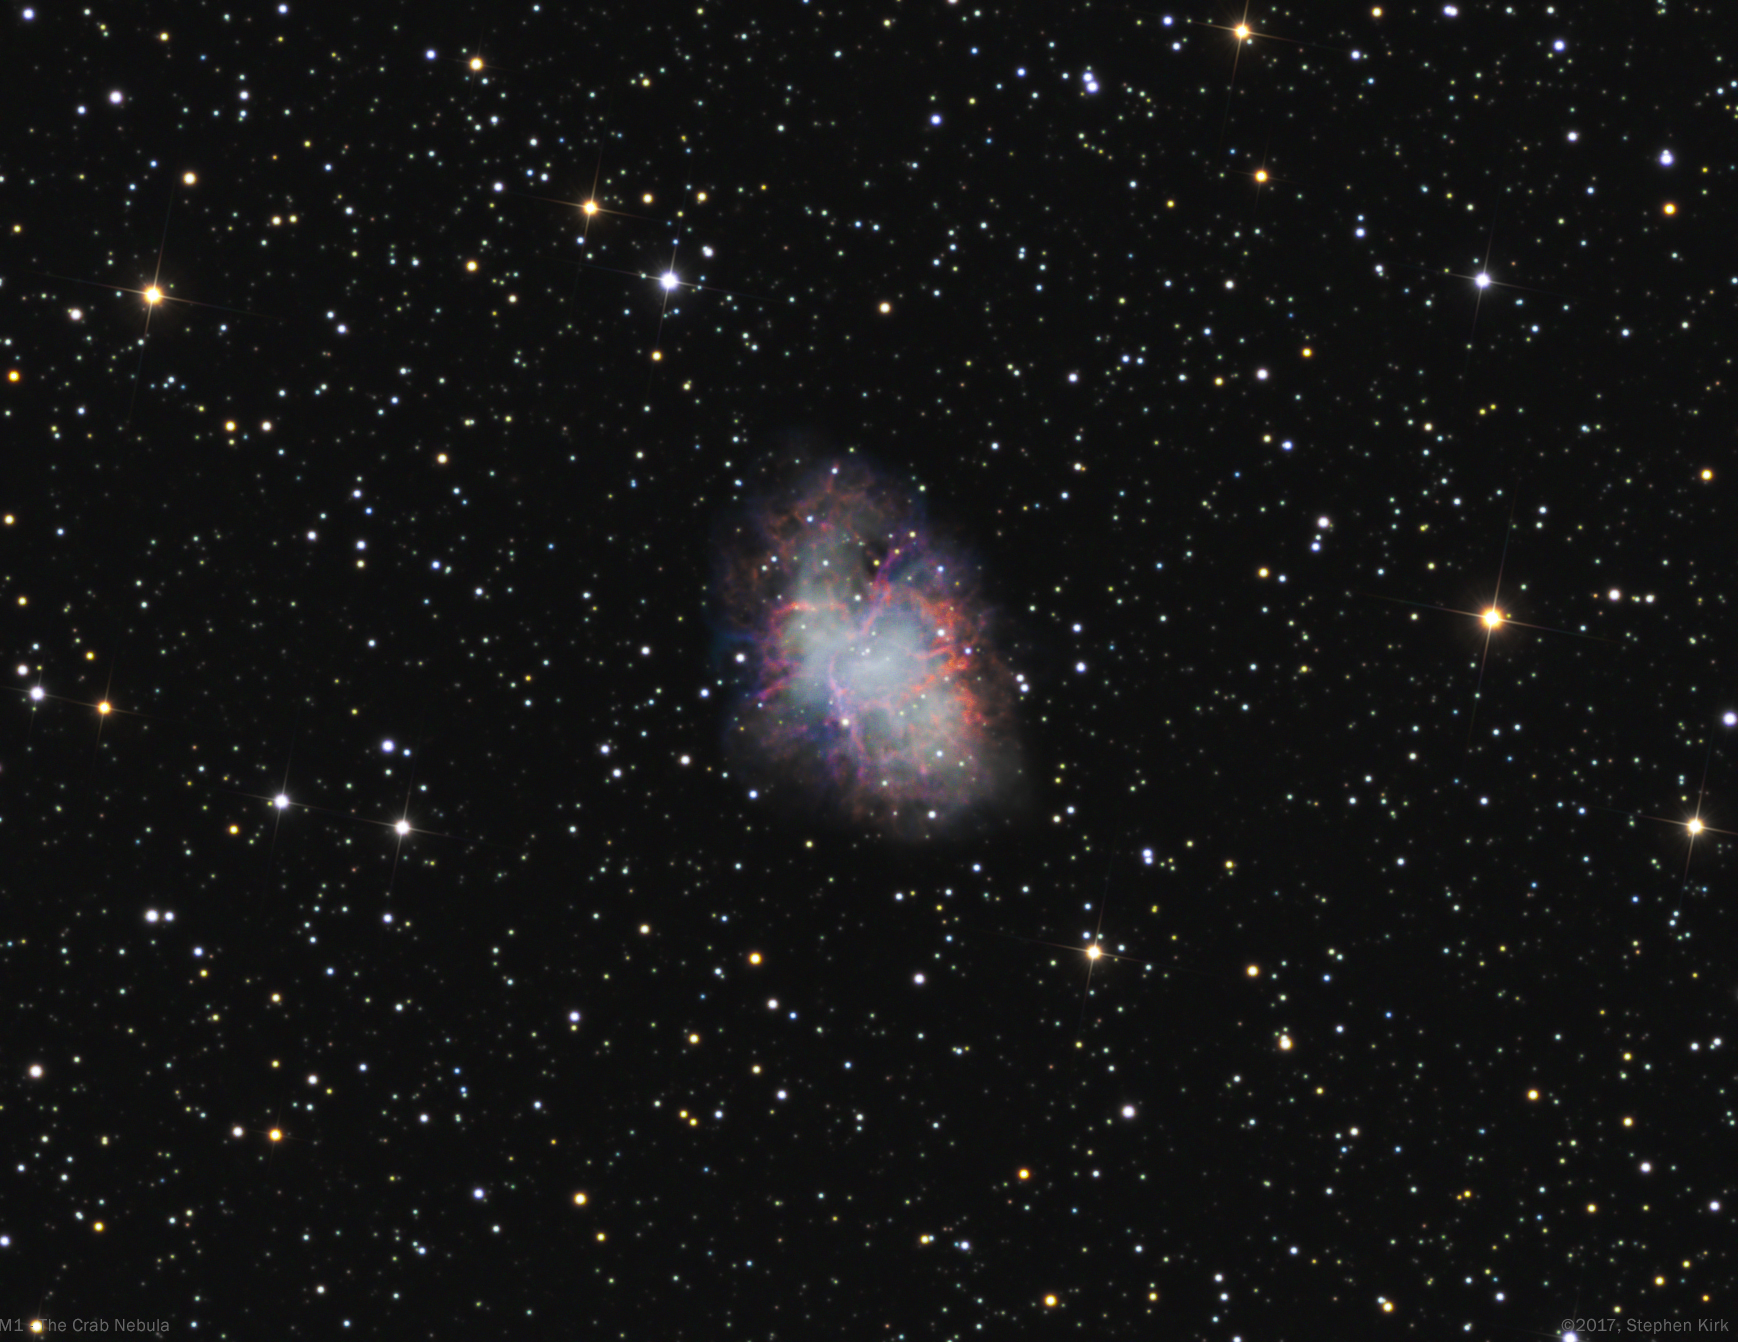
M1 - The Crab Nebula TEC140
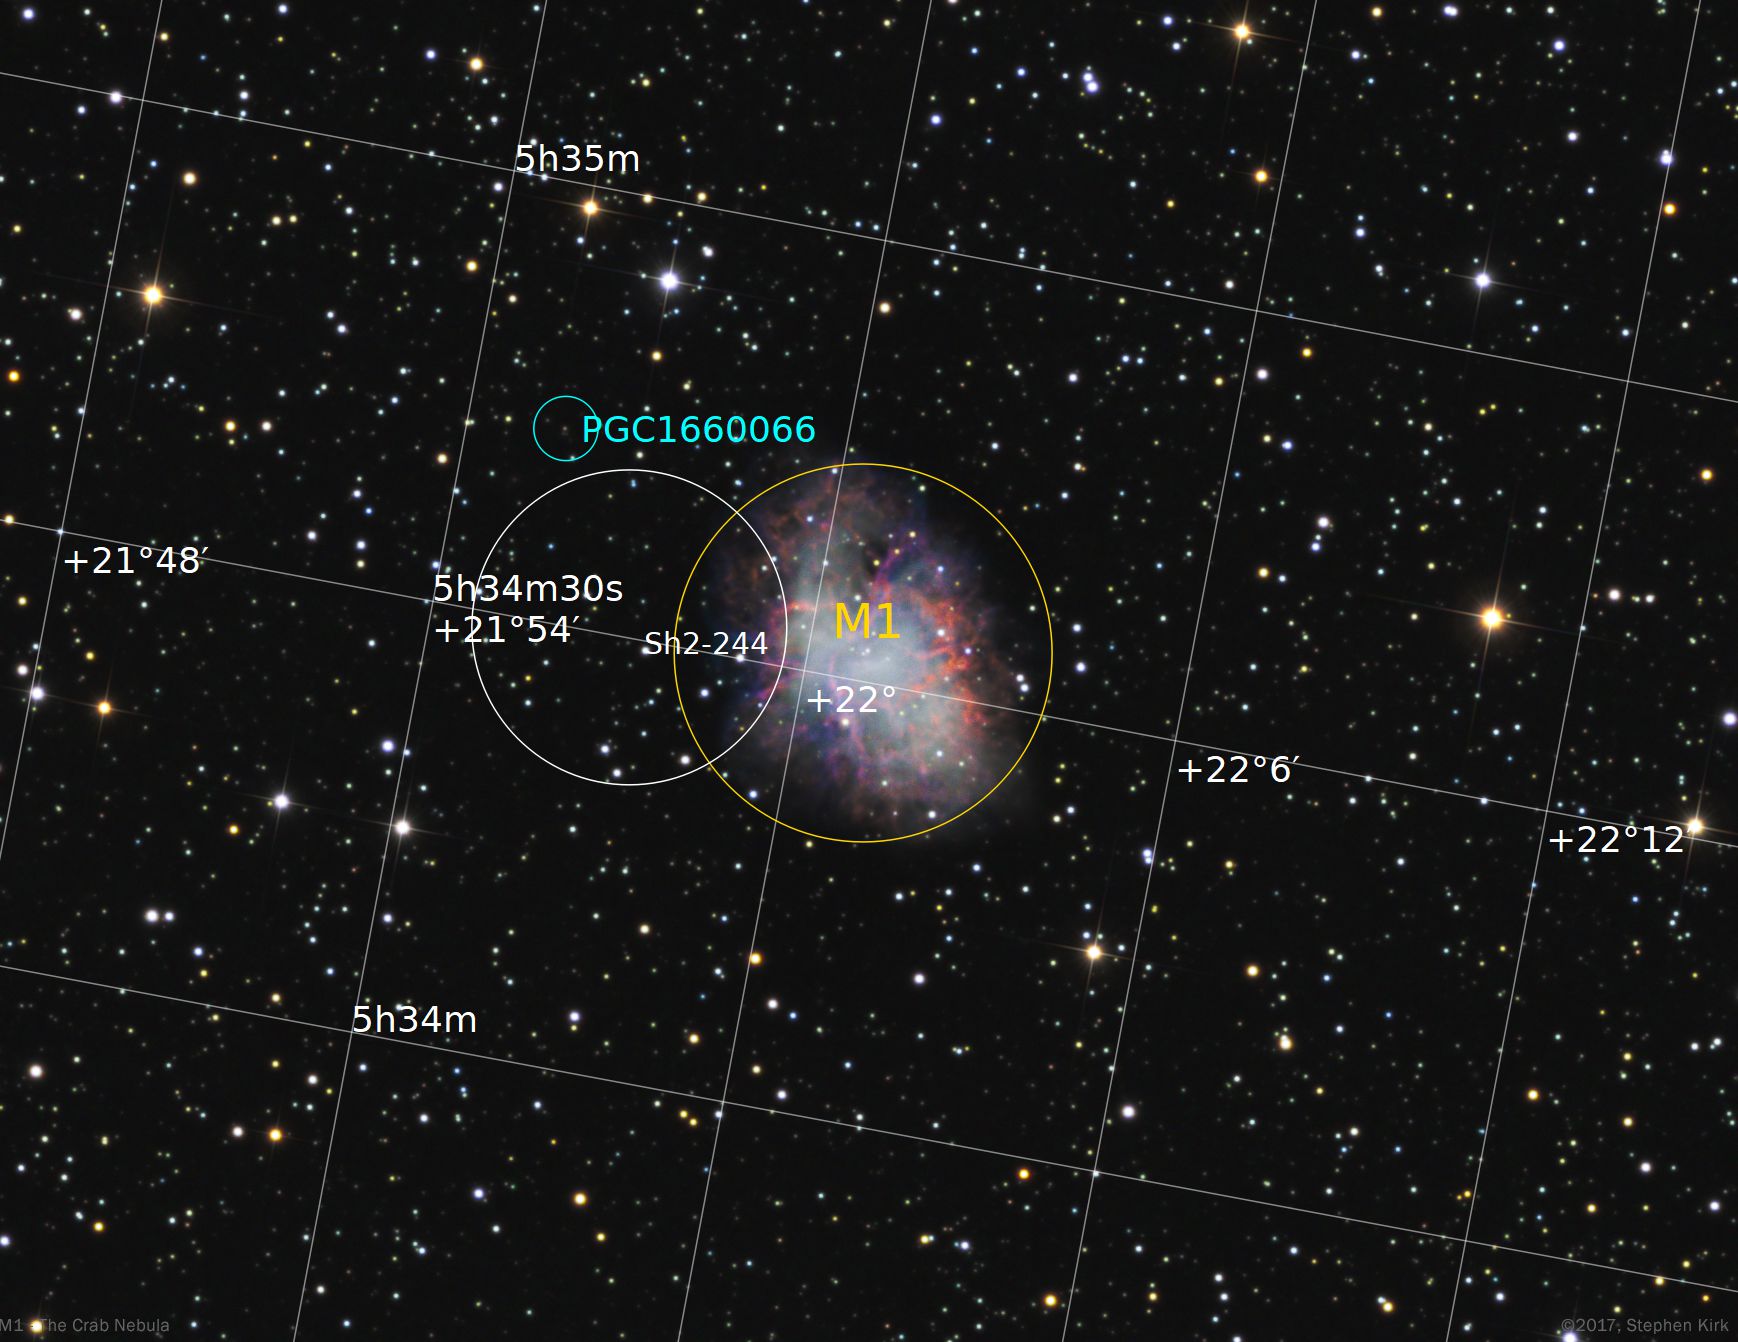
The Crab Nebula - M1 - is the expanding remains of a supernova that was seen in 1054 throughput medieval Europe, The Middle East and China. The nebula is very distant at about 6500 light years and lies in the Perseus Arm of our galaxy, further out from The Galaxy's core than The Sun. It is called The Crab because William Parsons from his Irish observatory who first viewed it in 1840 thought it resembled the outline of a crab and the name has stuck. The object was first observed in the 1731 and was linked to the Supernova of 1054 as recently as 1913. Earlier photographic plates from the 1950's and those taken today show a definite expansion in the nebula in the intervening 70 years.

Image Technical Data
Imaged from my backyard in Nottingham, UK in the winter of 2017 with my TEC 140 refractor and Atik 460 cooled CCD camera and Baader LRGB filters. I used a NEQ6 mount guided with OAG.
All images data binned 1x1:
Lum > 10 x 900s ; Red > 15 x 300s ; Green 15 x 300s ; Blue > 19 x 300s
Image capture with APT and processing in PixInsight and Photoshop CC.
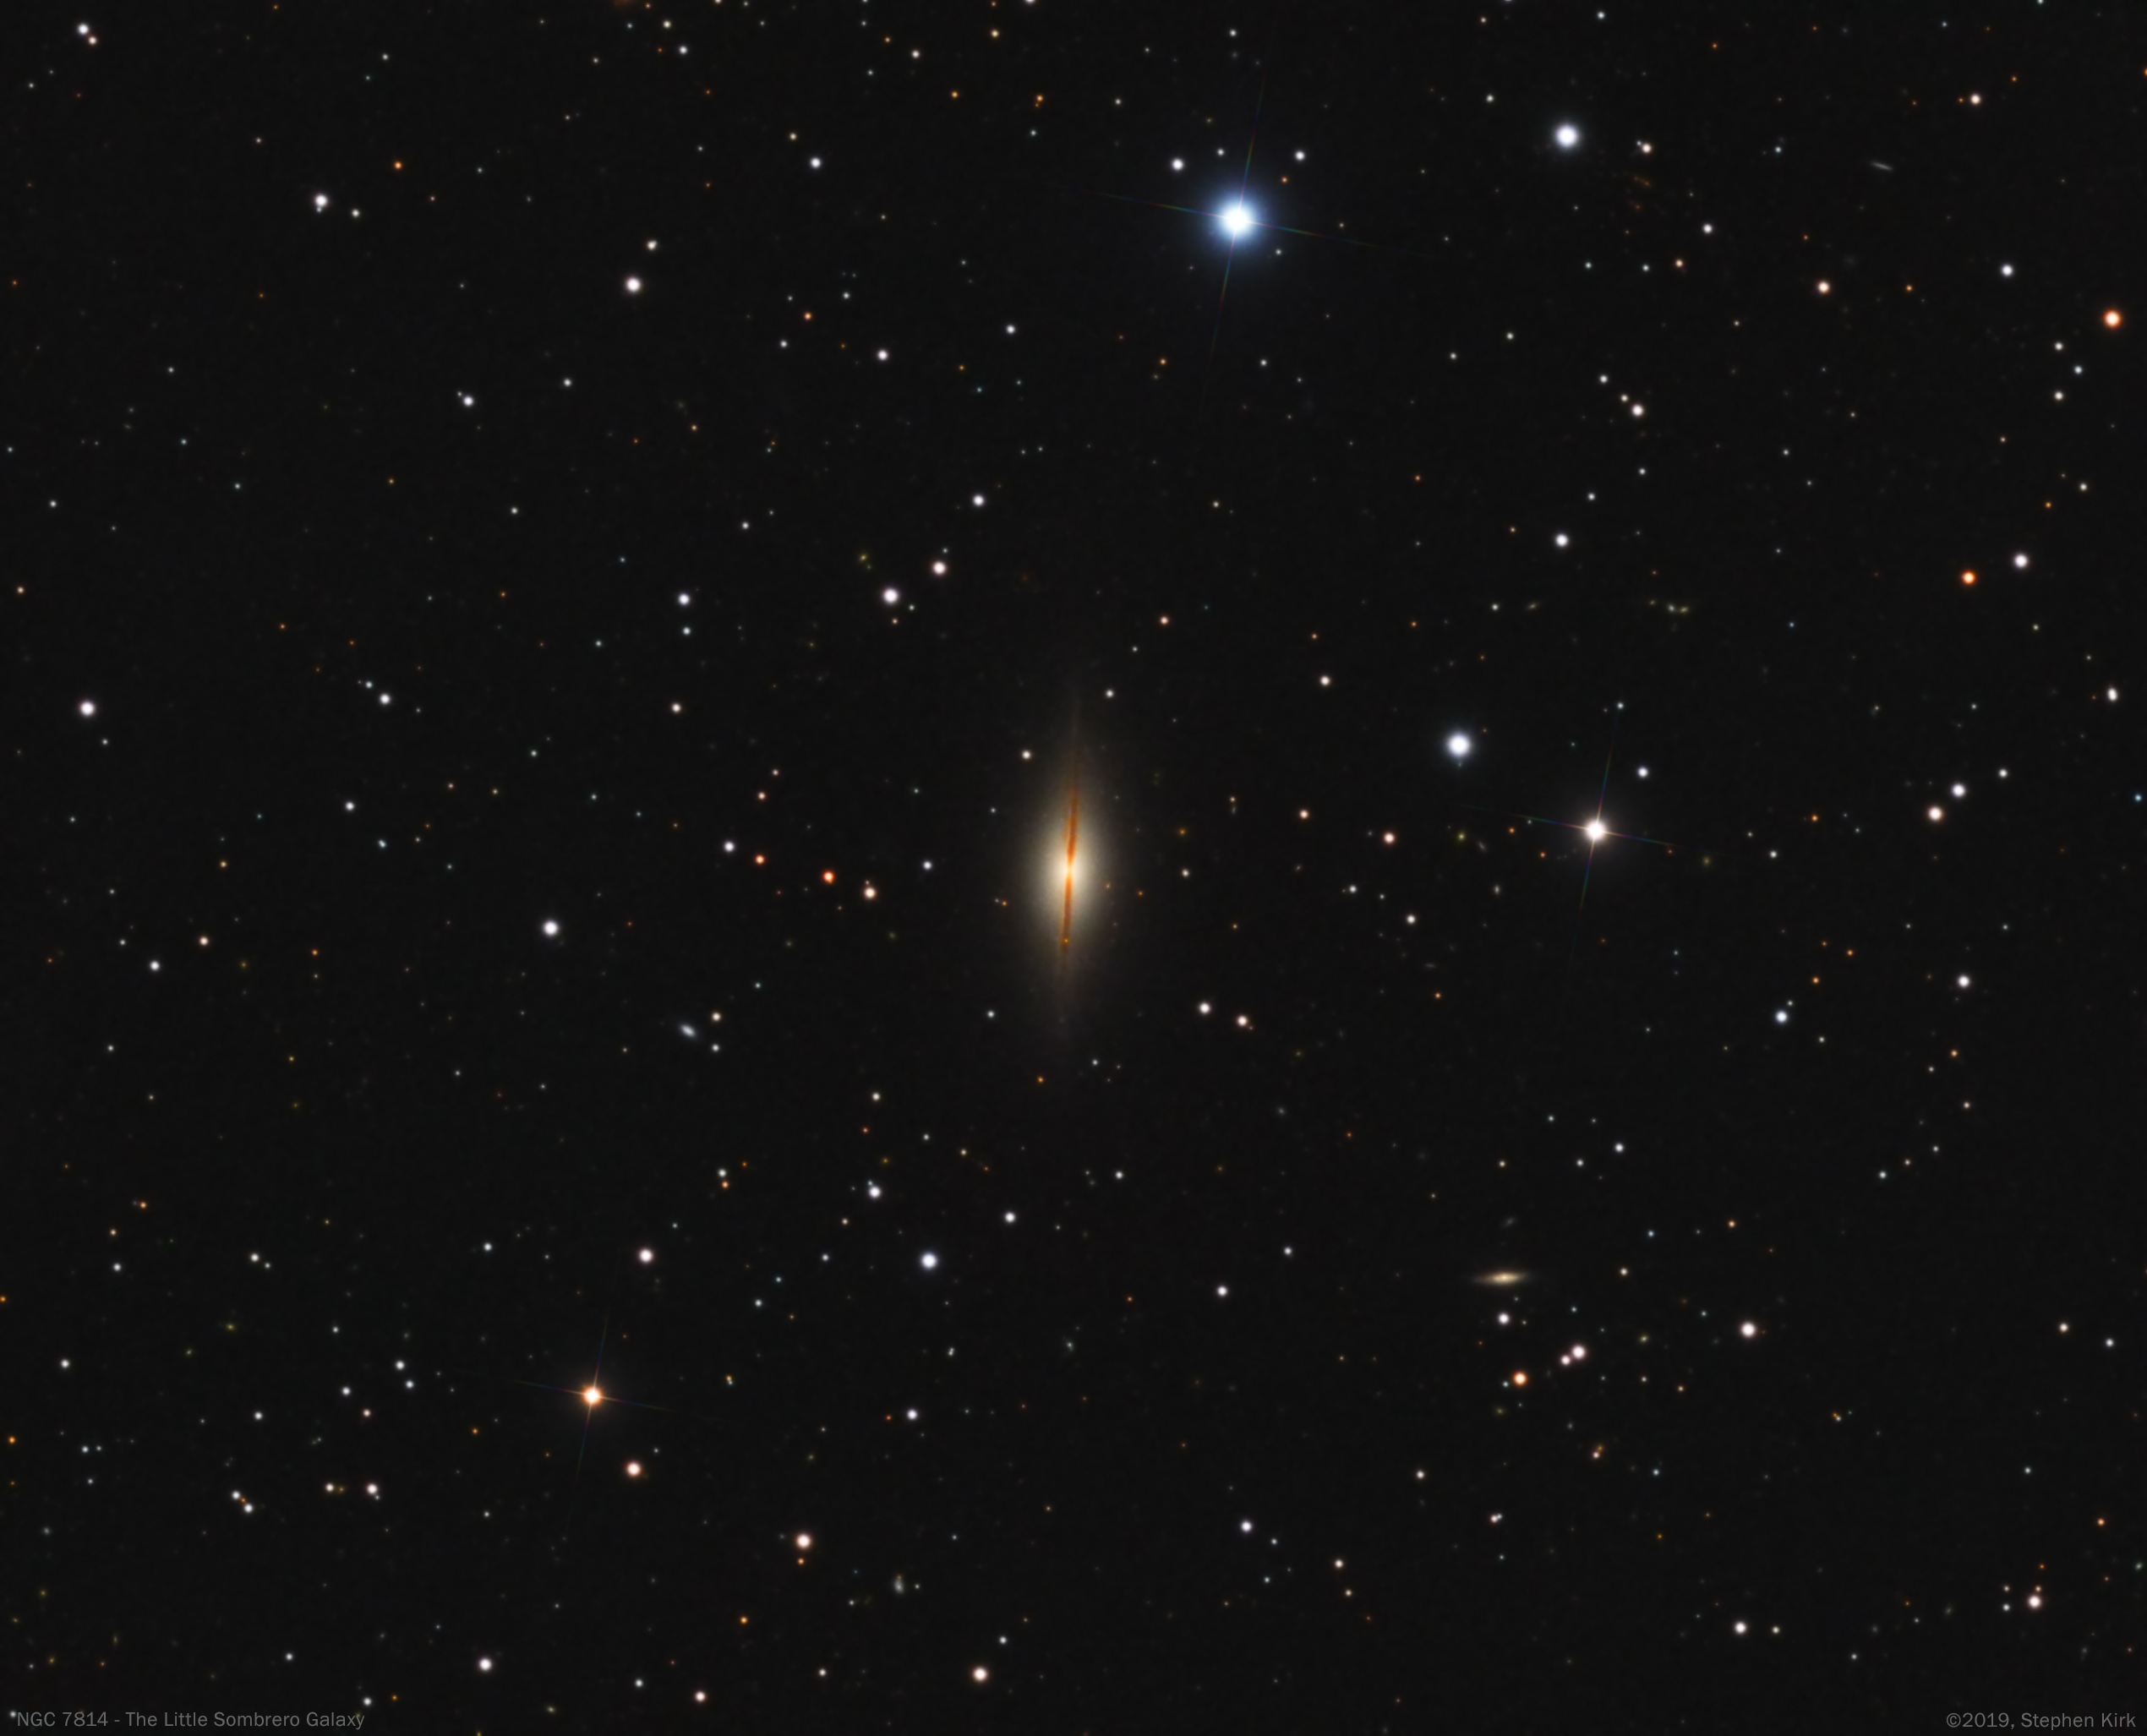
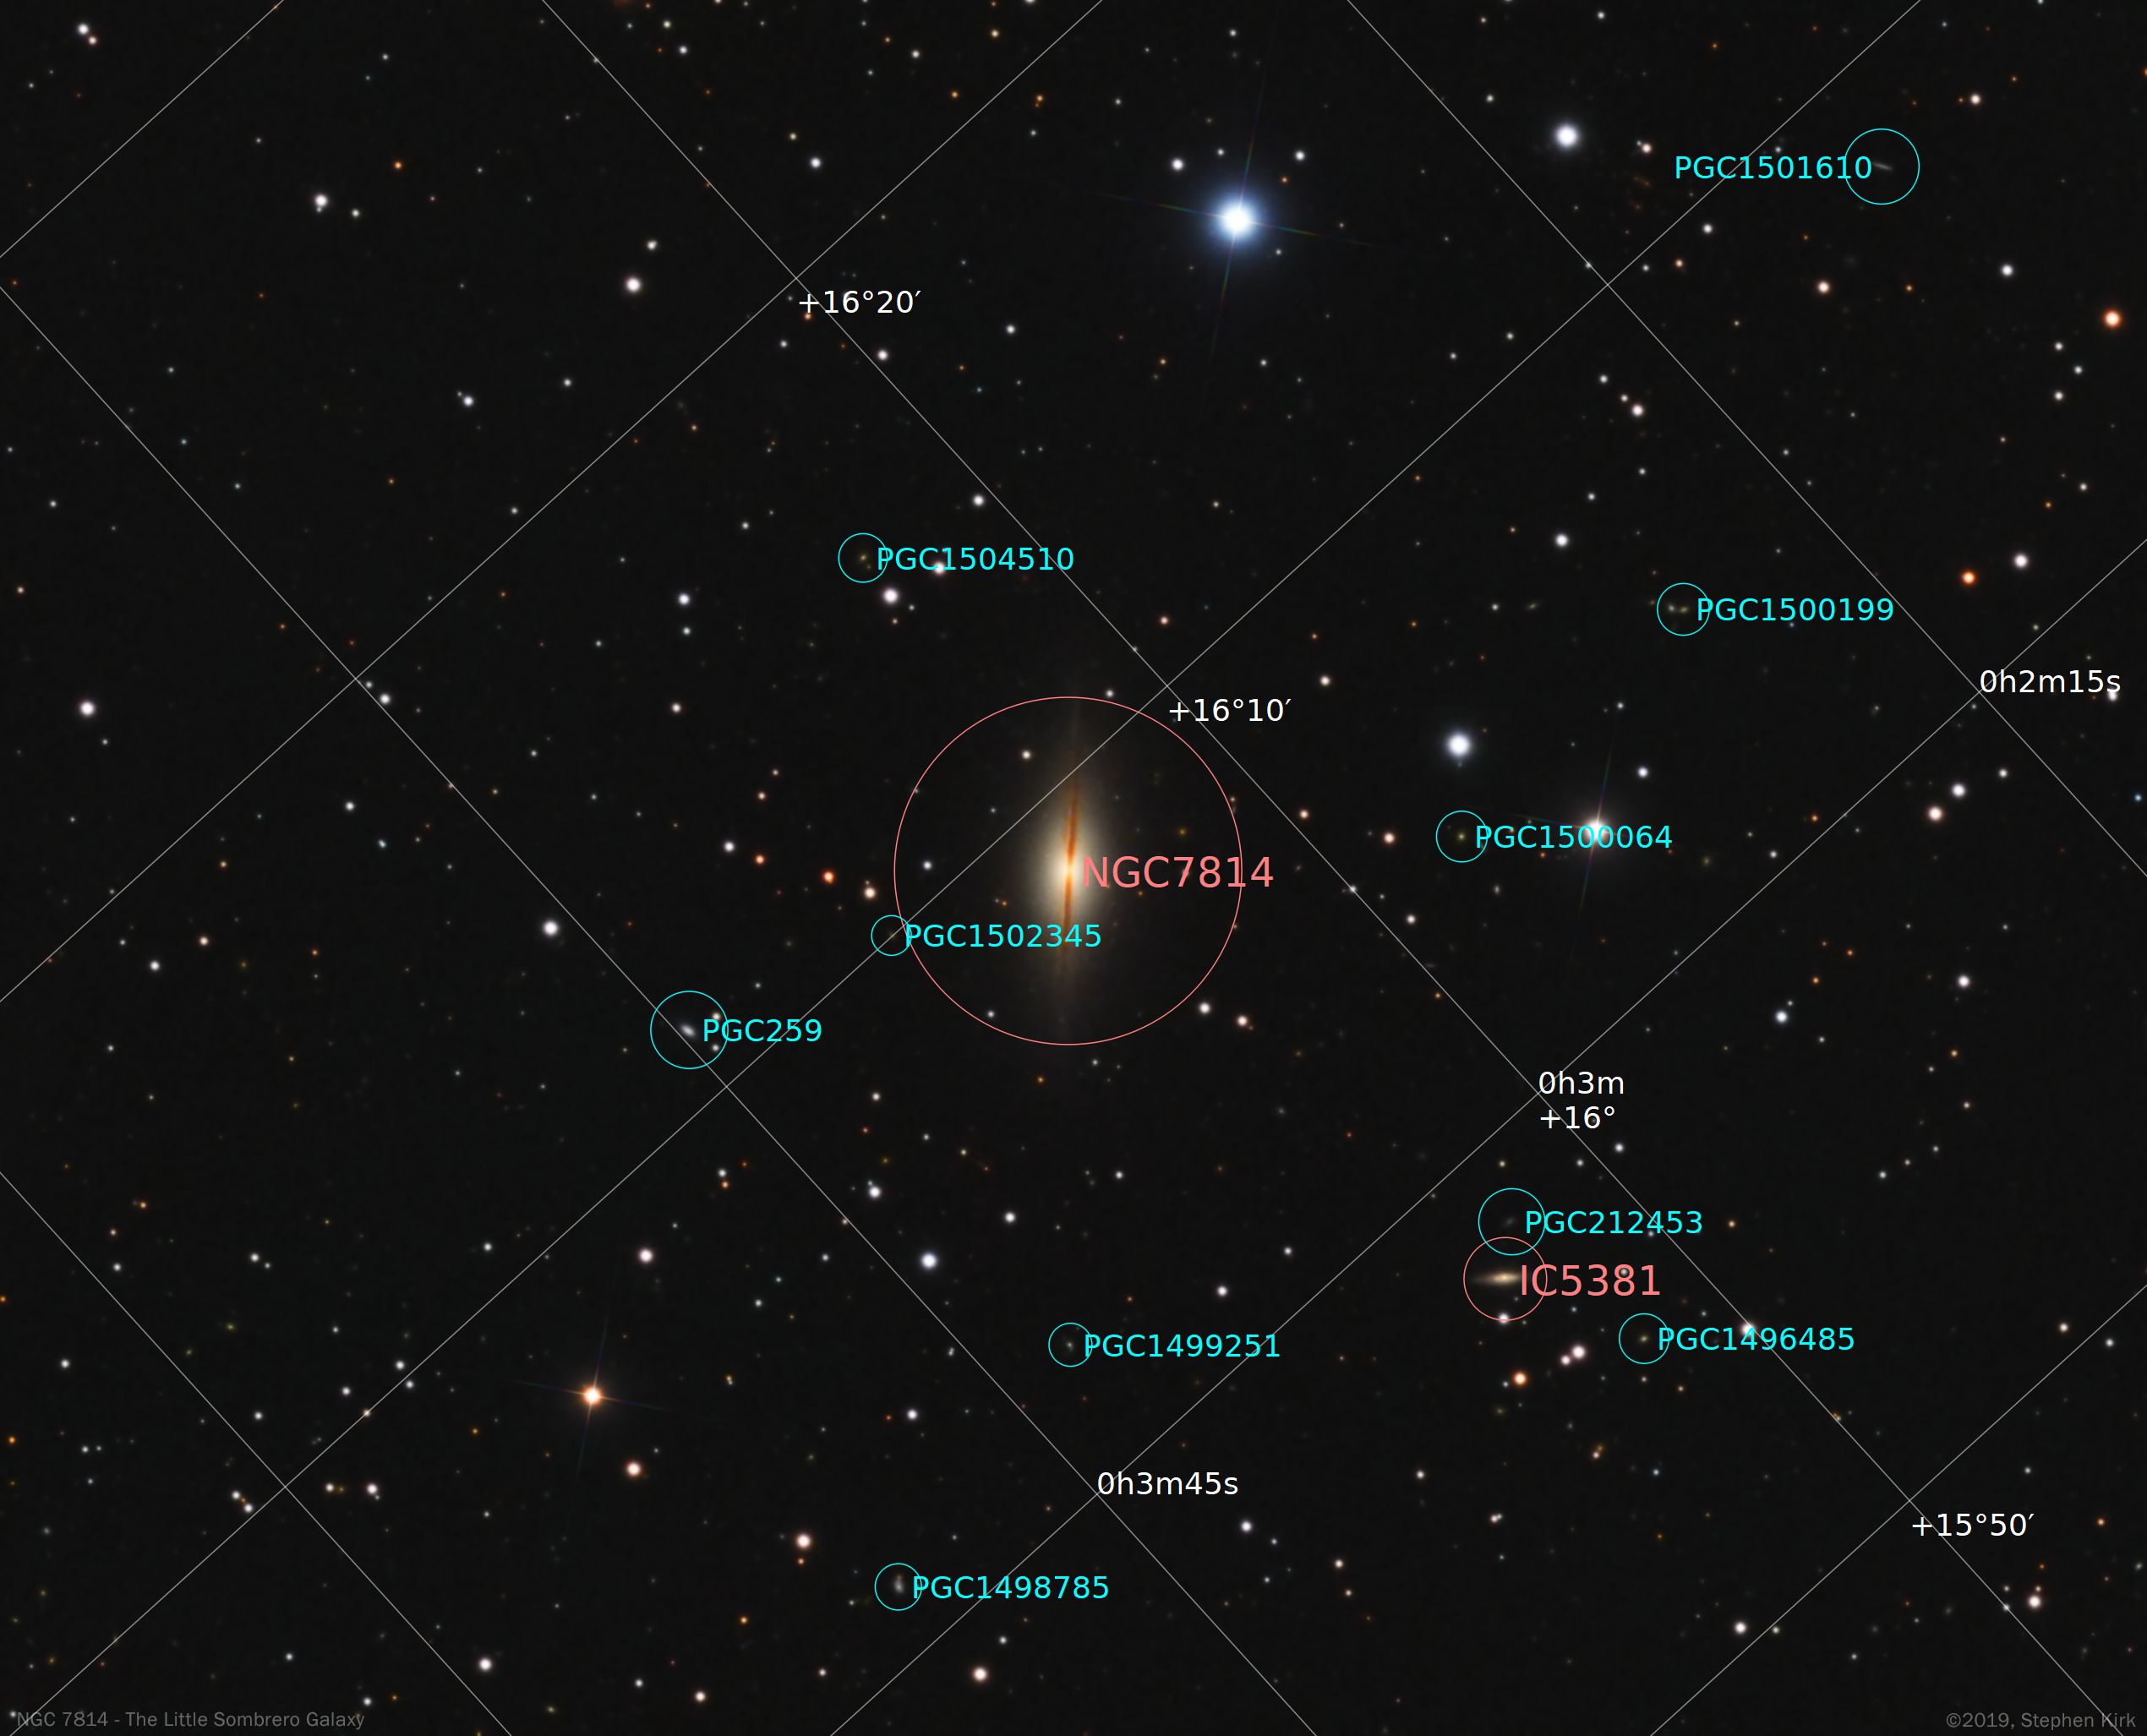
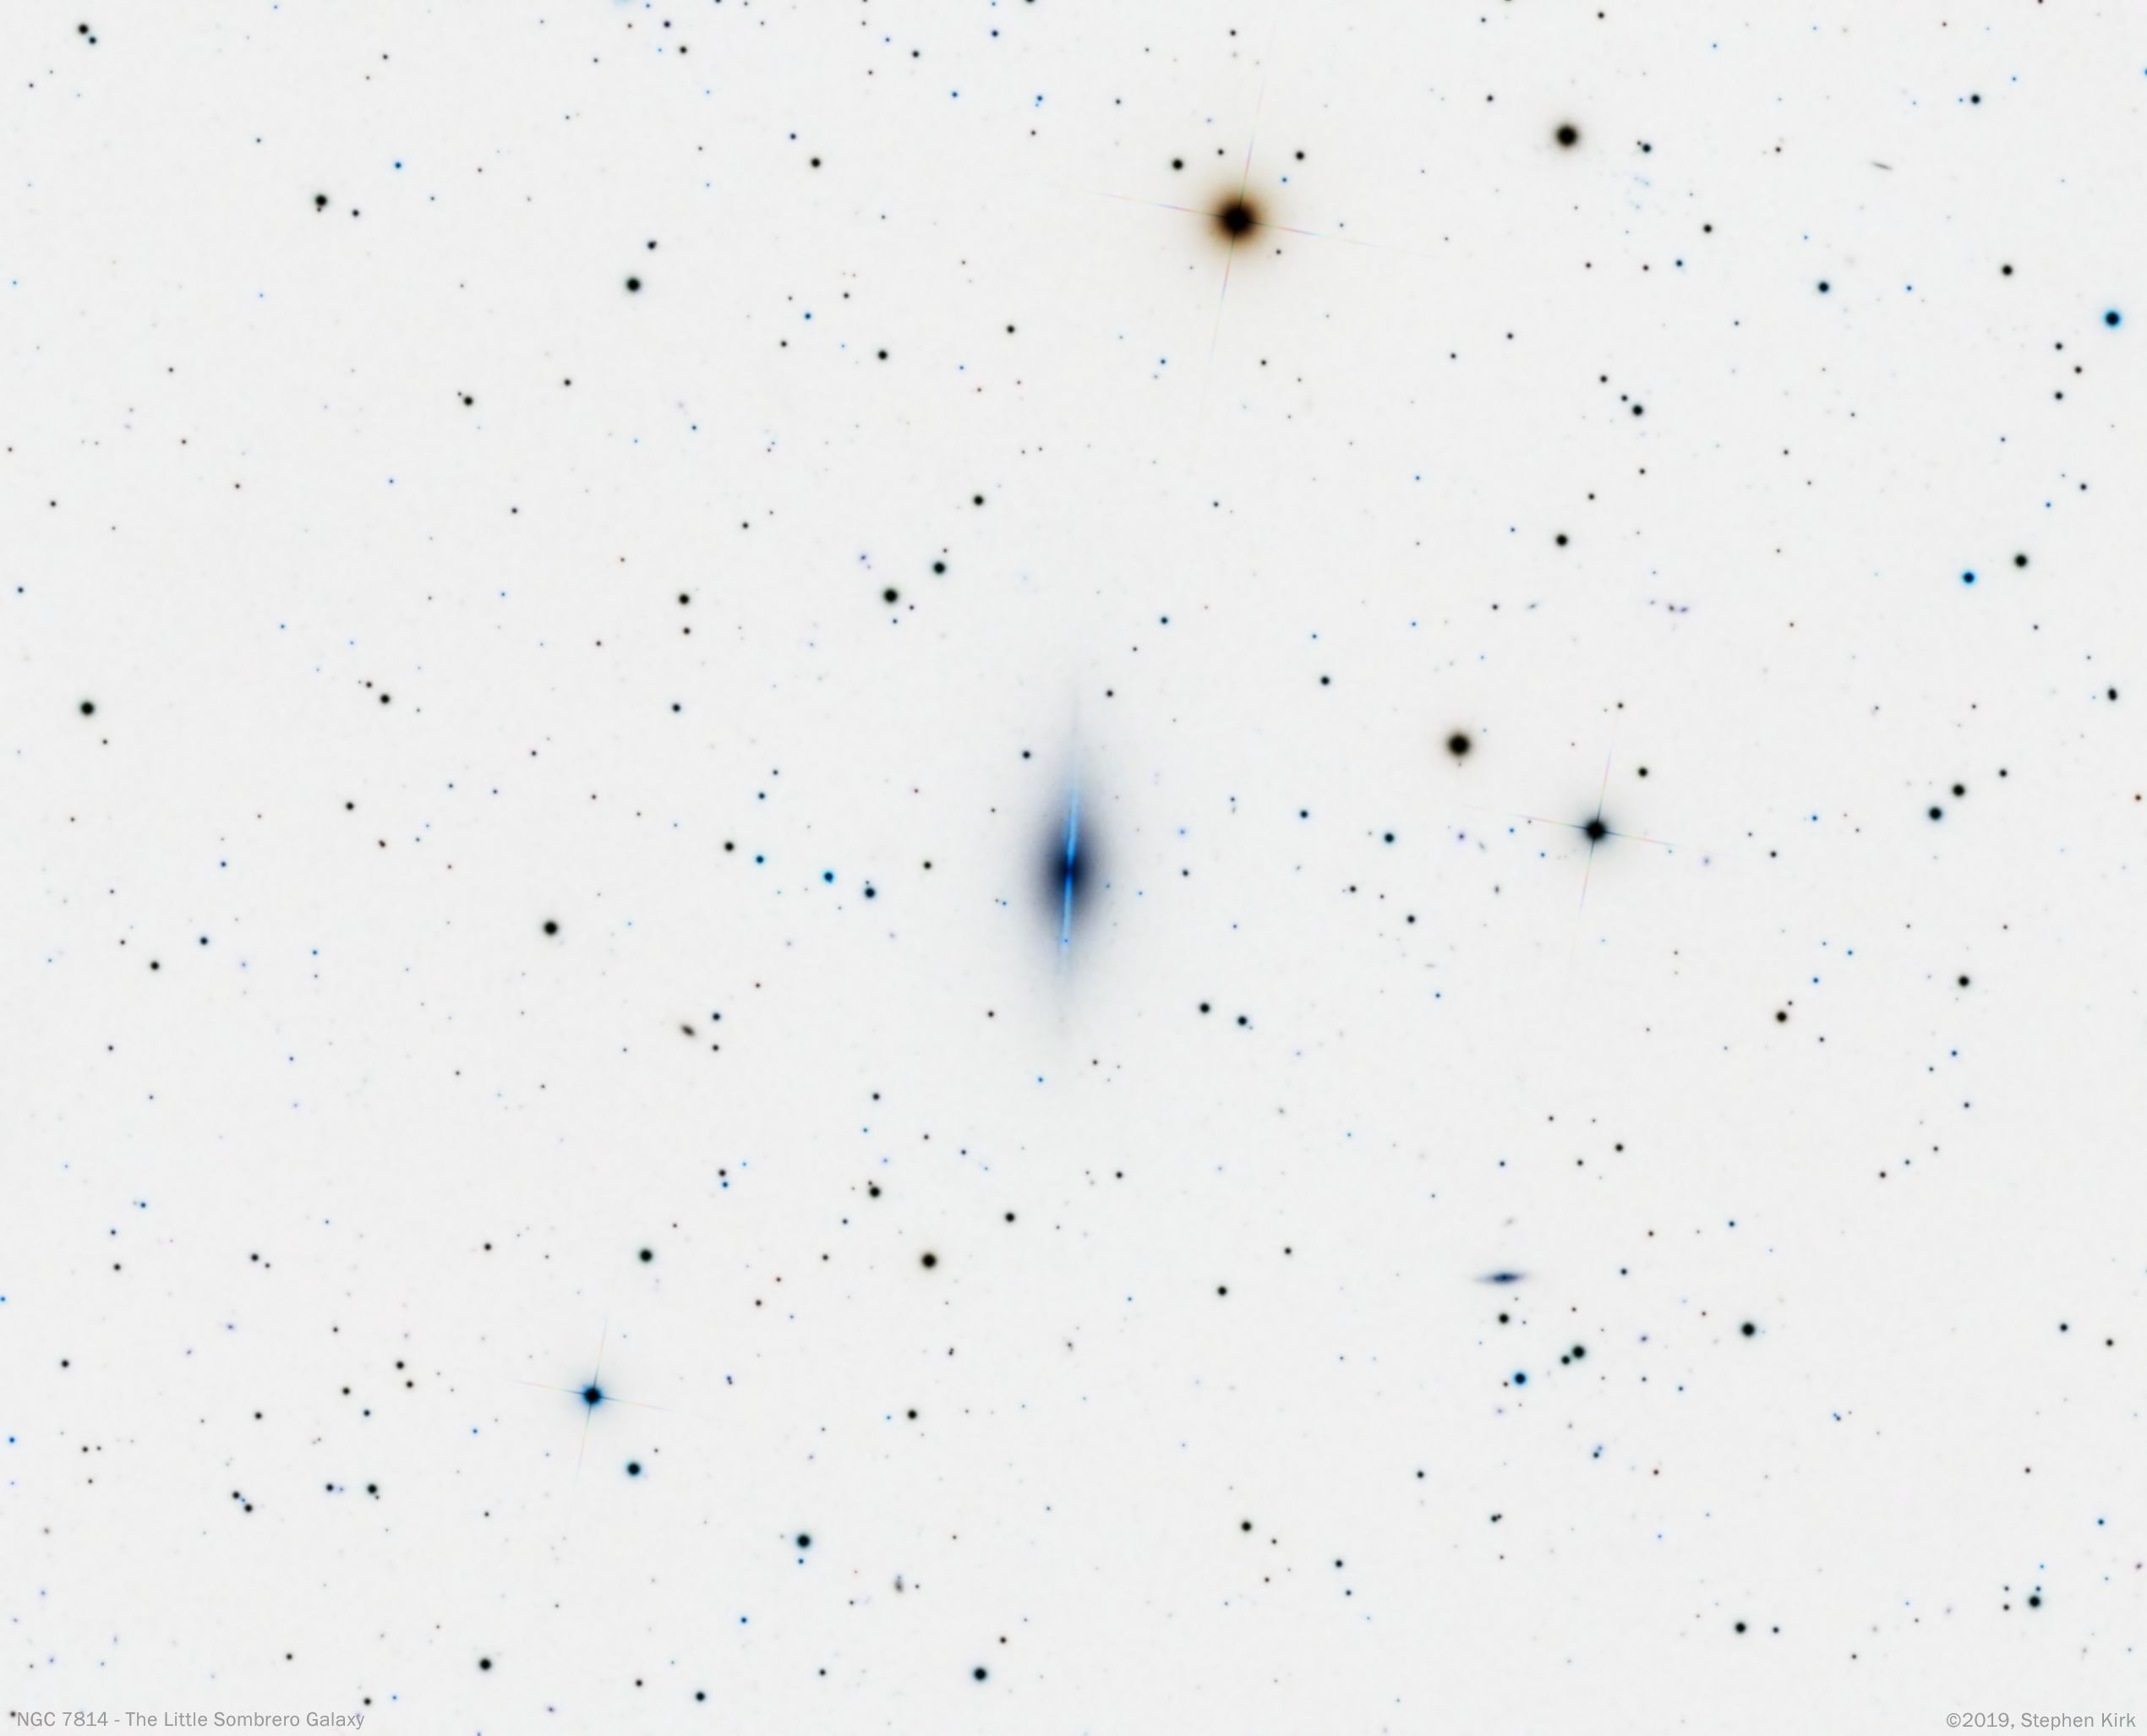
NGC 7814 - The Little Sombrero Galaxy - TEC 140

NGC 7814 is an edge-on spiral galaxy 40 million light-years away in the constellation of Pegasus. IT is nicknamed "The Little Sombrero" because of its likeness to The Sombrero Galaxy M104 in Virgo. Close examination of the picture reveals many tiny galaxies, up to a billion light years away in the depths of The Universe.
The dust lanes of the edge-on spiral arms can be easily seen.
Image Technical Data
NGC 7814 is very remote and so needs a long integration (exposure) time. This image was captured from my backyard observatory in Nottingham, UK over the course of three nights in October 2019 (a very wet period in the UK and the capture nights were 2,17 and 24). It took significant dedication to capture the subframes for this image given the dreary weather circumstances and I nearly gave up on several occasions! I used my TEC 140 refractor with Atik 460 cooled CCD camera with Astrodon E Series Generation 2 filters on my OAG guided MESU 200 mount.
Integration is a total of nine hours comprised of:
Luminance > 22 x 900s binned 1x1 ; Red > 17 x 300s 2x2 ; Green > 14 x 300s 2x2 ; Blue > 14 x 300s 2x2
Image capture in Sequence Generator Pro and processing in PixInsight and Photoshop CC. The bright star to the top centre is very difficult to control. This star is of course a foreground star in our own galaxy and is millions of times nearer to the Earth than the galaxy.
M38 - Open Cluster in Auriga TEC 140
M38 is the third of three Messier Open Clusters in the constellation of Auriga, in the Northern hemisphere of the sky. The other two Messier clusters are M36 and M37. All of them are easily visible with binoculars and are seen as faint smudges against the darker background. If you read my post on the Constellation of Auriga you will see all three of the Open Clusters in the same image

Image Technical Data
Imaged from my back yard in Nottingham, UK on the 18th January 2020 whilst high overhead from my location. I used my TEC 140 refractor with Atik 460 cooled CCD camera and Astrodon RGB E Series Generation 2 filters. I used my MESU 200 mount guided with OAG.
All exposures binned 1x1: Red > 12 x 180s ; Green > 14 x 180s ; Blue > 13 x 180s. This gives a total integration time of just under two hours.


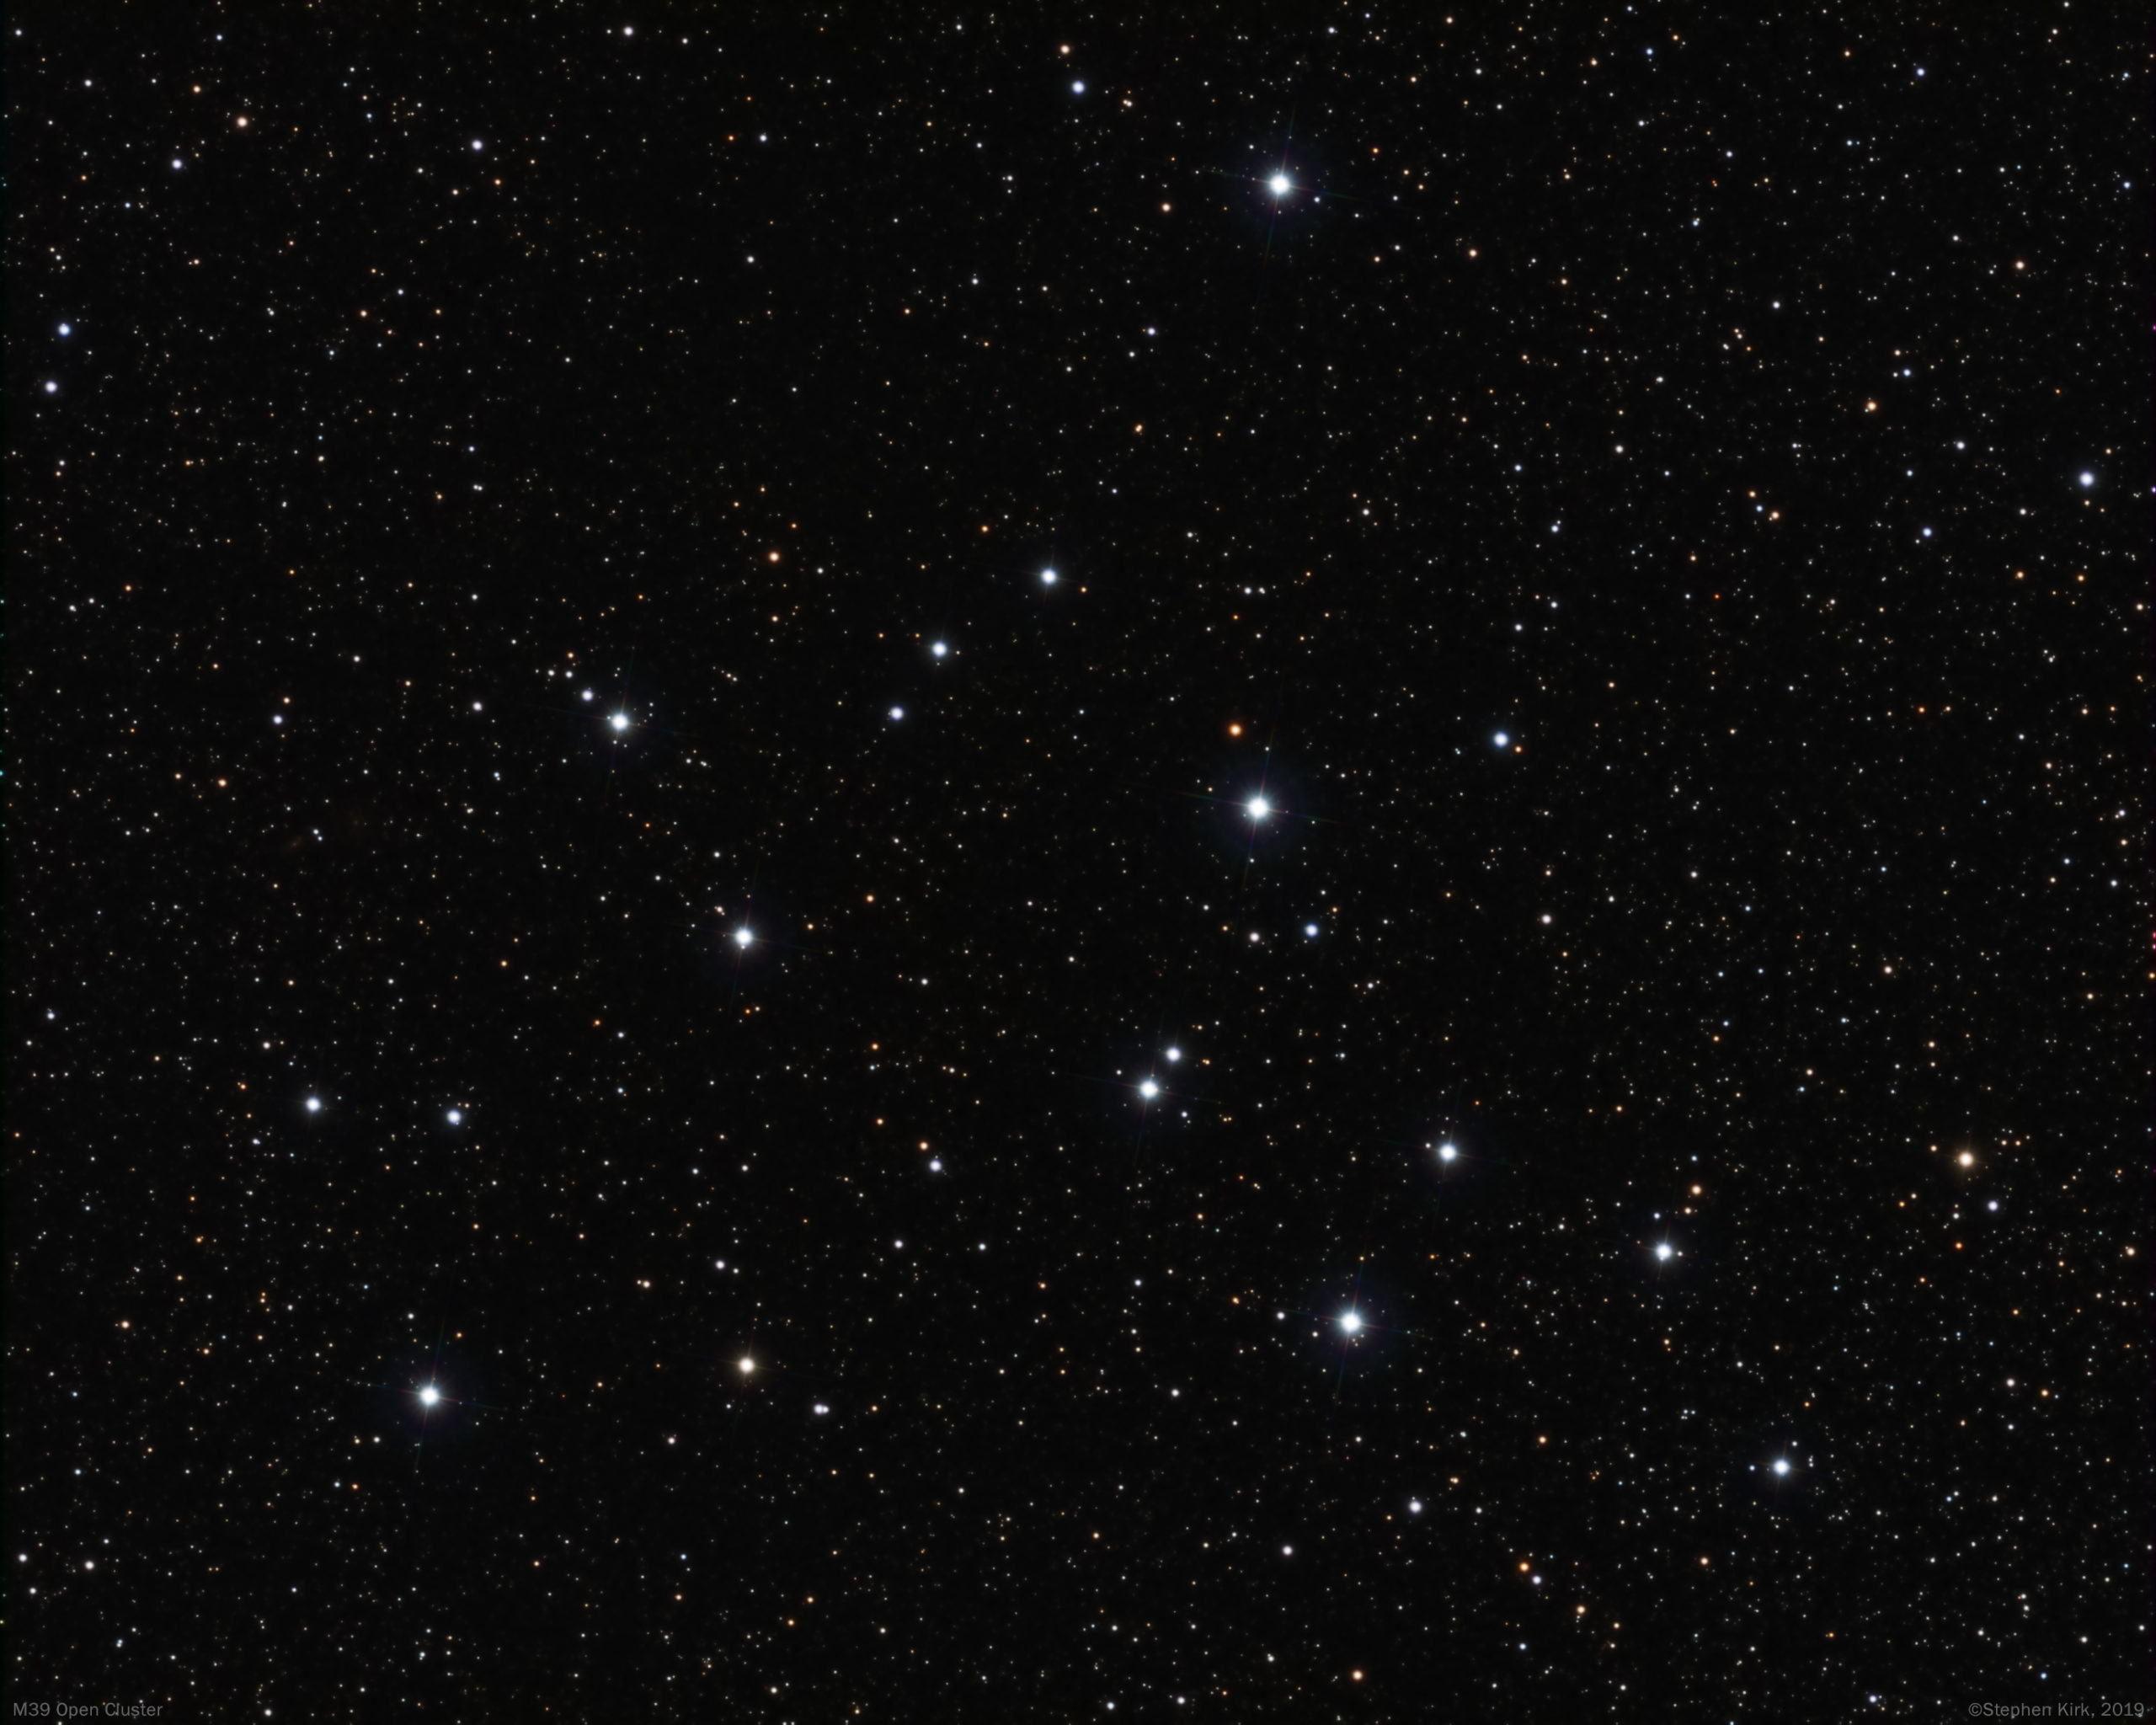
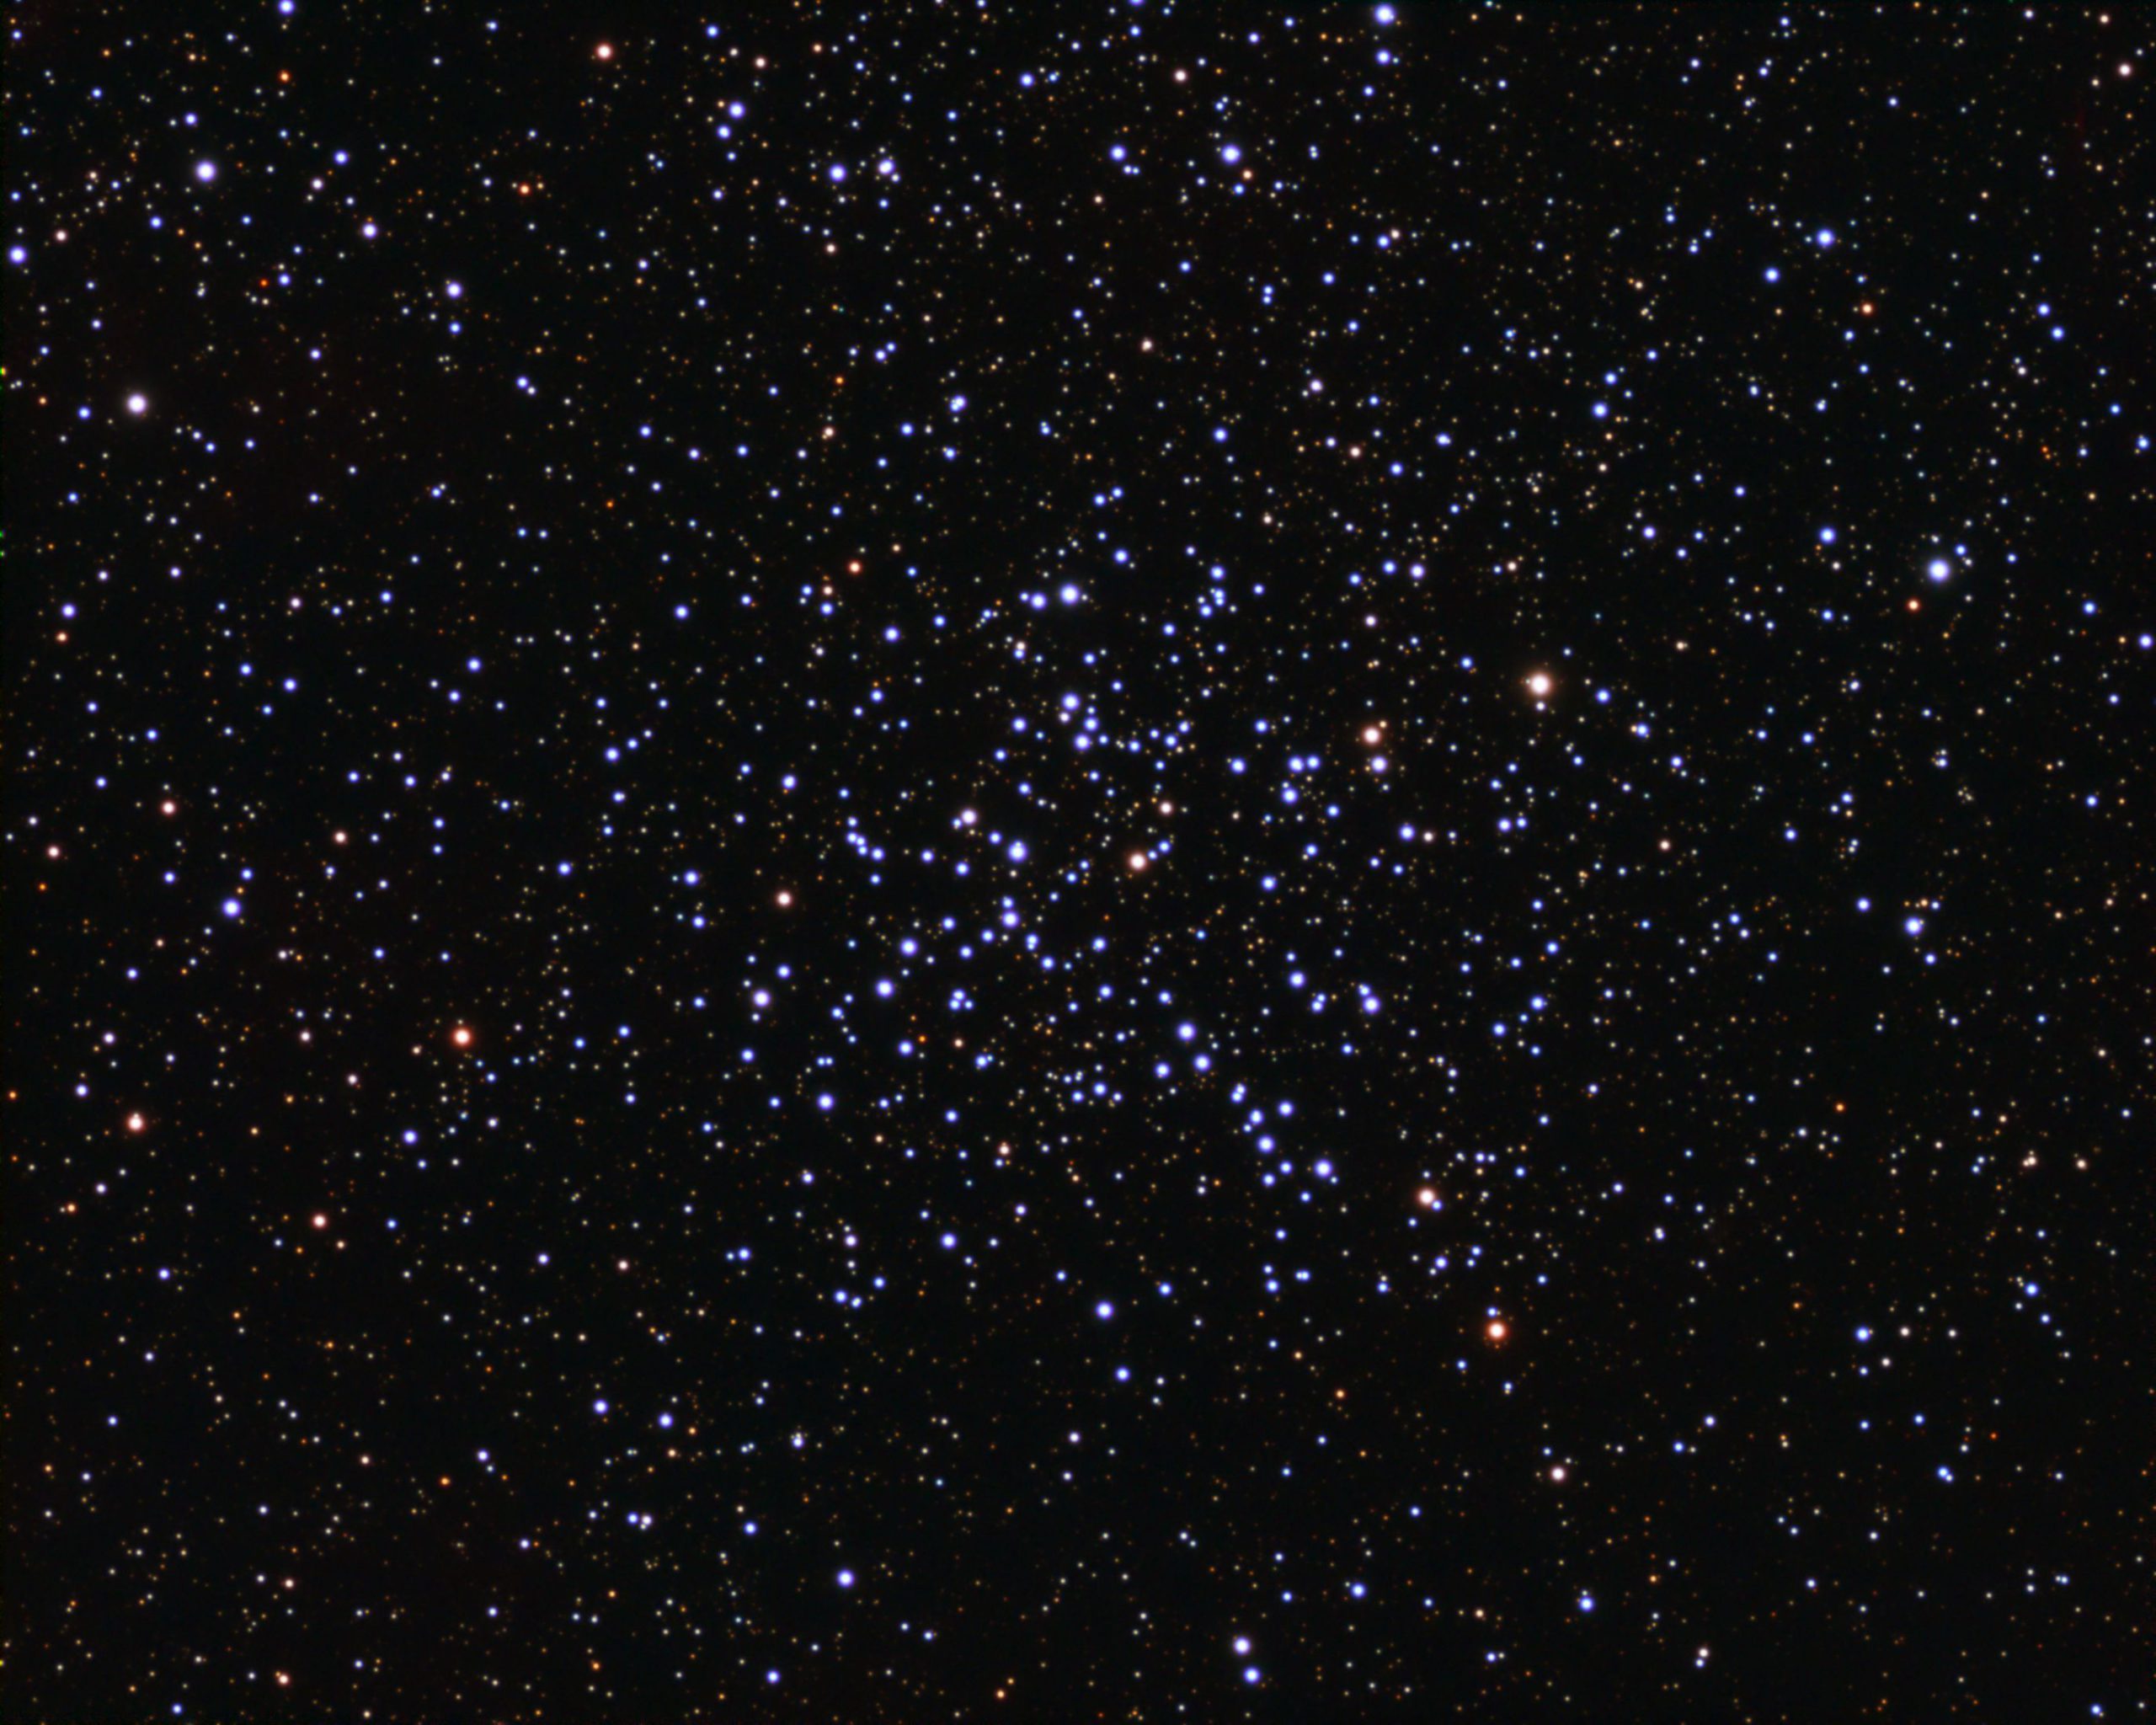
M39 Open Cluster in Cygnus - TEC140 refractor
M39 is an open cluster, about 1100 light years distant, in the constellation of Cygnus, The Swan. M39 is about 30 arc minutes in diameter, about the width of the full moon. The Cygnus constellation abounds in interesting objects and The Milky Way galaxy flows straight through it.

ImageTechnical Data
Imaged from my backyard in Nottingham, UK on the 16th October 2019 when it was high overhead from my location. I used my TEC 140 refractor and Atik 460 cooled CCD camera with Astrodon RGB E Series Generation 2 filters. I used my MESU 200 mount guided with an off-Axis guider.
All exposures binned 1x1:
Red > 15 x 120s ; Green > 12 x 120s ; Blue > 15 x 120s


I hope you like it! :)
NGC 6946 - The Fireworks Galaxy - TEC 140

NGC6946 is located on the border between Cygnus and Cepheus and is a fairly bright galaxy about 25 million light years away. It is dubbed the "The Fireworks Galaxy" due to the unusually high number of supernovae that have occured here - ten - that have been observed during the last century. Typically a galaxy would normally have one per century and it is not known why this galaxy has had ten times the average.
The galaxy is quite heavily obscured by dust within our own galaxy and this is probably the reason why it was not accorded the honour of a Messier catalogue number.
Image Technical Details
Imaged from my back yard in Nottingham, UK, during September 2020 whilst high overhead. I used my TEC140 refractor with Atik 460 CCD camera and Astrodon LRGB Generation 2 E series filters and a Ha (3nm) filter. Out in front of the filter wheel was an IDAS light pollution filter. MESU 200 Mount was guided with an off-axis guider. Transparency for the luminance was good but was poor for the RGB and Ha data.
Lum > 36 x 300s 1x1s ; RGB > 14 in each x 300s 2x2 ; Ha > 14 x 300s 2x2
Image capture in SGP and processing in PixInsight and Photoshop CC.


Unboxing, Impressions And Initial Setup Of QHY268C and OAG-M
Introduction And Rationale For Purchase
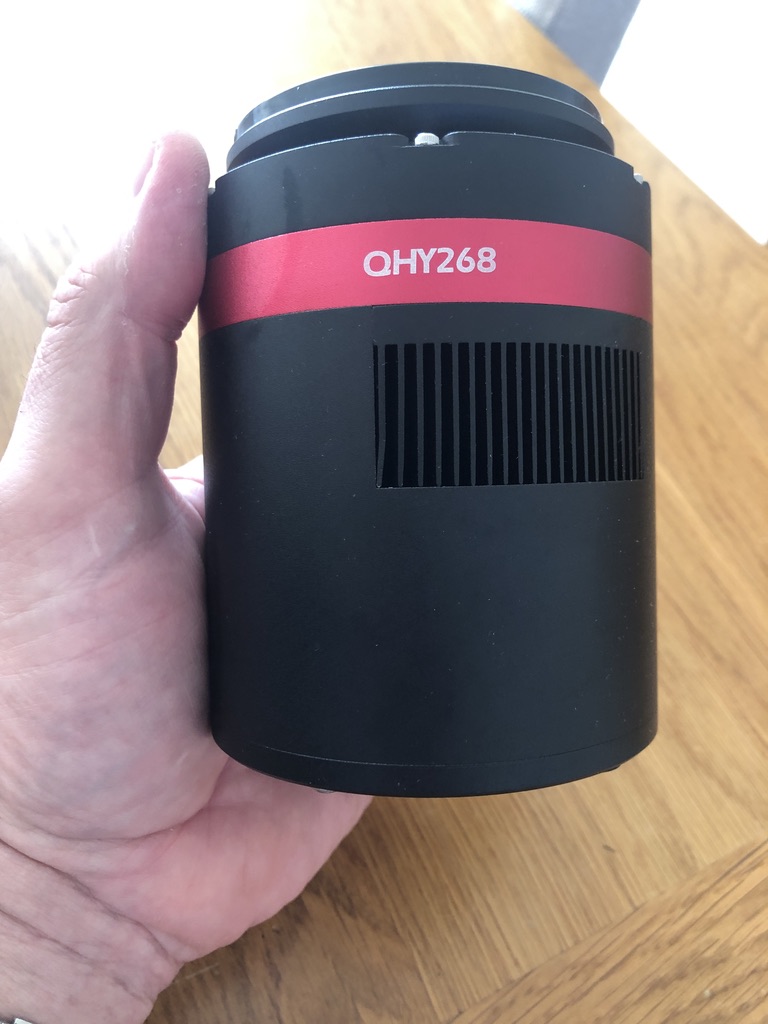
I am already a very happy owner and user of two CCD mono cameras and associated filter wheels; an Atik 460 CCD with EFW2 and a Moravian Instruments G2-8300 CCD camera. I have been very pleased with the performance of both, I enjoy using them and will continue to do so. I have connected my Moravian CCD for use exclusively on my Samyang 135mm lens and it is semi-permanently attached to it. I have my Atik460 semi-permanently attached to my TEC140 scope. I do not want to disturb these two hardware arrangements. However, this leaves me without a camera for my excellent Takahashi FSQ85. So with this in mind I needed to acquire a third, cooled, astro-imaging camera.
I considered buying a QSI683 CCD or maybe an Atik 8300 chip CCD camera. However, I think the era of CCD in amateur astrophotography is coming to an end and CMOS appears to be the strategic direction with the development of bigger and more sensitive imaging chips. I do not want to make an unwise investment in another CCD camera so I started my investigations into the popular CMOS based cameras from the Chinese QHY and ZWO brands. After reading some superb reviews about how incredibly good the current generation One Shot Colour (OSC) CMOS cameras are nowadays, with their 16 bit depth, high resolution and high QE efficiency allied with very low read noise and zero amp glow I decided to take the plunge and order the QHY268C camera. This camera offers incredible bang for the buck being based on a large APS-C sized, 26 million pixel sensor, the Sony IMX571. This is the same sensor as that used in the superb Fujifilm XT-3 mirrorless camera.
We are plagued with cloudy skies in the UK at the best of times and I do not want to invest in another mono camera with filters at this point. I have so many half finished images with data sets missing a colour or two that it is sometimes taking me several years to finish an image, which is most frustrating as I am sure many of you know only too well. You get partly through the run, with say the LRB filters done then the cloud rolls in for three weeks and at the end of that time the object has set behind the houses or trees for that particular year! I want to be able to take images with just a light pollution filter and get something in the can in an evening or two when there is a clear period. This is my rationale for buying a OSC camera.
At the time of this writing - September 2020 - I am aware that QHY and ZWO are working on APC-C sized mono cameras too and I may consider one of those in the future. However, for now I wanted a OSC for this purchase. The resolution of the current generation OSC sensors is so high that even with their Bayer matrix, they are capable of very good narrowband imaging with the multiple wavelength narrowband filters from Otolong and others, for instance the L-Extreme filter.
I understand and accept that ultimately, nothing will beat a mono sensor and the associated filters. By going mono you are dedicating the entire sensor's resolution and pixels to that one wavelength. So with mono you will always, ultimately, gain a better resolution and S/N ratio. Accepted. However, that is in an ideal world. I am very much removed from that ideal world nirvana. Firstly, in the UK, I live in a cloud infested country underneath the junction of major Atlantic, European and Polar weather systems converging above with the jet stream running straight above me. Consequently I sometimes struggle to get two clear nights of imaging in a month. It can often be much worse than that even and I have known winter seasons that were complete write-offs with only two or three nights across the entire season. As I alluded to before, collecting multiple filters worth of data to complete a broadband or composite image is simply not possible in reasonable timescales if a deep integration is needed. In the past we would have to suffer this because the alternative, OSC, simply was nowhere near as good as mono. That is no longer the case with the latest generation of OSC sensors from QHY and ZWO. Secondly, with my skies and circumstances, I am never going to be able to "compete" with some of you guys who live in climates where more clear skies are available to spend the time on mono filter images. I simply do not have that clear sky time and will never have the data quality to be an APOD contender. I accept my limitations but still love the hobby of astrophotography for its own sake, not to be a champion. This makes the latest generation of OSC cameras very attractive to me.
I bought this camera from Bern at Modern Astronomy together with the QHYOAG-M. I want to off-axis guide the FSQ85 which this camera will be mostly connected to. However, I also sometimes want to mount it on my Williams Optics Redcat 51 with the OAG, depending on the object target. Both setups offer a superb, wide field with this camera.
The camera costs a princely £2049 with the OAG another £199. Not insignificant sums by any standards.
Receiving The Camera
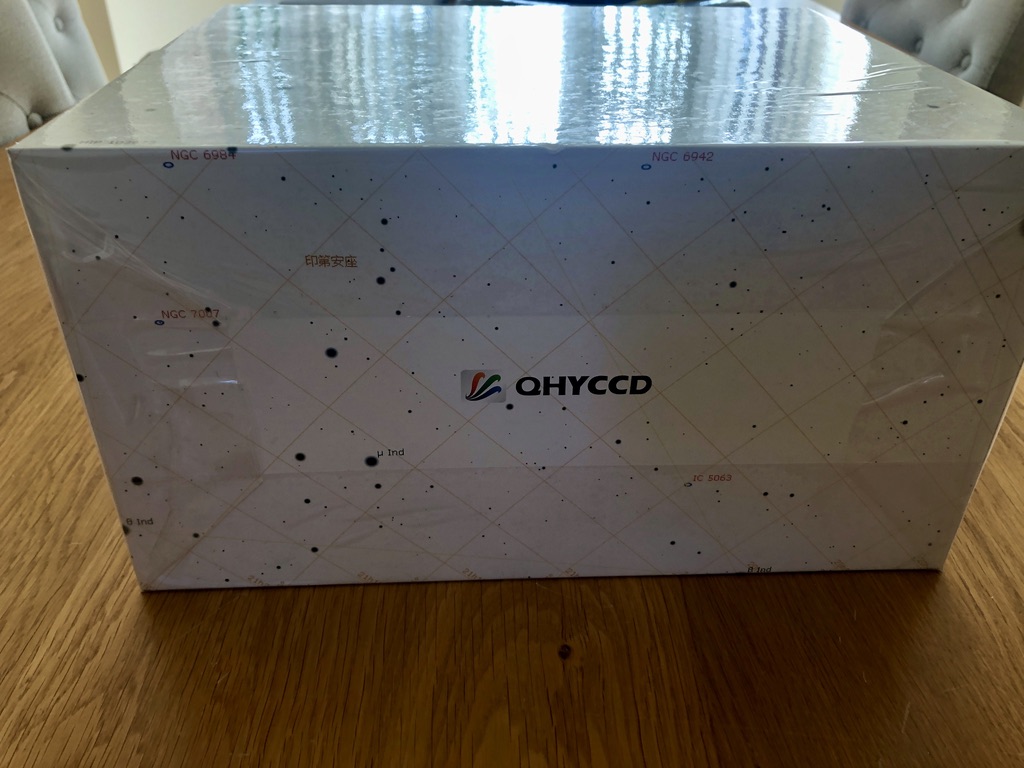
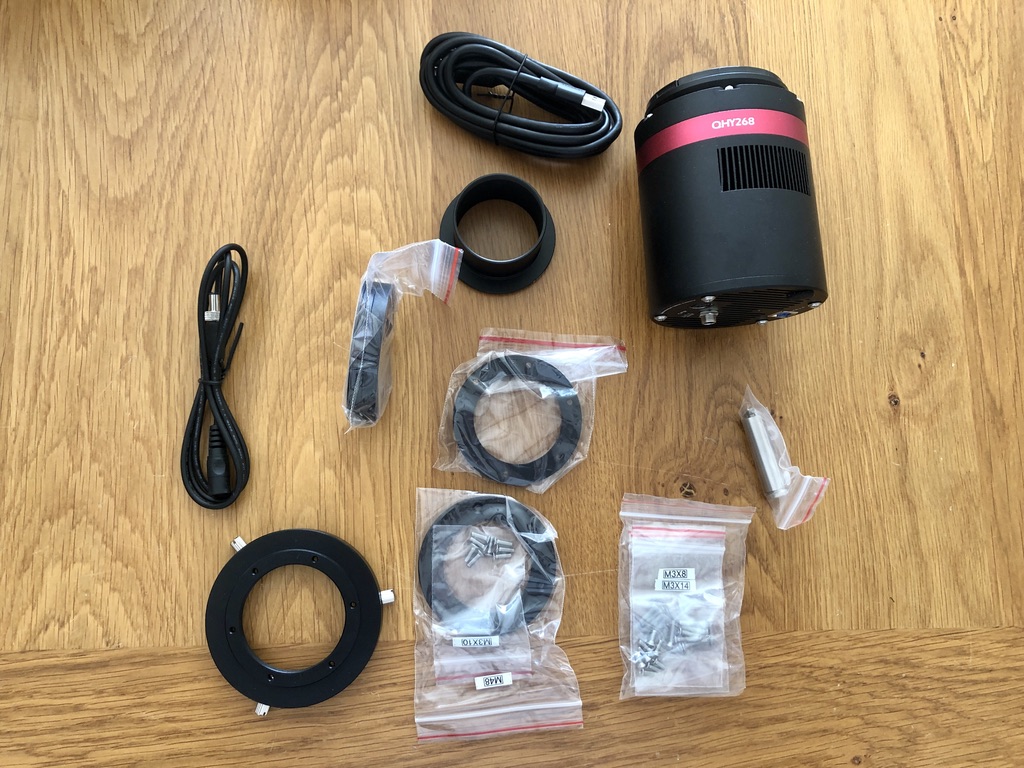
The camera is shipped in a rather nice outer QHY cardboard box which is very sturdy. The lid is shrink wrapped to protect it. The box was immaculate, undamaged and had been protected in transit from Bern by being packed in an outer box with lots of packing. I always keep the boxes of my stuff in case I ever decide to sell the stuff in the future as it makes it more desirably to a lot of folks.
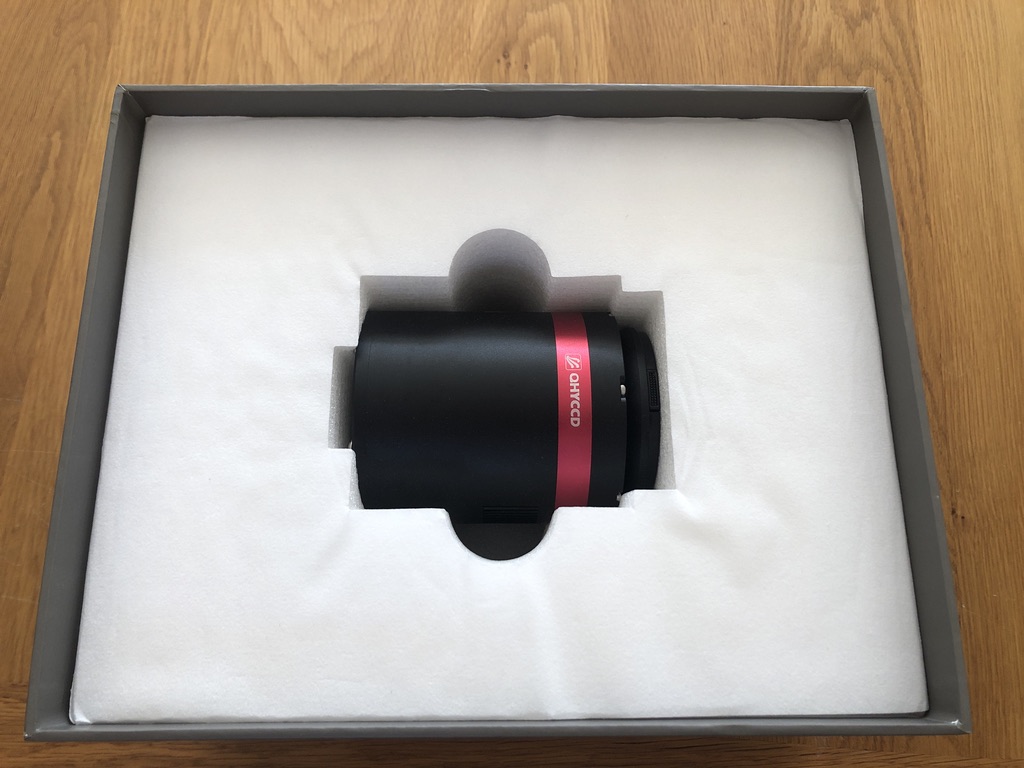
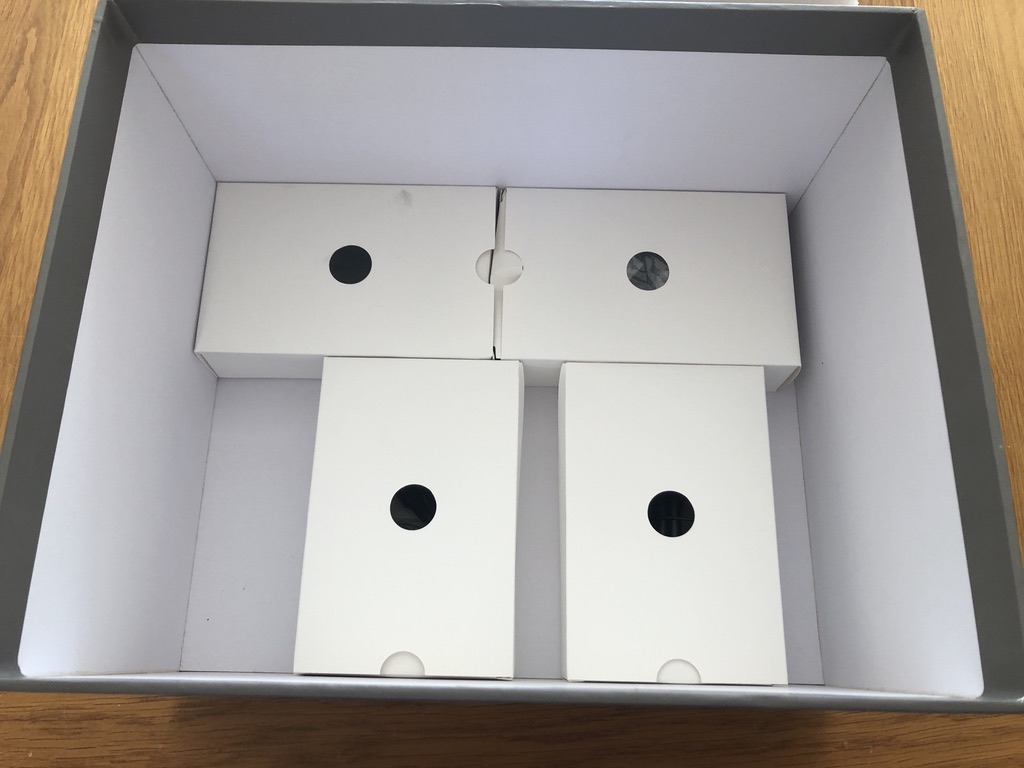
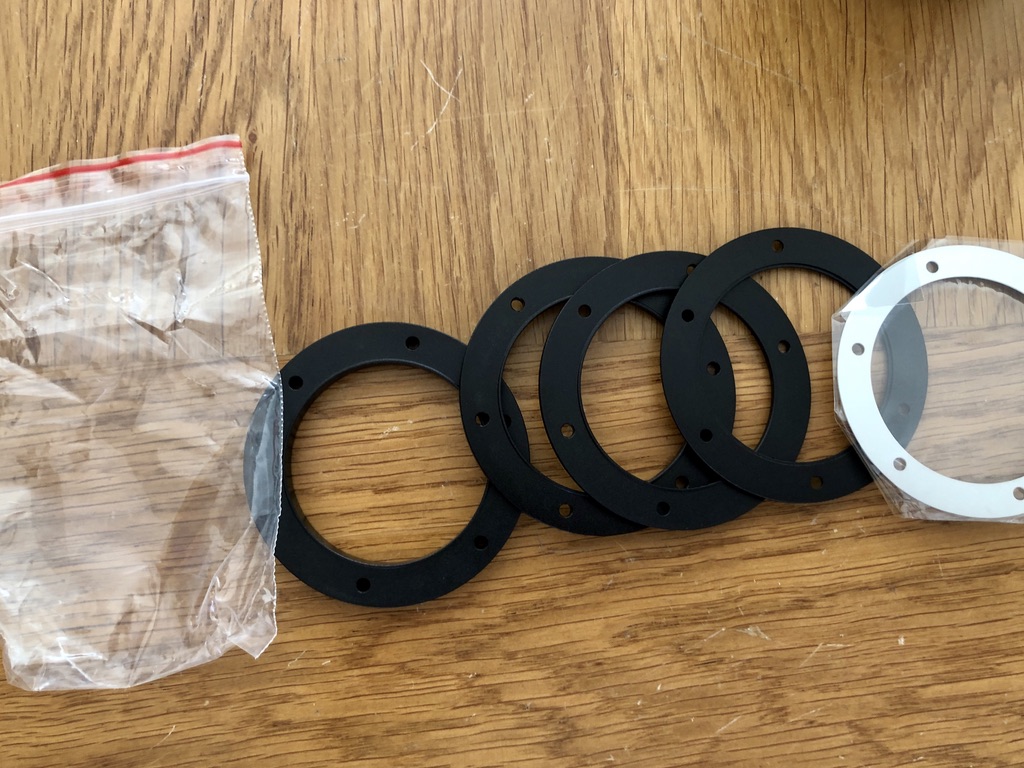
The camera itself is protected in thick, Styrofoam moulded to its shape. Underneath this tray holding the Styrofoam with the camera is a lower area with four boxes that include the spacers, power supply, power cable, cigarette light style power cable desiccant/holder. It is all very neatly packaged. I have no need of the power cable or supply and made my own power cable with a 2.5mm plug to connect into the 12v power distribution bar on my mount.
The camera is a solid, robustly built, quality item with a nice hefty feel to it without being overtly heavy. The sensor seems huge compared to my other astronomy cameras! Gone are the days with the tiny sensors!
So far, so good. I'm impressed (and remain so, but more about that later ;) ).
Connecting The OAG to the Camera - Attempt 1
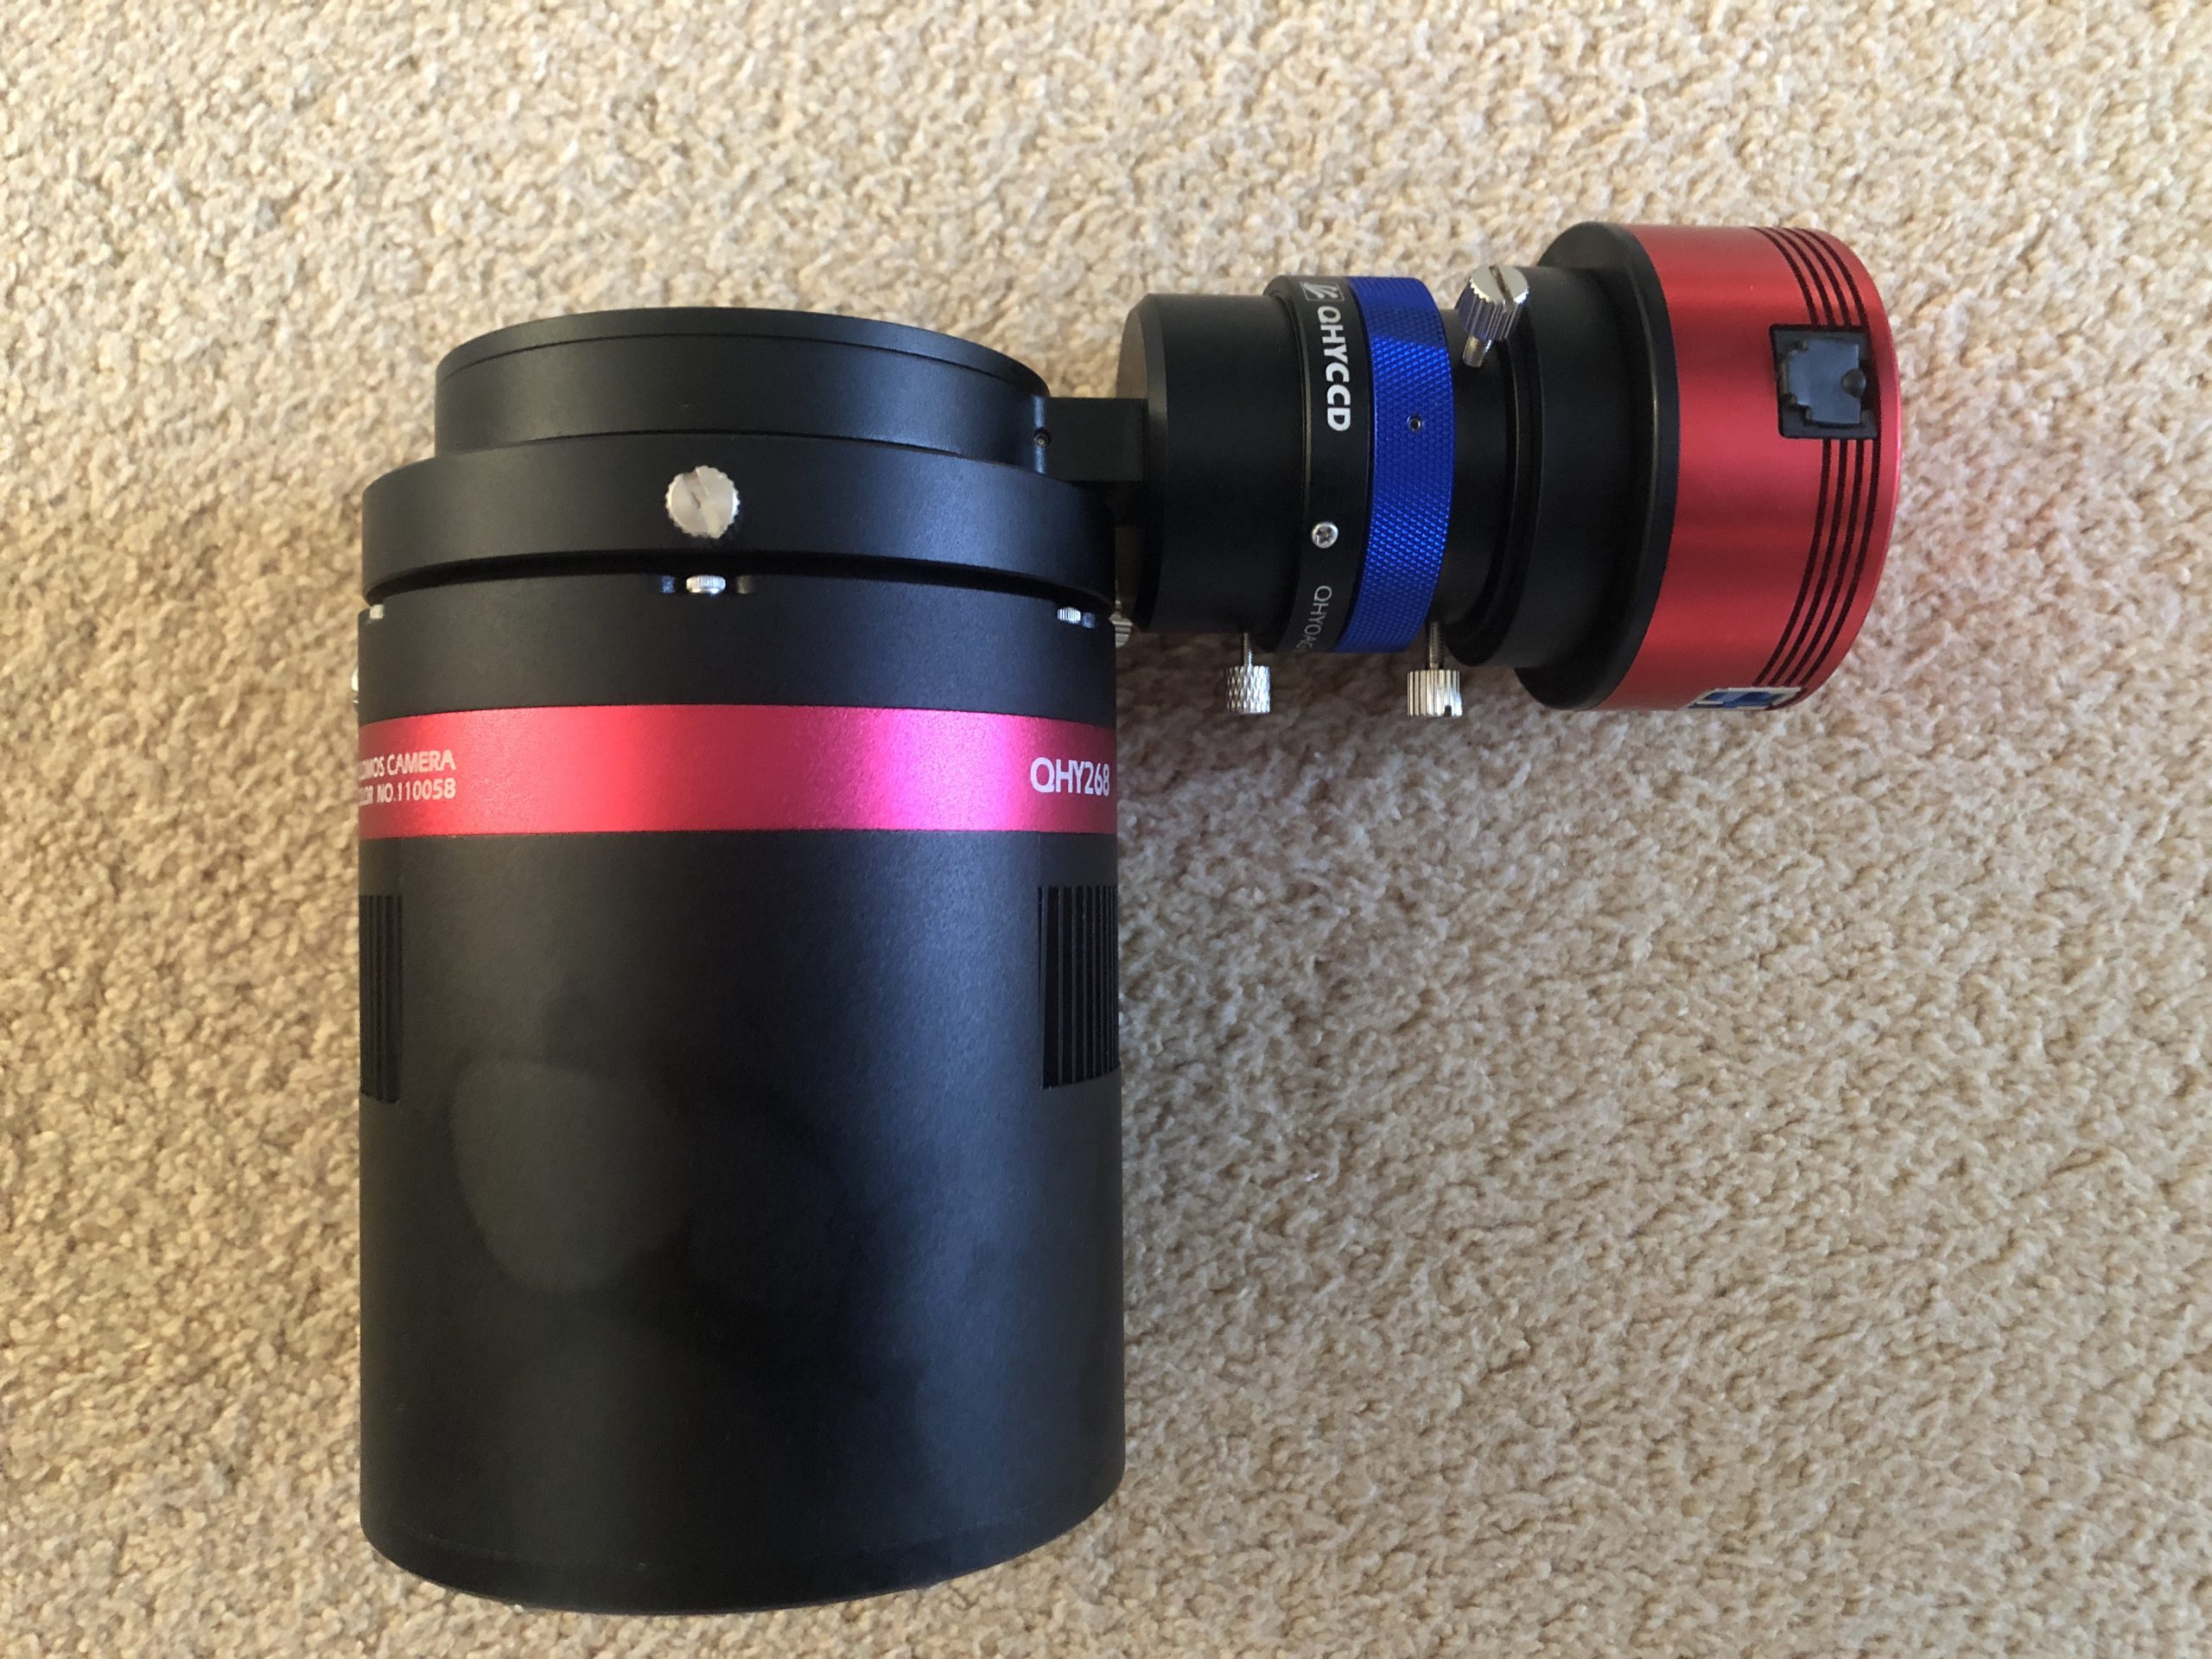
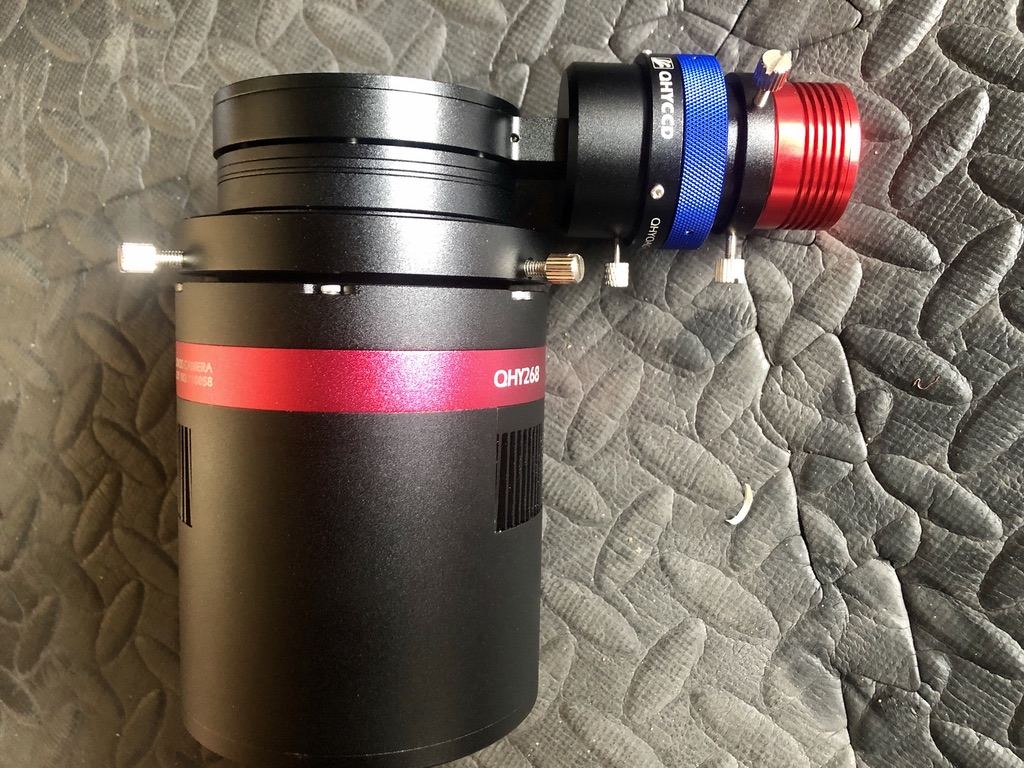
I want to set up my QHY268C camera - a OSC as discussed - with the OAG, a QHYAG-M which presents an M54 thread. No need for a filter wheel in a colour camera (more on that later).
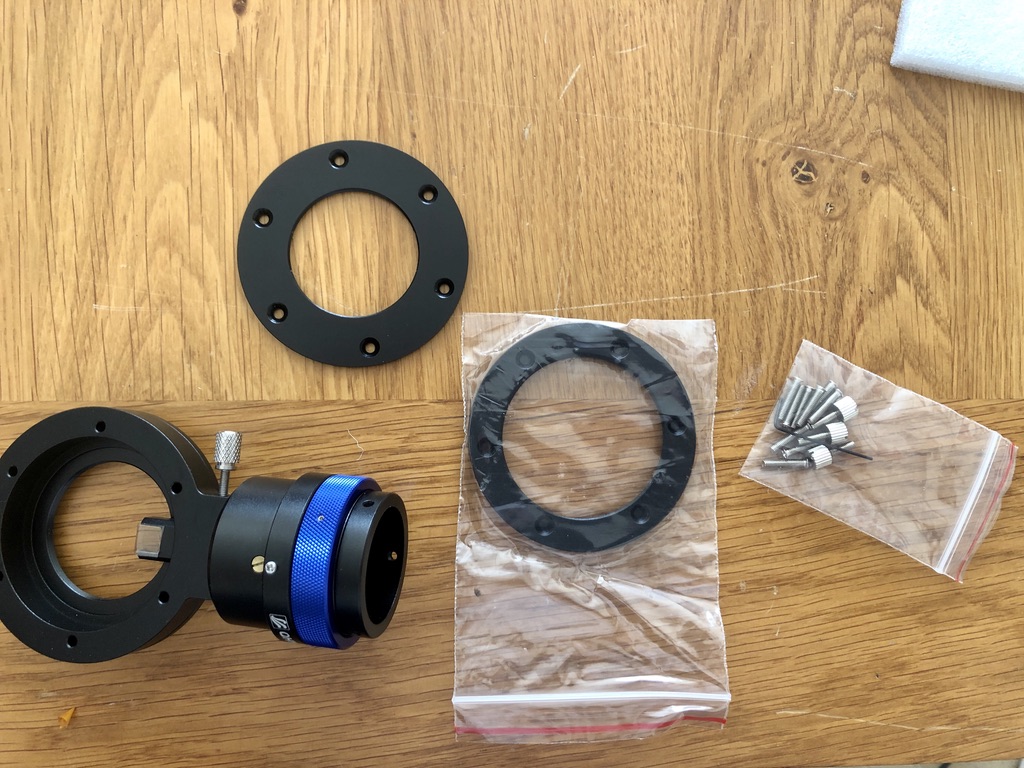
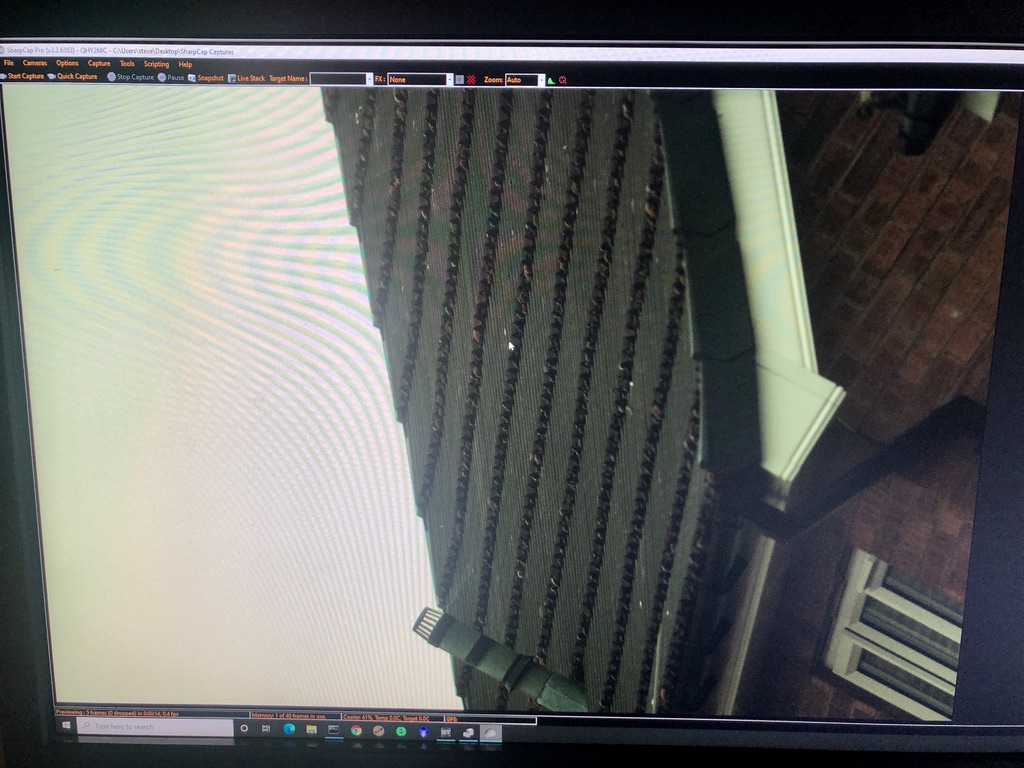
It took me a while to work out how to connect the OAG camera side to the tilt plate adapter that the camera body is held onto with three knurled thumb screws. On the telescope side I am (for now) using a M54 to 2" nosepiece adapter. I then installed my puck style ASI174mm camera into the OAG, as indicated in the QHY OAG diagram, since the diagram implies that this arrangement will work.

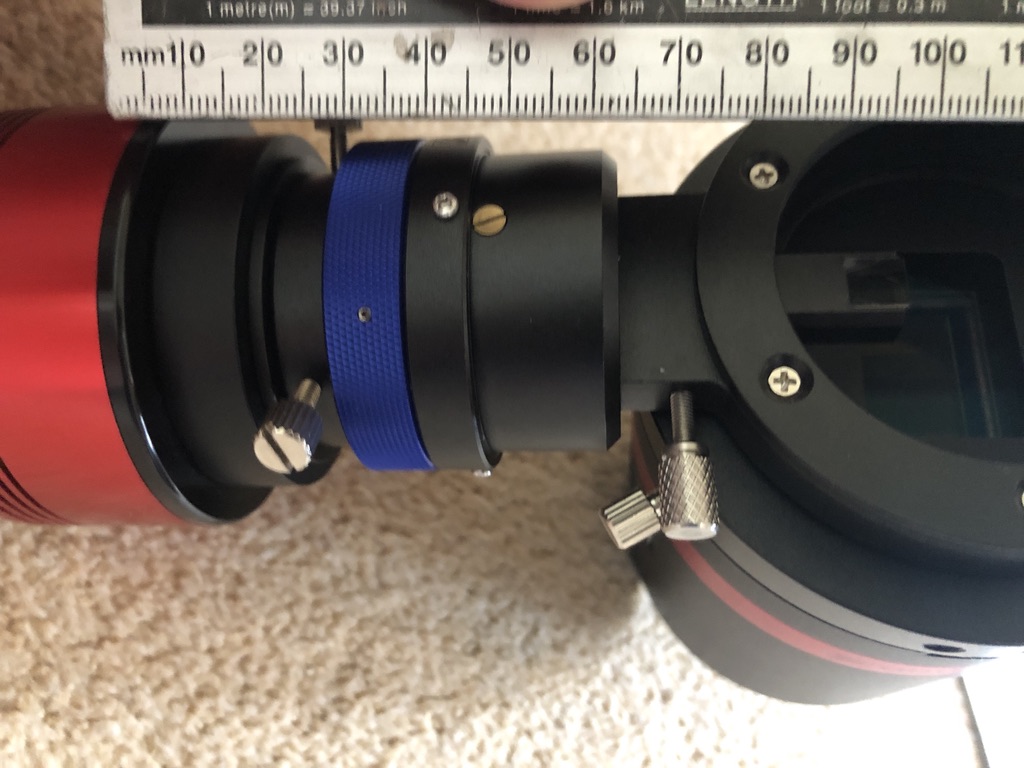
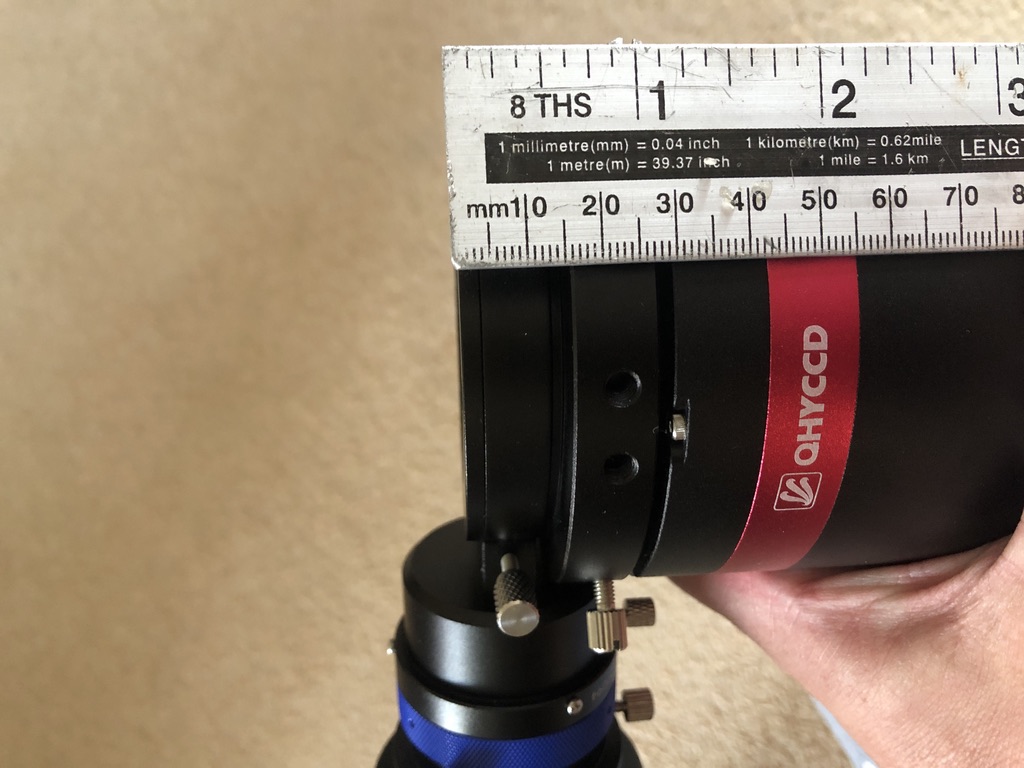
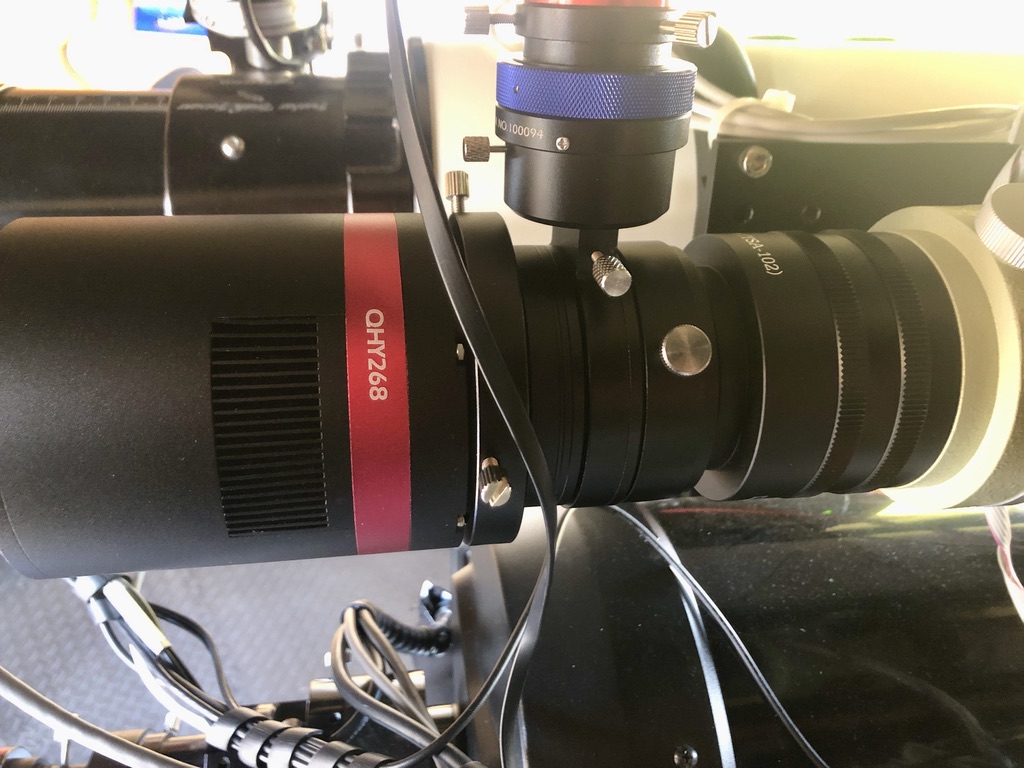
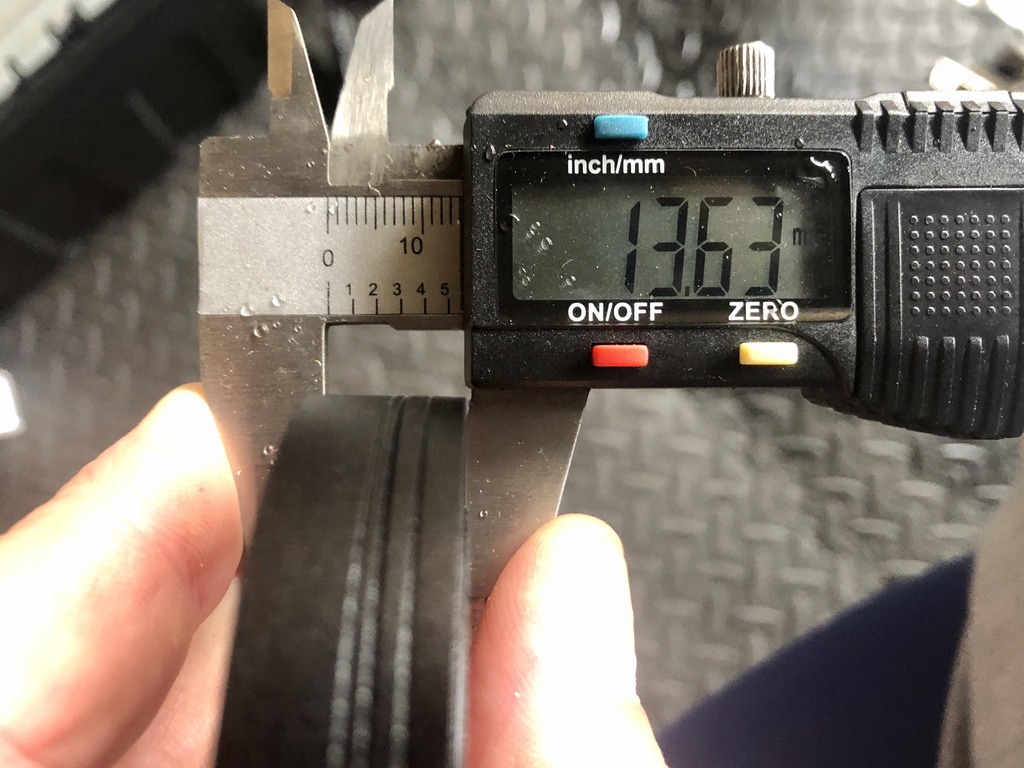
I then tried to get the focus set up on my Takahashi FSQ85 to the main imaging camera and the guide camera. This telescope has quite a long backfocus distance from the rear of the focuser housing to the point of focus, about 195mm, that I will discuss in another post. However, with the the necessary [expensive] Takahashi adapters I got the main camera into focus using Sharpcap and my Lakeside autofocus. Cool. Then, firing up PhD2 I tried to focus the guidecam in the OAG. Miles out of focus and after much cursing and fiddling with gain, offset and exposure of the ASI174M I measured the distance from the sensor of the guidecam compared to the distance of the main QHY268c imaging camera and as can be seen in the photos above, they are radically different. The main imaging camera is about 42mm from the front of the nosepiece whereas the guidecam is the best part of 100mm - 58mm in difference!!!!!! No wonder I cannot focus the guidecam, it is much too far from the focus point of the FSQ85!
Connecting The OAG to the Camera - Attempt 2
It had been a long day with this, work, the kids and other things. After sleeping on it, after some head scratching and upon further thought, the distances are different of course because the ASI174M is a "puck" style camera, its imaging chip is being held above the top of the OAG. Clearly I need to use a 1.25' "bullet" style guider where the chip is right at the front and can be inserted deep into the focuser of the OAG-M, thereby significantly shortening the distance from the guidecam chip to the FSQ85s focal plane.
As it happens, I have a ASI120MM mini guidecam on another rig so that I could test this theory. So I installed this and I could start to see the blurred outline of the trees and houses that I was using to perform this daytime test of focus of the QHY268C and the guidecam. So with this bullet cam I was nearly in focus but not quite - it needed to be a bit nearer to focus still. So using some of the spacers provided with the QHY268C and a bit of experimentation, I found I needed 13mm of extensions to "pad" out the OAG camera side to the camera. Upon thinking about it, this makes sense because this padding would be where a filter wheel would be if one was installed! I also needed to buy some 35mm M3 screws off of Ebay since the ones provided with the camera are not long enough. You need six of them. They cost pennies.
As soon as I did this I could get the two cameras simultaneously focused. Note however, that if you move the adjustable pickoff prism in the OAG, you will make the guidecam either nearer or further away (from the FSQ focal point) and may need to refocus the guidecam. So it is important to get the pick-off prism adjusted so that it just clears the line of sight of the main camera's imaging chip. Otherwise you will get artefacts on your light frames. Flats will take care of this of course but it is better not to have the prism in the light path to the main imaging chip in the first place.
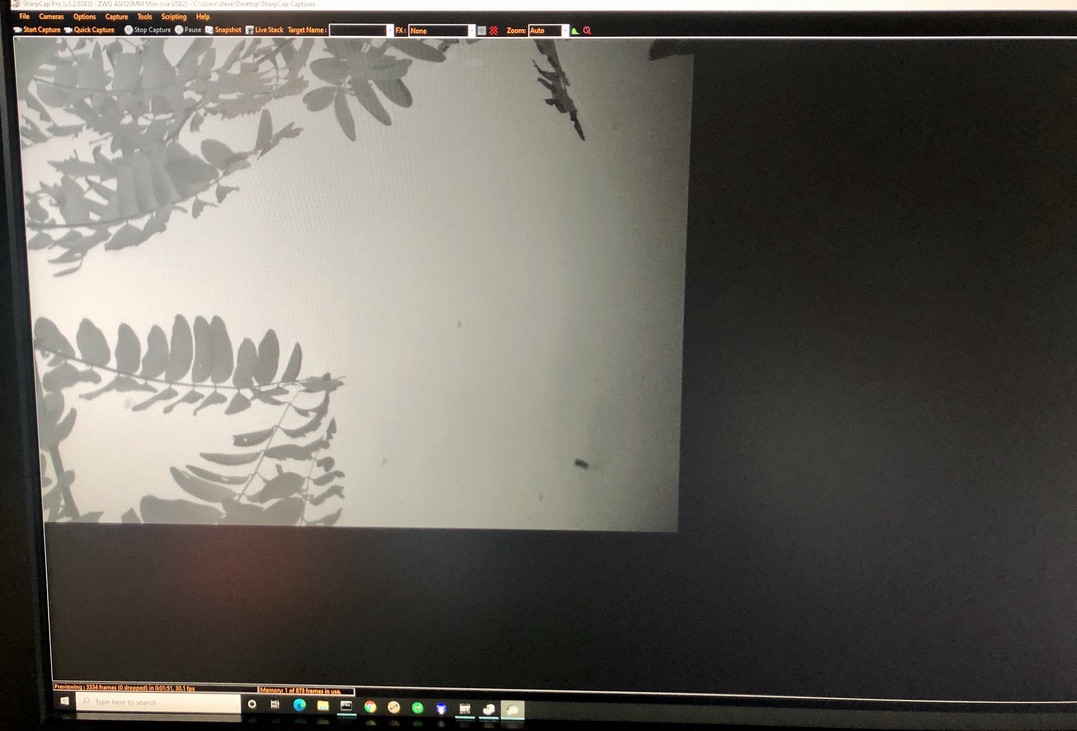
As is normally the case when wanting to test new gear, the weather is not cooperating at all. I managed to get one 300s light frame in before it clouded over on the evening of Friday 25th September 2020 :) We've had no clear skies since then🙄.
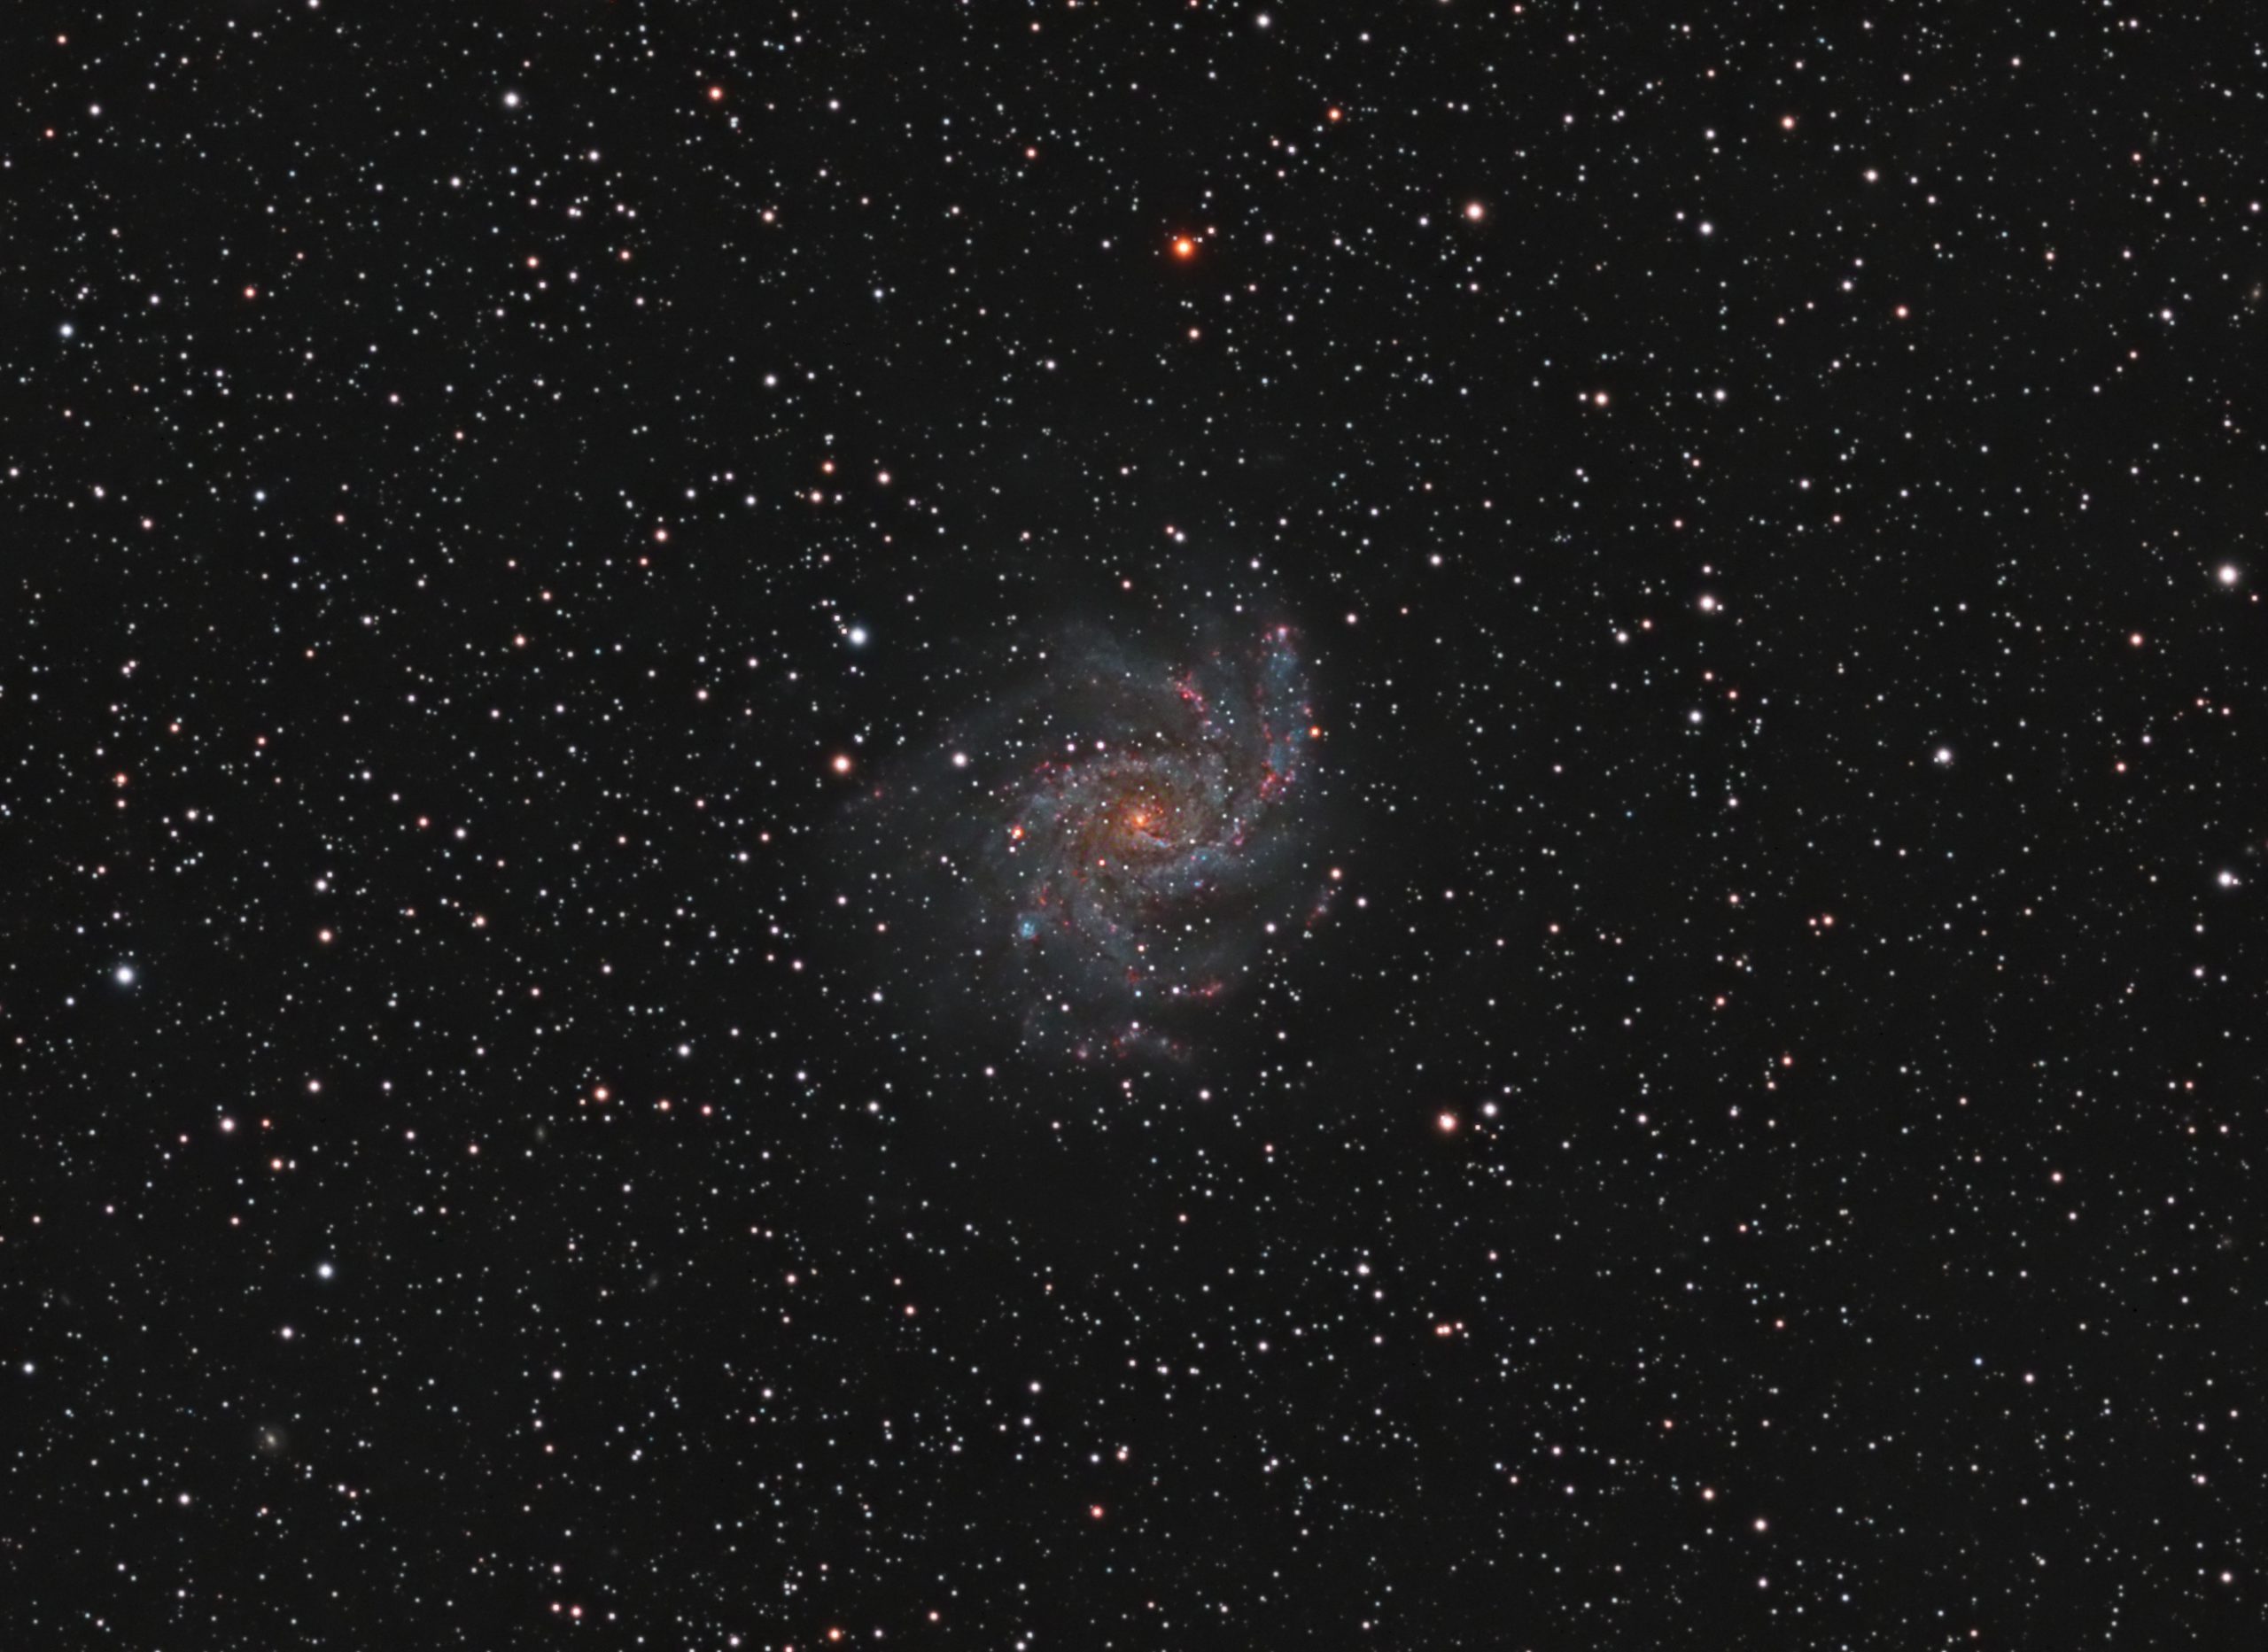
It is an impressive start, all I did was unbayer the image in Pixinsight and then stretch it and boost the colours a bit. Nothing else.

After quite a bit of fiddling about that took several hours I now have the main camera and the guide cameras in simultaneous focus on my FSQ85.
I look forward to good things from this combination and will update my site with my latest thoughts. So far, very early in my career with this camera, I am very impressed!
N.B. These views of my QHY268C camera and OAG are mine. No one paid me any money or offered me any discounts or services on anything astronomy or otherwise nor did they request I write this article. I bought everything I use on my website with my own money and offer my thoughts, ideas and opinions to help others because I enjoy doing so, not for material or financial gain for myself.
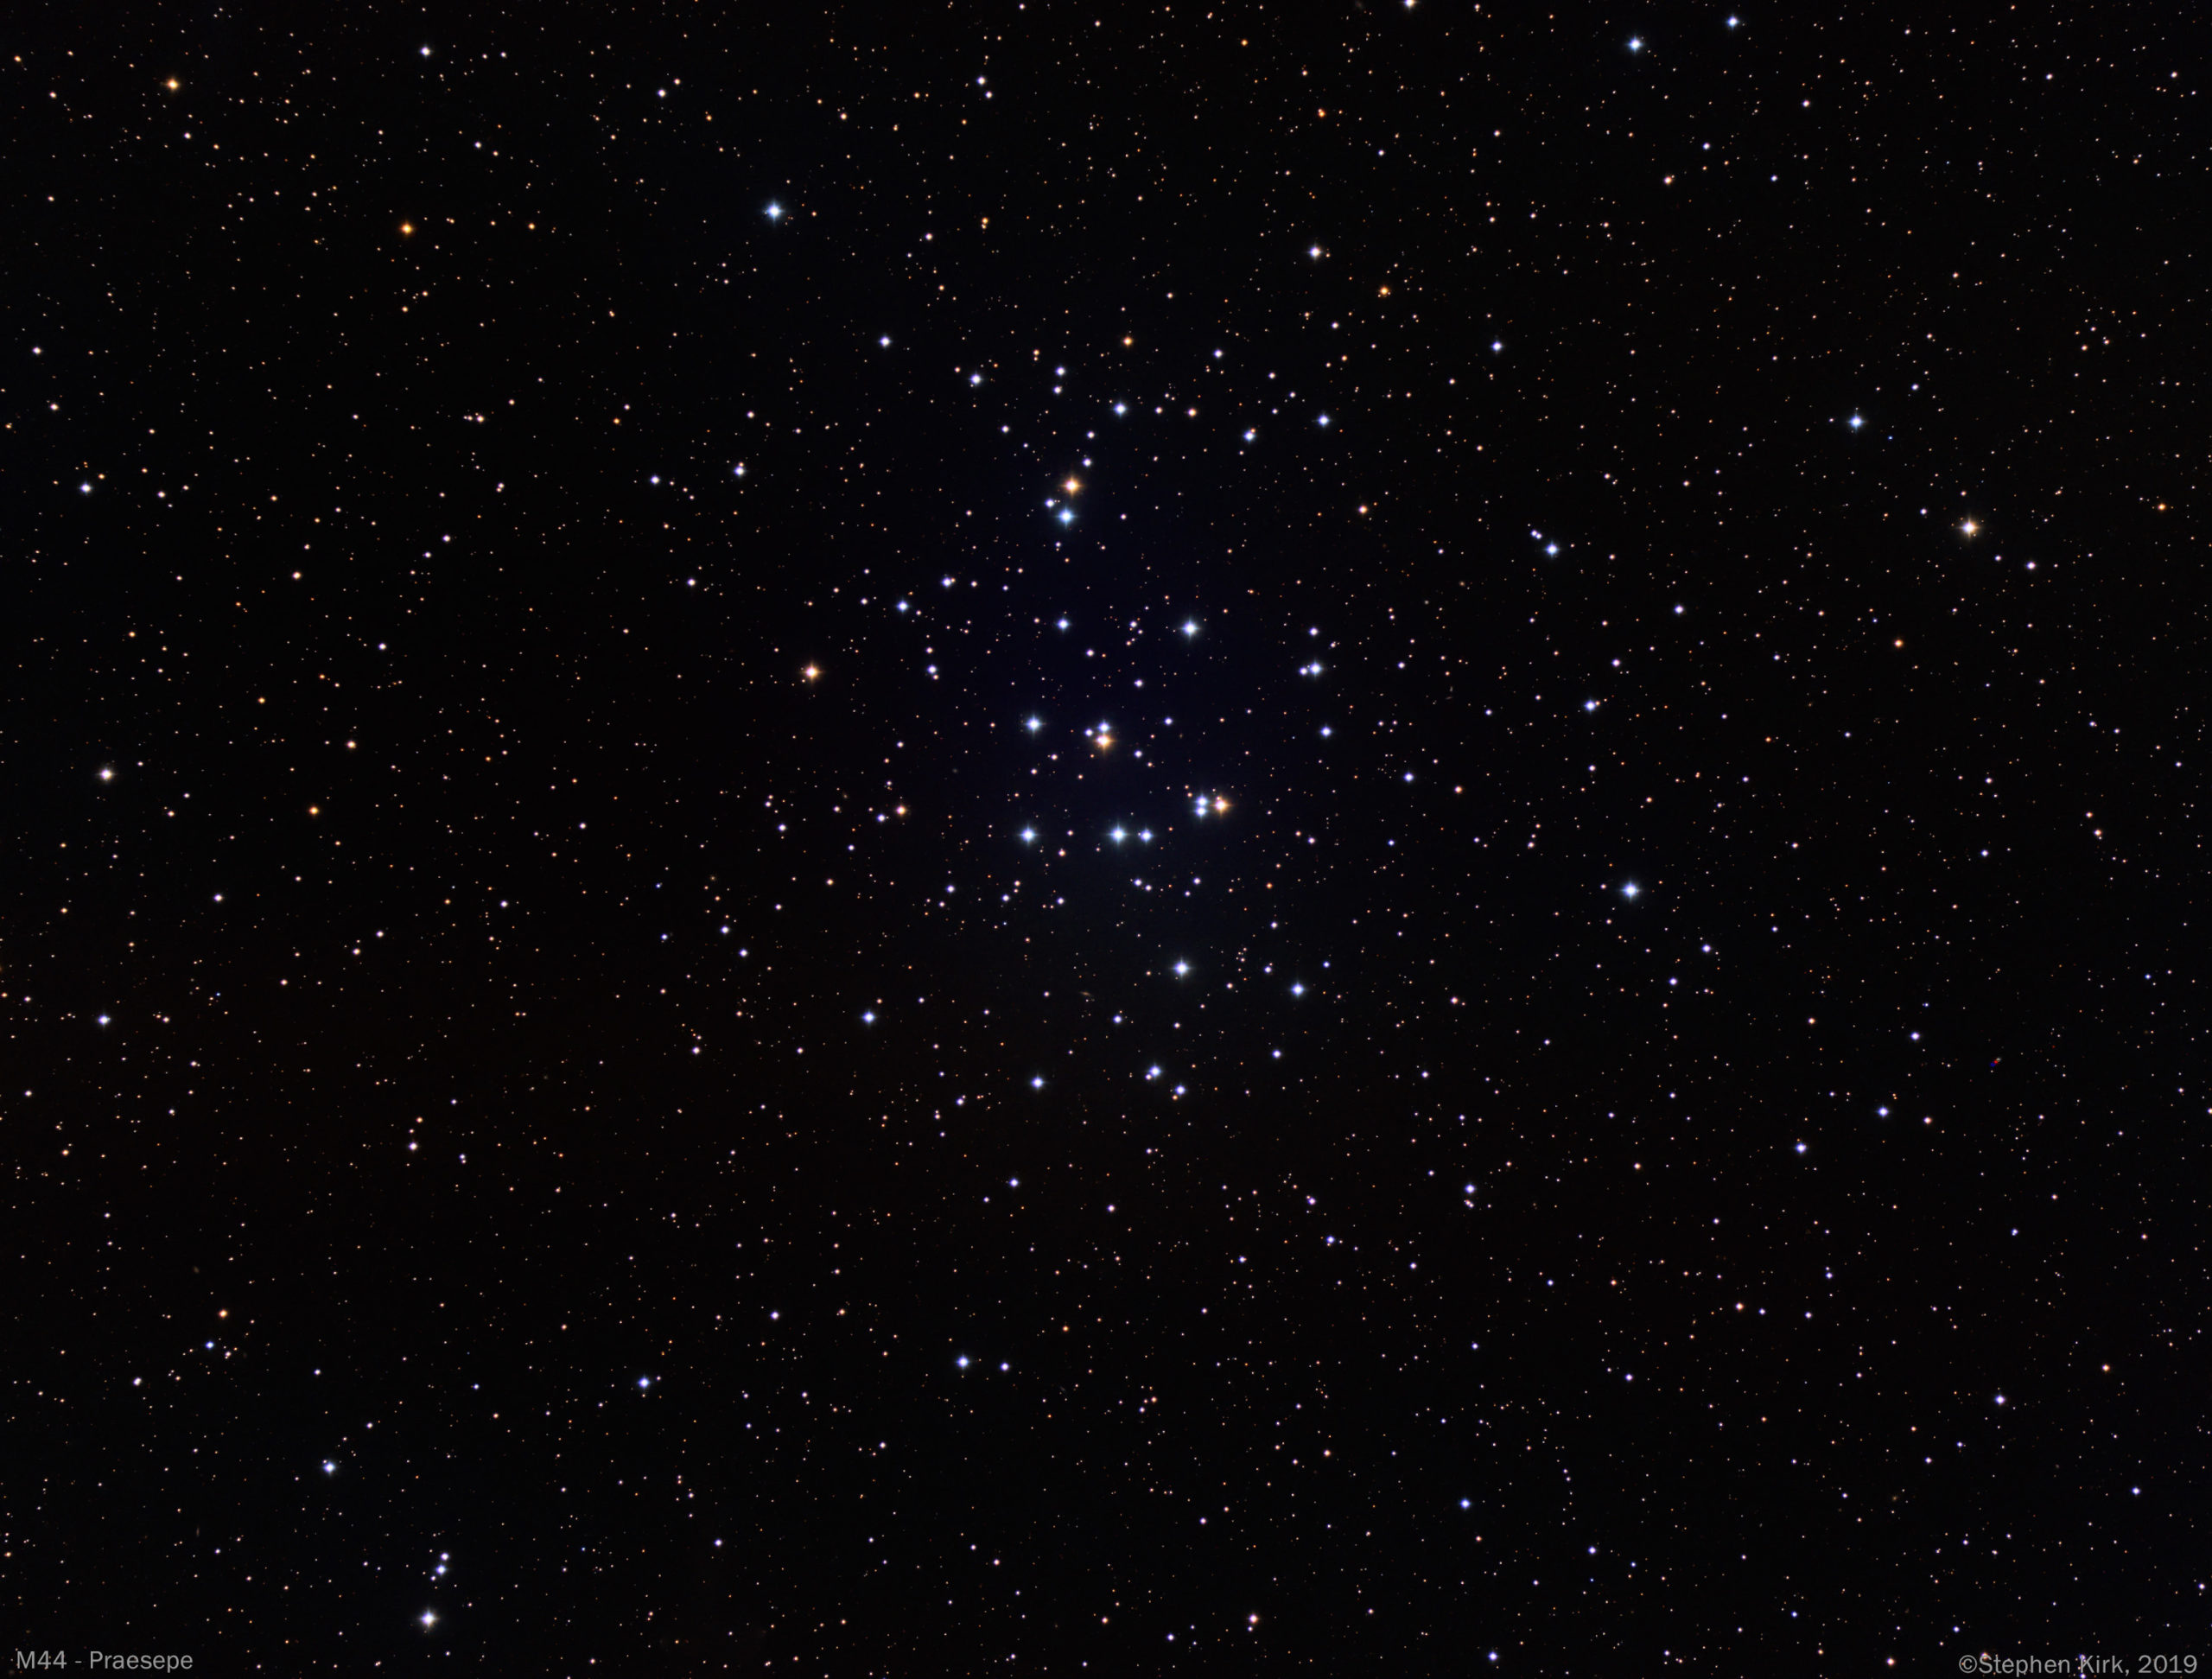
M44 - Praesepe - with FSQ85
M44 or "Praesepe" as it is called, is a famous open cluster visible in the late winter/ springtime in the constellation of Cancer - The Crab. It is often nicknamed The Beehive cluster since it resembles a swarm of bees when viewed in a wide-field telescope or binoculars. Along with M45 it is one of the most immediately breathtaking sights in the deep sky. At about 510 light years it is one of the closer Open Cluster to the Earth and is about 12 light years across and contains about 1000 stars. Note the tiny, distant galaxy in the bottom of the cluster PGC24400.

Image Technical Data
Imaged over two evenings, the 22 and 23 February 2019 from my backyard in Nottingham, UK. Conditions were far from ideal with a high, hazy mist that made transparency poor and subsequent processing difficult.
Captured with Takahashi FSQ85 and Moravian G2-8300 CCD camera with Astrodon RGB filters. All data binned 1x1:
Red > 14 x 120s ; Green > 16 x 120s ; Blue > 14 x 120s
Mounted on MESU 200 telescope mount and guided with OAG


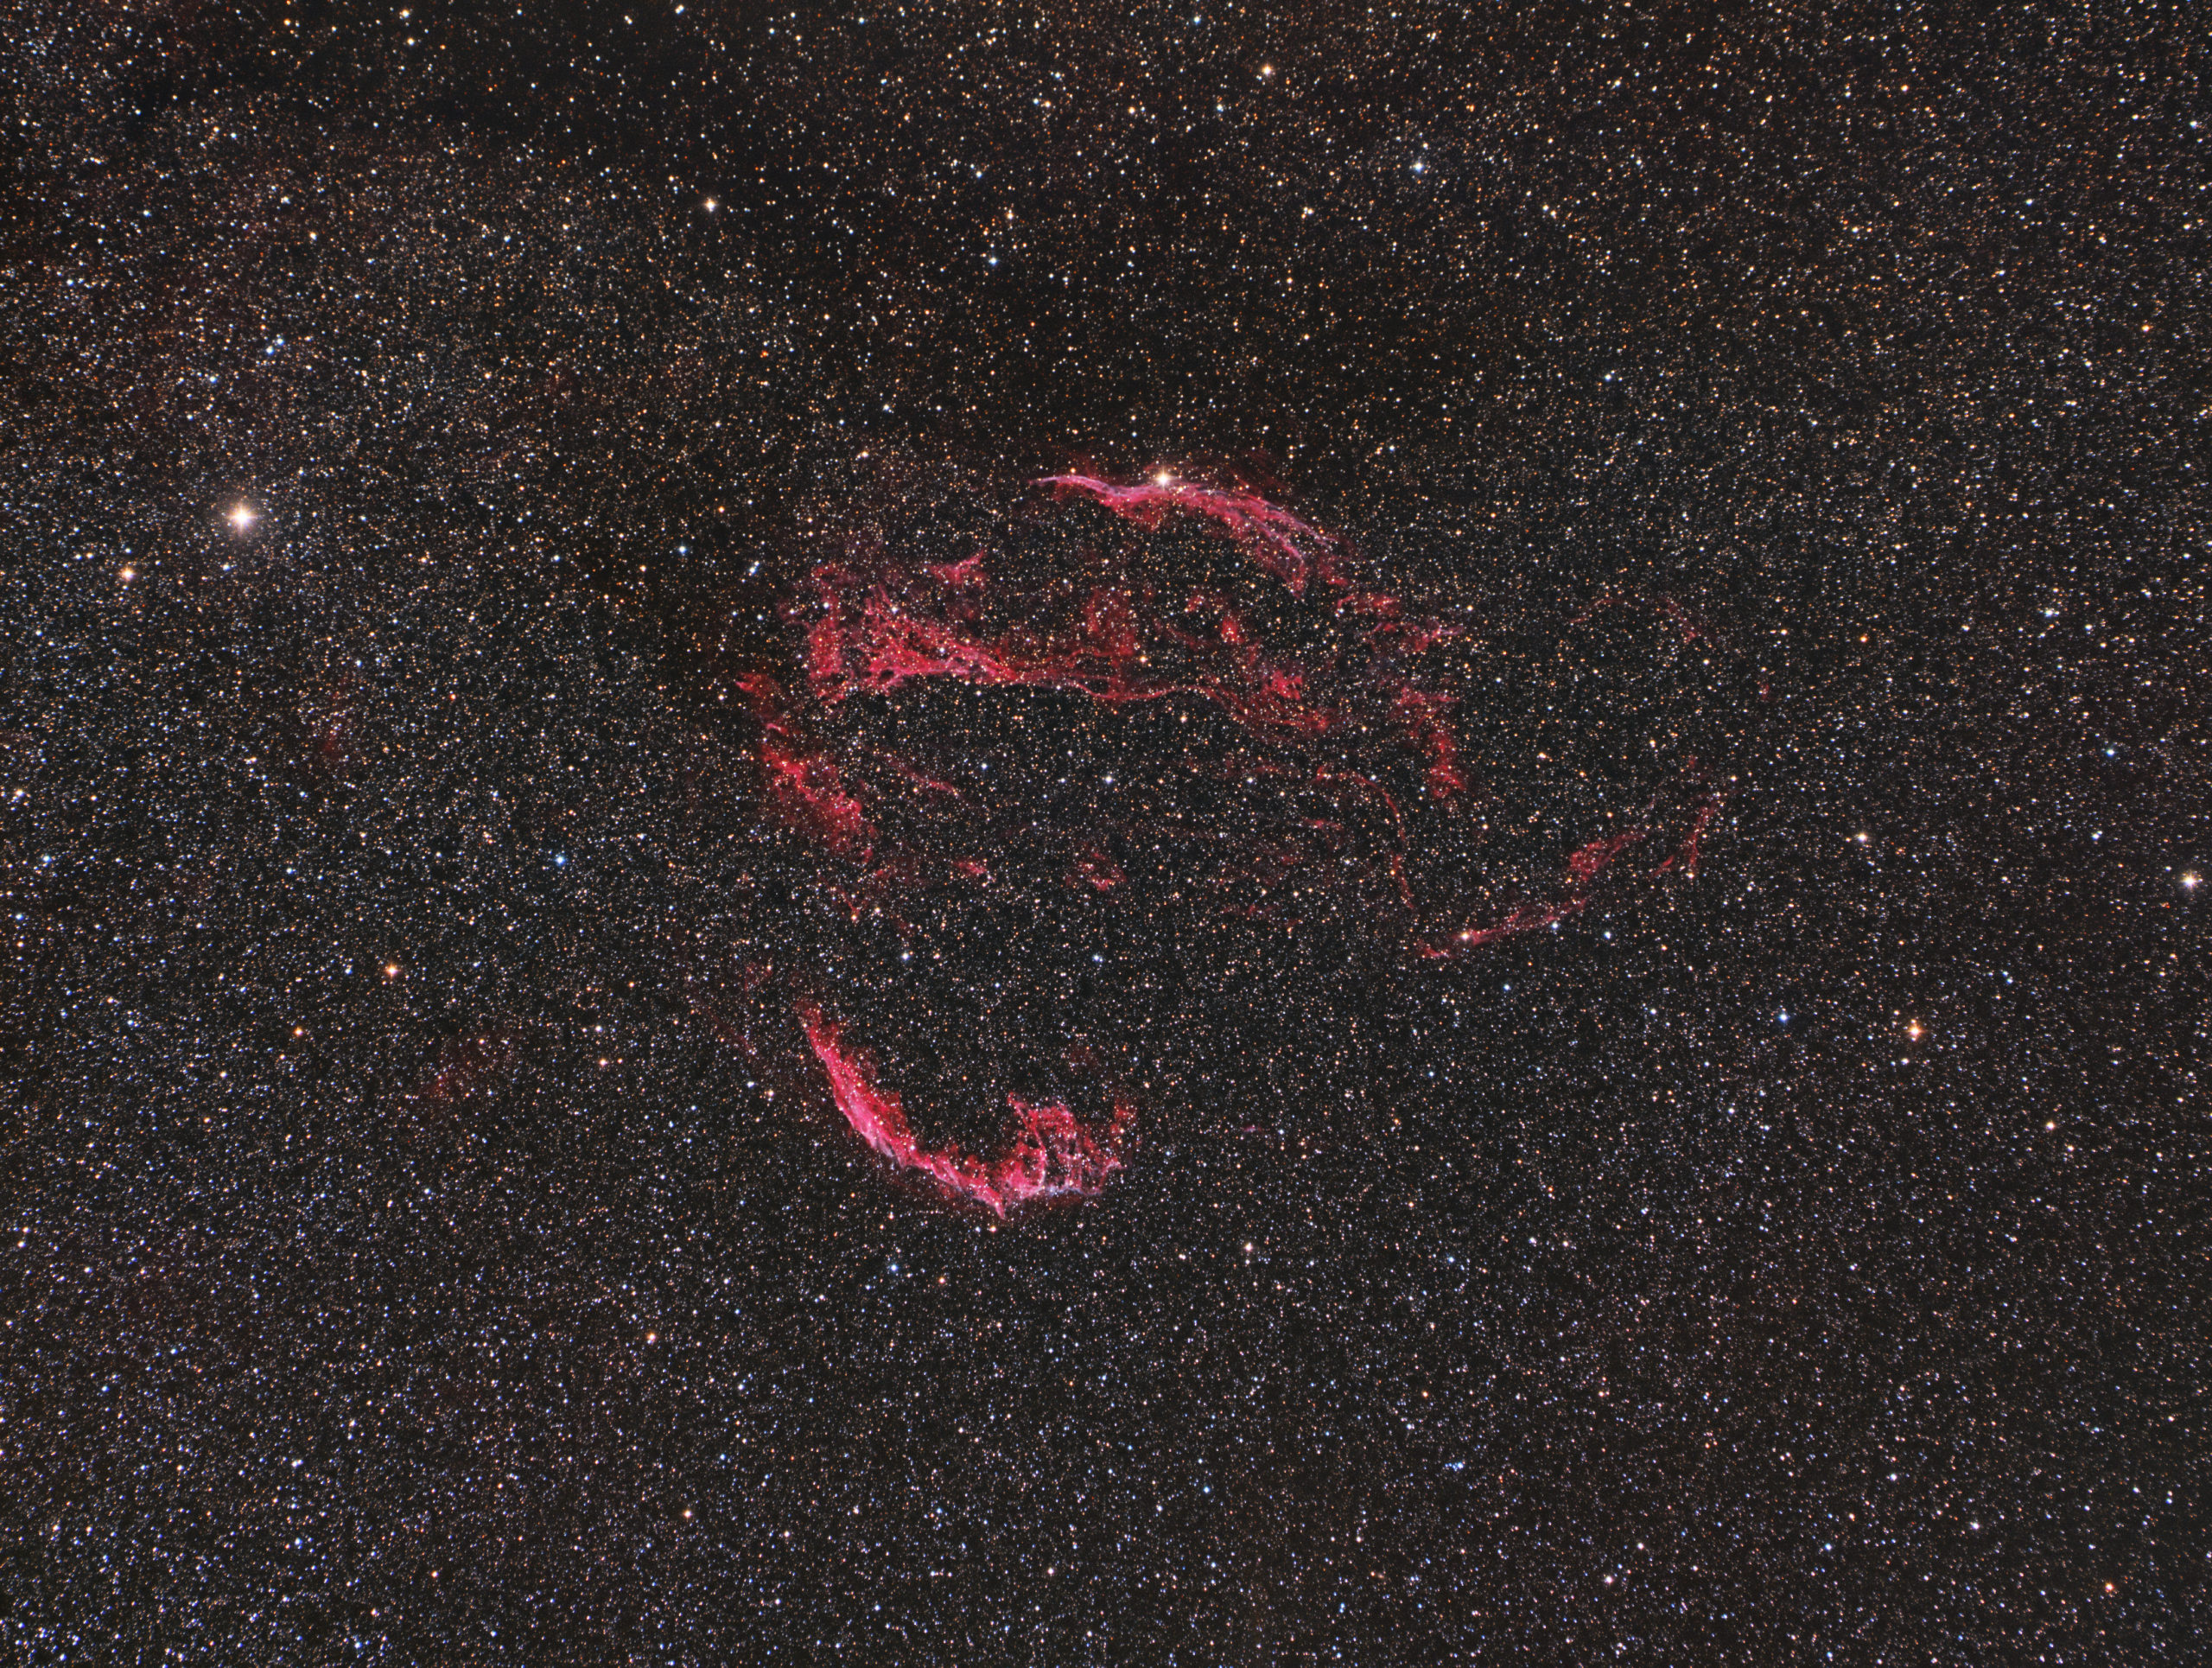
The Veil Nebula - Samyang 135mm Lens
The Veil Nebula in Cygnus is the remnant of a supernova of a star about 20 times the mass of the sun that exploded about 20000 years ago. The nebula is a huge, very faint and diffuse object, about six moon widths in diameter and is located about 2500 light years away. Very few telescopes can capture the entire Veil Nebula complex due to the huge angular size that it presents on the sky and creating a multi-frame mosaic is a very time consuming process, especially in the UK where clear nights are such a rare and premium time. This makes DSLR lenses ideal and few are better or as cost effective as the Samyang 135mm that was used to capture this image.
Image Technical Details
The image was captured from my backyard in Nottingham in the UK on the nights of the 13th and 14th September 2020. I left the systems capturing data overnight on an automated basis capturing the Veil nebula and several other targets whilst I was asleep in bed :). I used a Samyang 135mm lens (Samyang = Rokinon in the US/Canada) connected to my Moravian Instruments G2-8300 CCD camera with Astrodon RGBHa (3nm) filters on my NQ6 mount. All exposures binned 1x1:
Red > 14 x 300s ; Green > 14 x 300s ; Blue > 14 x 300s ; Ha > 31 x 300s
Total Integration time of just over six hours. The total width of the image is about 8 degrees by 6 degrees with a resolution of 8.5 arcsec/pixel.


Above are the Ha images made with the Astrodon 3nm Ha filter in the 31mm version. You can see the exquisite detail this filter picks out.

The RGB image is made from 42 x 300s exposures. It carries the colour of the image but is boosted by the blending of the Ha data which adds the punch and vibrancy of the master image at the top of the page.


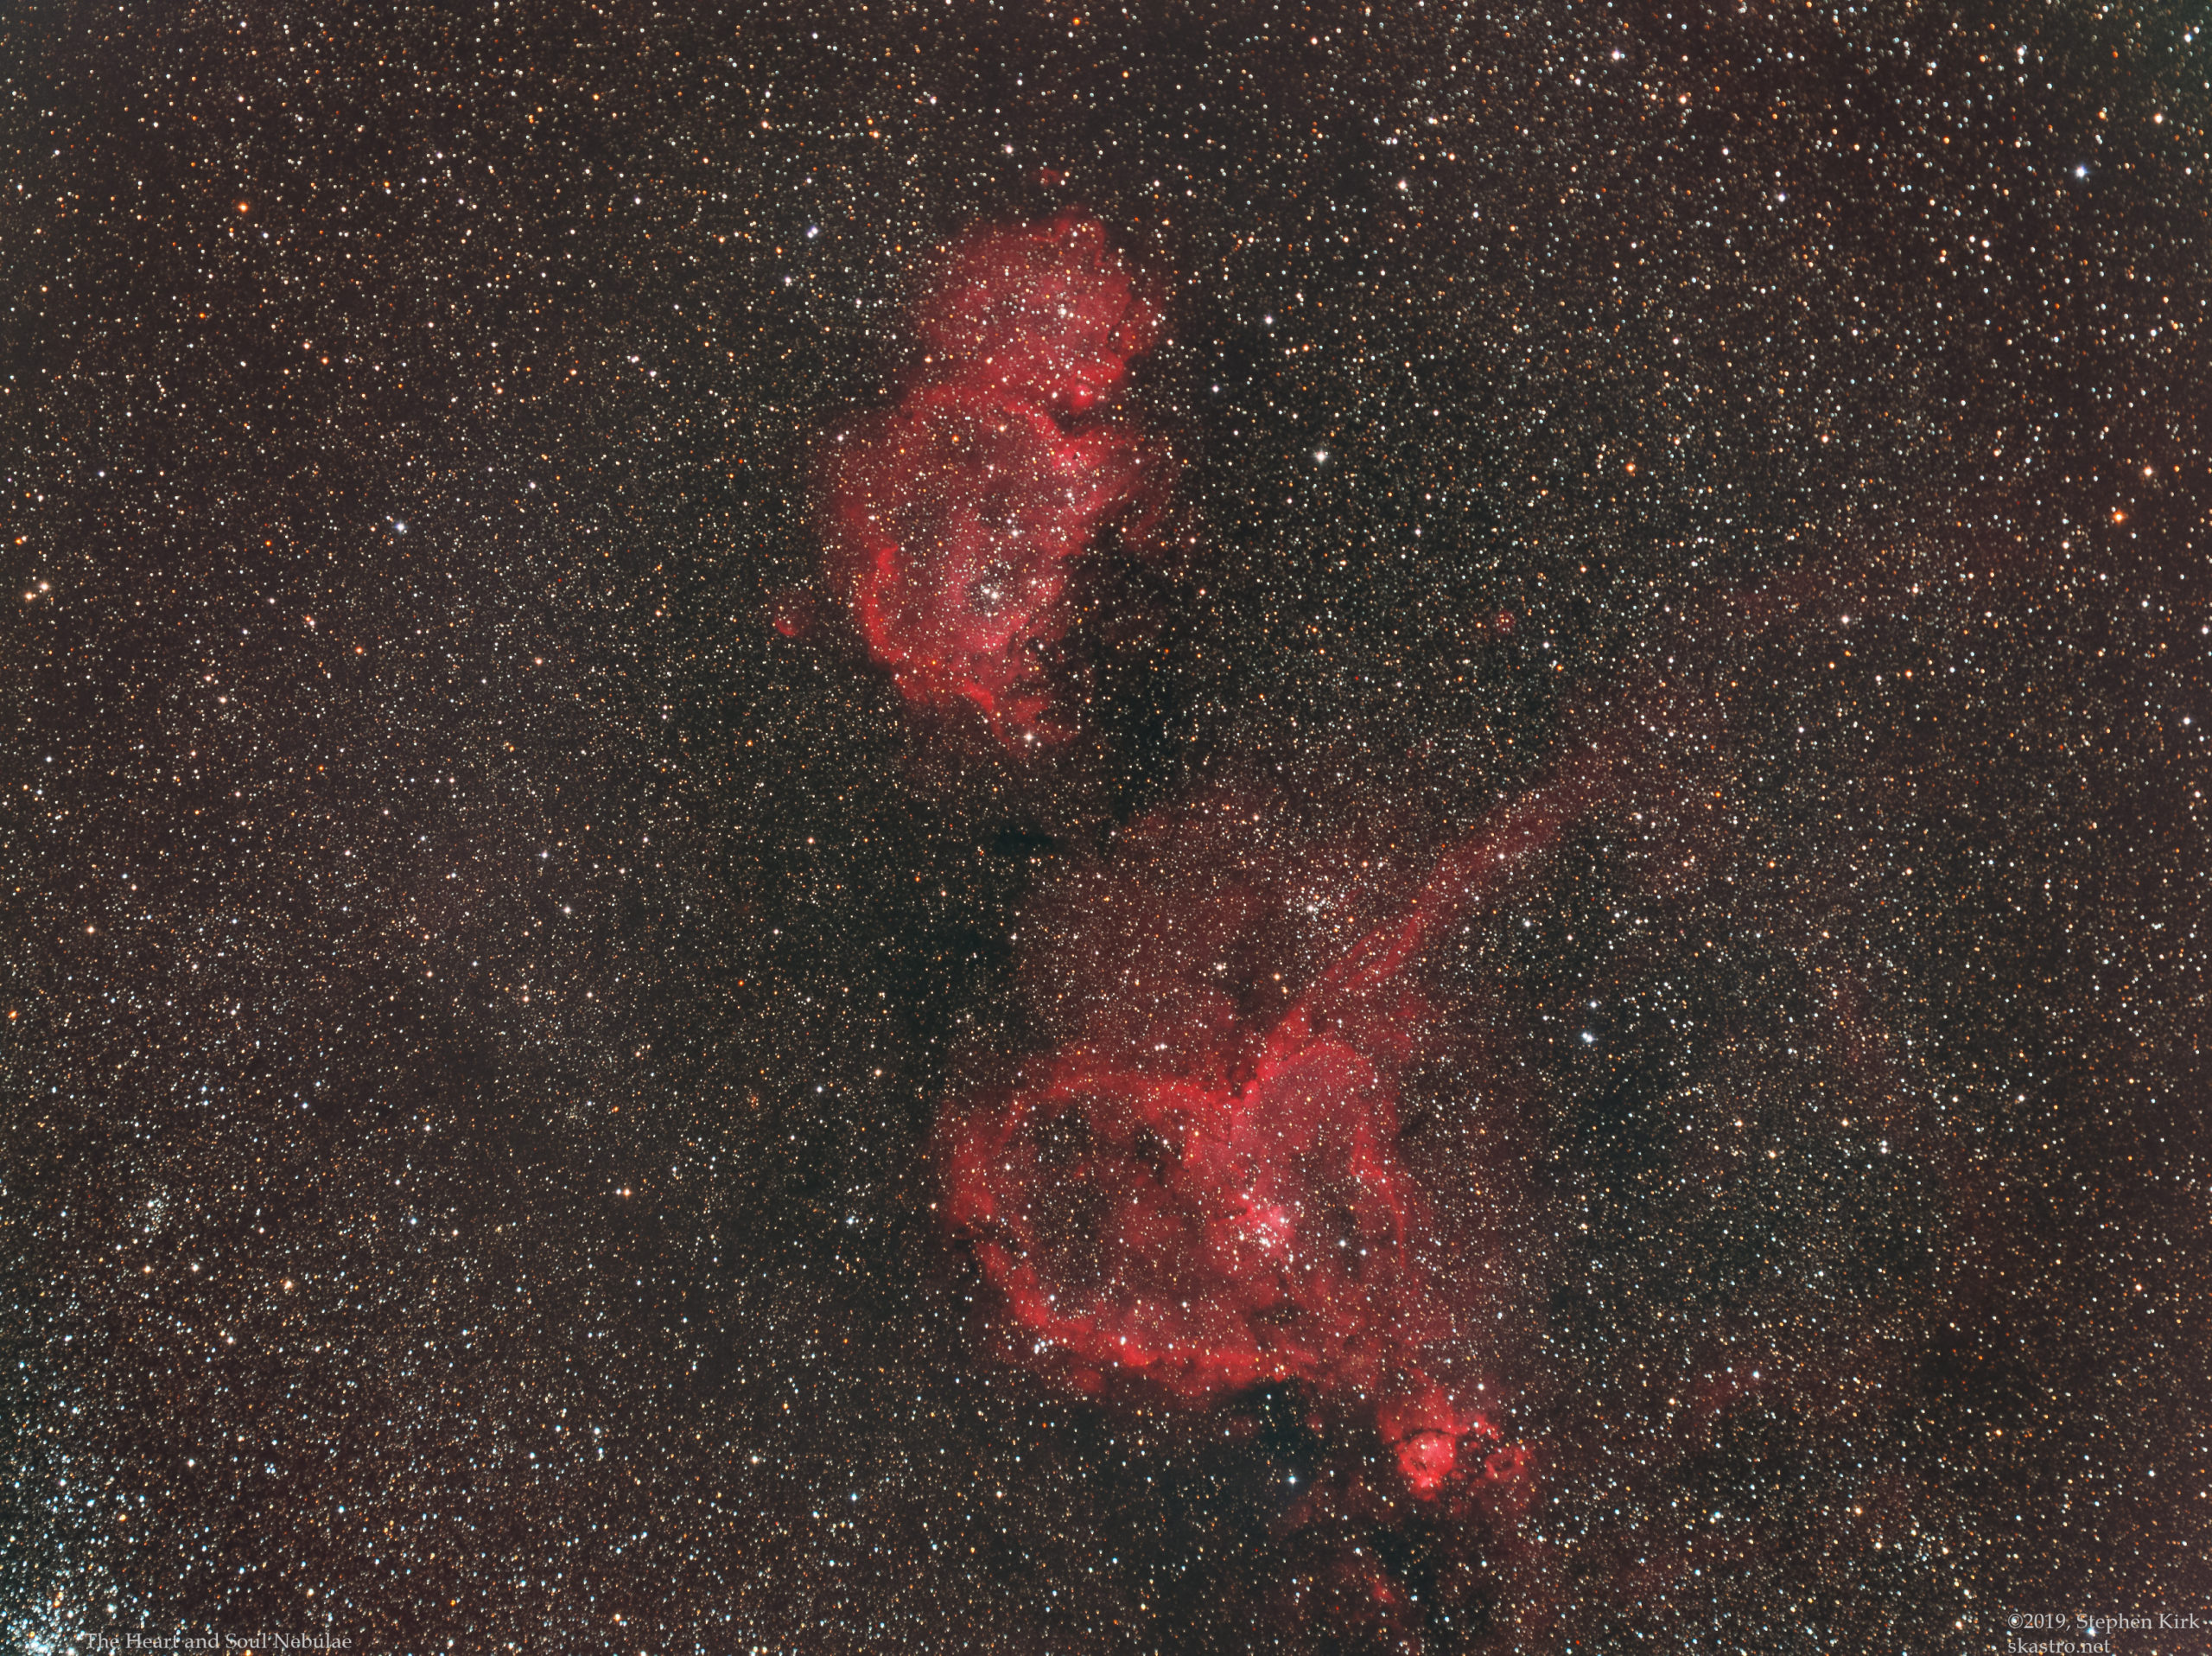
The Heart and Soul Nebulae Samyang 135mm
The Heart and Soul Nebulae are a well known and famous pairing of Nebulae in the late summer/autumn sky of the Northern Hemisphere. These nebulae are located far away - 7500 light years - in the Perseus arm of the galaxy, further out from the core of the galaxy than the Sun and are vast star forming regions rich in Hydrogen Alpha that gives the images the intense red glow.
All image data collected with a Samyang 135mm lens at F2.8 with a Moravian G2-8300 CCD camera. Below is the RGB image gathered with Astrodon RGB filters. All binned 1x1: Red 14 x 300s; Green 13 x 300s; Blue 14 x 300s. This gives an RGB integration time of 210 minutes or three and a half hours.
The picture looks nice but it does lack punch and vibrancy as it stands. It needs the addition of the Hydrogen Alpha data that will enhance the details.

Below is the Hydrogen Alpha channel that consists of 36 x 300s exposure with an Astrodon 3nm Ha filter with Samyang 135mm and G2-8300 CCD camera, collected with an Astrodon 31mm 3nm Ha filter. The amount of detail in this image is very evident. Below this is a starless version of the Ha image used to blend into the RGB image.


I finally created the blended HaRGB images by using layers of the Ha channel blended at different opacities as overlay and lighting layers in Photoshop. This gives the best of both worlds; the colour present in the RGB and the detail in the Ha image. The total integration time of the image is about six and a half hours.

Finally an annotated version of the image showing many Sharpless Catalog (Sh2) objects present.

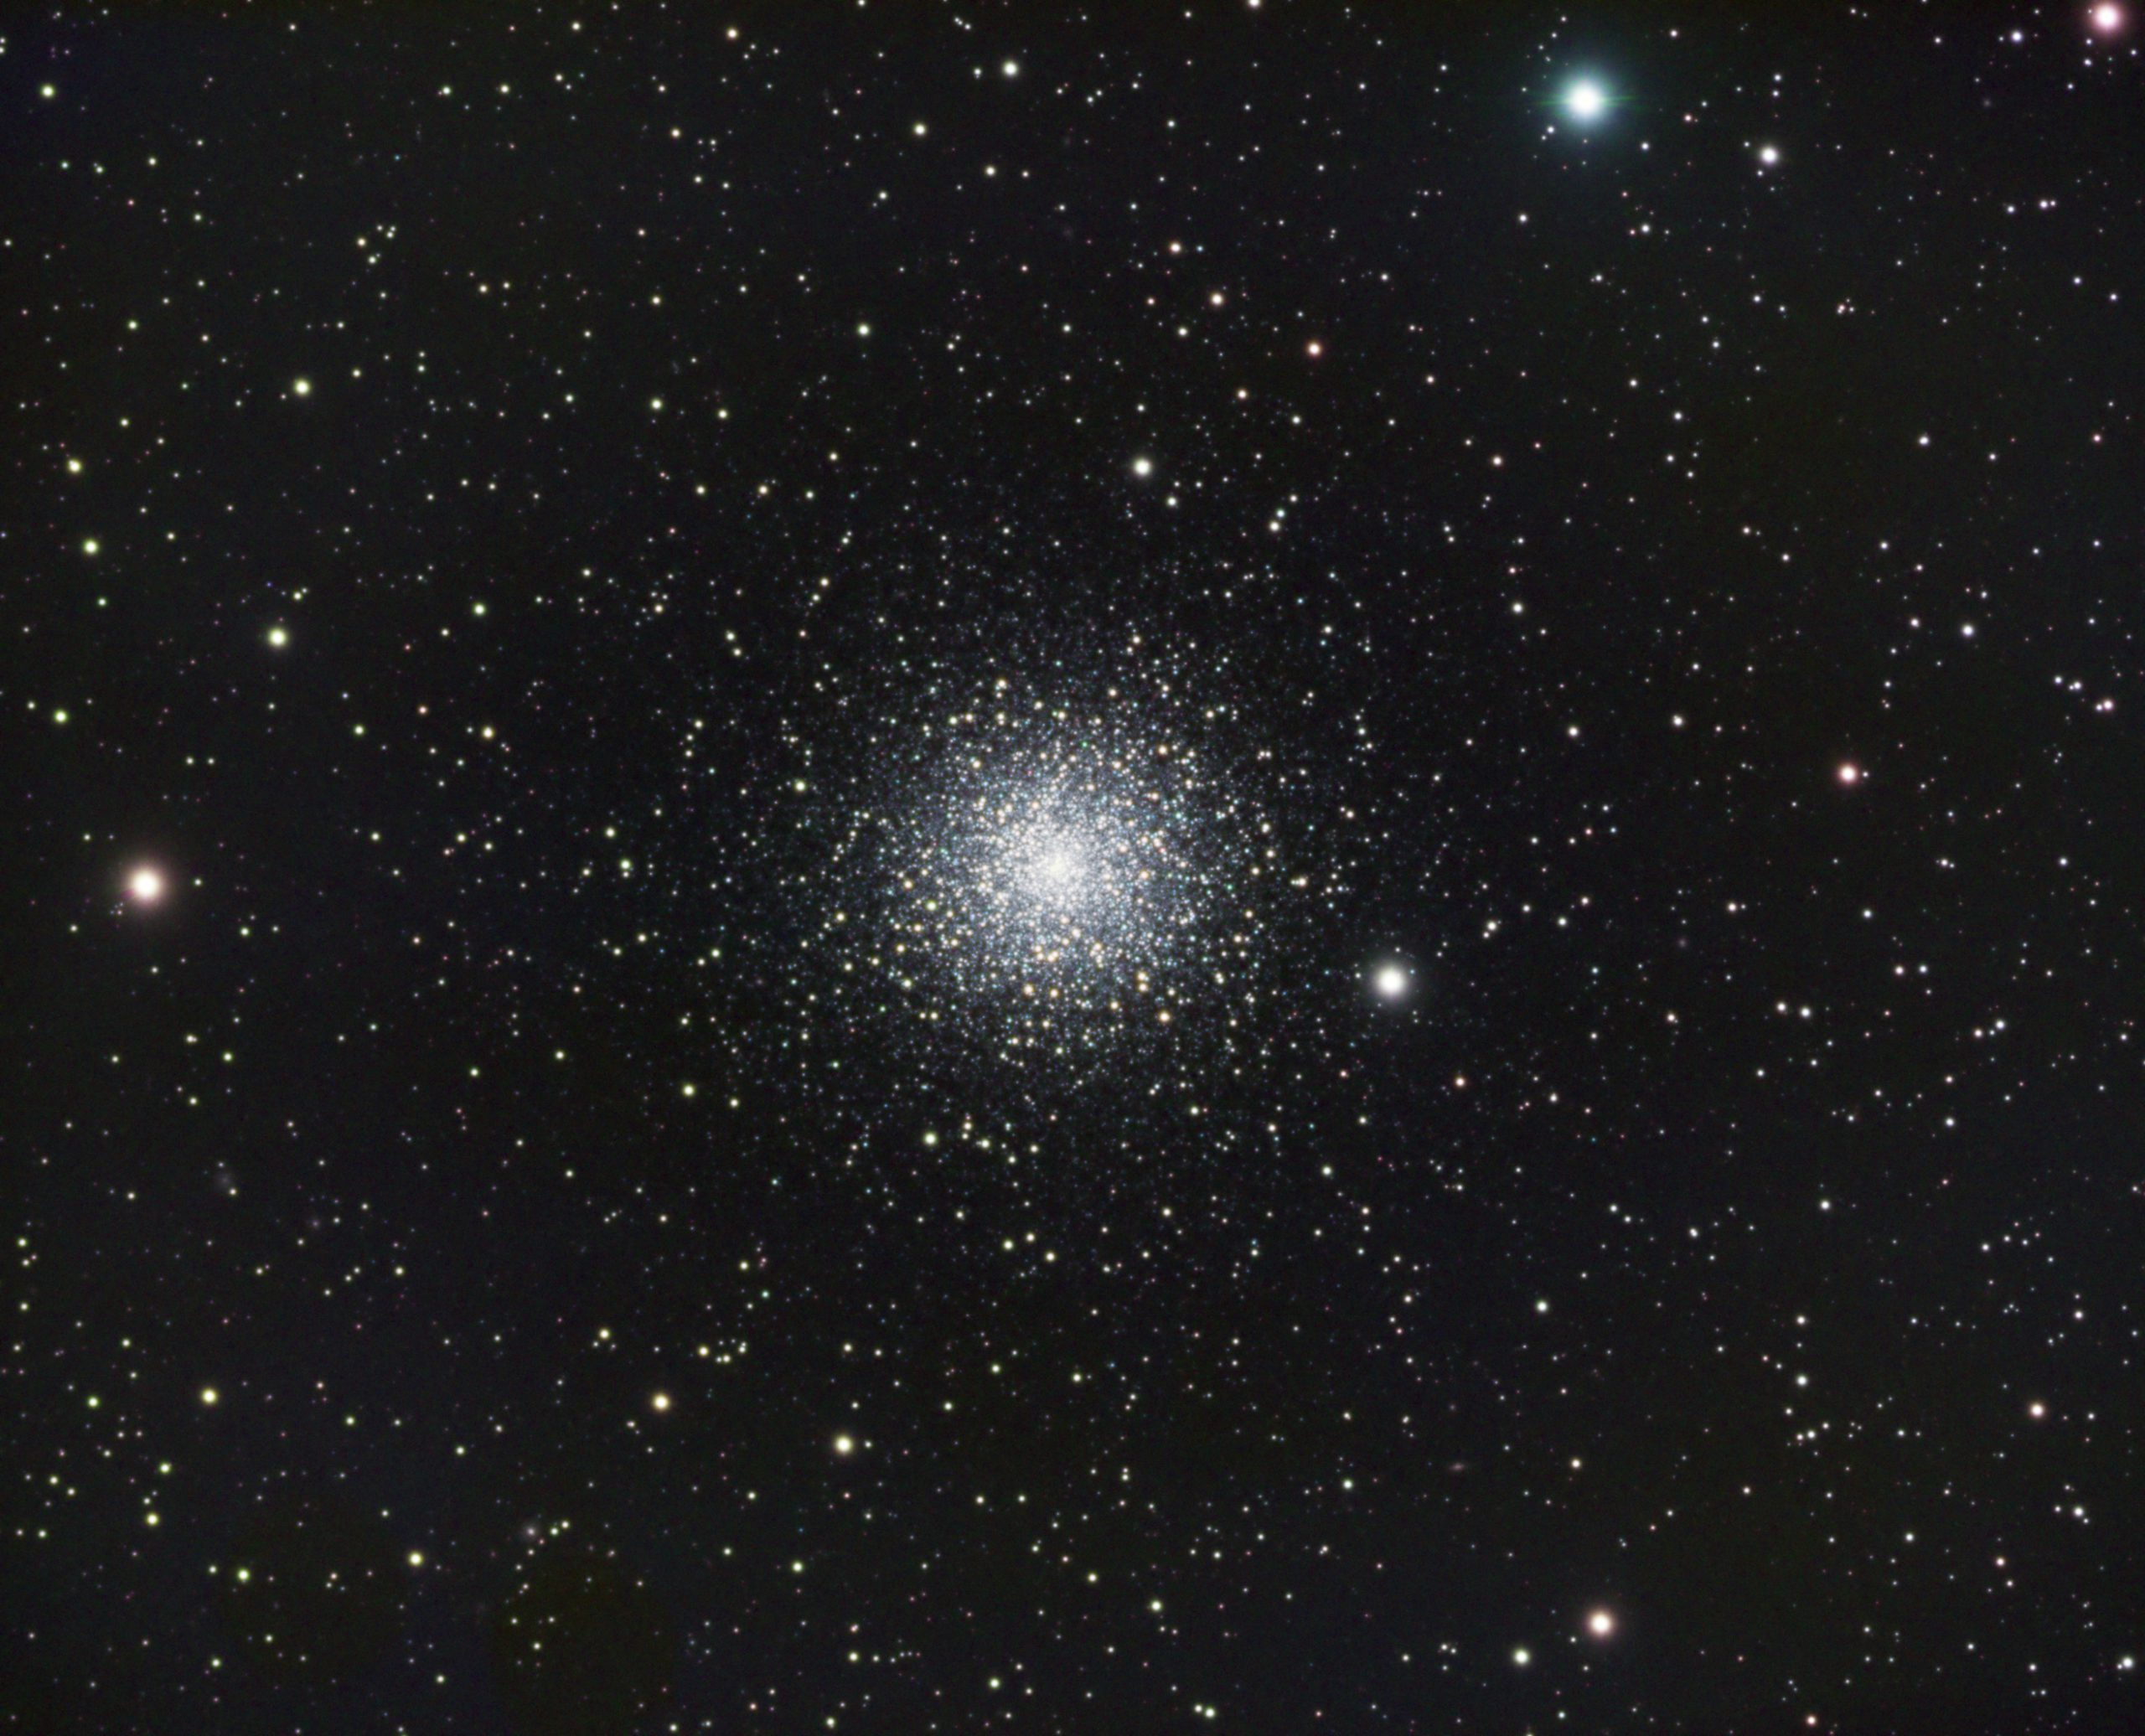
M15 The Globular Cluster in Pegasus
M15 is a magnificent Globular Cluster in the constellation of Pegasus, which after M13 and M92 is arguably the best one visible to Northern Hemisphere observers.
It is located about 34000 light years away and is about 125 light years in diameter with an age of 12 billion years, it is as old as the Milky Way itself.

Image Technical Data
Imaged with my TEC 140 refractor and Atik 460 CCD camera September 24th 2018. Mount is my MESU 200 guided with off-axis guiding.
Red 22 x 300s 1×1; Green 12 x 300s 1×1; Blue 19 x 300s 1×1
Total Integration of the data set is about four and a half hours. Note that I did not use a separate luminance channel and instead I binned each of the RGB channels 1x1. I remain to be convinced of the need to capture a separate luminance channel with either globular or open clusters.
Image processing is with PixInsight and data collected with Sequence Generator Pro.
