

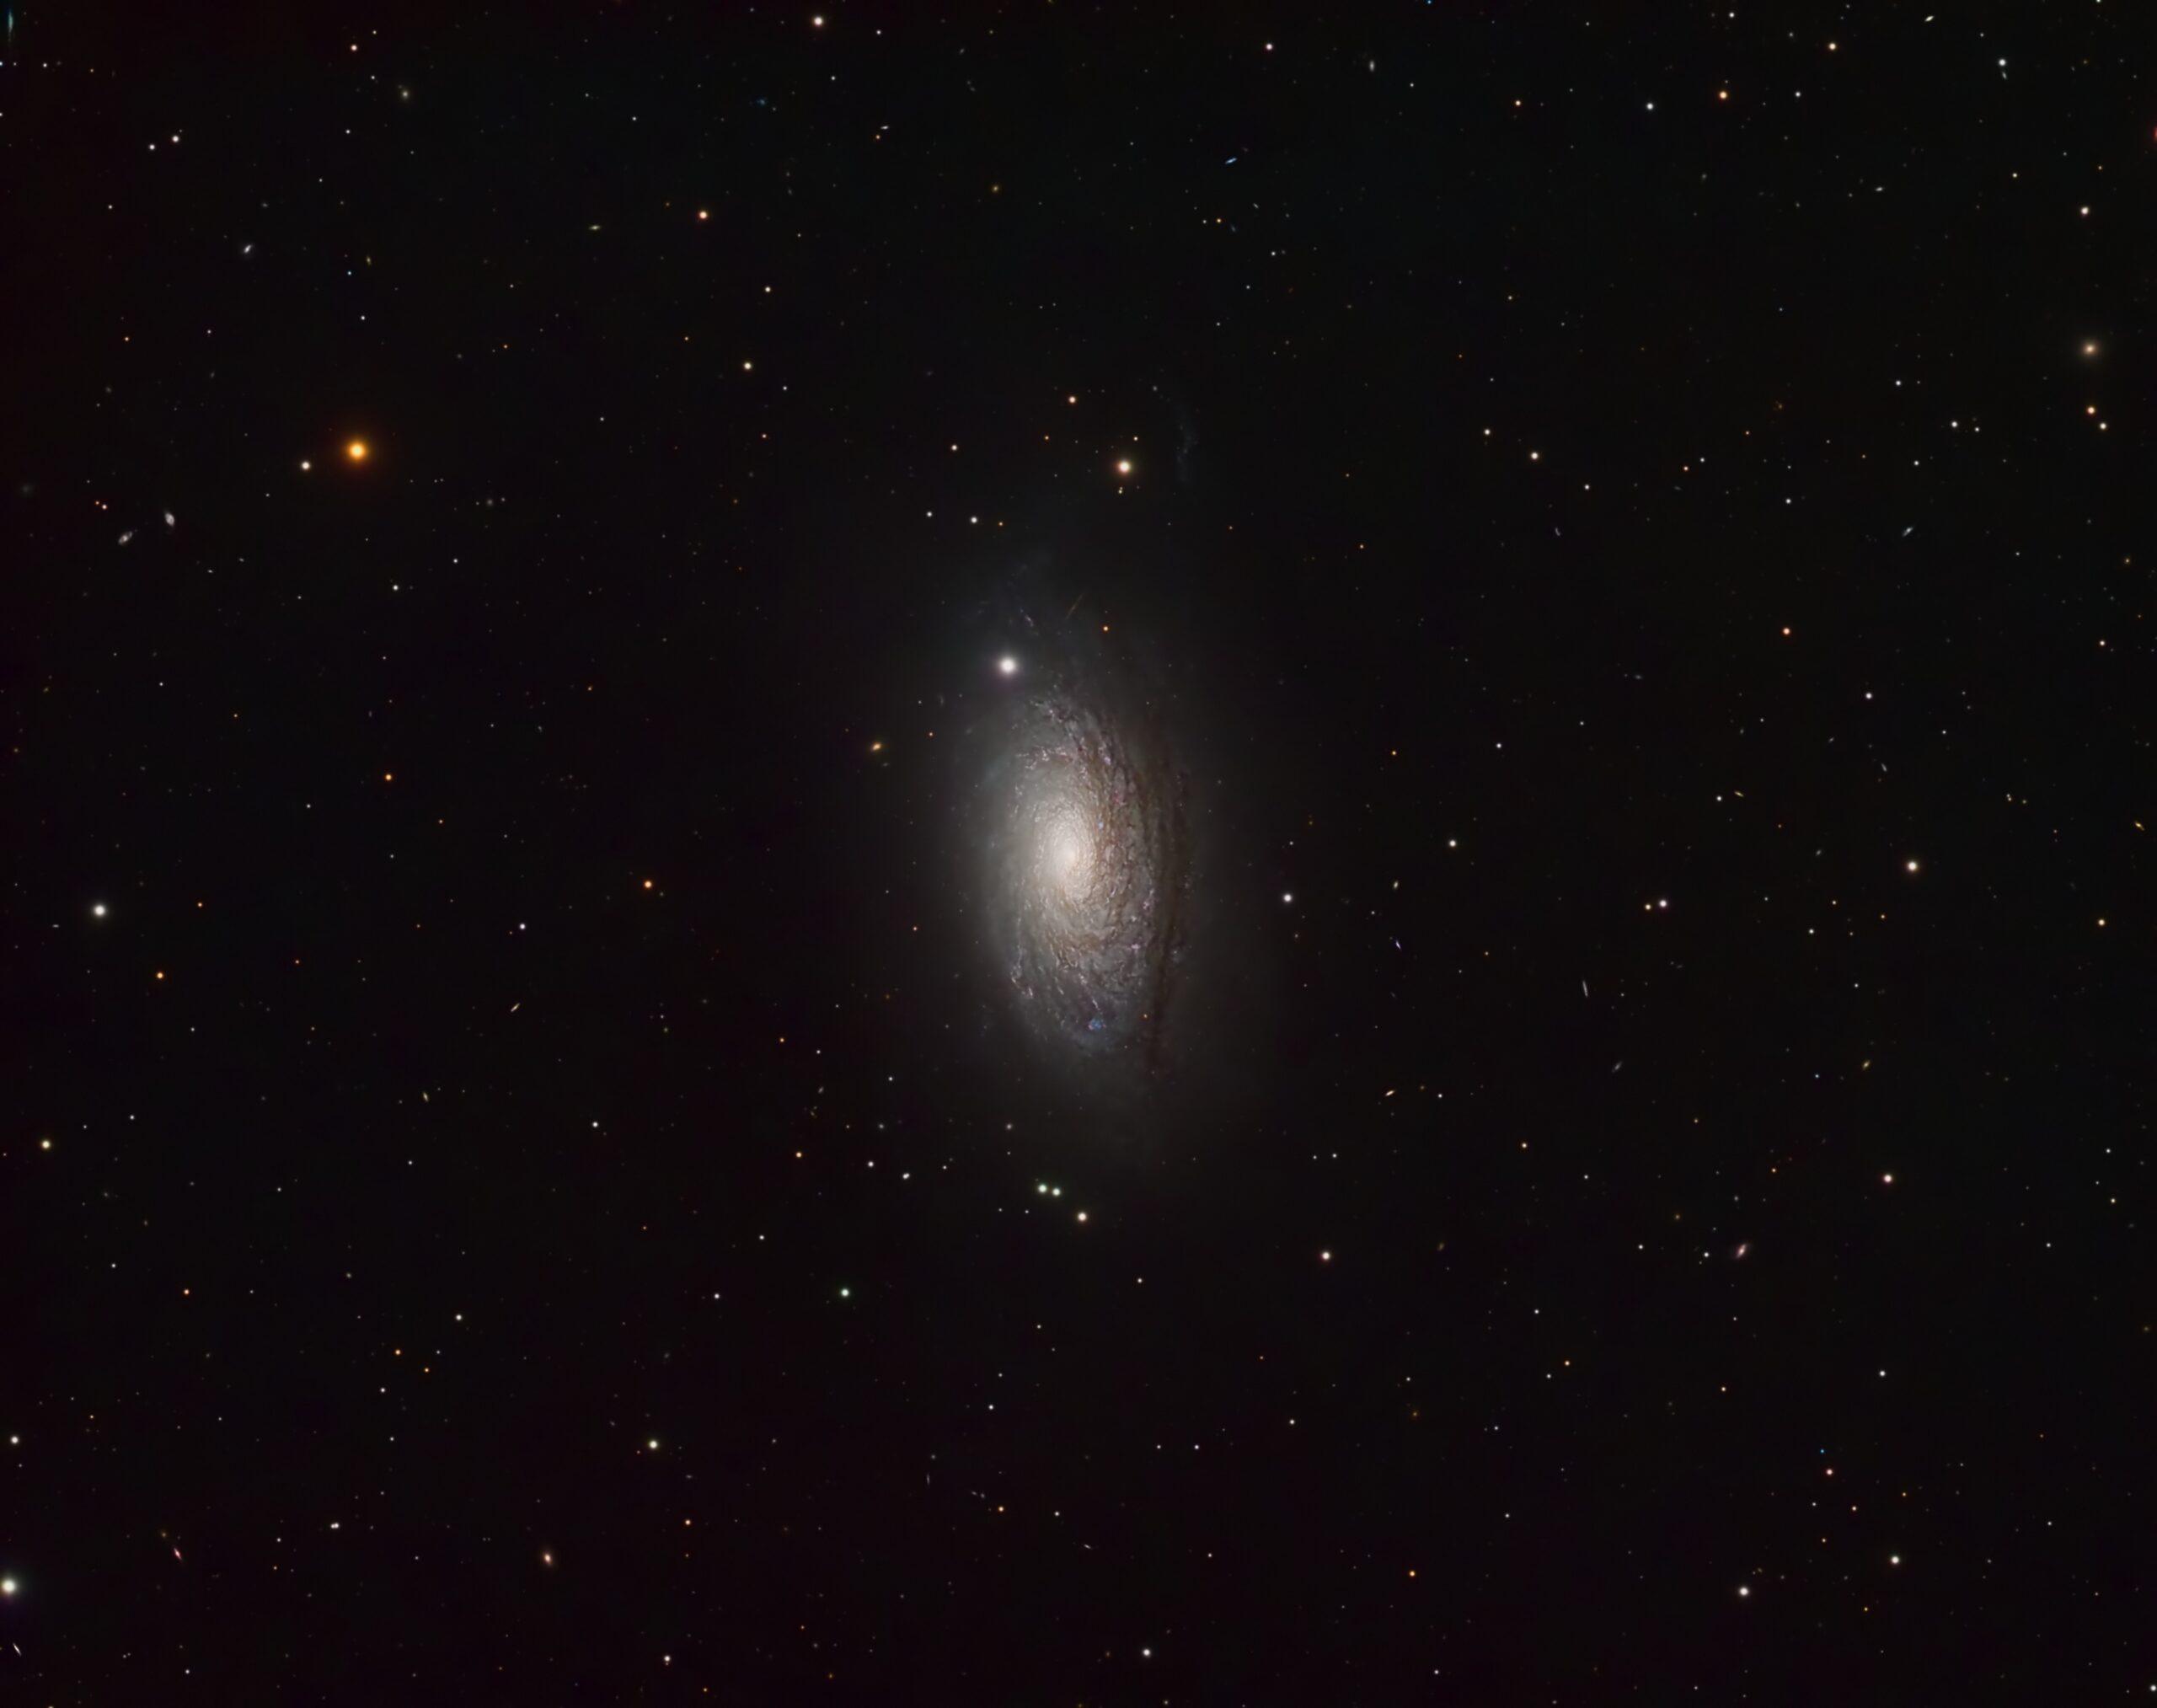
M63 - The Sunflower Galaxy
M63 is a magnificent spiral galaxy located in the Northern constellation of Canes Venatici, about 30 million light years away. The galaxy is a member of the M51 group. There are lots of faint galaxies in the background.
Technical Data
Full resolution image here (opens in new tab)
M63, often called the Sunflower Galaxy because of its resemblance to that flower, is a spiral galaxy about 27 million light years away in the constellation of Canes Venatici. It is a member of the M51 group of galaxies.
I captured the data for this image of the galaxy from my back yard observatory in Nottingham, UK over the nights of 4th and 5th of May 2021 when M63 was high near the zenith. Most of the data was captured in the middle of the night on an automated basis whilst I was asleep in bed! I used my TEC140 refractor and Atik 460 CCD camera with Astrodon E Series LRGB filters. I used off-axis guiding on my MESU200 mount.
Integration is a total of nine hours comprised of:
Luminance > 30 x 300s binned 1×1 ; Red > 22 x 300s 1×1 ; Green > 24 x 300s 1×1 ; Blue > 24 x 300s 1×1 to give a total of about 8.5 hours of integration time. Captured with SGP pro and processed in PixInsight.
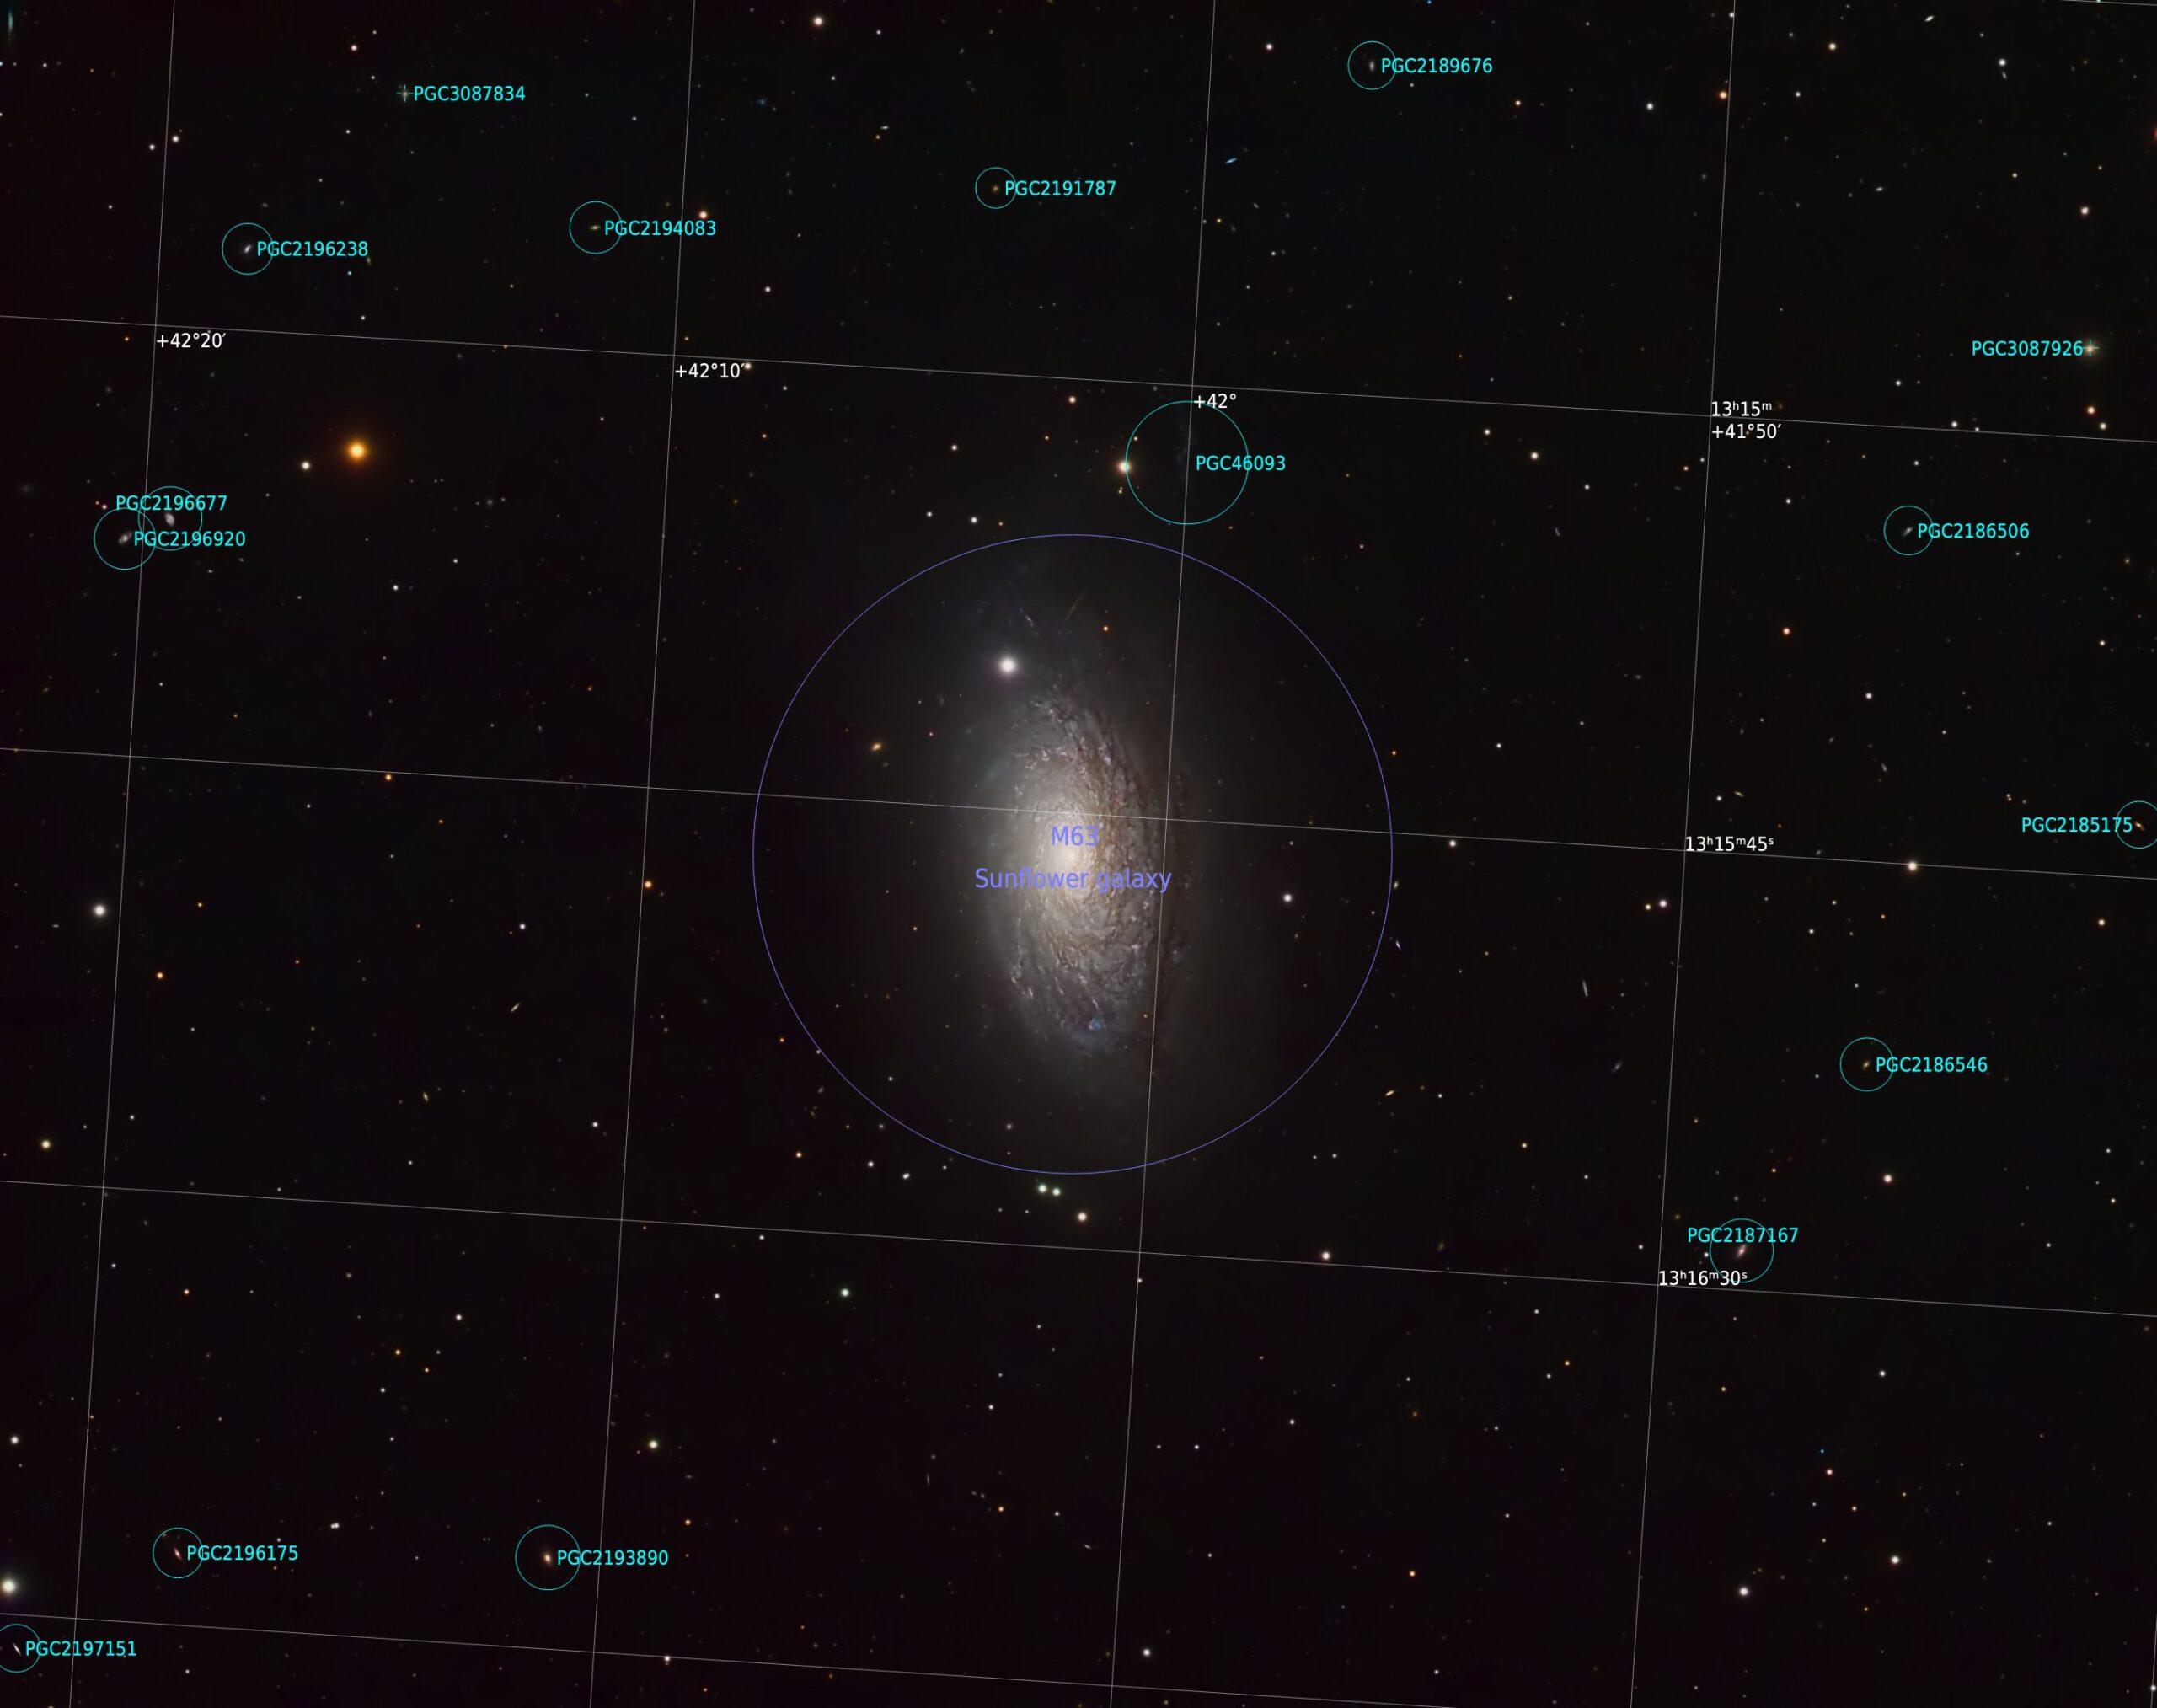
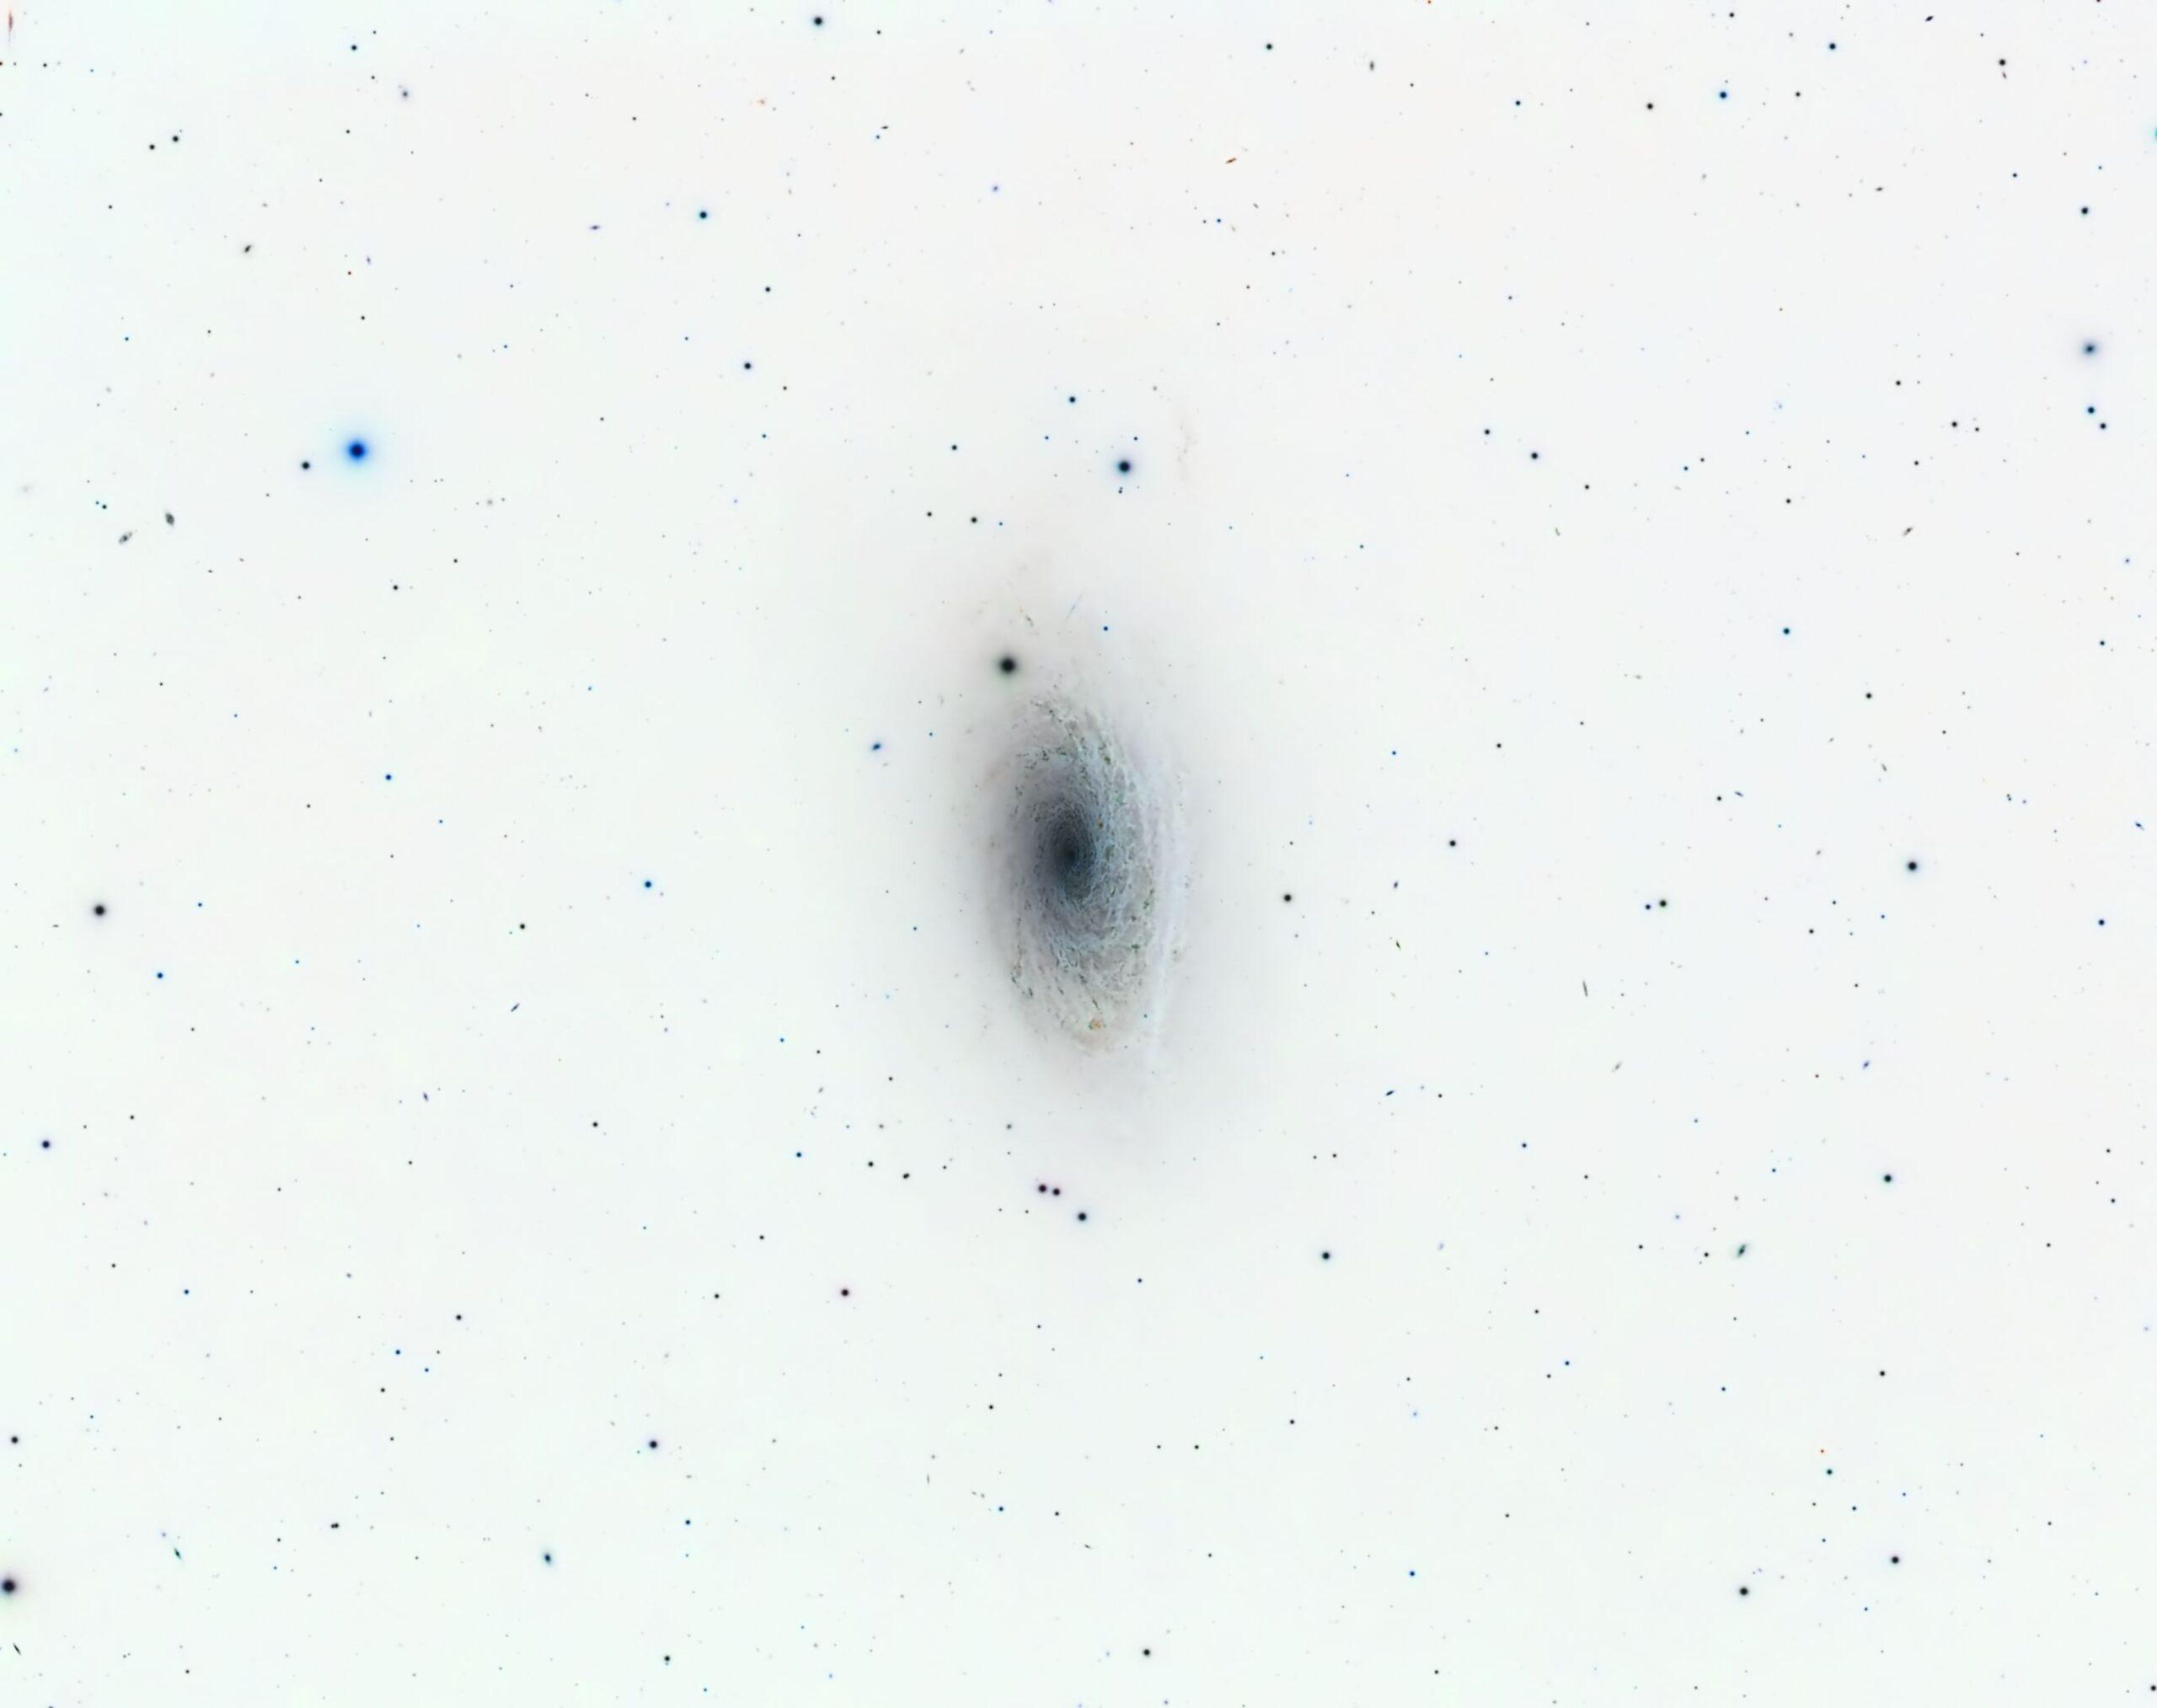
Annotated and inverted versions of the galaxy shown above. The annotated version shows the many, extremely distant background galaxies present in the image, some of which are billions of lightyears away.
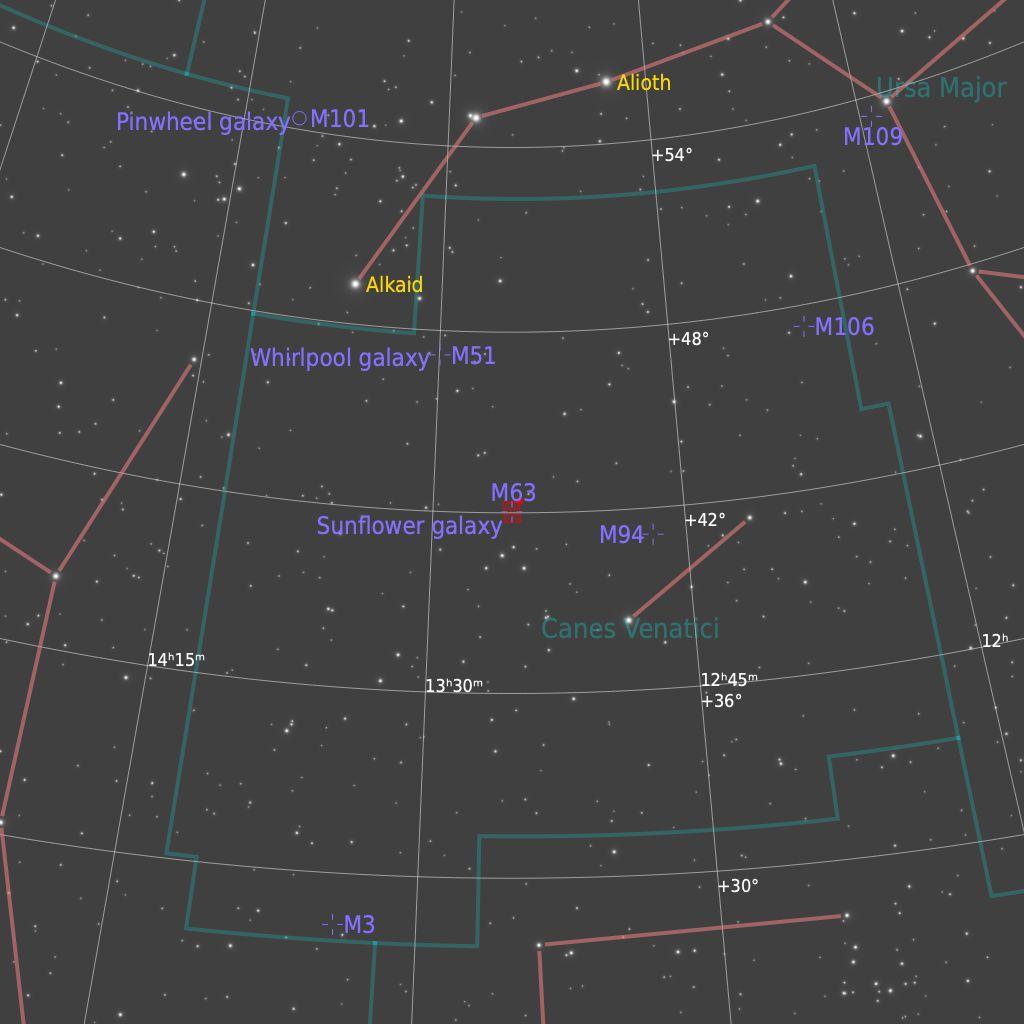
The finder chart to the left shows the location of the galaxy.
The image at the top of this page is 42 arc-minutes in width and 32 arc-minutes in height at an image scale of 0.927 arc-seconds/pixel.
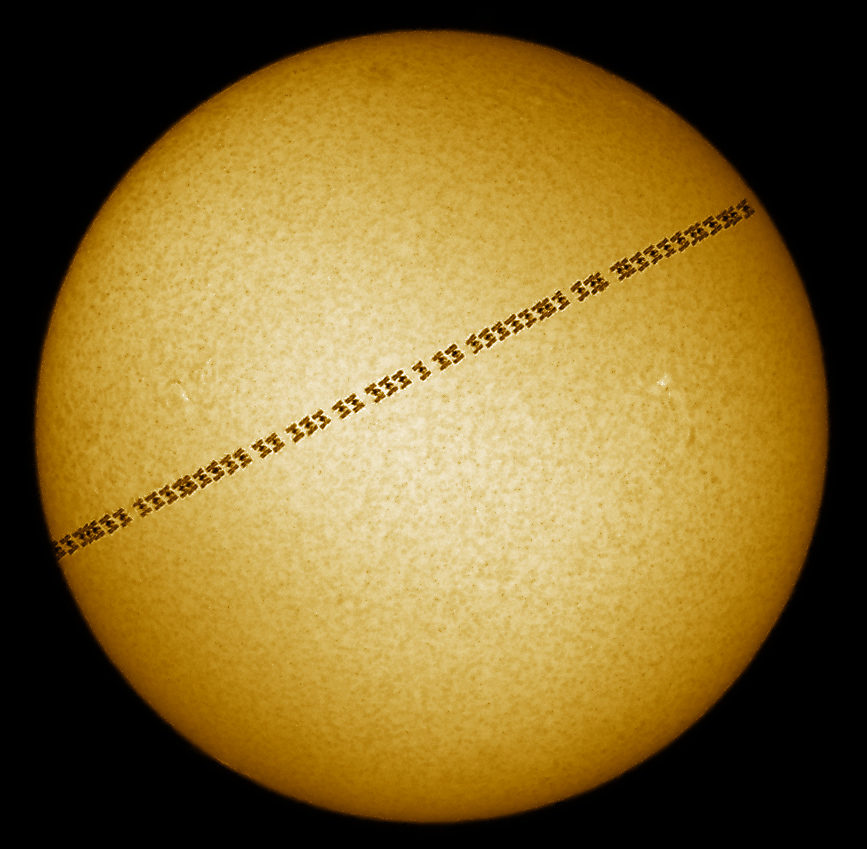
ISS solar transits with Lunt T60Ha telescope and ASI174MM camera
I captured two ISS transits of The Sun on the weekend of 12-13th June 2021. Both images and videos were taken with my Lunt Systems T60Ha Hydrogen Alpha telescope and ASI174MM camera.
The transit above was not quite visible from my back yard and so I had to put all the gear into my car and drive about three miles from where I live. I set up about twenty minutes early to ensure I was ready and there were no technical gremlins. I was not quite located exactly where the ISS crossed the precise diameter of the sun - I was about 300m away! Yes, a very small change of position on the Earth's surface really does make that much difference to the visible track of the ISS across the face of the sun. The ISS was about 520km away when this sequence of images were taken.
The ISS moves much more quickly than the slowed down image would suggest. It crosses the disk of the sun in only about 2/3 of a second. Literally blink and you will miss it. I started the image capture about 30 seconds ahead of time to ensure the camera is running at a high rate prior to the ISS' arrival and to account for any error in the ISS' arrival calculations. As it happens the ISS transit finder tool https://transit-finder.com/ is accurate to the split second. By the way, an iPhone connected to a 3/4G network is accurate to within a few thousandths of a second.
To the left is a composite image of the camera exposures, running at 124 frames per second. The ASI174MM camera has an electronic shutter that captures the entire 1936x1216 HD frame in buffer and then scans that entire frame before transmitting the frame over the USB3 bus at 5Gigabits/second before capturing the next frame. A high speed laptop with a solid state SSD is required in order to write images at this data rate.
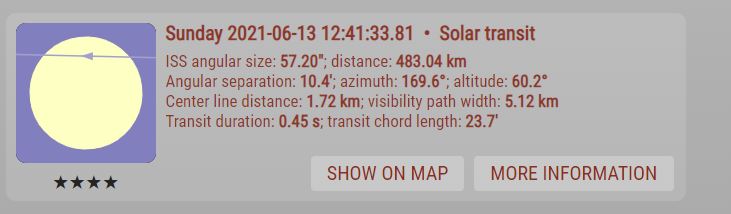
The day afterwards, Sunday 13th June, there was another ISS transit, this time visible from my back yard, albeit as a chord across the sun and not across the diameter (to get a full diameter I would have had to travel with my gear about a mile away). I could have again driven out in the car, but I quite liked the idea of the ISS crossing a chord. This mage is below. The sky had been perfectly clear and hot all morning before the transit and all afternoon afterwards, but just about 30 seconds before the ISS transit occurred the only cloud in the entire blue sky decided to pass in front of the sun! Had the transit occurred ten seconds before or ten seconds later I would have missed it. Fortunately there was a tiny thin bit in that cloud that allowed me to capture the transit, although some faint cloud is visible. I kind of think that the wispy cloud adds to the atmosphere of the image, wouldn't you agree?
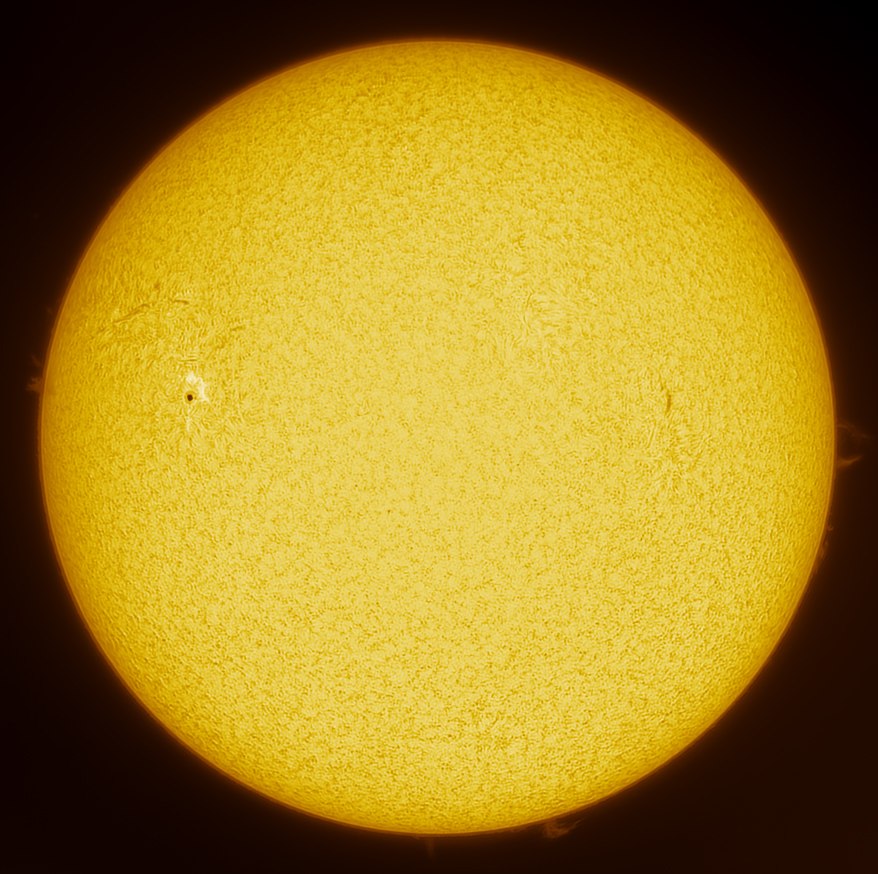
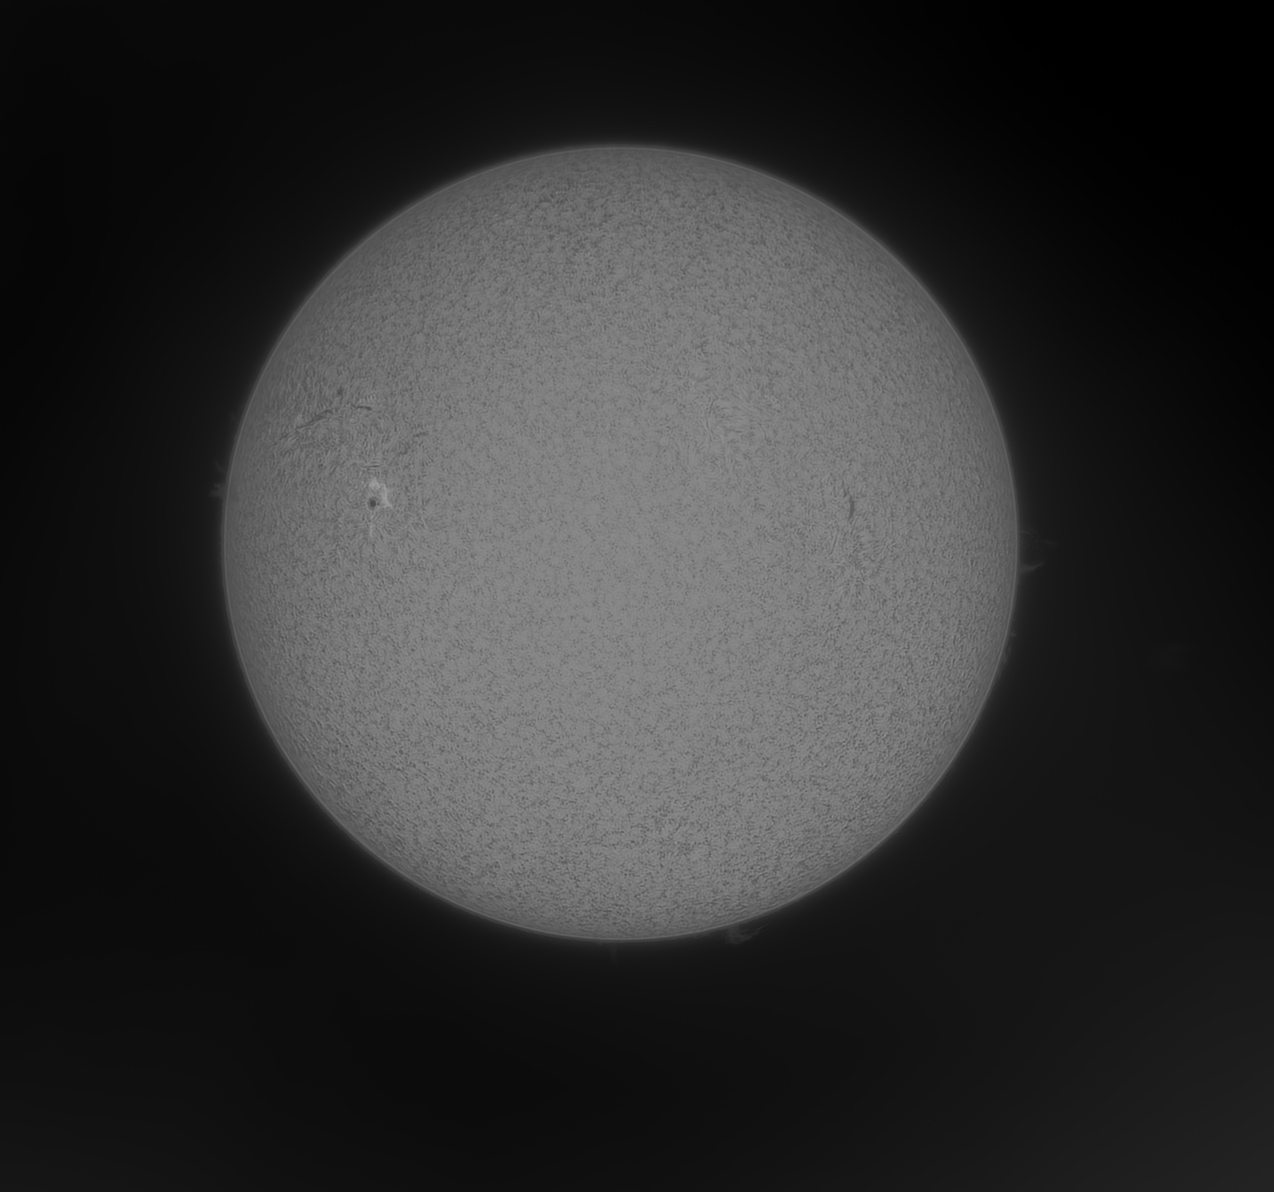
The Sun, 16 June 2021 in Ha with Lunt 60THa and ASI 174MM
This is a 10000 frame capture of the Sun with good seeing at 13:10 UK time in Nottingham. I used my Lunt 60Tha and my ASI174MM camera at 16-bit and 65 fps. The day was very hot - by UK standards - at about 28C and quite humid. I was able to use 92% of the frames which I stacked in Autostakkert. Post processing in IMppg and Photoshop CC. The image capture is a full disk and disk and proms are from the same capture.
The Hubble Deep Field (from Nottingham)
Background
The Hubble Deep Field (hereon-after the HDF) is an iconic image from the Hubble Space Telescope (HST). In 1995 the HST was instructed to stare at a tiny patch of space in the constellation of Ursa Major that is almost devoid of stars and is far from the plane of the galaxy, enabling the telescope to stare out of the galaxy into the depths of the Universe. It did this for about 190 hours with a total of 340 exposures and in so doing captured some of the most distant galaxies in the Universe, some of which are an astonishing 12 billion light years away.

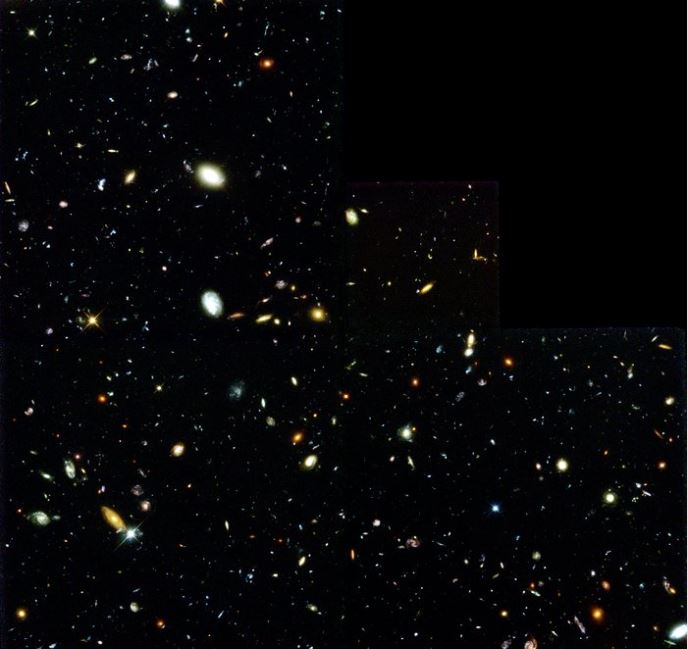
The HDF is located above the "bowl" of The Plough (or Big Dipper as it is called in North America) asterism in Ursa Major as can be seen in the left image above. The right image is the actual HST, a composite of red, green and blue to create a colour picture. No ground based telescope can capture such an image since the galaxies are so remote and faint that the slightest atmospheric turbulence will blur out the faint galaxies. However, the brighter members are available to ground based telescopes as we shall see later. Read more about the HDF here.
The HDF image was created with the Wide Field and Planetary Camera 2 (WFPC2) that was installed on the first Hubble servicing mission in 1993 and is an iconic instrument that created many of Hubble's most famous images. By today's standards its CCD sensor was tiny and comprised of three 800x800 sensors in a "L" shape. The missing top right of the image was used for the planetary section of the WFPC2 camera and just uses the bottom left quarter of the top left segment. By utilising digital manipulation techniques the four imaging quadrants could be stitched together to create a composite image. The WFPC2 was replaced by the WFPC3 in another servicing mission in 2009 that has a more modern (by 2009 standards) sensor that offers a complete image corner to corner. The WFPC2 was returned to earth and is displayed at a NASA museum.
Whilst very interesting, this is not just a pretty, semantic picture - it holds extremely important information about the early universe and the evolution of galaxies. Other Deep Field images were subsequently taken with the HST in other parts of the sky and the deep Universe looks almost identical everywhere we look, proving the cosmological principle that the Universe is essentially identical, everywhere, as a result of the Big Bang 14 billion years ago.
My Version
I took it on myself as a small project to image the Hubble Deep Field myself. Ursa Major and the HDF region is directly overhead at my location in Nottingham, UK in spring time. I downloaded the HDF coordinates from the Internet and used my TEC140 and Atik 460 CCD camera and captured 6 x 600s exposures with a luminance filter. There is no point in acquiring colour data for such remote objects. I used these to create this image:
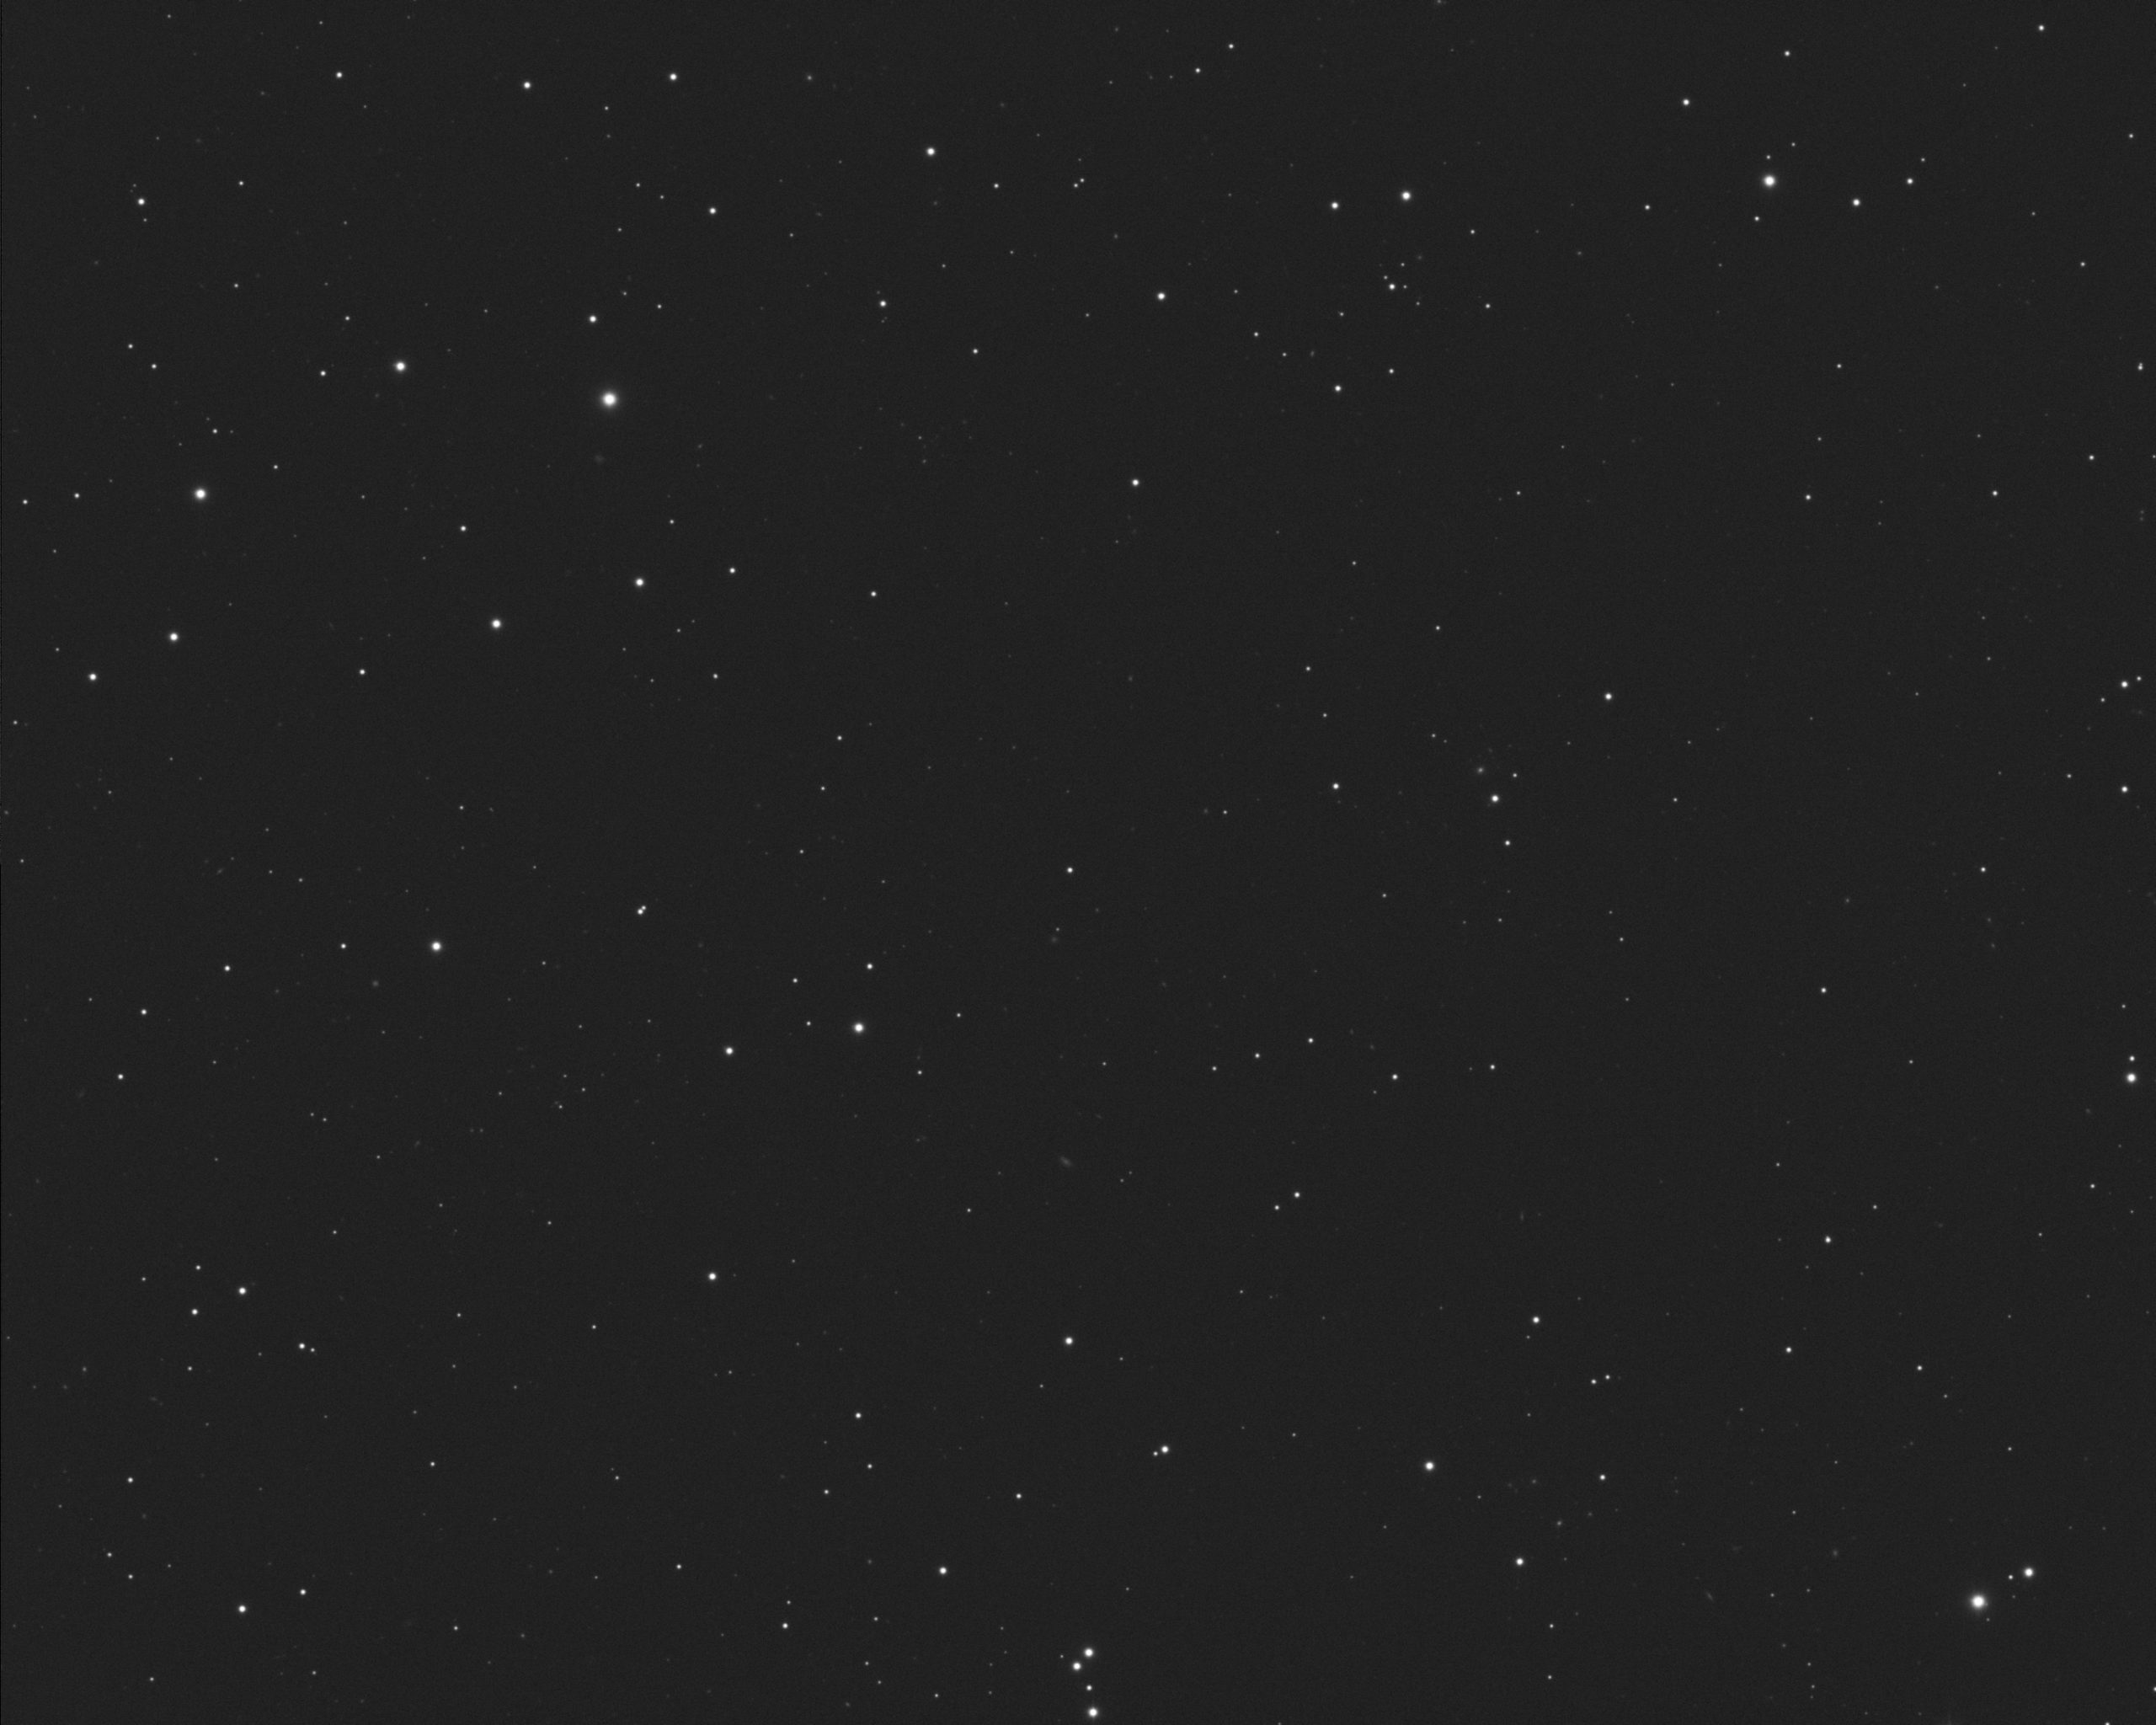
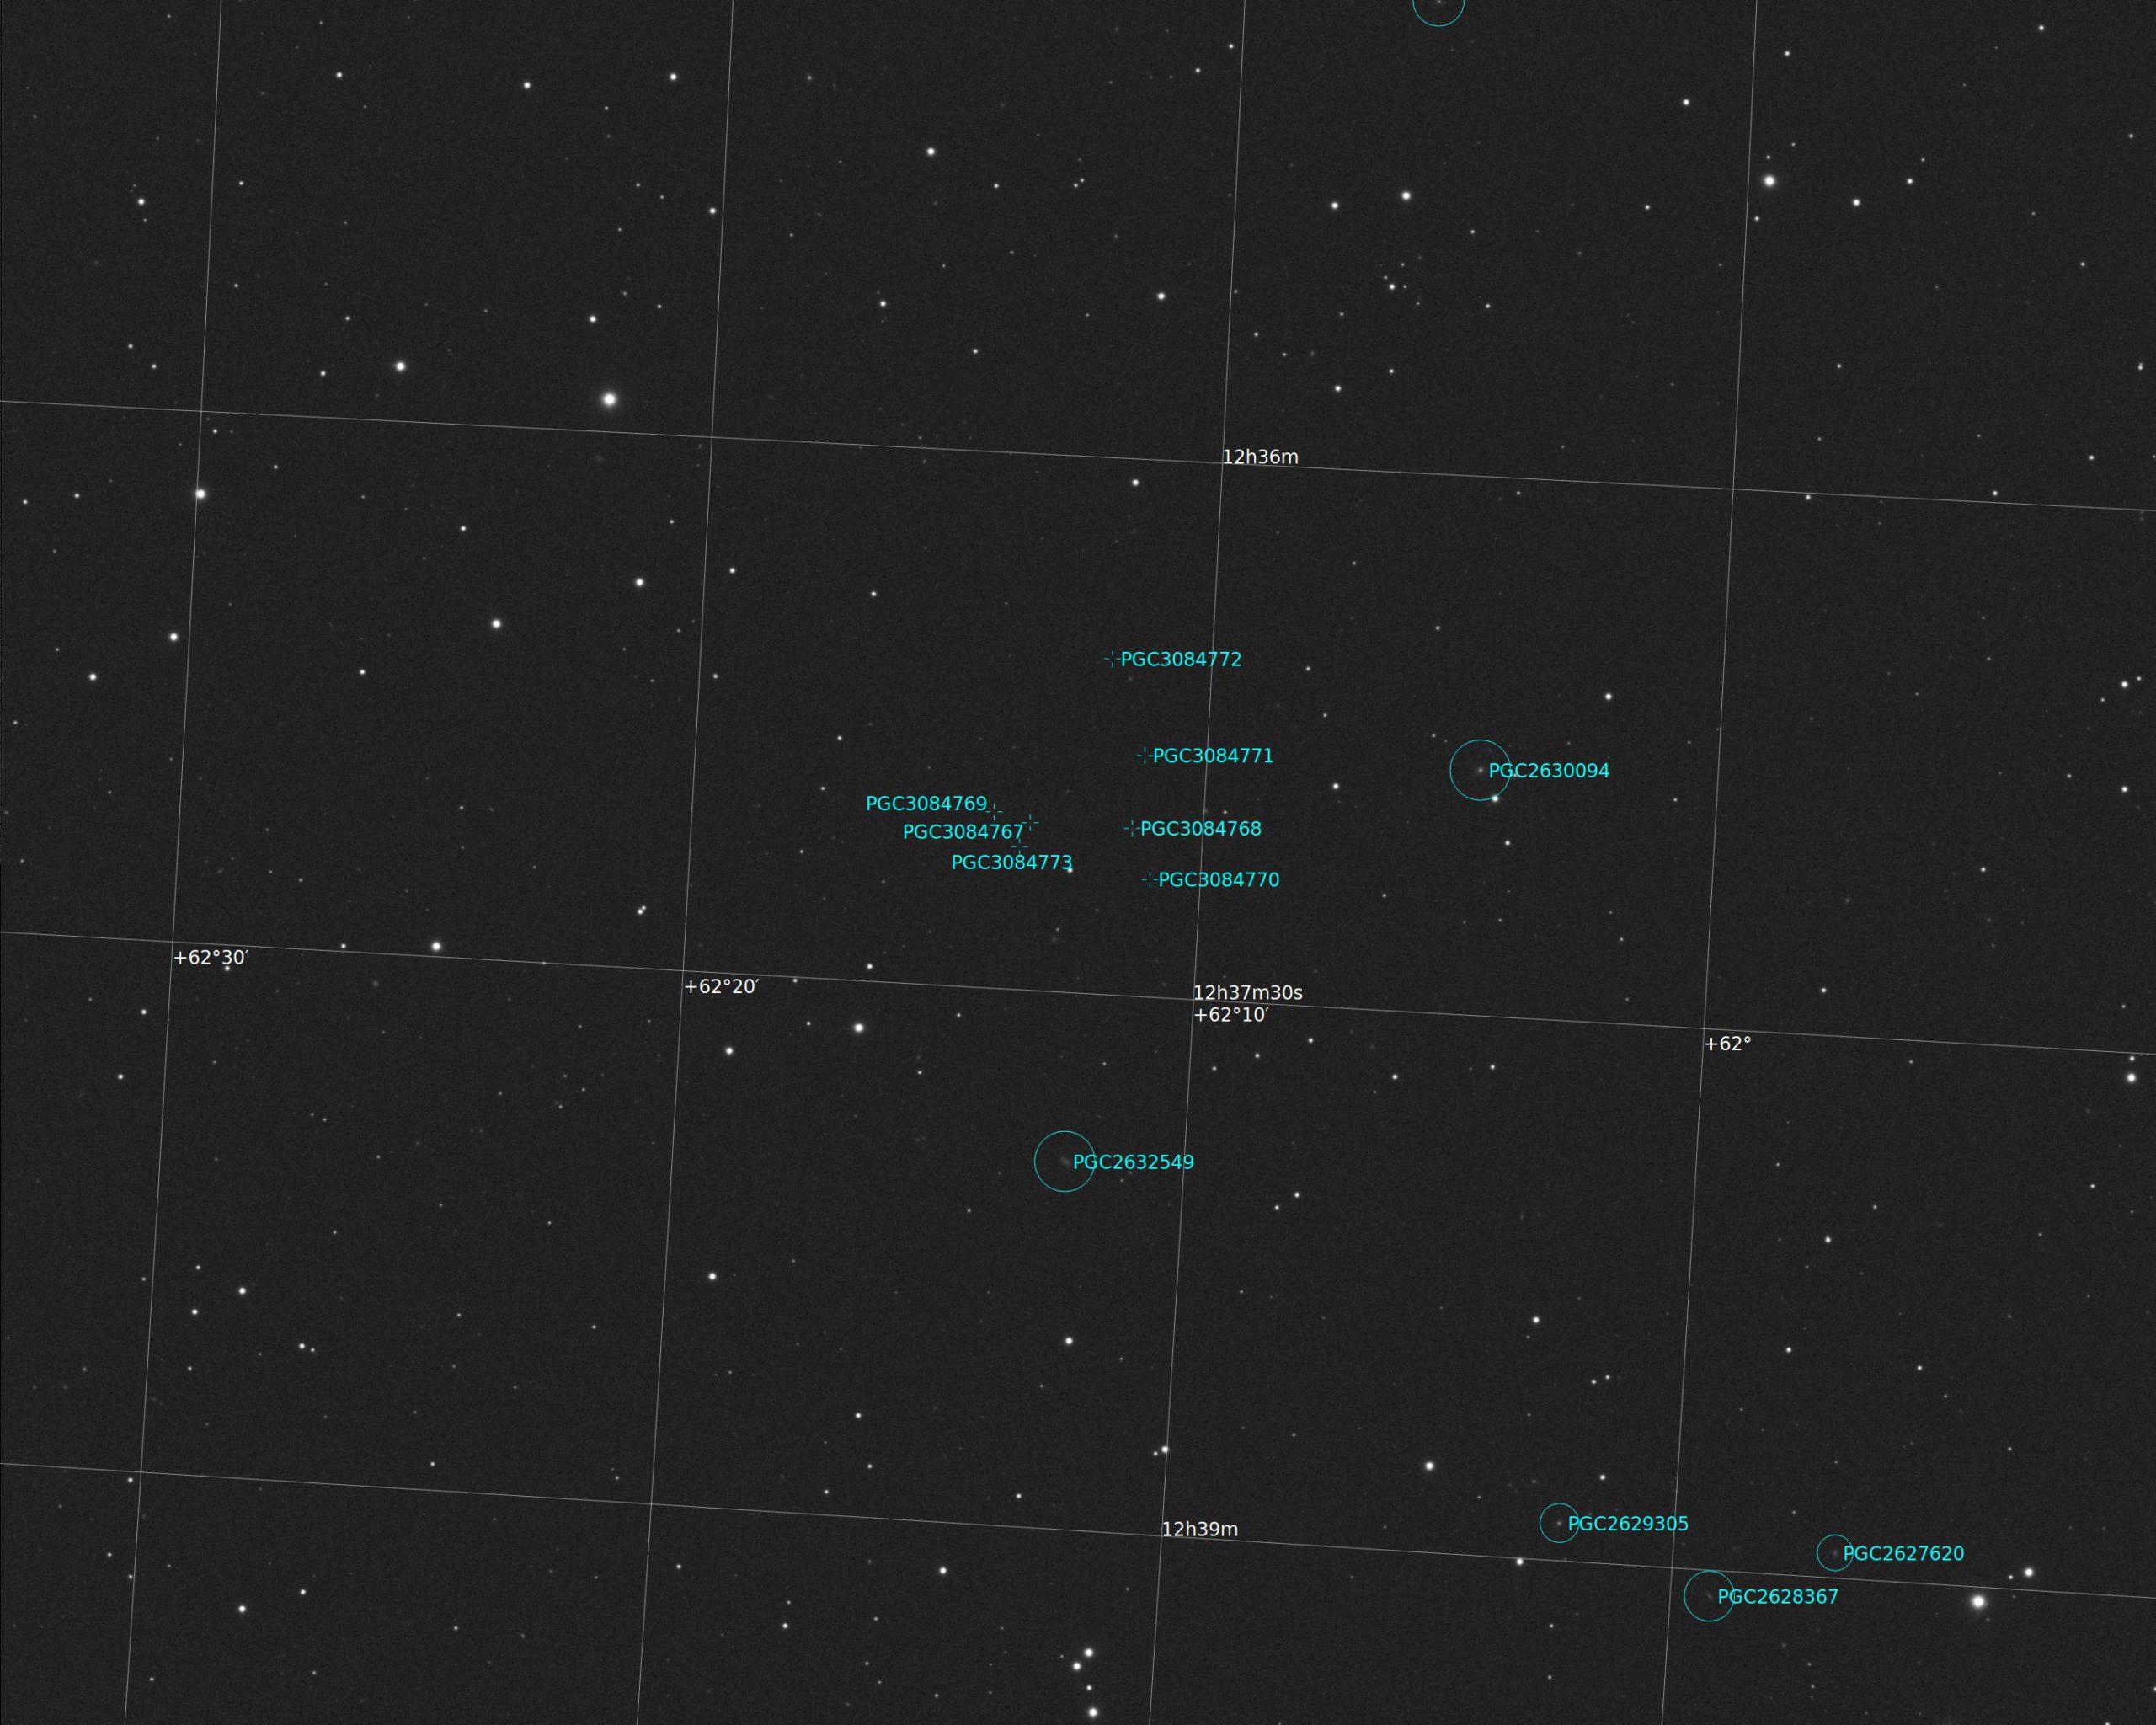
There are many extremely remote and faint fuzzy galaxies across this entire image. I then plate solved this image in PixInsight above to give me the galaxies surrounding the HDF as indicated on the left. Note the PGC galaxies. I used these to zoom in on the Hubble Deep Field area.
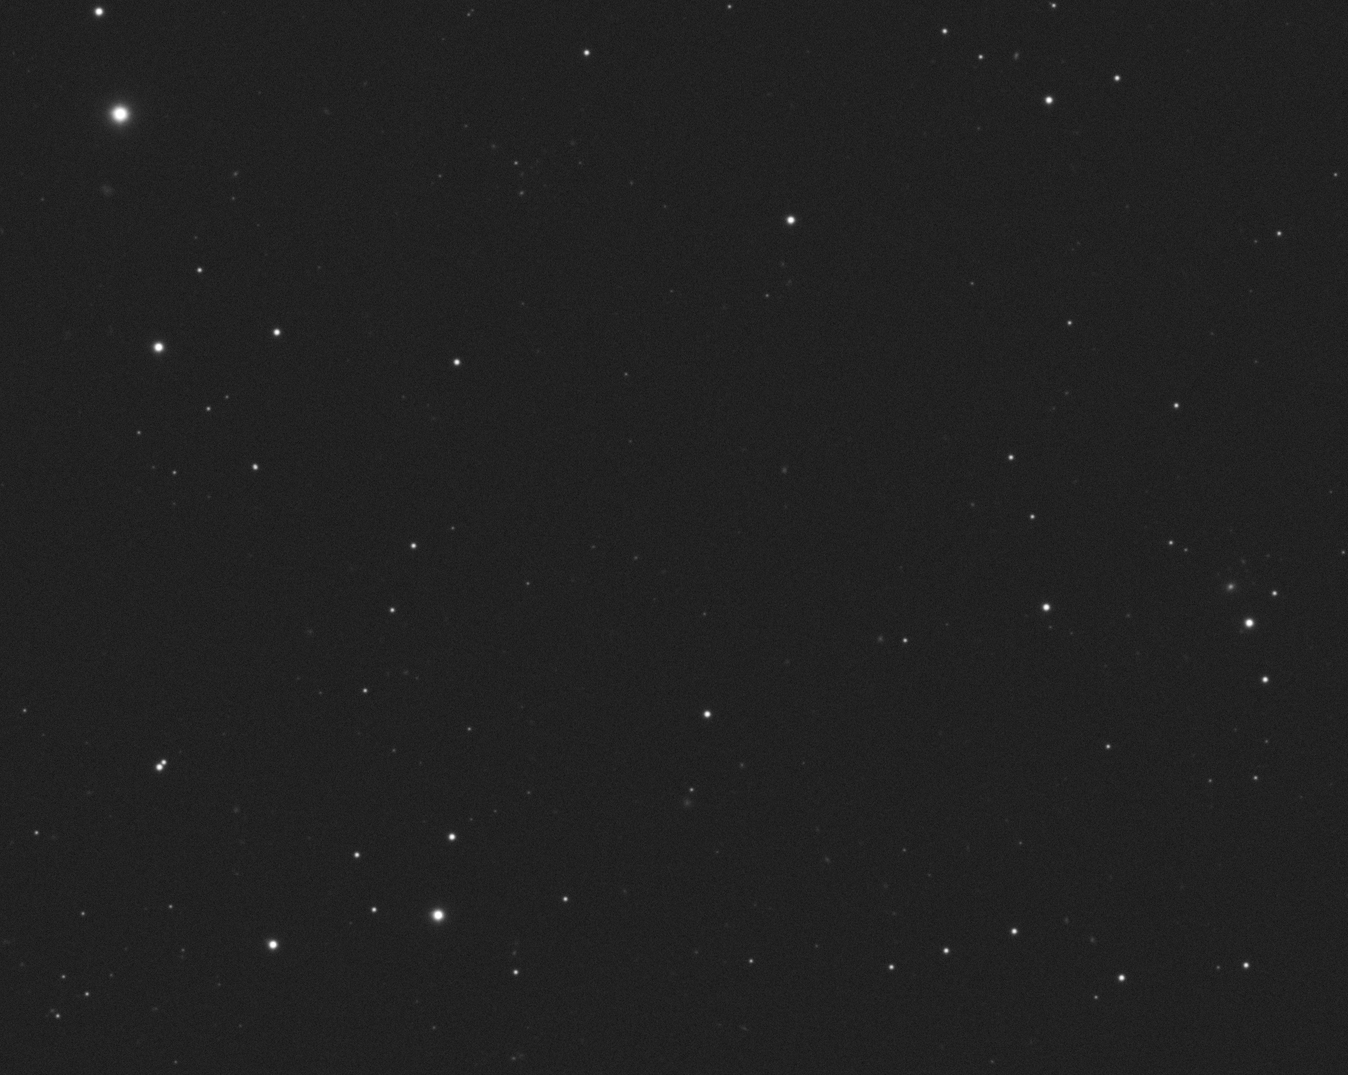
To the left is a zoomed in view of the Deep Field. The HDF is located just above the middle star that is one third of the way up from the bottom of the image.
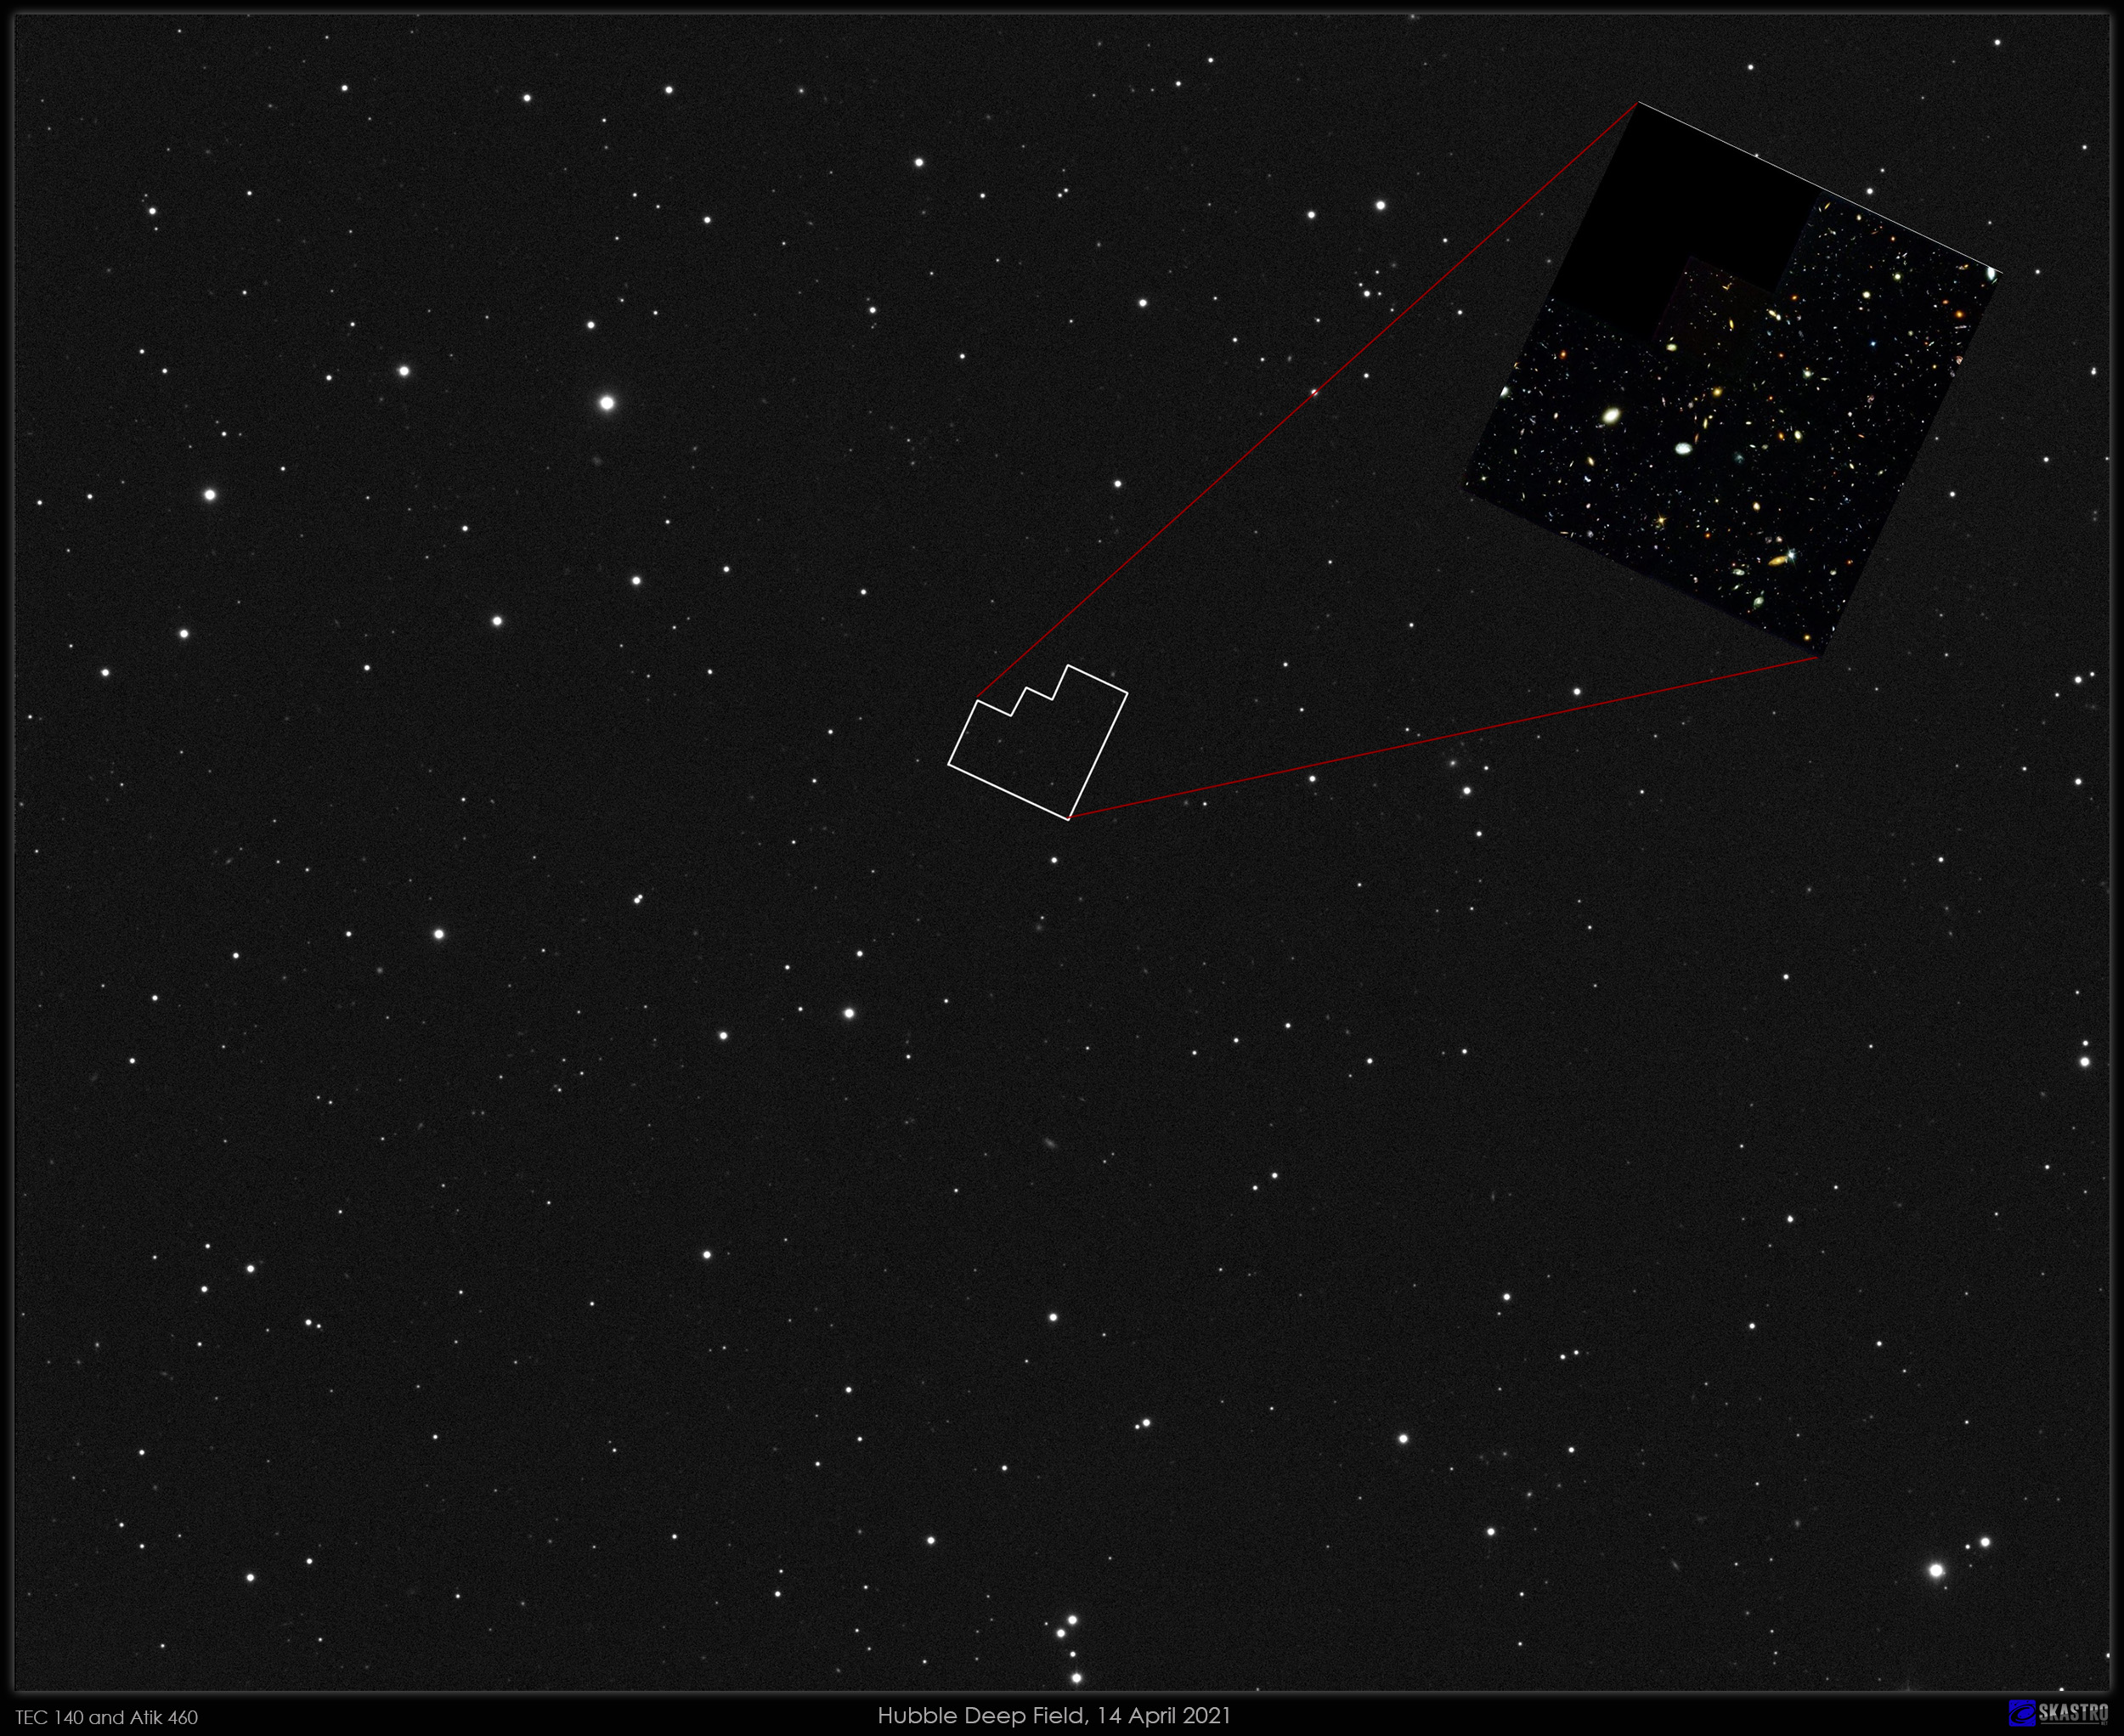
Above is the HDF annotated by superimposing the HST version of the HDF and rotating and scaling it in Photoshop to match my image. You can clearly see the four brighter galaxies (about five billion light years away) and a few of the others in my image.
It is quite remarkable what amateur equipment is capable of these days!
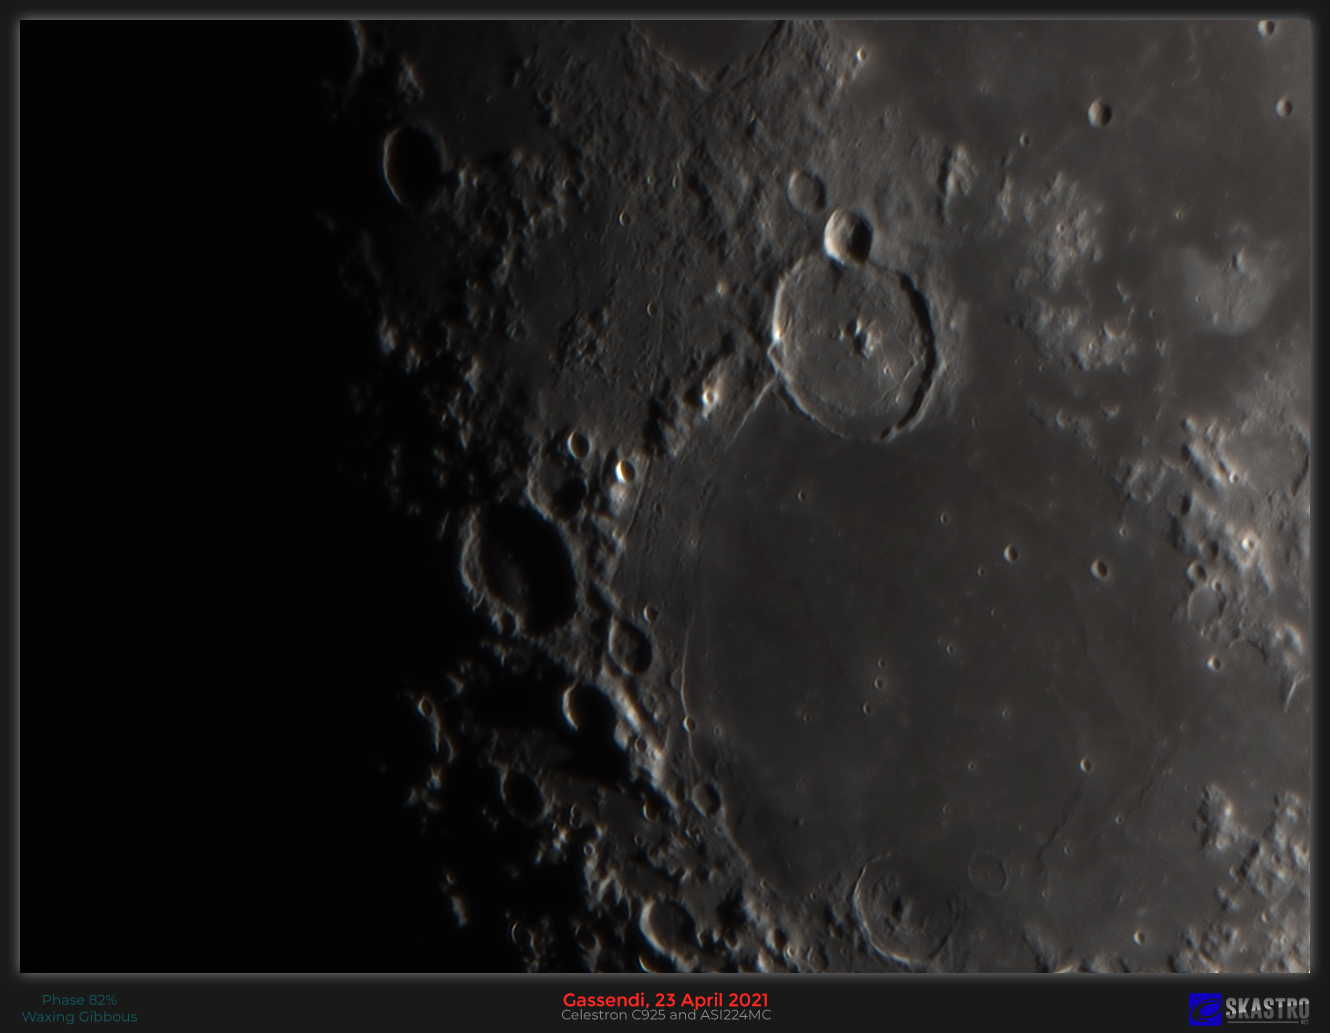
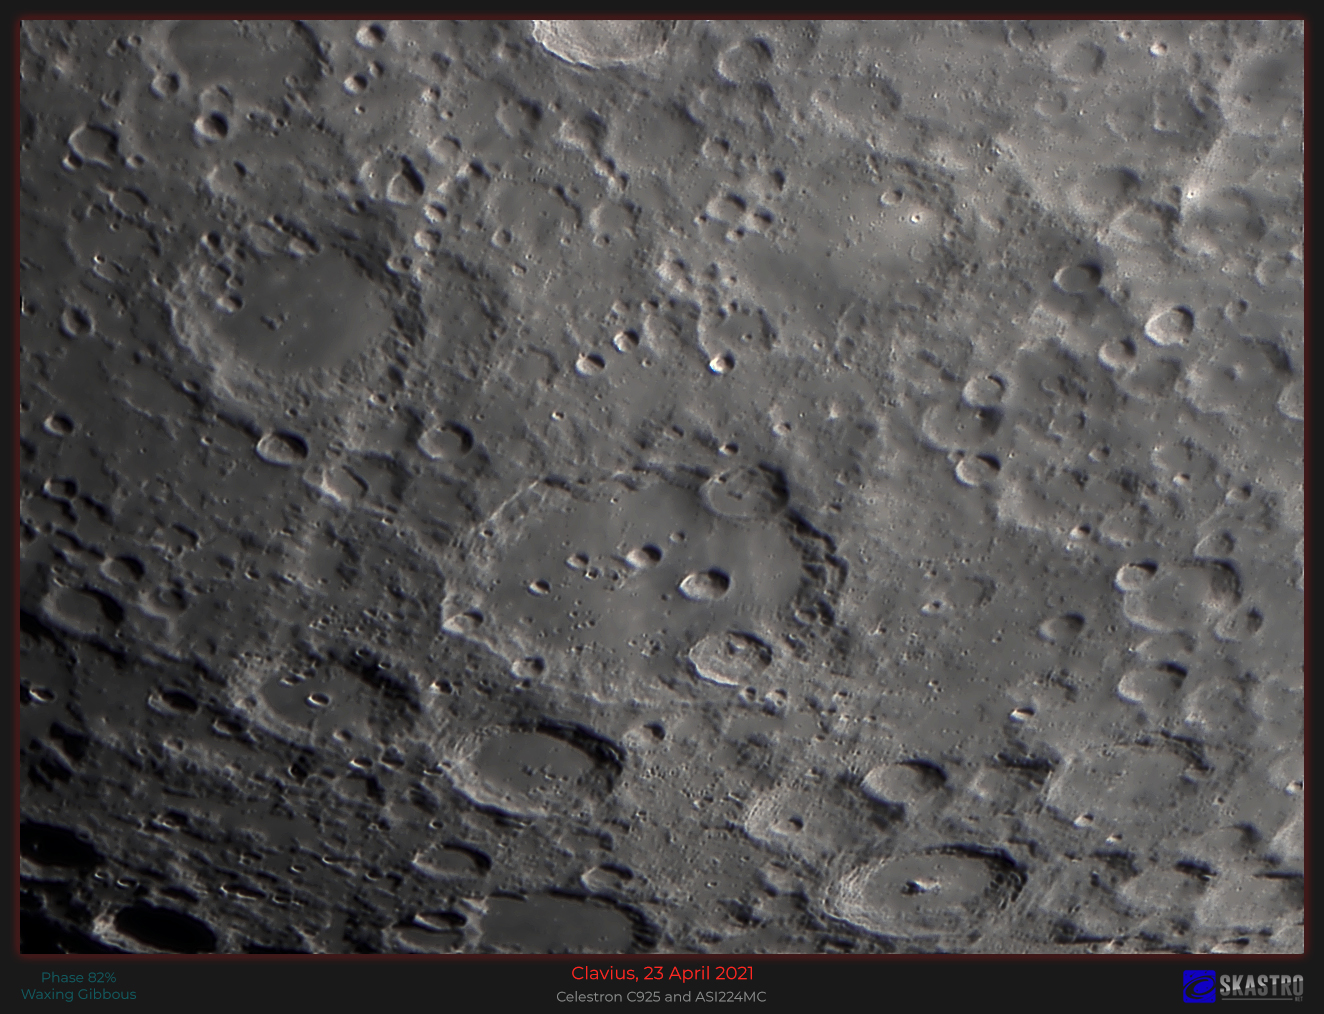
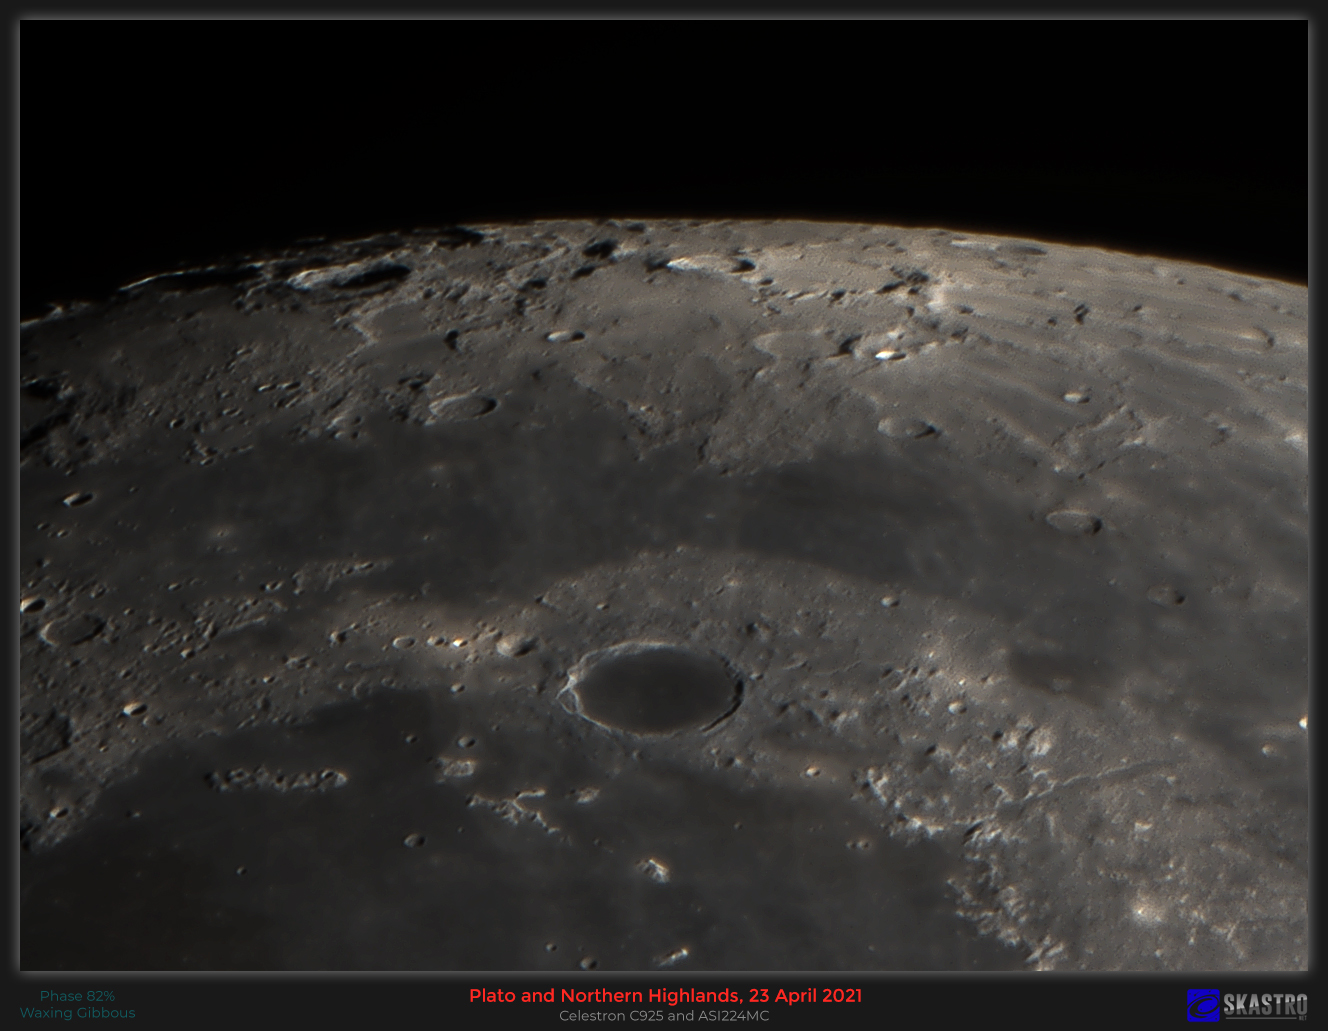
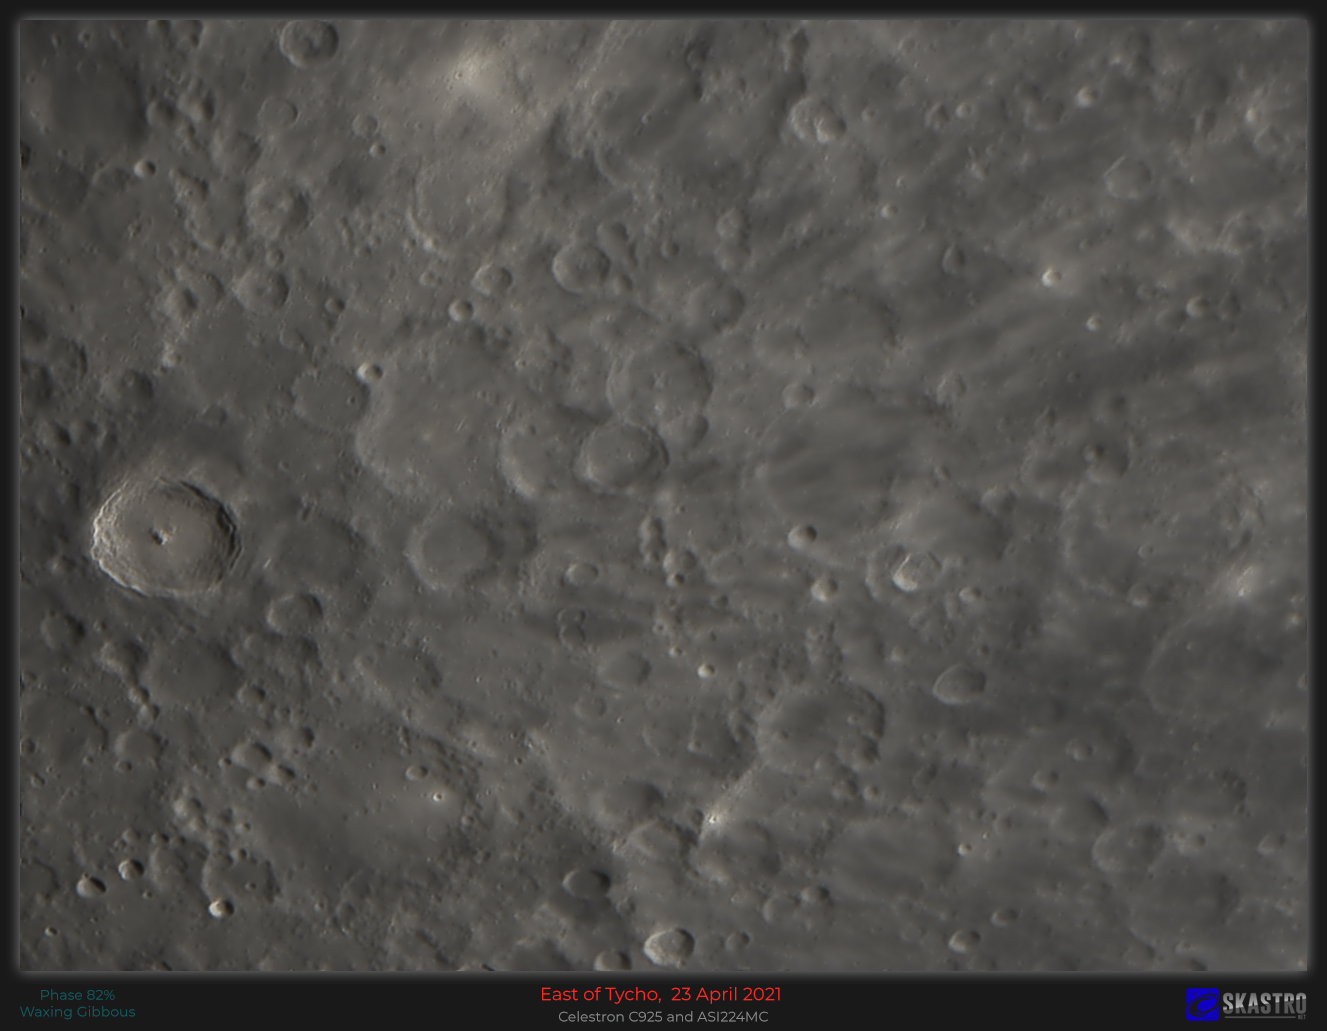
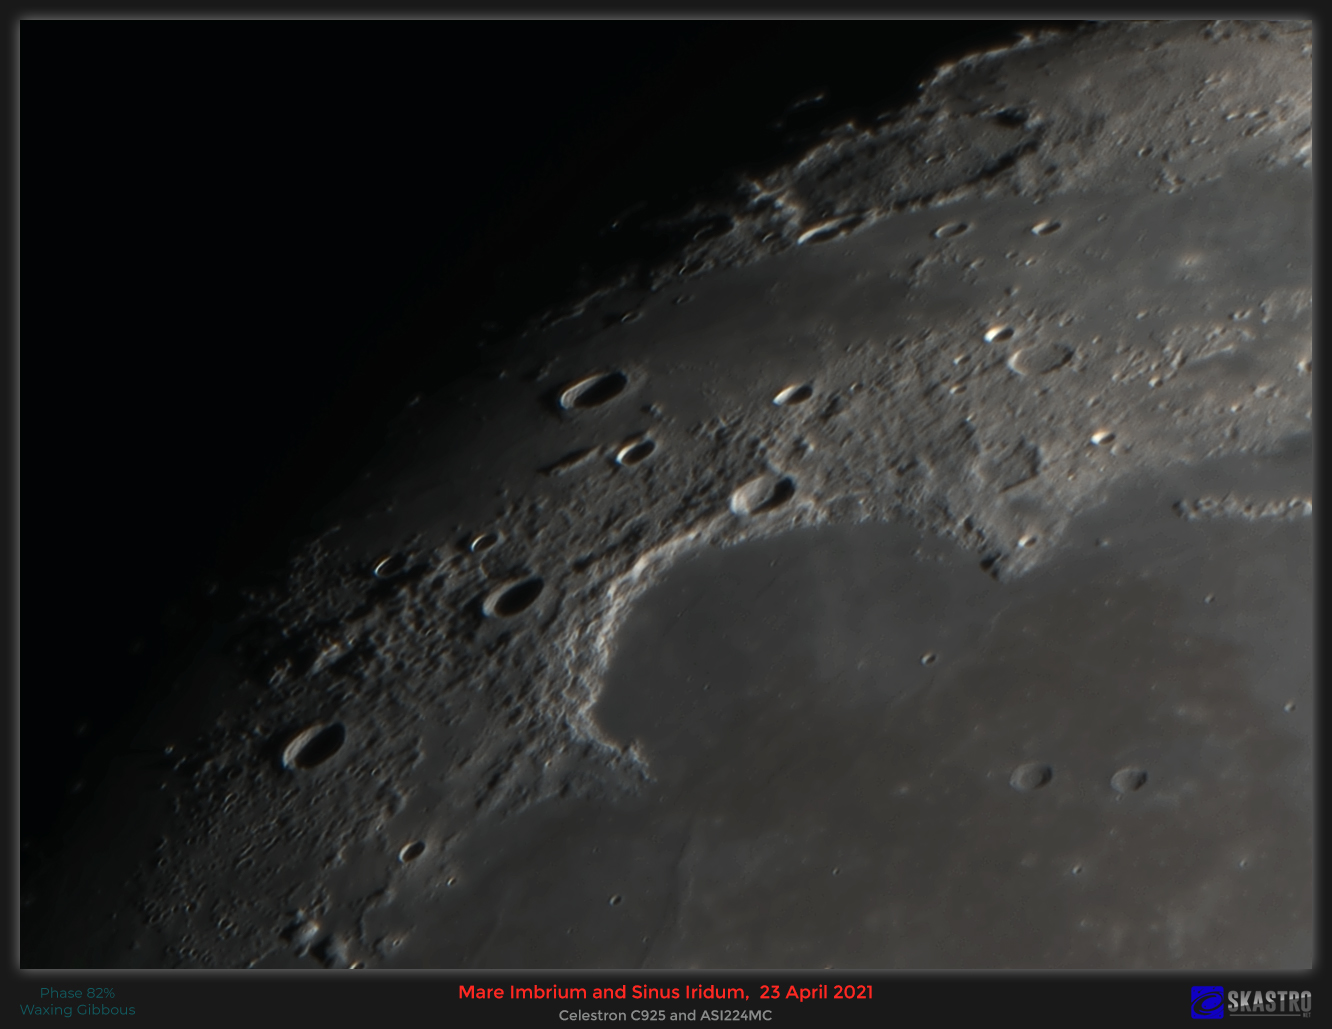
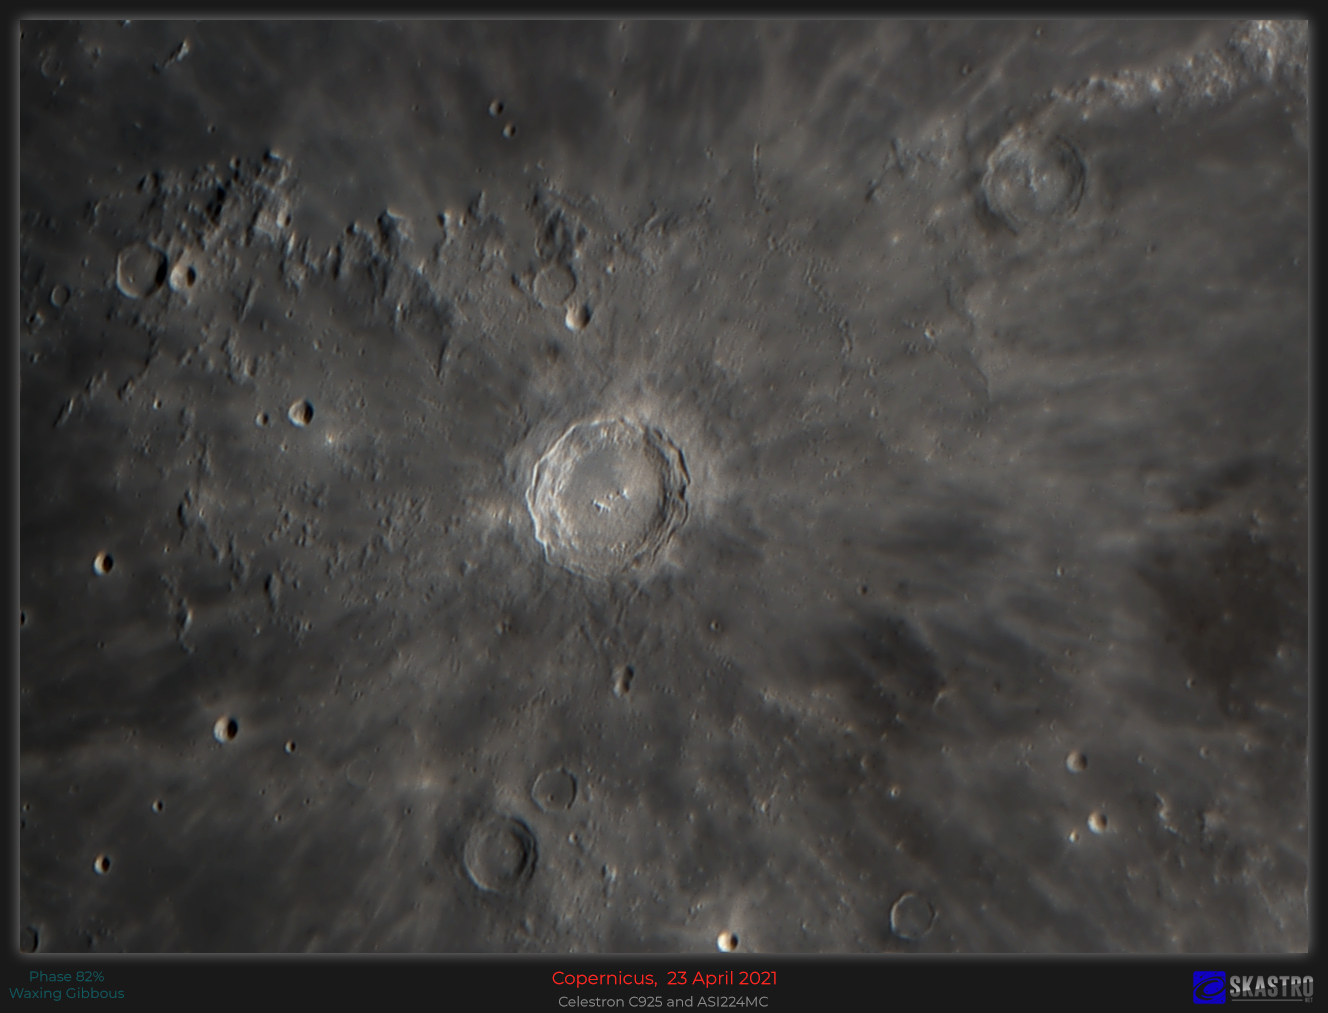
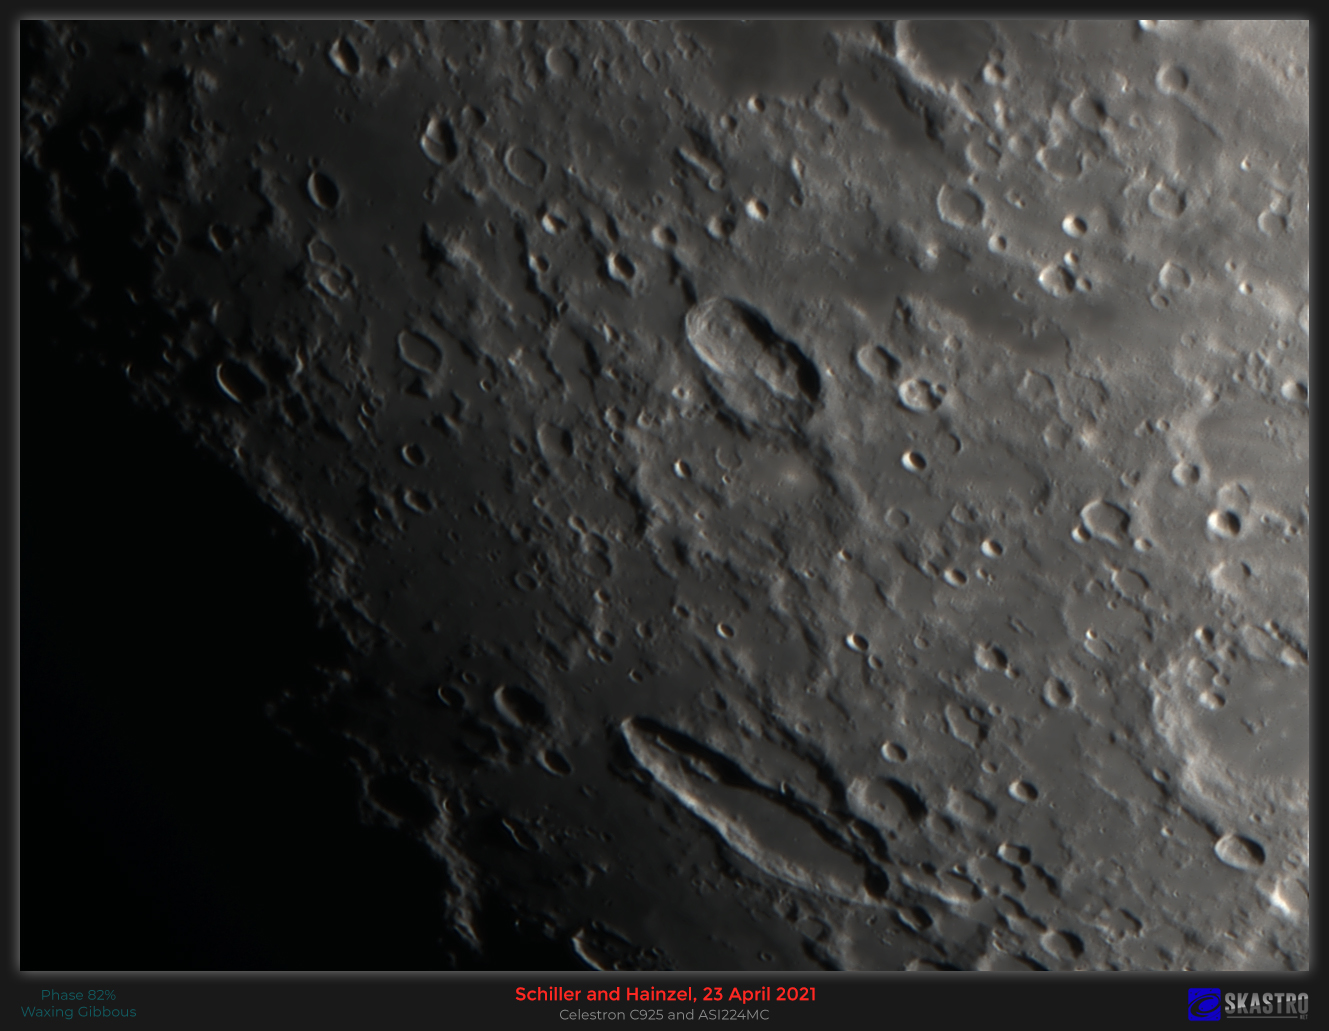
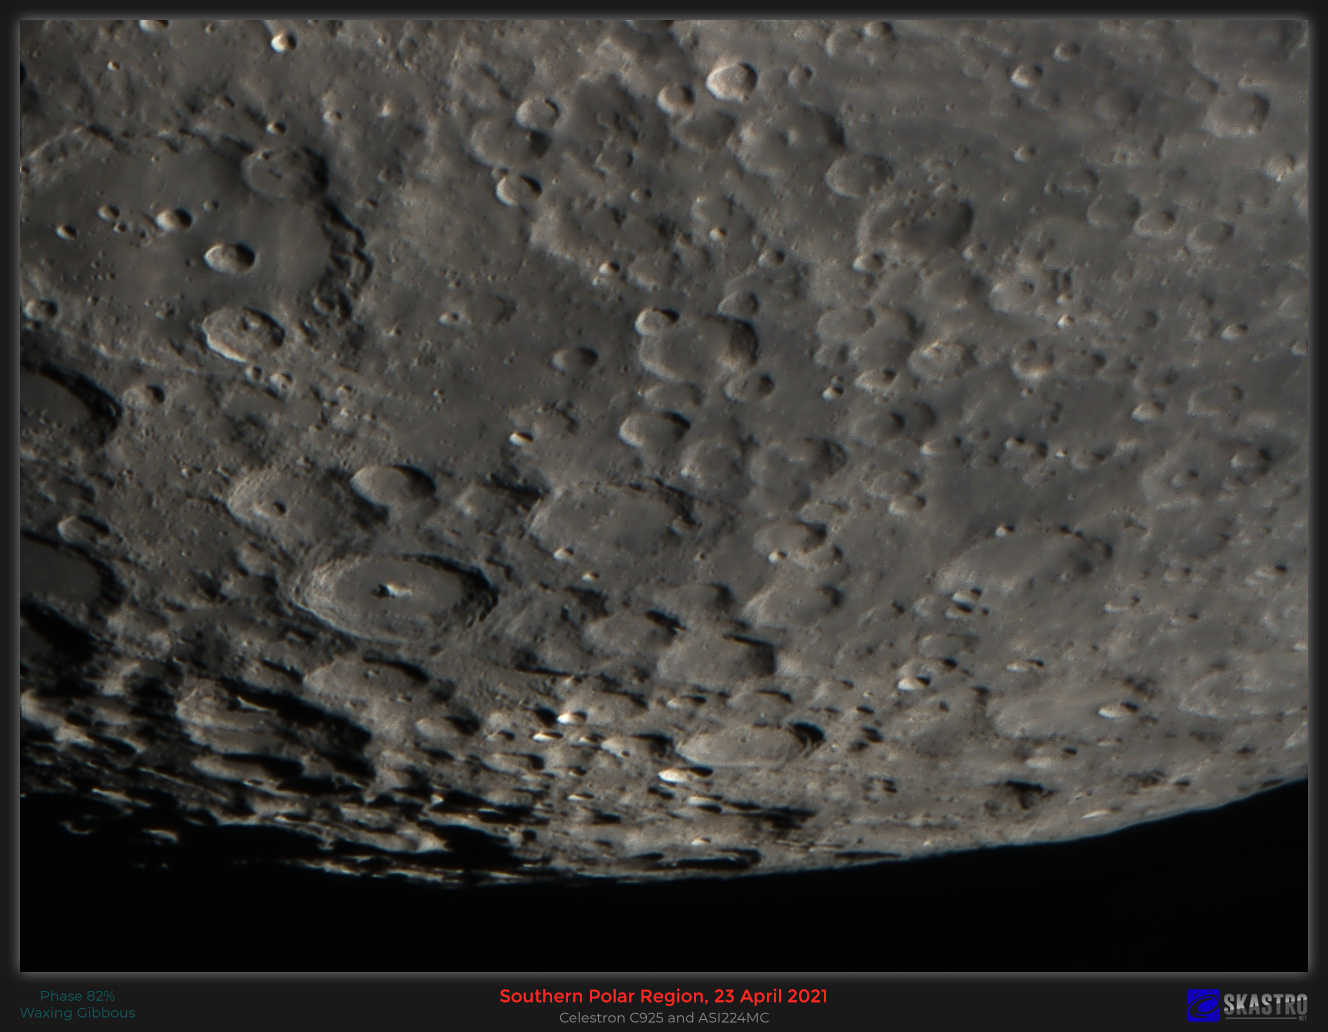
Lunar Pictures from 23rd April 2021 C925 and ASI224MC
A selection of images I took with my C925 and ASI224MC. Transparency was reasonably good but seeing was quite poor and the image was wobbly. Each image is developed from a 5000 frame .ser file choosing the best 15% of frames as a result of the poor seeing. The Moon is at a phase of 82% waxing gibbous and some nice shadows on the terminator.
From my back yard observatory in Nottingham, UK. Using Celestron C925 SCT telescope and ASI224MC colour high speed planetary camera.
Telescope is at its native focal length of F10 for all these images since the seeing was much too unstable to use a Powermate or Barlow, even a x2 one woudl have been too much on this session.
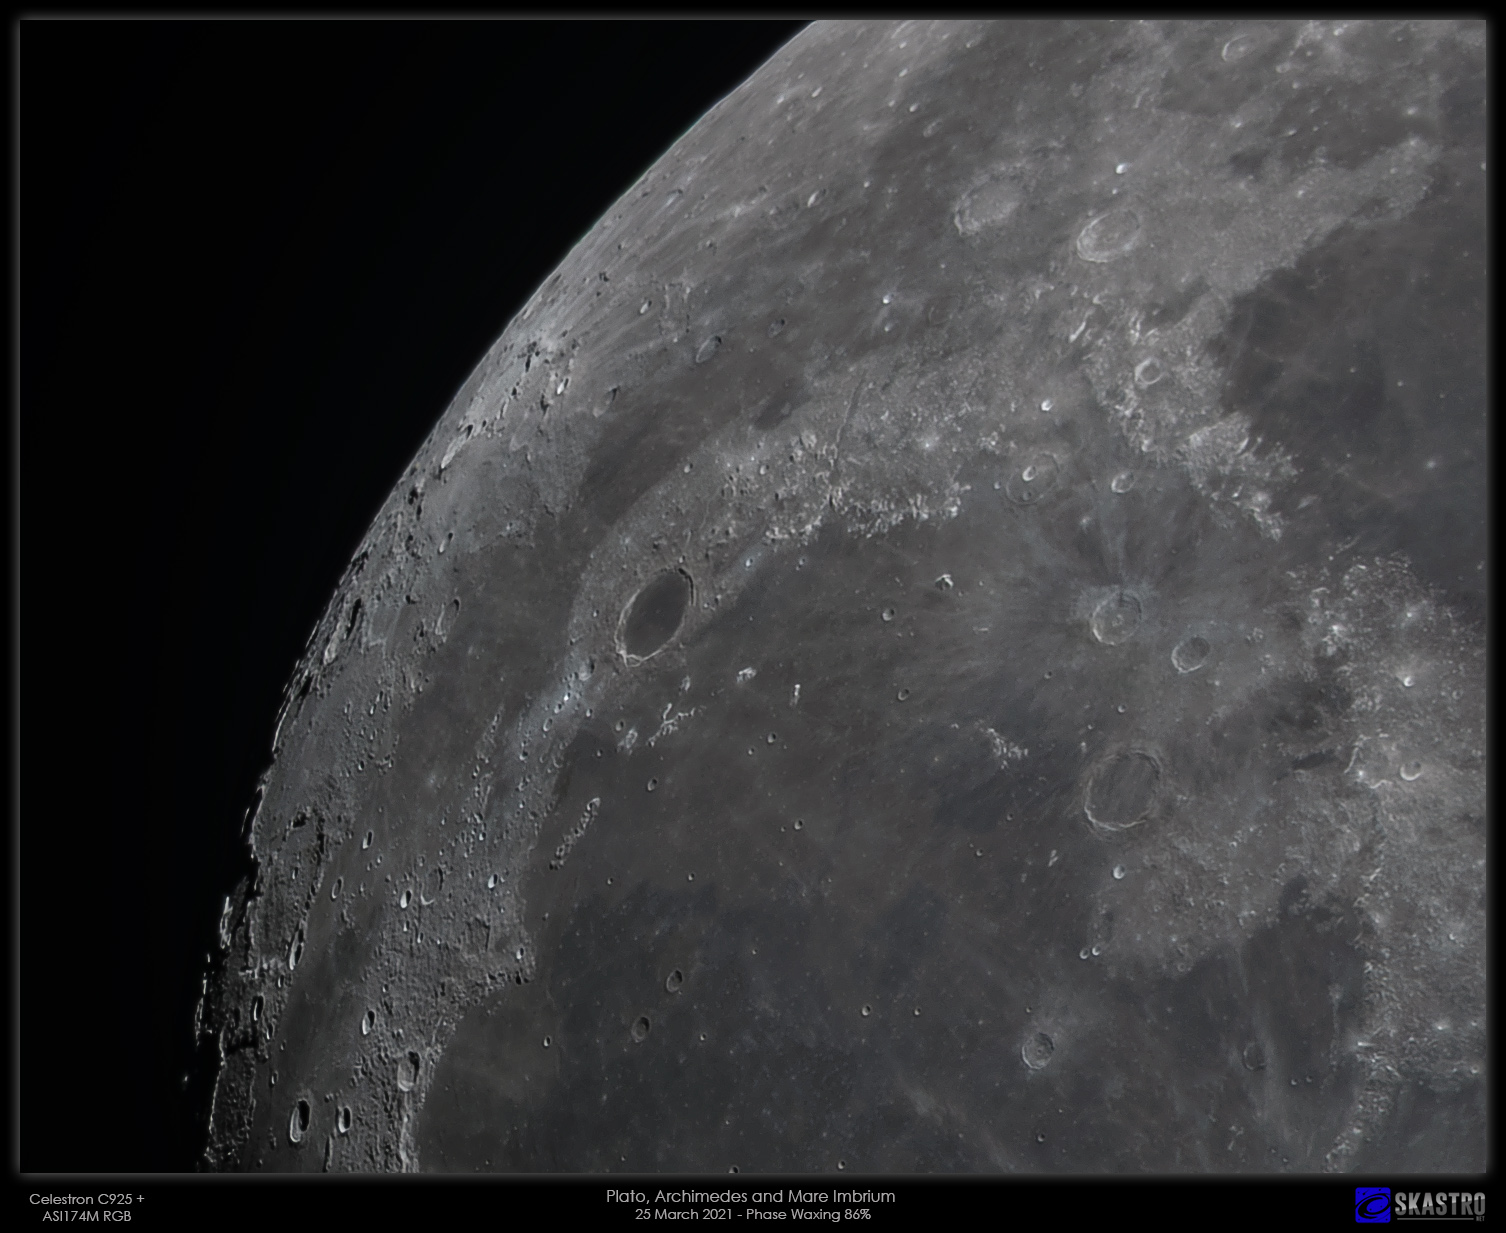
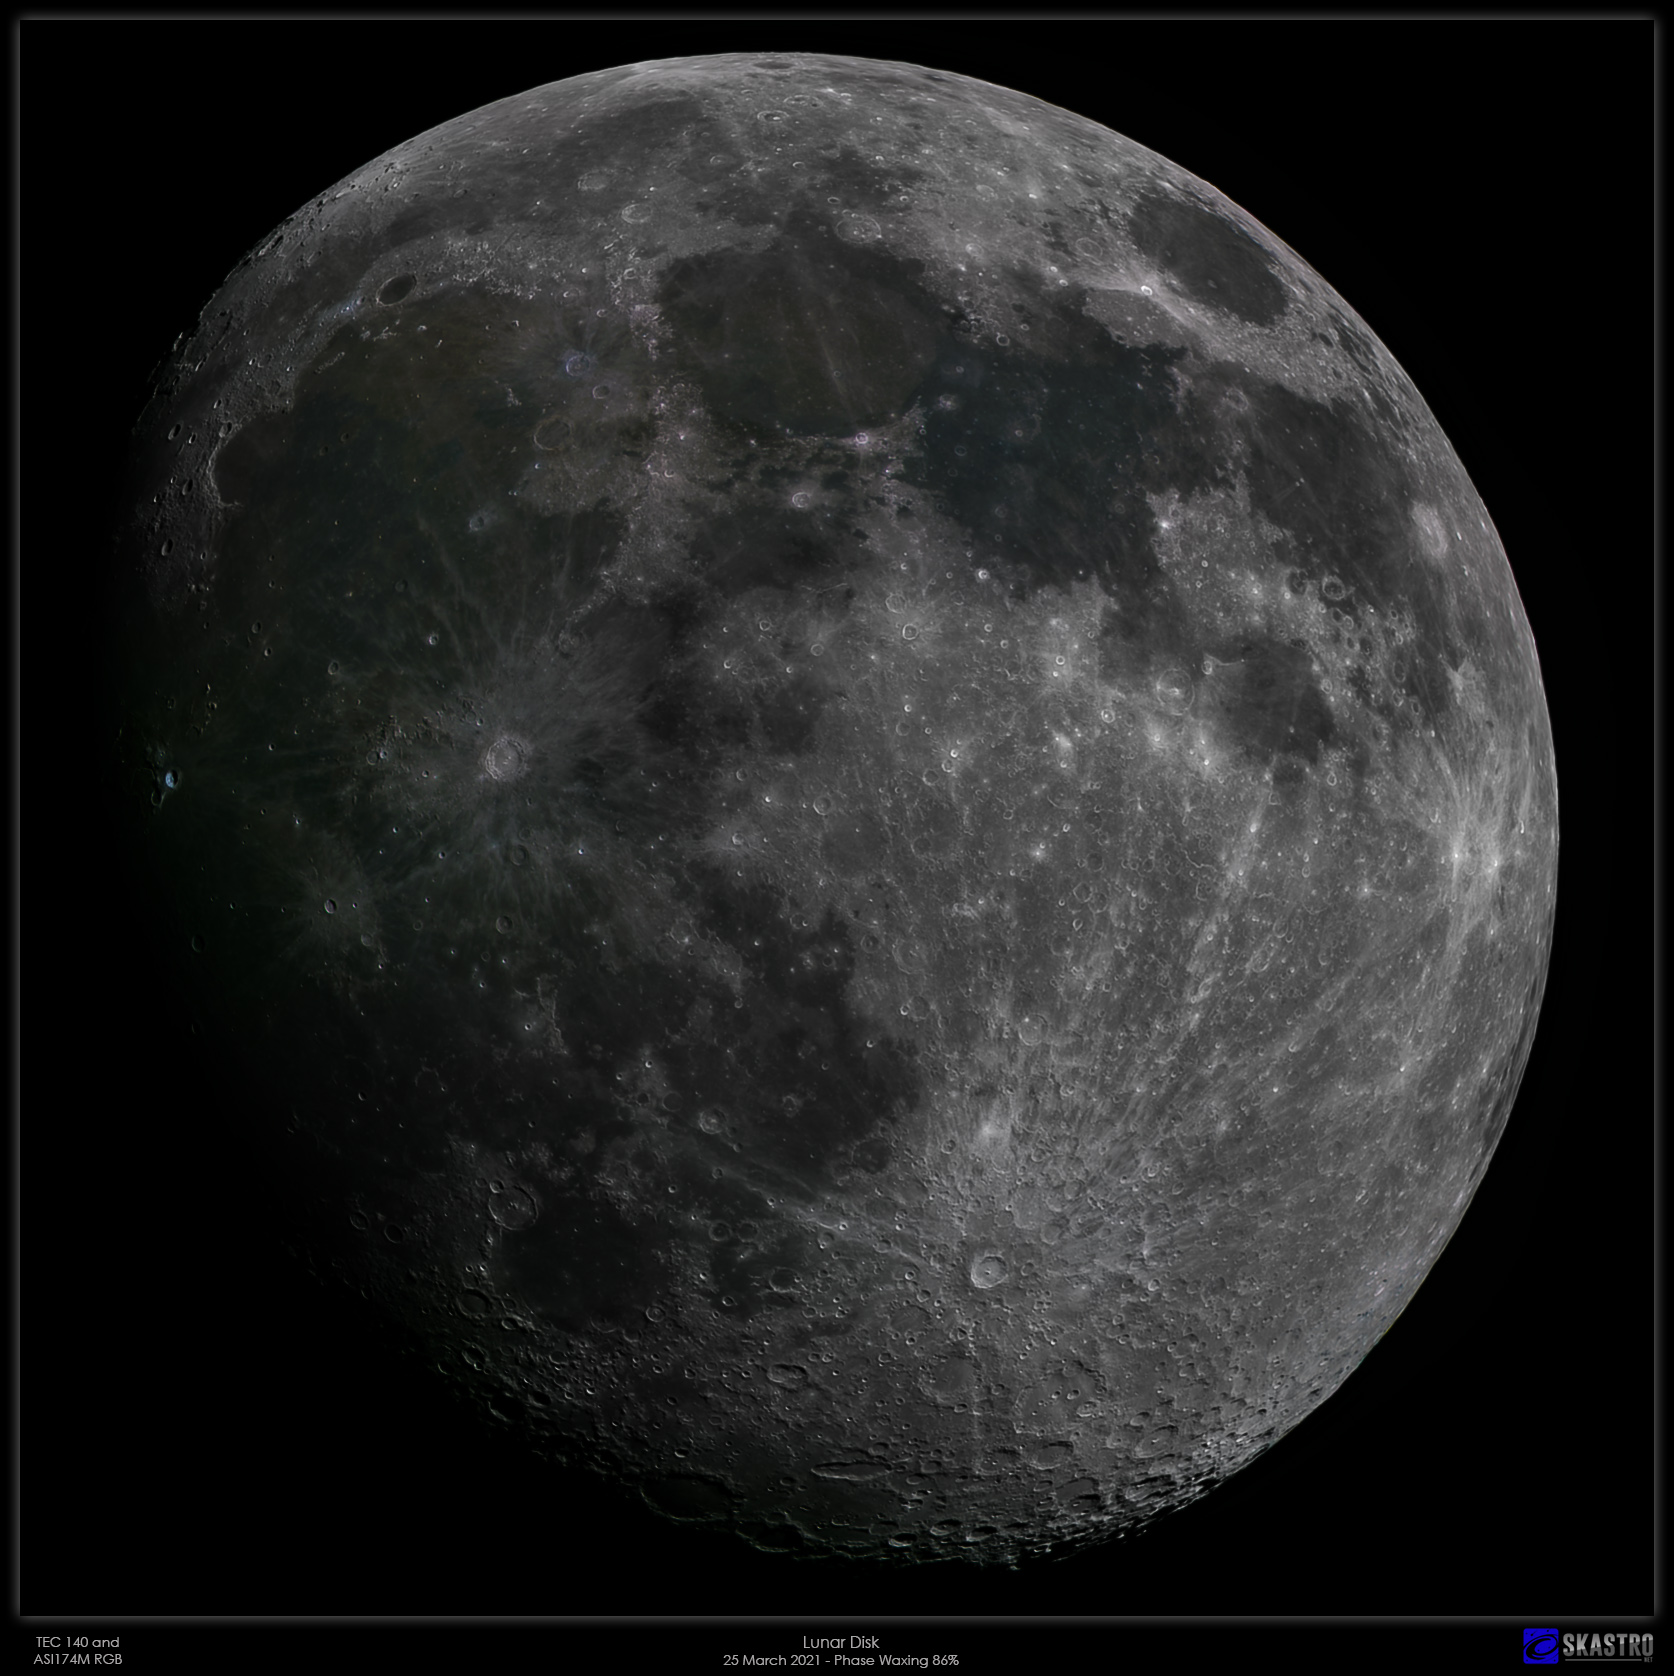
Lunar Images from 25th March 2021 with TEC140 and C925 SCT with ASI174M
Images on this post were made by using the TEC140 and Celestron C925 SCT telescopes with my ASI174M mono camera. From my backyard in Nottingham on the evening of 25th March 2021 with the Moon high to the south in Leo at a phase of 86% waxing (i.e. growing towards full moon) and at an altitude of about 50 degrees above the horizon. A slightly hazy sky made for quite good seeing although it was very cold and windy and the moon was jiggling about a lot in the gusts, even inside my sheltered observatory. I had to try and time my capture runs between these gusts and passing clouds, a process that was not always successful. As a consequence I accumulated nearly 600G data for these four pictures in total, much of which had to be deleted. I was outside at the scope for about 90 minutes doing these captures.
All the captures were done in Firecapture software at about 60 fps in 16-bit mode. I used DeepSkyStacker for processing the .ser files and then Photoshop and PixInsight for image processing.
First up, the partial disk image below is with my TEC140 refractor (flattener removed) and the ASI174M camera. This is a two pane mosaic using RGB (Baader CCD RGB filters) for colour and a Baader Ha 7mm filter for the luminance. For the merging together of the two panes I used the Photoshop merge tool. The image is the best 50% of 6000 frames in each of the RGB channels and the top 50% of 10000 frames in the Ha. For my next run on this I am going to try for 20000 frames in each of the RGB to try and get more colour since I struggled to get more colour out of the bluer cobalt rich regions.
I am very happy with this image other than I wish it had that bit more colour. I think my technique of the Ha channel for the luminance is highly effective. I deconvolved this in PixInsight and then used a bit of HDR multiscale transformation and a bit of Unsharpmask to get a wonderful crisp luminance without overdoing it as I often see with some lunar images.
The RGB is simply aligned RGB channels with the alignment performed with the Star Alignment tool in PixInsight which is easier than Photoshop in my opinion for this purpose.
Below we have three images of the Moon in a closer up or more "zoomed in" imaging scale. These are with the C925 SCT telescope at its native F10 focal length - i.e. no Barlow - and again with the ASI174M with RGB filters. I did not use a dedicated luminance channel with these three images and I instead used RGB channels and made a pseudo-luminance after balancing those three channels in a 1:1:1 combination to create the pseudo-luminance. I then used deconvolution, HDR multiscale transformation and Unsharpmask in PixInsight on this pseudo-luminance to enhance the details before blending it with the RGB composite in Photoshop.
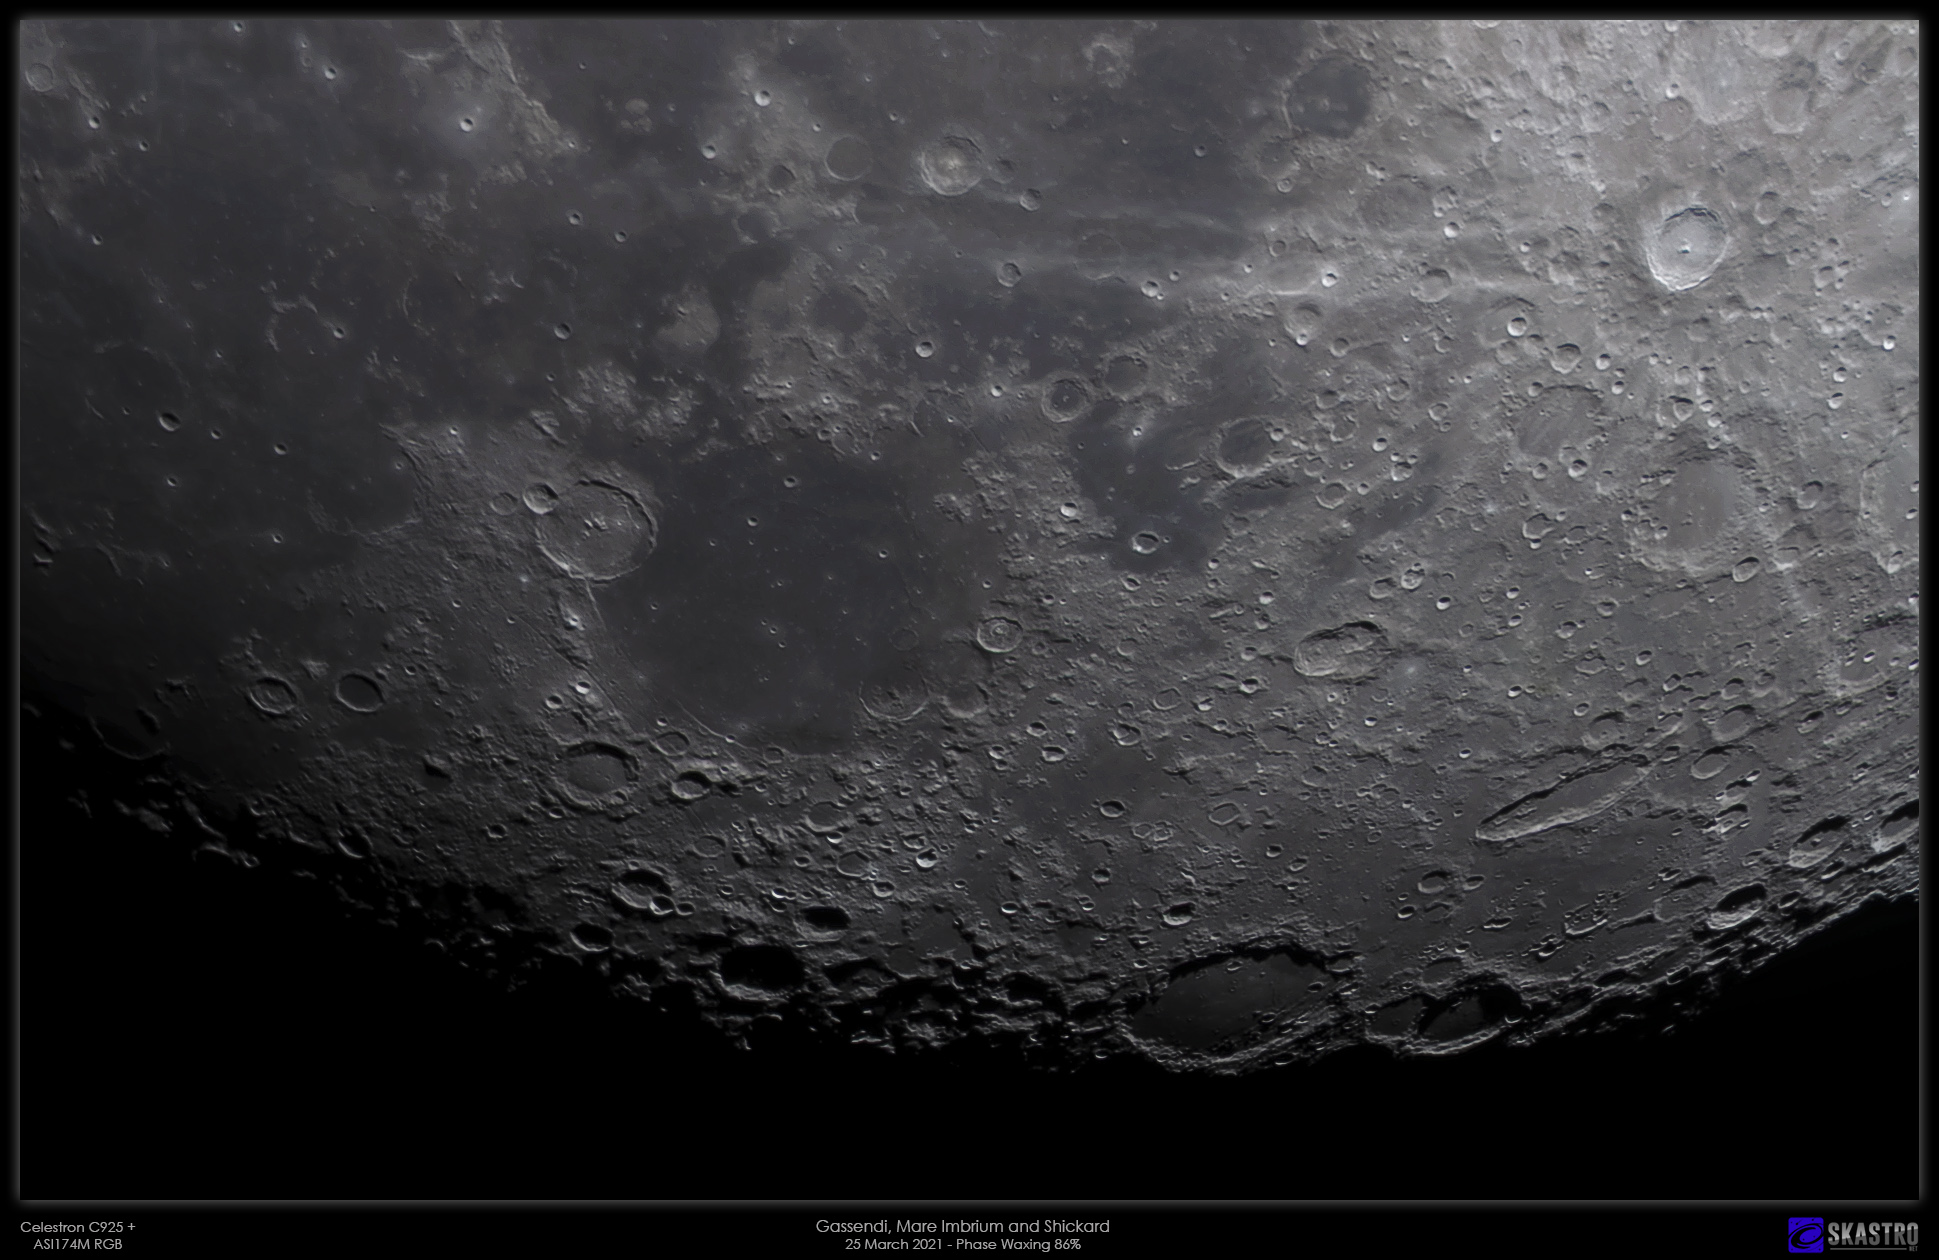
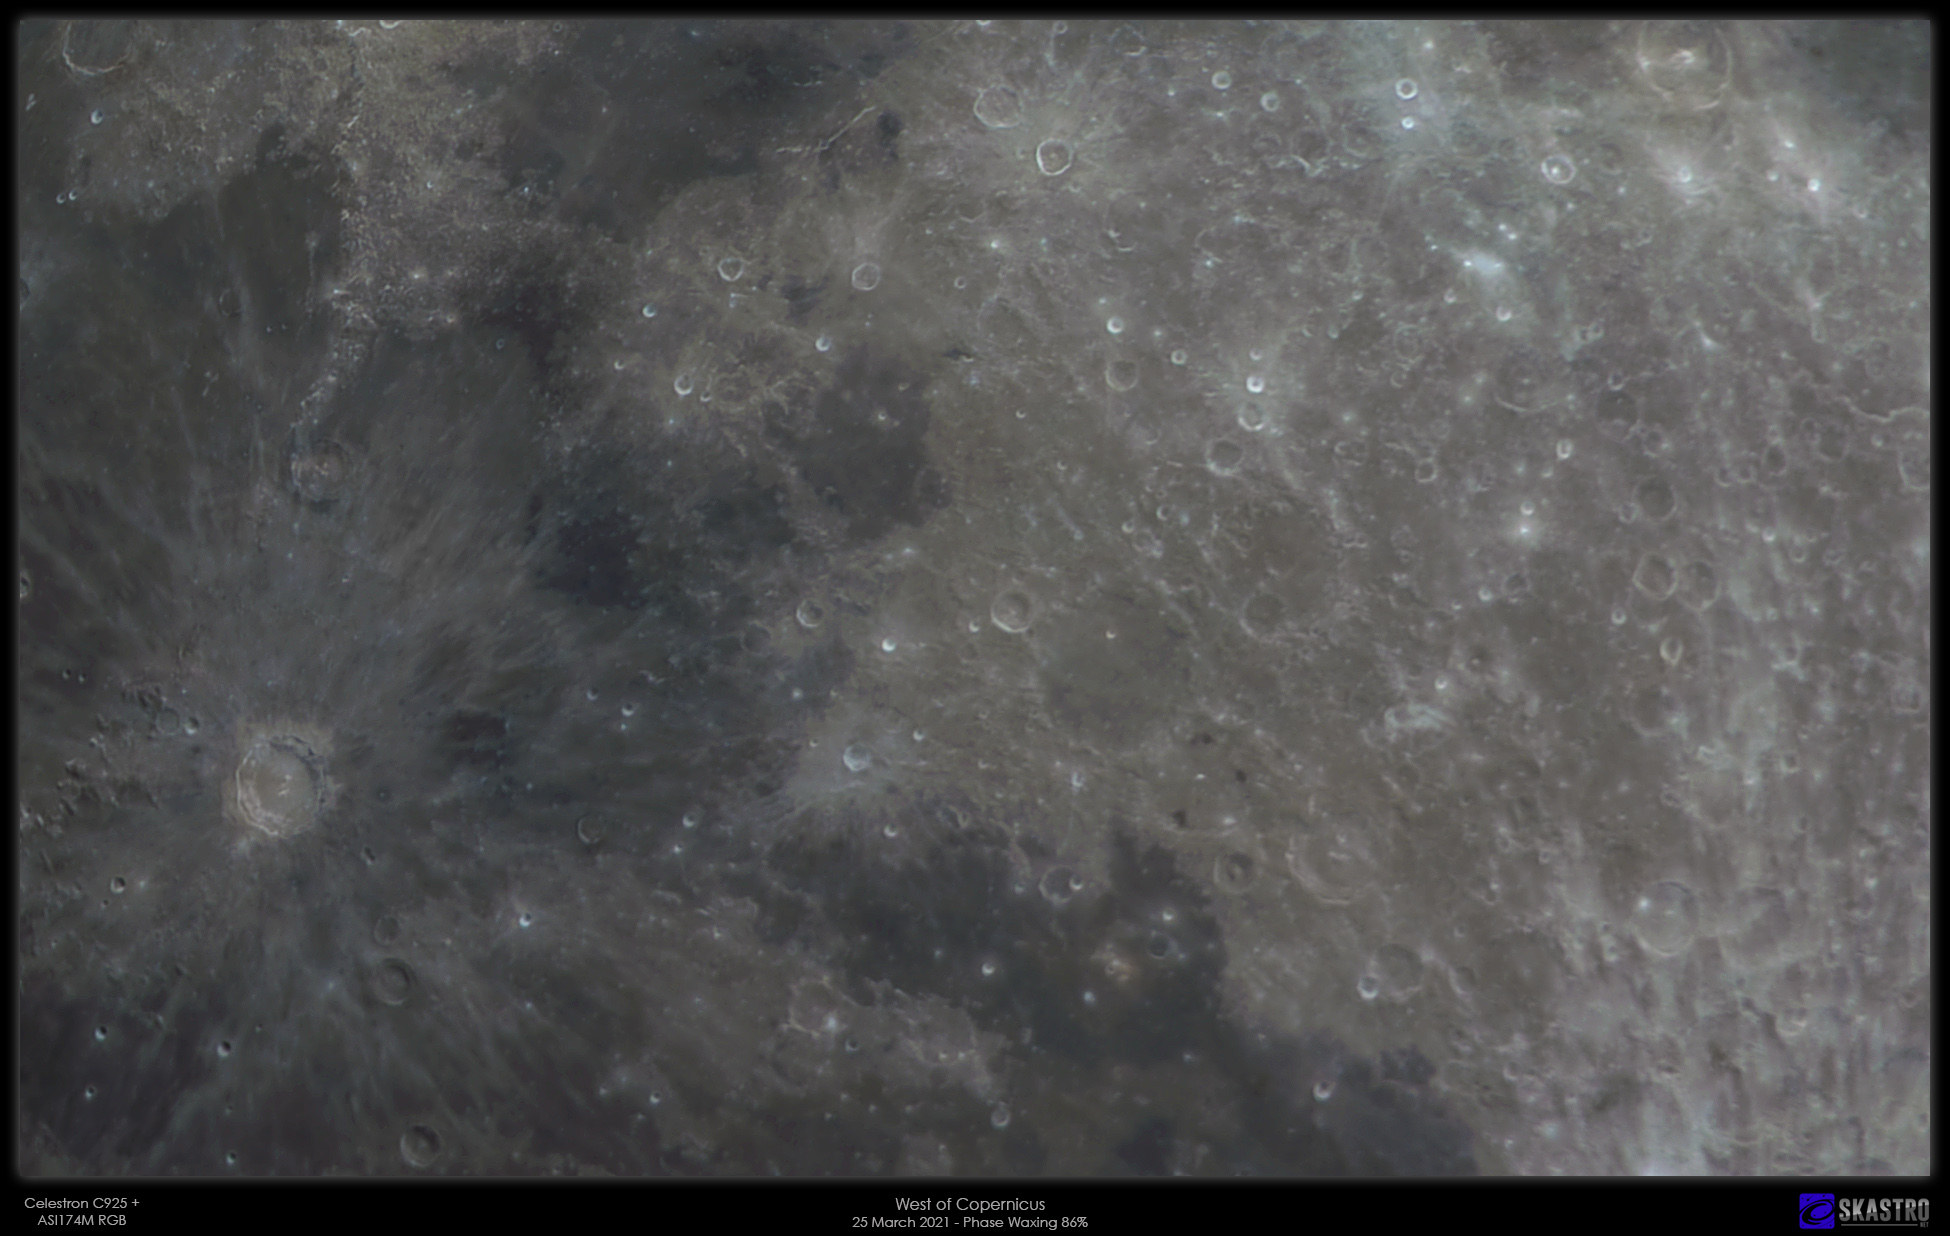
I hope you like them!
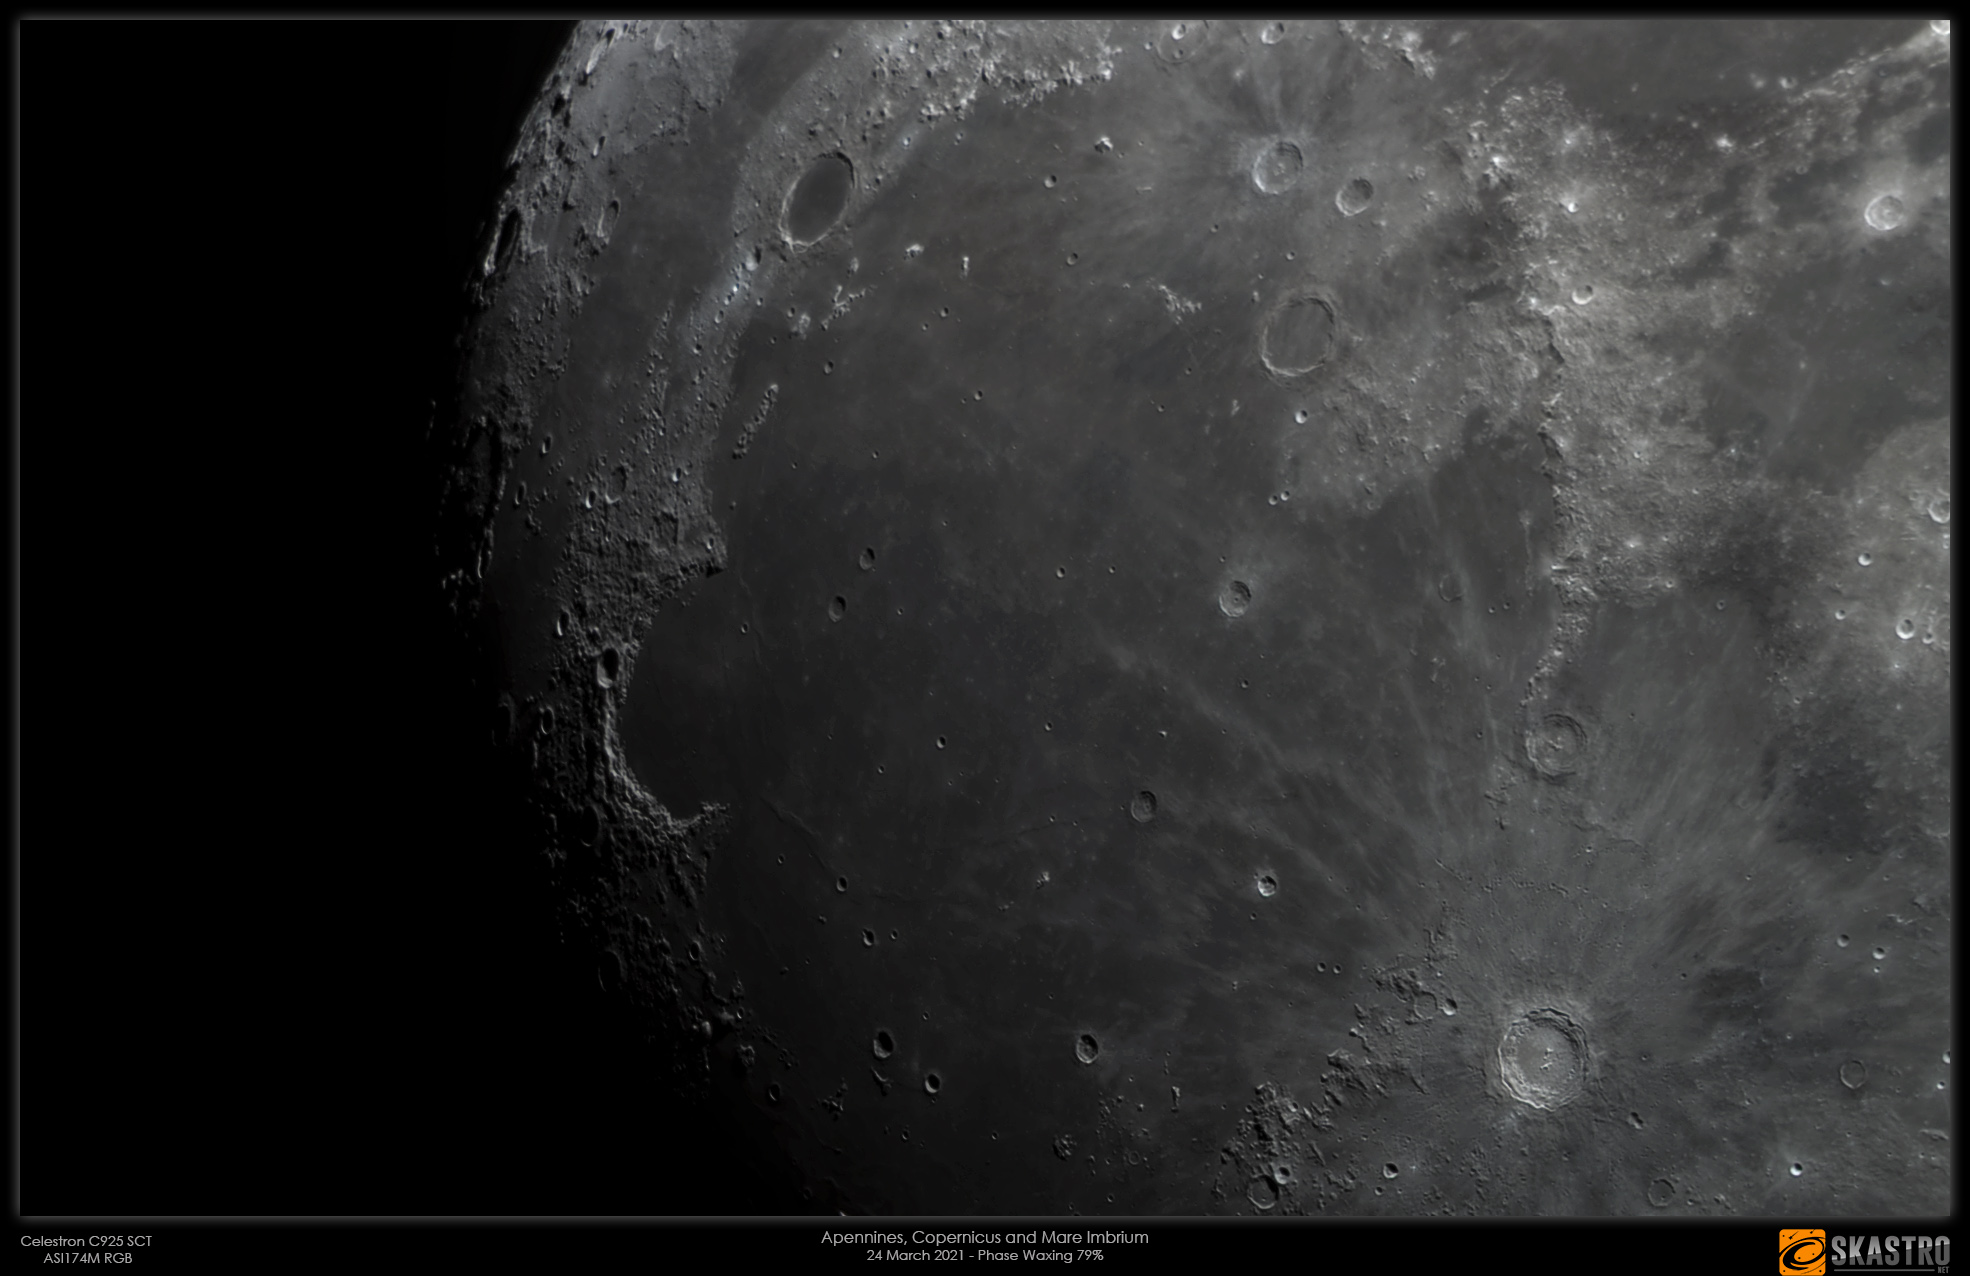
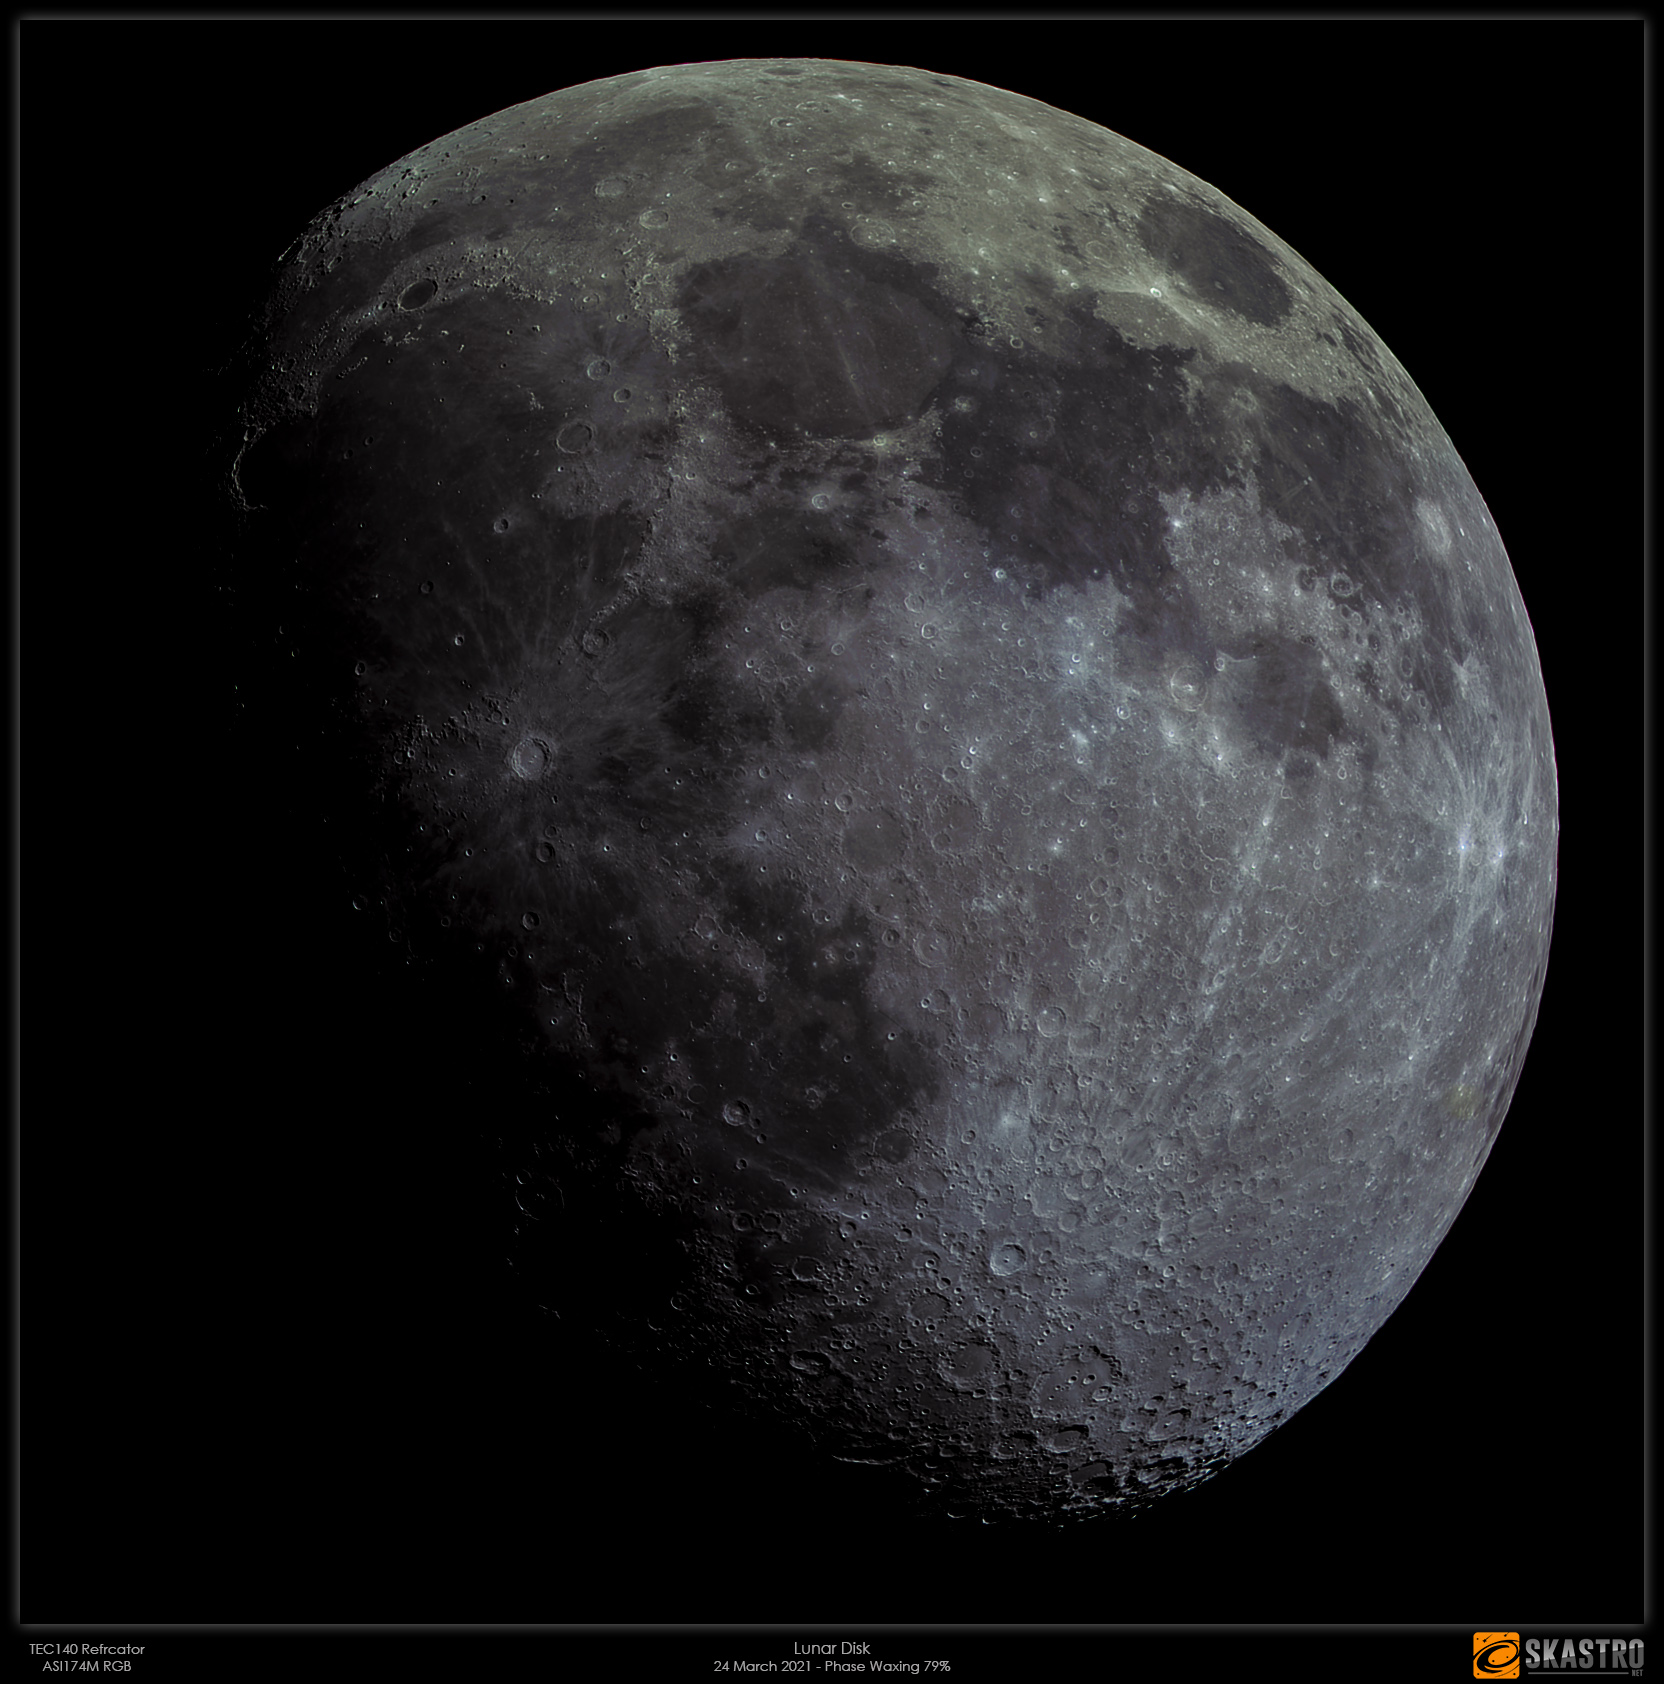
Lunar Images 24 March 2021 with TEC140 and Celestron C925 with ASI174M
A selection of four images I took with my two main telescopes on the evening of the 24th March 2021 with The Moon at 78% waxing gibbous phase to the South in the constellation of Leo.
First up below is a main disk taken with TEC140 refractor. I shot RGB through those filters on my ASI174M camera and I took the luminance through a 7nm Ha filter. My field of view with the TEC140 and this camera is only half the disk and so I have to take sequence runs, one for the north and the other for the south and then combine them in Photoshop.
I then moved on to use my C925 SCT telescope again using the ASI174M in RGB mode. I did not capture a specific luminance channel this time and just used RGB and made a pseudo-luminance. The weather conditions were too windy to get a closer scale with the Barlow lens on this occasion.
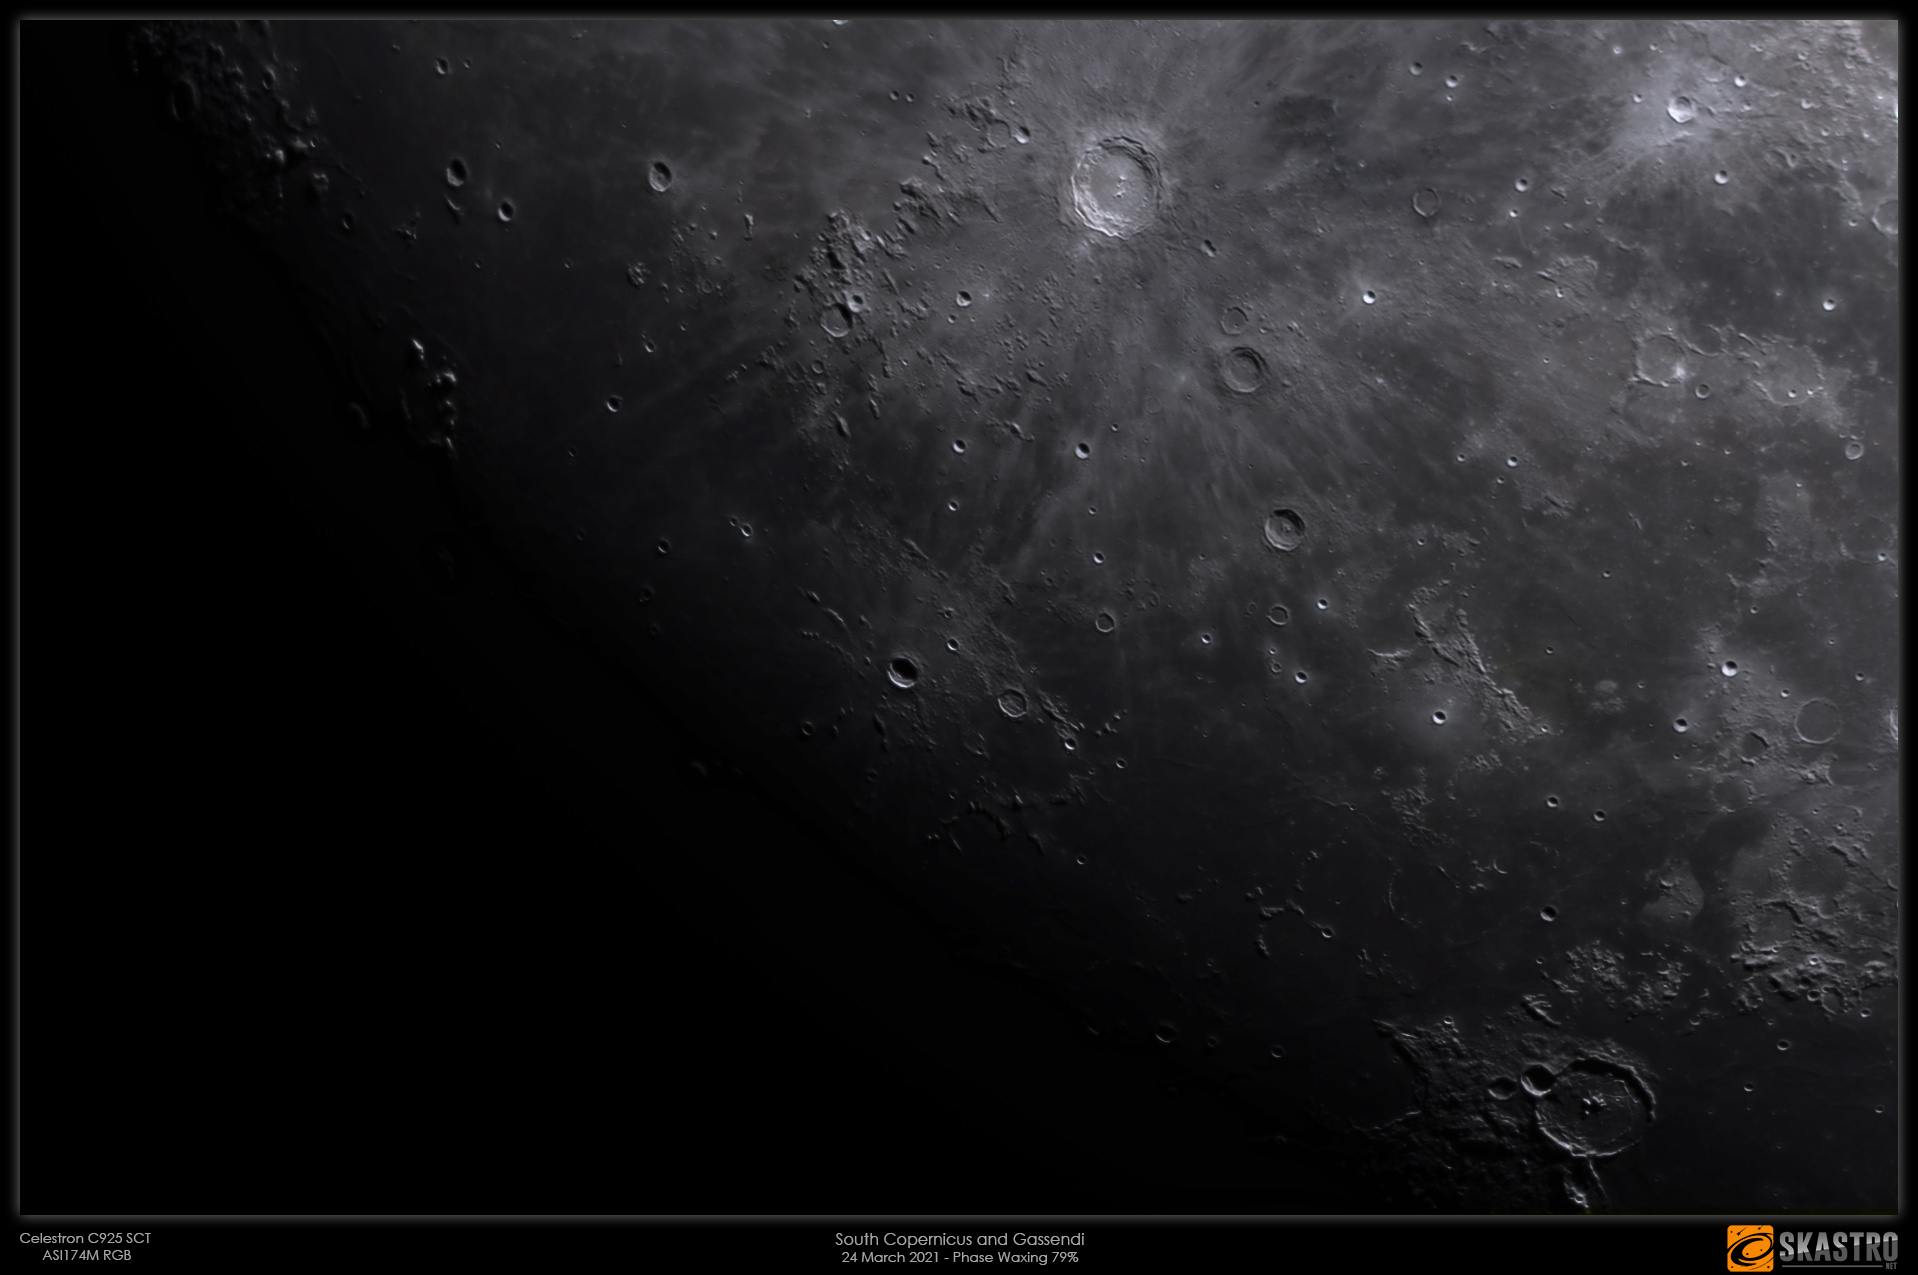
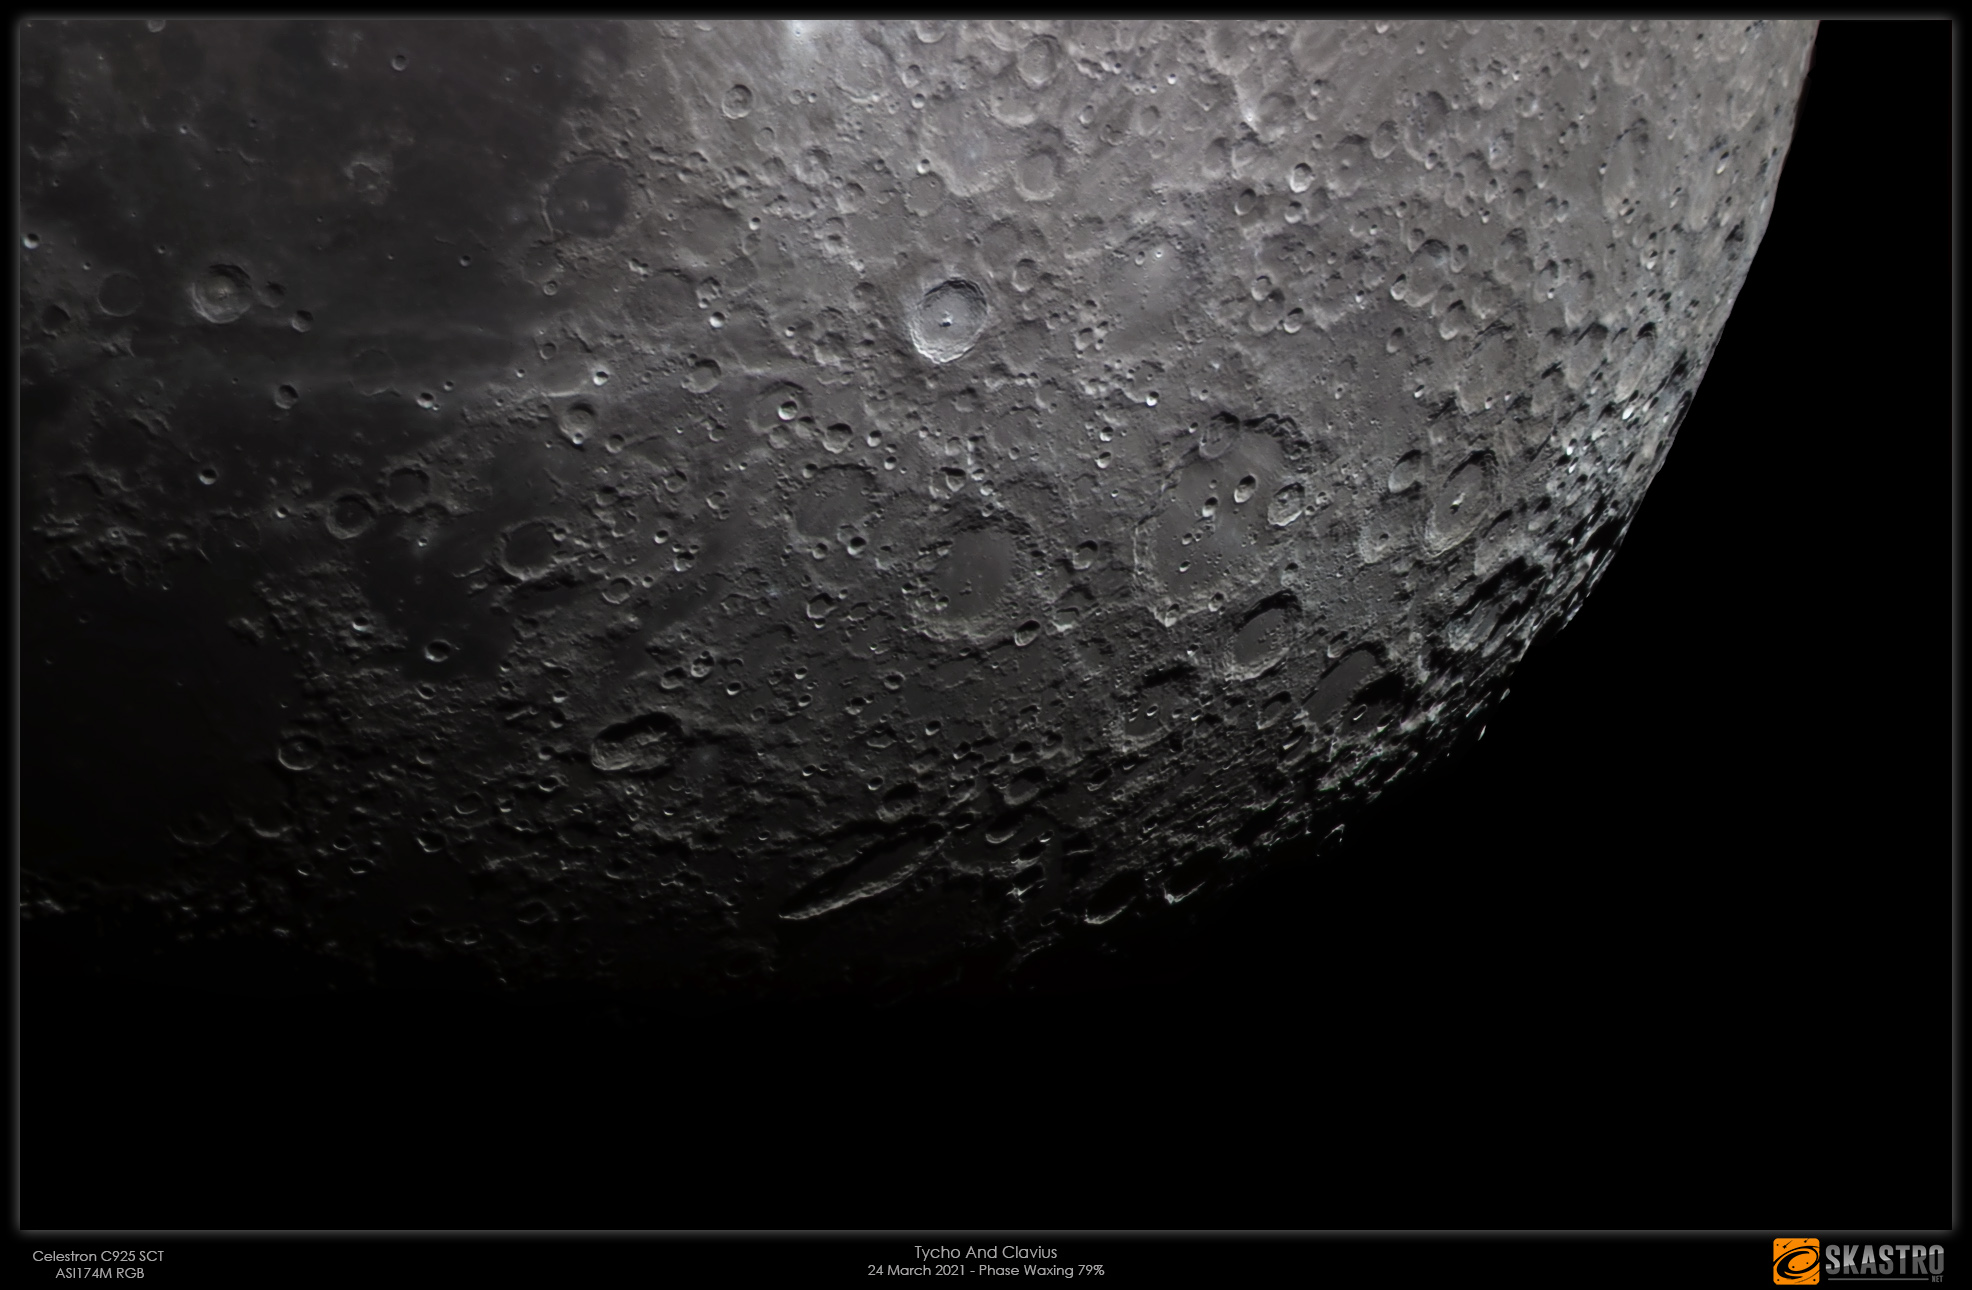

All images are RGB and captured with Firecapture software and then processed in Planetary System Stacker and then in PixInsight and Photoshop.
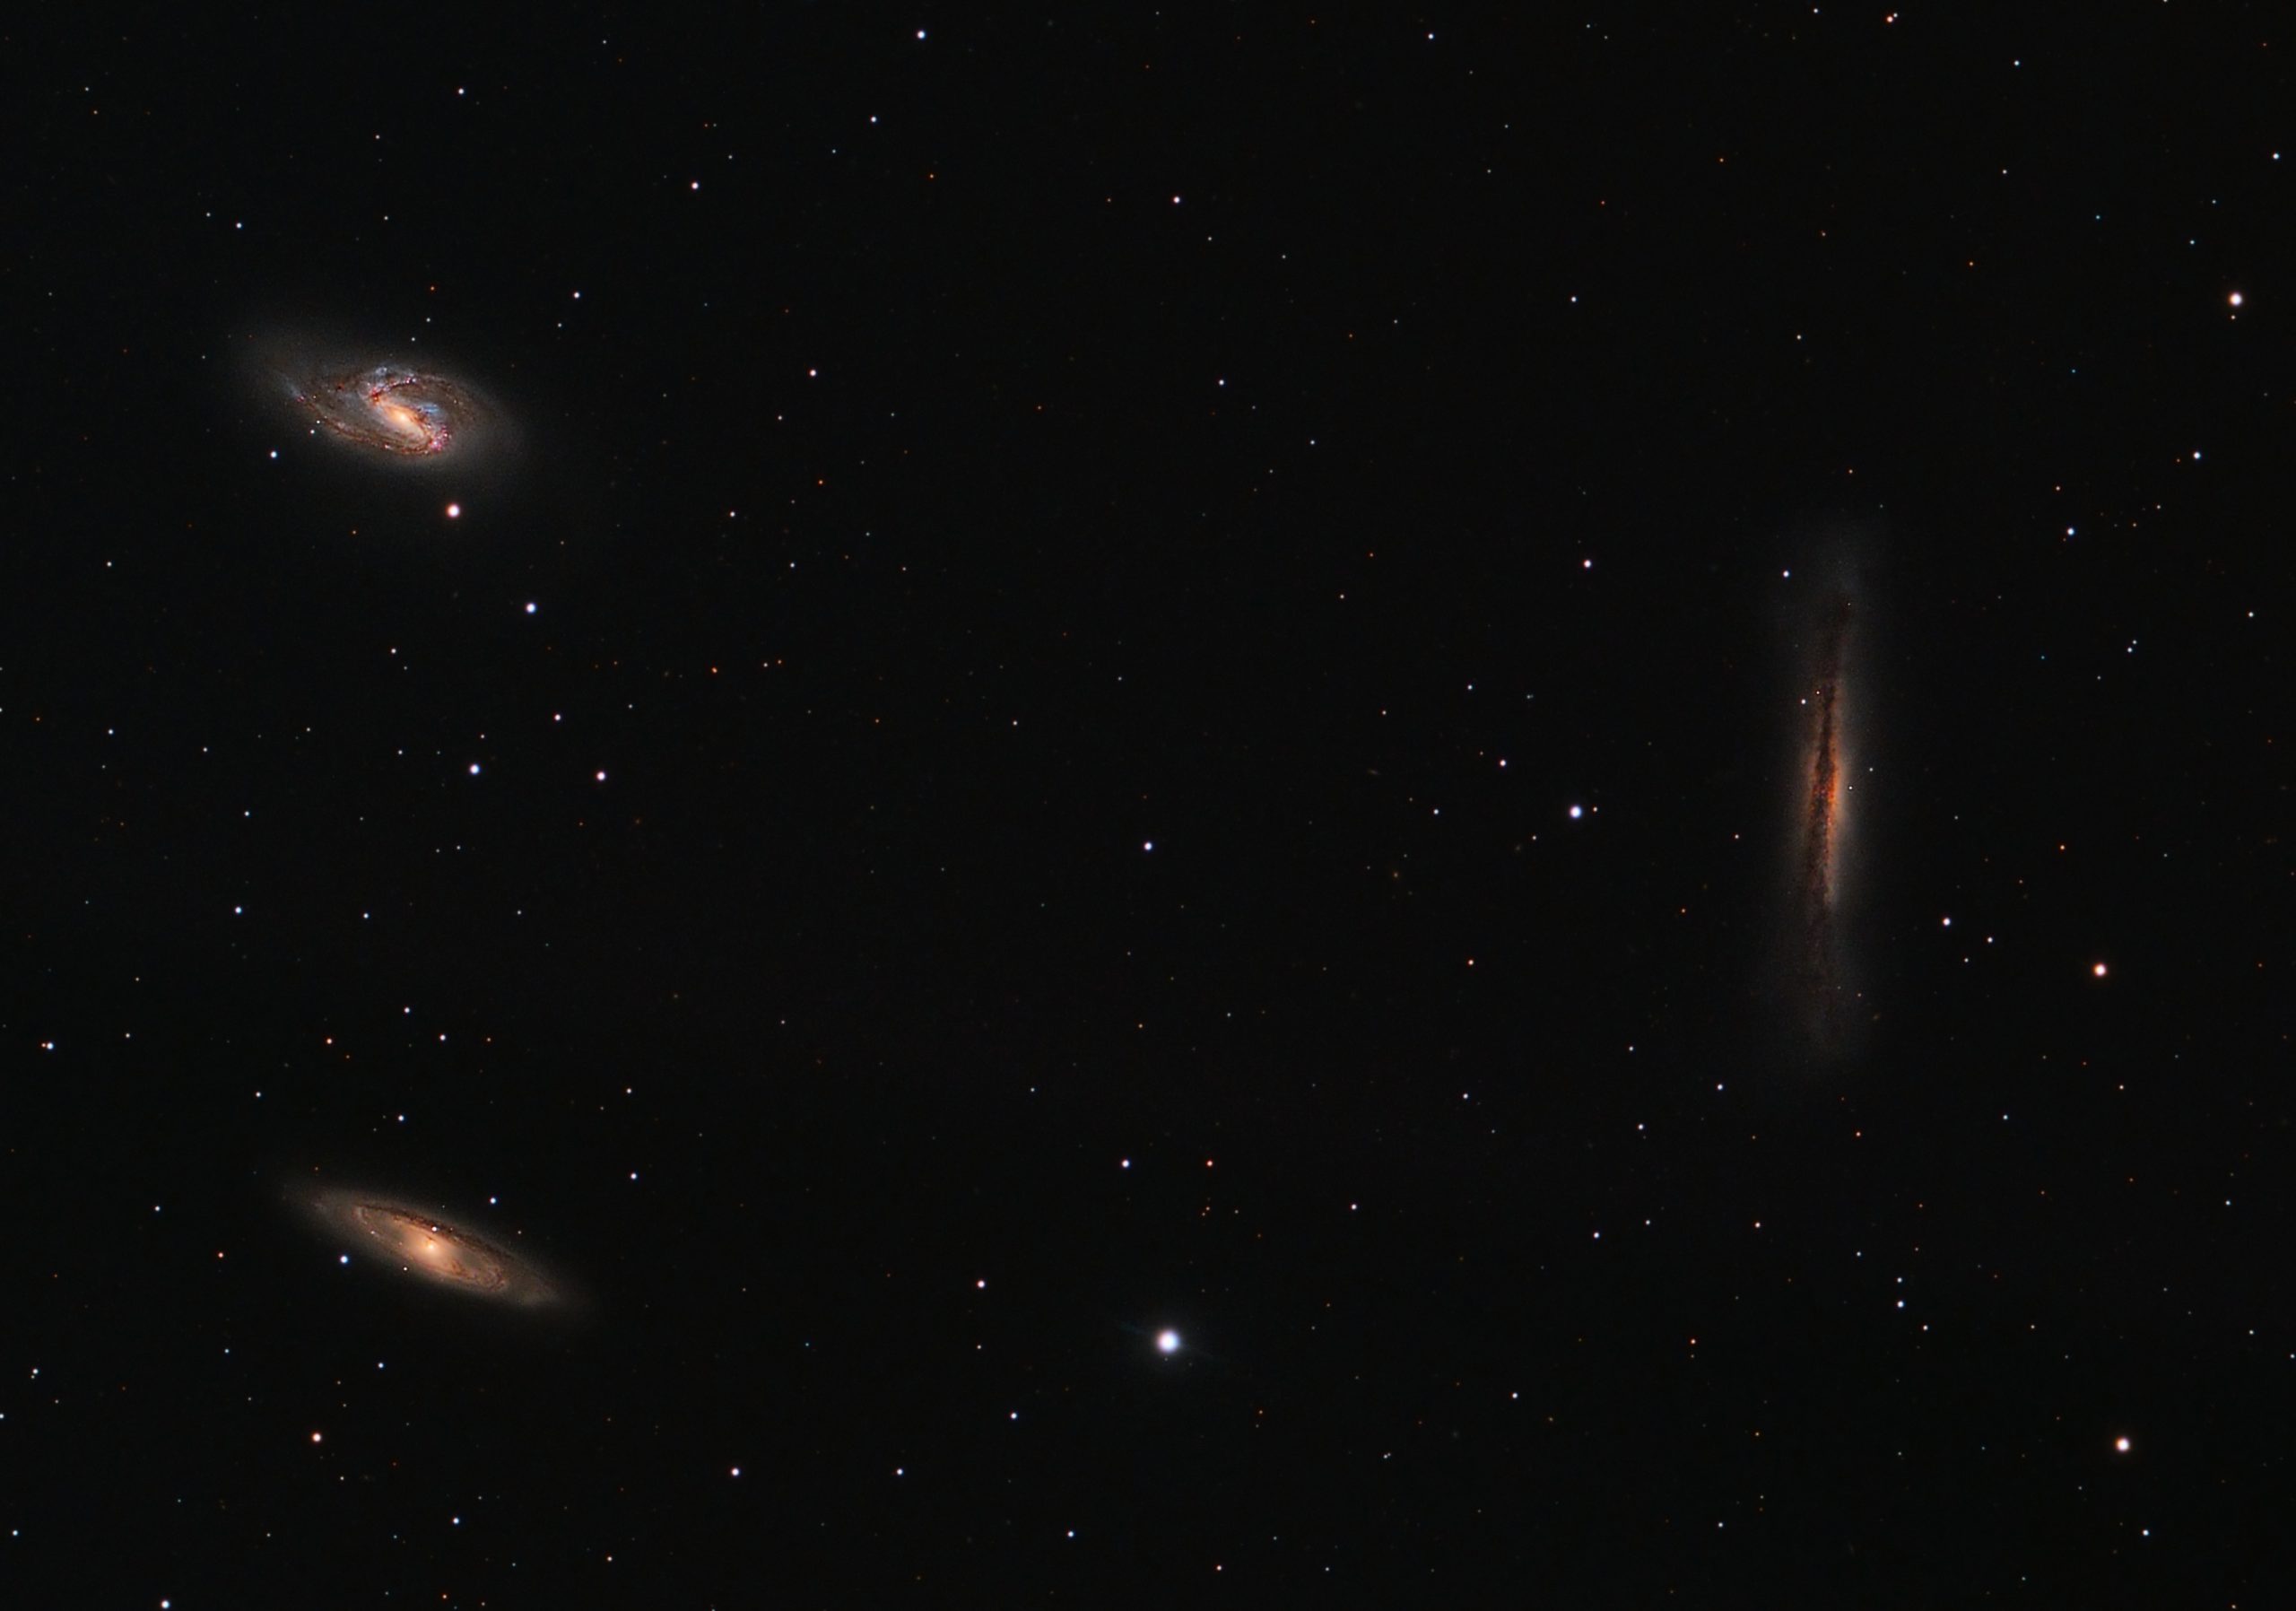
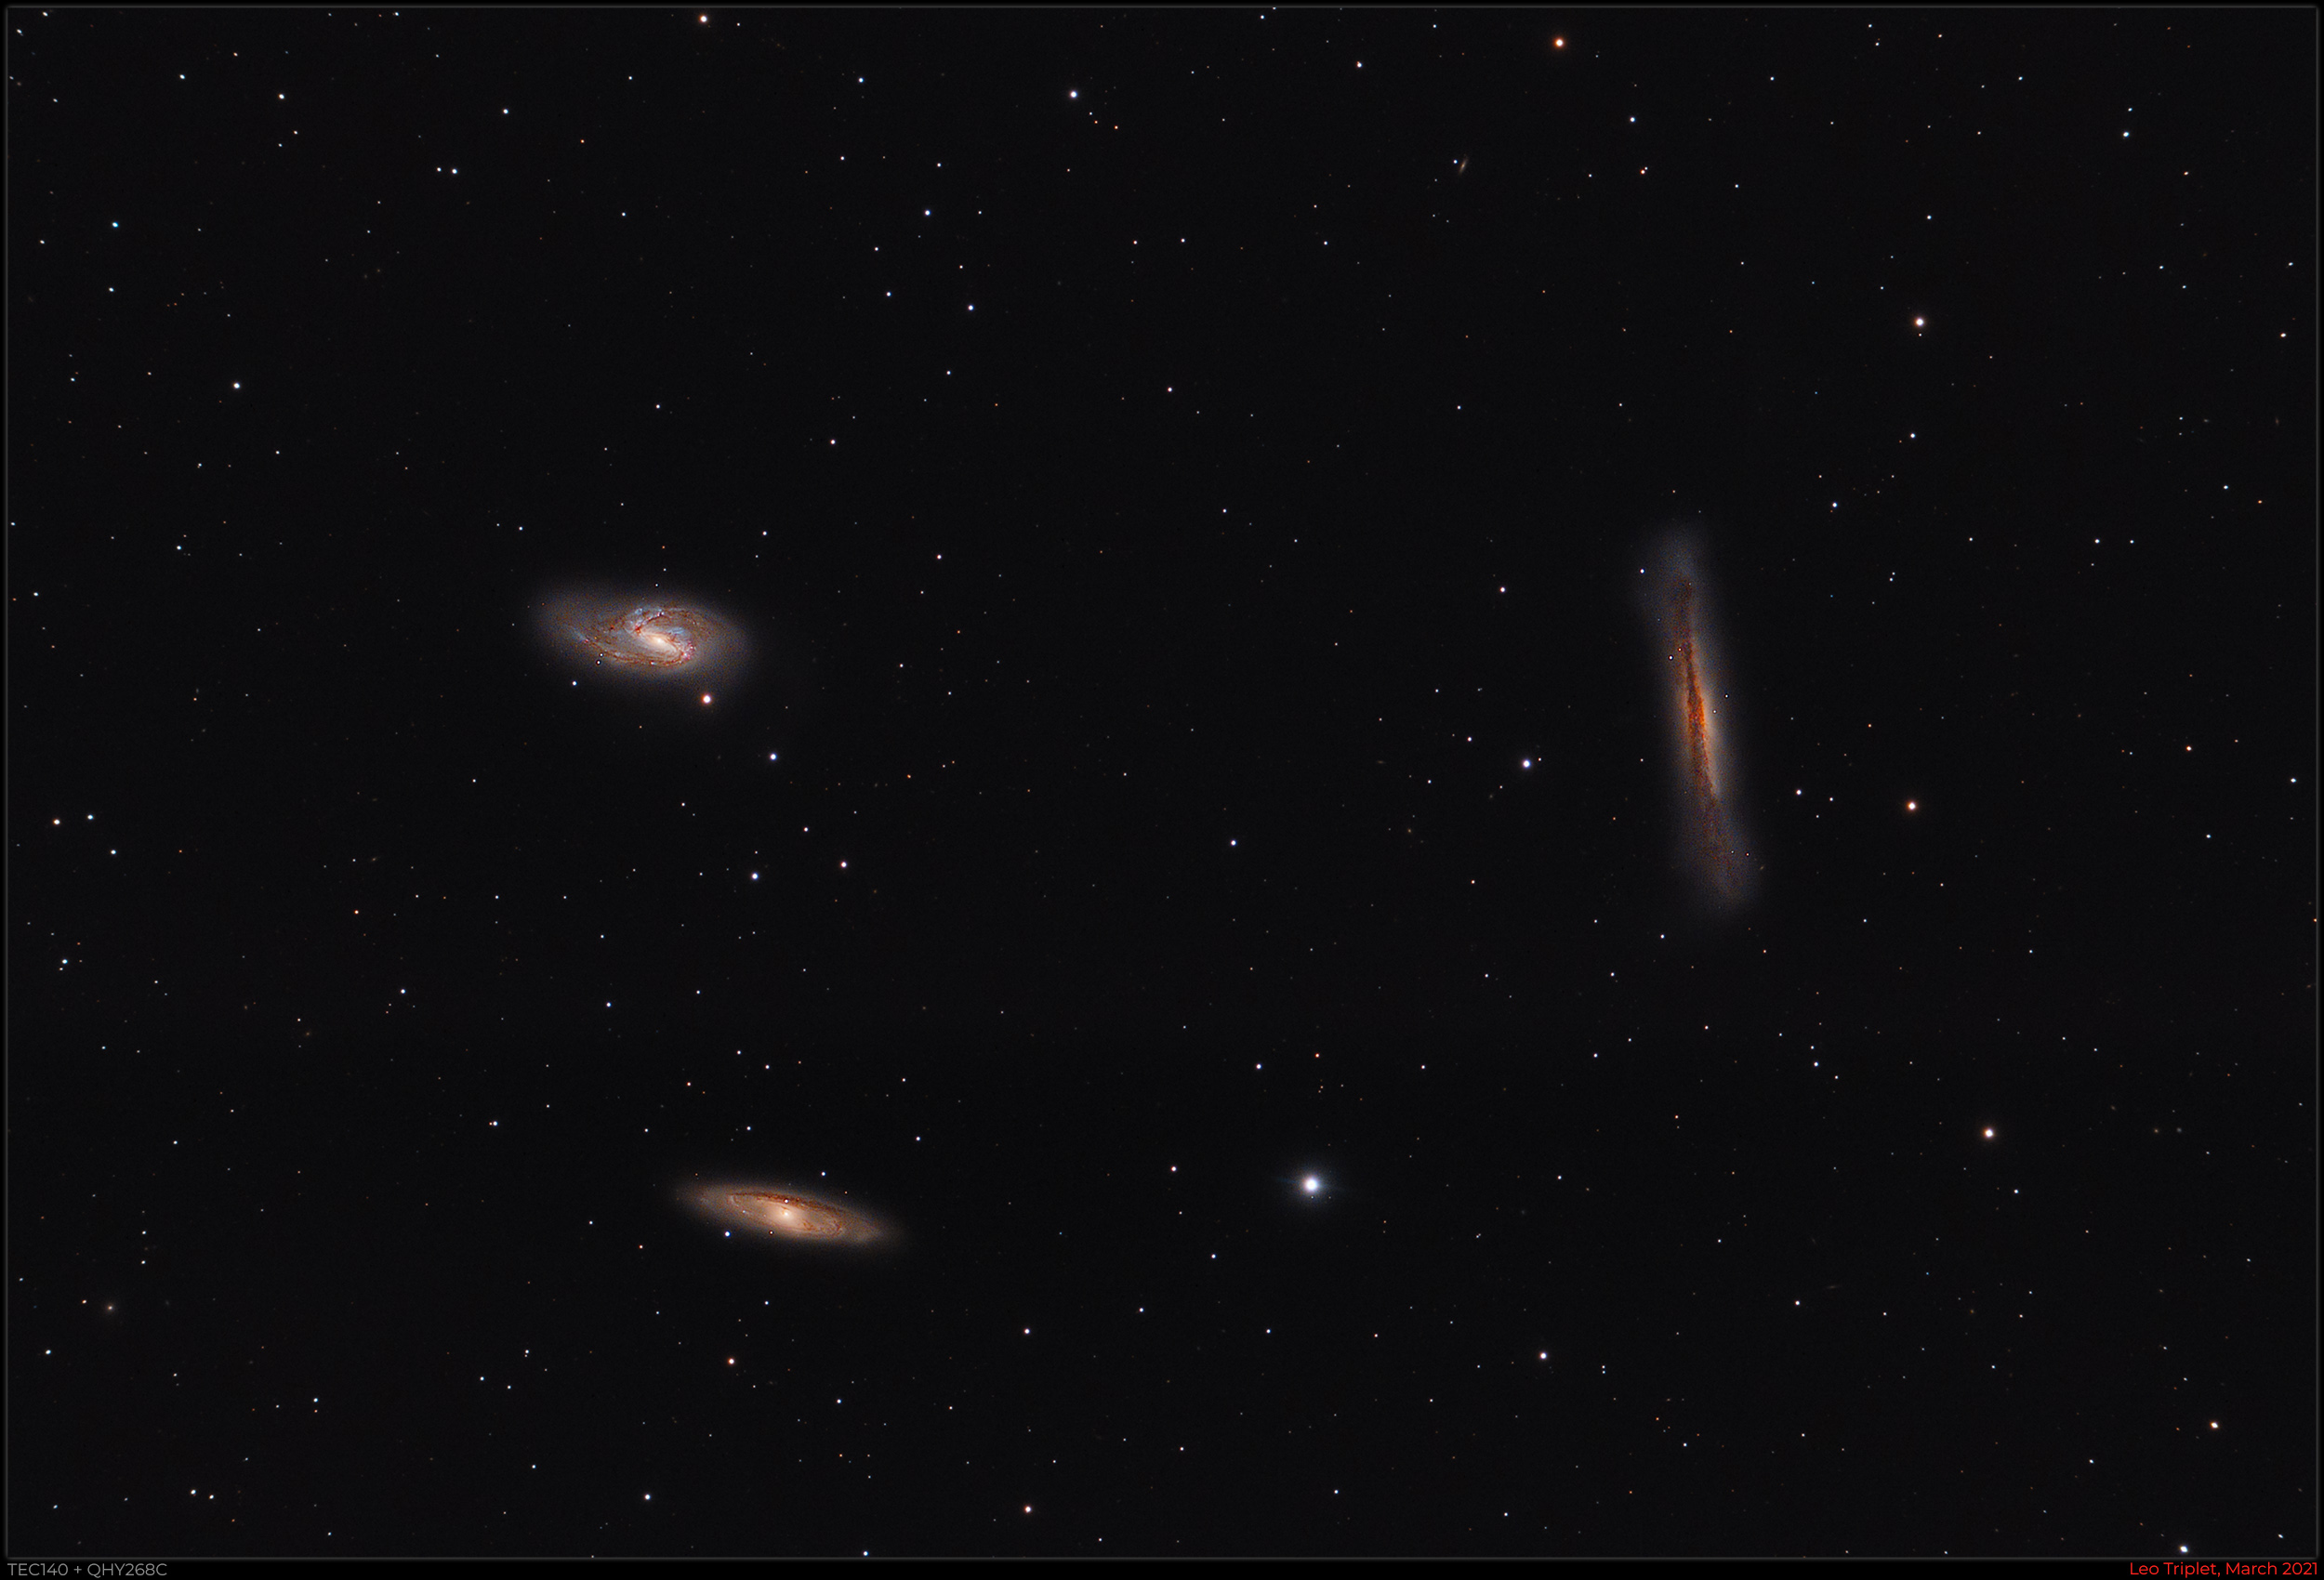
The Leo Triplet with TEC140 and QHY268C
The Leo Triplet is a popular and famous group of galaxies in the constellation of Leo, best viewed in late winter/early spring in the Northern Hemisphere. They are often imaged together like this as the triplet or as individual galaxies.
They are located about 35 million light years away and consists of the Messier galaxies M66 (top left in the image), M65 (bottom left ) and to the right we have NGC 3628, commonly called The Hamburger Galaxy.
The galaxies are easily visible in a small to mid-sized telescope as faint smudges in this isosceles triangular pattern. The galaxies are sometimes called the M66 Group but ask any astronomer and they will immediately know what you mean if you mention the Leo Triplet! Another famous galaxy group in Leo is the M96 group.

Technical Details
Image captured from my back yard observatory in Nottingham, UK on the 20th March 2021 just to the East of the Meridian line. I captured 40 x 180s exposures with my QHY268C One-Shot-Colour camera on my TEC140 refractor using off-axis guiding on my MESU 200 mount. The only filter I used was a LDAS Light pollution filter since I live in a residential area with Bortle 5 sky conditions.
Seeing and transparency were terrible and I debated with myself long and hard whether I bothered imaging at all on that night. However, since in the UK we have just endured the worst winter for cloud I can remember in 30 years of practical astronomy, I decided that beggars can't be choosers and I went ahead with it anyway. I am glad I did since the outcome is not too bad.
Ideally it could use more exposure time and I will add to this as and when we get some more clear sky time.
Images exposures captured with Sequence Generator Pro and processed with PixInsight and Photoshop CC.
The image above is a crop of the image below. I include this since some people my prefer the wider field.
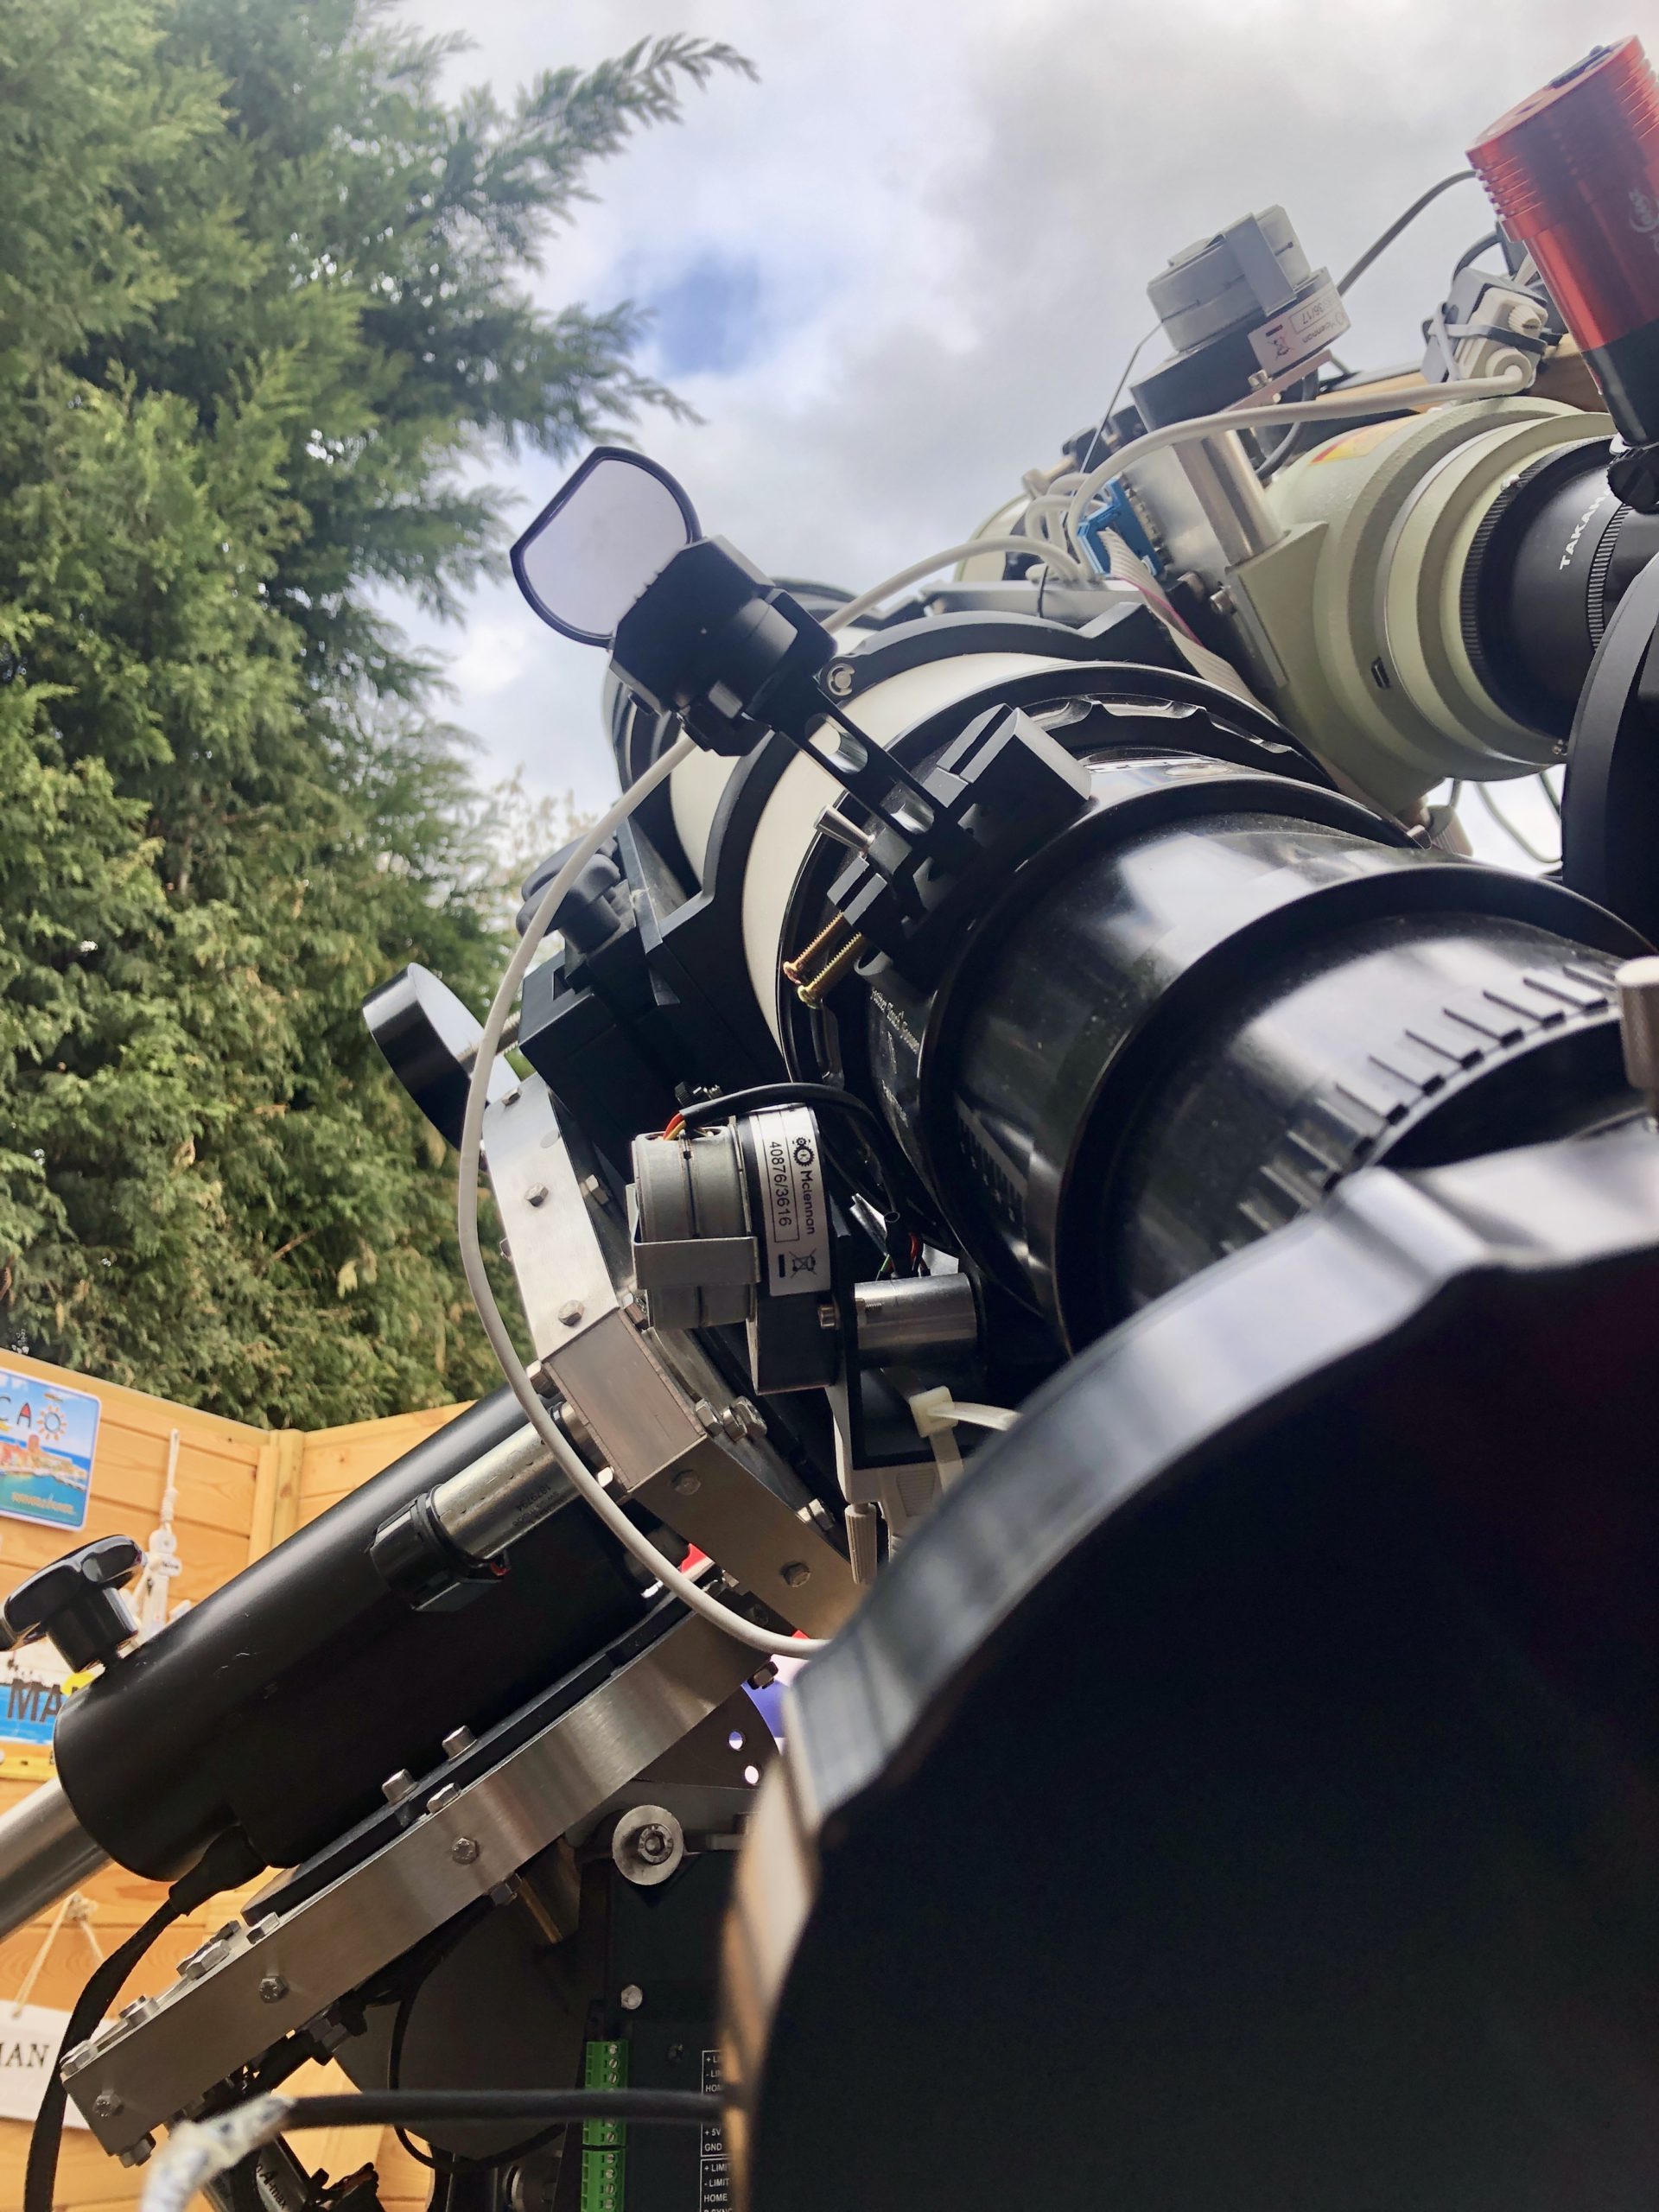
The Importance Of A Properly Aligned Finder Device
One of the most important and overlooked matters to consider to prevent untold frustration in observational and imaging astronomy is being able to easily, quickly and reliably find the object you want to observe or image. The smaller the field of view of the telescope/camera/eyepiece combination, the more difficult and important this becomes. When you factor in the fact that the subject may not yet be in proper focus it is clear that just pointing the telescope in the direction of the moon, planet or object and hoping that it will be in the field of view (FoV) is a forlorn hope and leads to great frustration whilst you are hunting around trying to get the object both in focus and in the FoV. I’m a mild natured person and even I have been found cursing at the EP on many occasion trying to do this!

With the advent of relatively affordable and excellent telescopes of the Schmidt-Cassegrain (SCT) design from Celestron, Skywatcher and Meade, their long focal length presents challenges in getting the object in the FoV. You can be moving the telescope, either manually or via the handset/computer, seemingly for an age, trying to get the blasted object in the centre of the EP or camera! The more powerful the eyepiece, or smaller the chip of the camera, the more difficult this becomes. It doesn't take long, especially when cold, to become utterly exasperated by this process and I have been known to give up and storm off back inside the house in frustration!
A great example is in the case of planetary work. The planets are a great distance from us and as such present a tiny angular diameter on the sky. Rarely can any planet be more than 45 arc seconds in angular diameter and they are usually much smaller than this. For example, a popular target such as Mars is often as little as 10 arc seconds across, the equivalent of observing a US nickel or a UK five penny piece 300 metres away. By way of comparison, The Moon is 1800 arc secs across. Consequently, to get an image on the camera or be able to get the planet into a position to be able to see details on its surface requires a great deal of magnification along with good seeing with a long focal length telescope. Even then, it is not uncommon to combine this with a Barlow lens of power x2 or x3 (or more) to create a F20 or F30 optical system in order to see more detail. So it is no wonder that when imaging/observing with such a long focal length and at such high power, getting the image onto the chip or into a high-power eyepiece is a challenge and can be an exercise in frustration. The answer to this is an accurately aligned finder device so that you can get the object into the FoV of the low powered finder with an assurance that it will then be visible in the main telescope.
Even though you may be impatient to get observing as soon as possible, getting the finder properly set up and aligned is well worth your time.
People use and prefer different types of finder scopes. Whatever type you use - I prefer Telrad's and red dot finders - getting them aligned with the optical axis of the telescope is the important factor, as discussed.
How accurately do you need to align it? That depends on what you want to generally observe. If you are using plate-solving for deep sky astro imaging and never use the scope visually then you may need no finder at all and you can leave the iterative plate solving process to automatically align the scope. However, for planetary observing and imaging you need to get the finder as accurately aligned as possible.
Here is my procedure and it is the same whatever the type of finder device you use; Telrad, finder scope or red dot finder. And before you start make sure the finder scope is VERY sturdily mounted to the main scope. Any bump or movement of the finder with respect to the main scope will ruin the alignment of the finder with the optical axis. It is very frustrating to complete the procedure, congratulate yourself for a job well done, get ready to observe only then to inadvertently bang the finder out of alignment!! Doh...!
- Use a wide field EP and select a bright star and then get this star into the centre of the FoV of the telescope. It often helps to de-focus the star so you can see the concentric rings so as to judge the centre of the FoV. This is the most frustrating step of the whole procedure so take your time and remain calm! :)
- Now align the finder device - whatever type it happens to be (i.e. Telrad/Red-Dot/Finderscope) with its adjustment screws to get the same star centred into the FoV of the finder device. TIP. Do yourself a favour and be sure you are aligning on the same star that is in your main scope! Without kidding you, I have aligned the finder on a different star before and then wondered why I couldn't find anything!
- Put a mid powered EP into the main scope. You will often note that the star that you centred in step one is no longer centred or, in some occasions, has moved out of the FOV. this is because the higher power of this second EP amplifies any error of what you thought was an accurate centering in step one. The defocus of the star in step 1 will make it easier to see whether the star is outside the FoV so you can bring it back into the centre more easily.
- Now that you have the star in the FoV of the main scope readjust the finder a second time to get the star into the crosshairs or in the middle of the red rings or dot.
- Optionally repeat this procedure with a still higher power EP to further refine the finder's accuracy in alignment with the main scope. The more accurately you can get the finder aligned with the main telescope the more enjoyable and easy it will be to use your telescope. Trust me, it is worth this time you are spending here.
To give you an example. When I do this procedure with my Celestron C925 SCT scope, I will first use my Televue Panoptic 35mm EP in the telescope. Now, consider that with a Celestron C925 even this EP is quite a reasonable magnification of 67. Hence without the finder this can take some fiddling (and cursing) to get a star into the C925's FoV because the FoV of the EP - even though it is a wide-angle EP - is quite small with the C925's 2350mm focal length. I then get my Telrad finder aligned with this same star. I then move to my Radian 17mm EP (138 magnification) to further refine the guider then followed by the 17mm with a X2 Powermate (276 magnification) to finally refine it. I will do this procedure on my permanently mounted scope every six months or so. Clearly, any knock, bang or movement of the finder will ruin its alignment and the procedure will have to be repeated.
I have finders on all of my telescopes that I use. I use a Telrad on my C925 SCT and a Red-Dot Finder on my TEC140 and on my FSQ85. I also have another Telrad on my 12" Dob reflector scope. These devices are not expensive and are crucial to the enjoyment of your telescope.
I hope you found this article useful and that I have convinced you to invest the time in a properly aligned finder device!
Clear skies!

Lunar Images, February 2021 with C925
I have owned my Celestron C925 SCT telescope for many years but have only ever used it for visual purposes. I have always preferred the use of refractors for imaging. However, I have started to want to get much greater detail in my lunar images, having been bitten by the lunar imaging bug. I had some significant issues getting the C925 properly collimated, accurate enough for imaging purposes, a story I discuss here. After successfully collimating the scope these are my first two pictures taken with The Moon quite low down in the East with some slight mistiness.
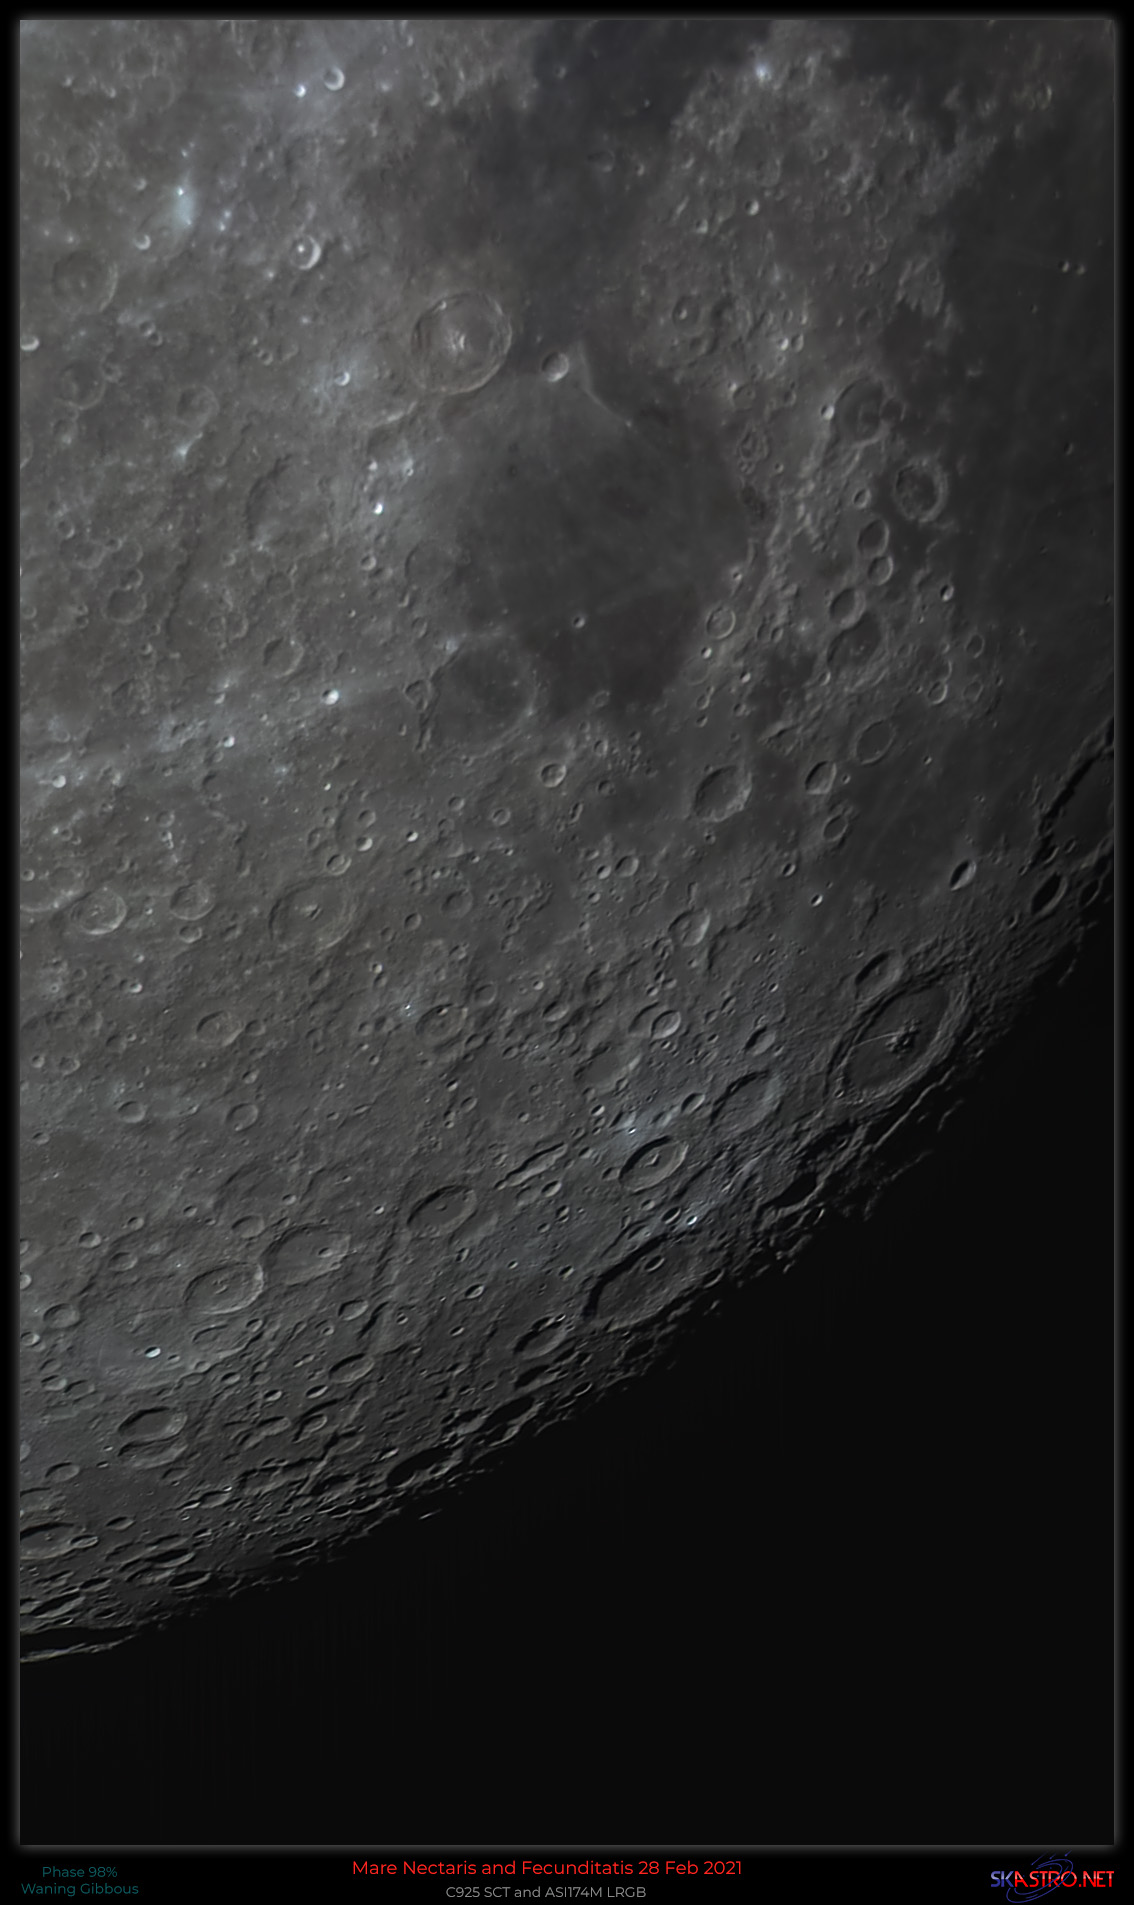
Above is the best 15% of 5000 frames in each of Red, Green and Blue. I collected the data with Sharpcap with ASI174M camera with Baader RGB filters. I created the master R,G,B files with PlanetarySystem Stacker and then used PixInsight and Photoshop to develop.
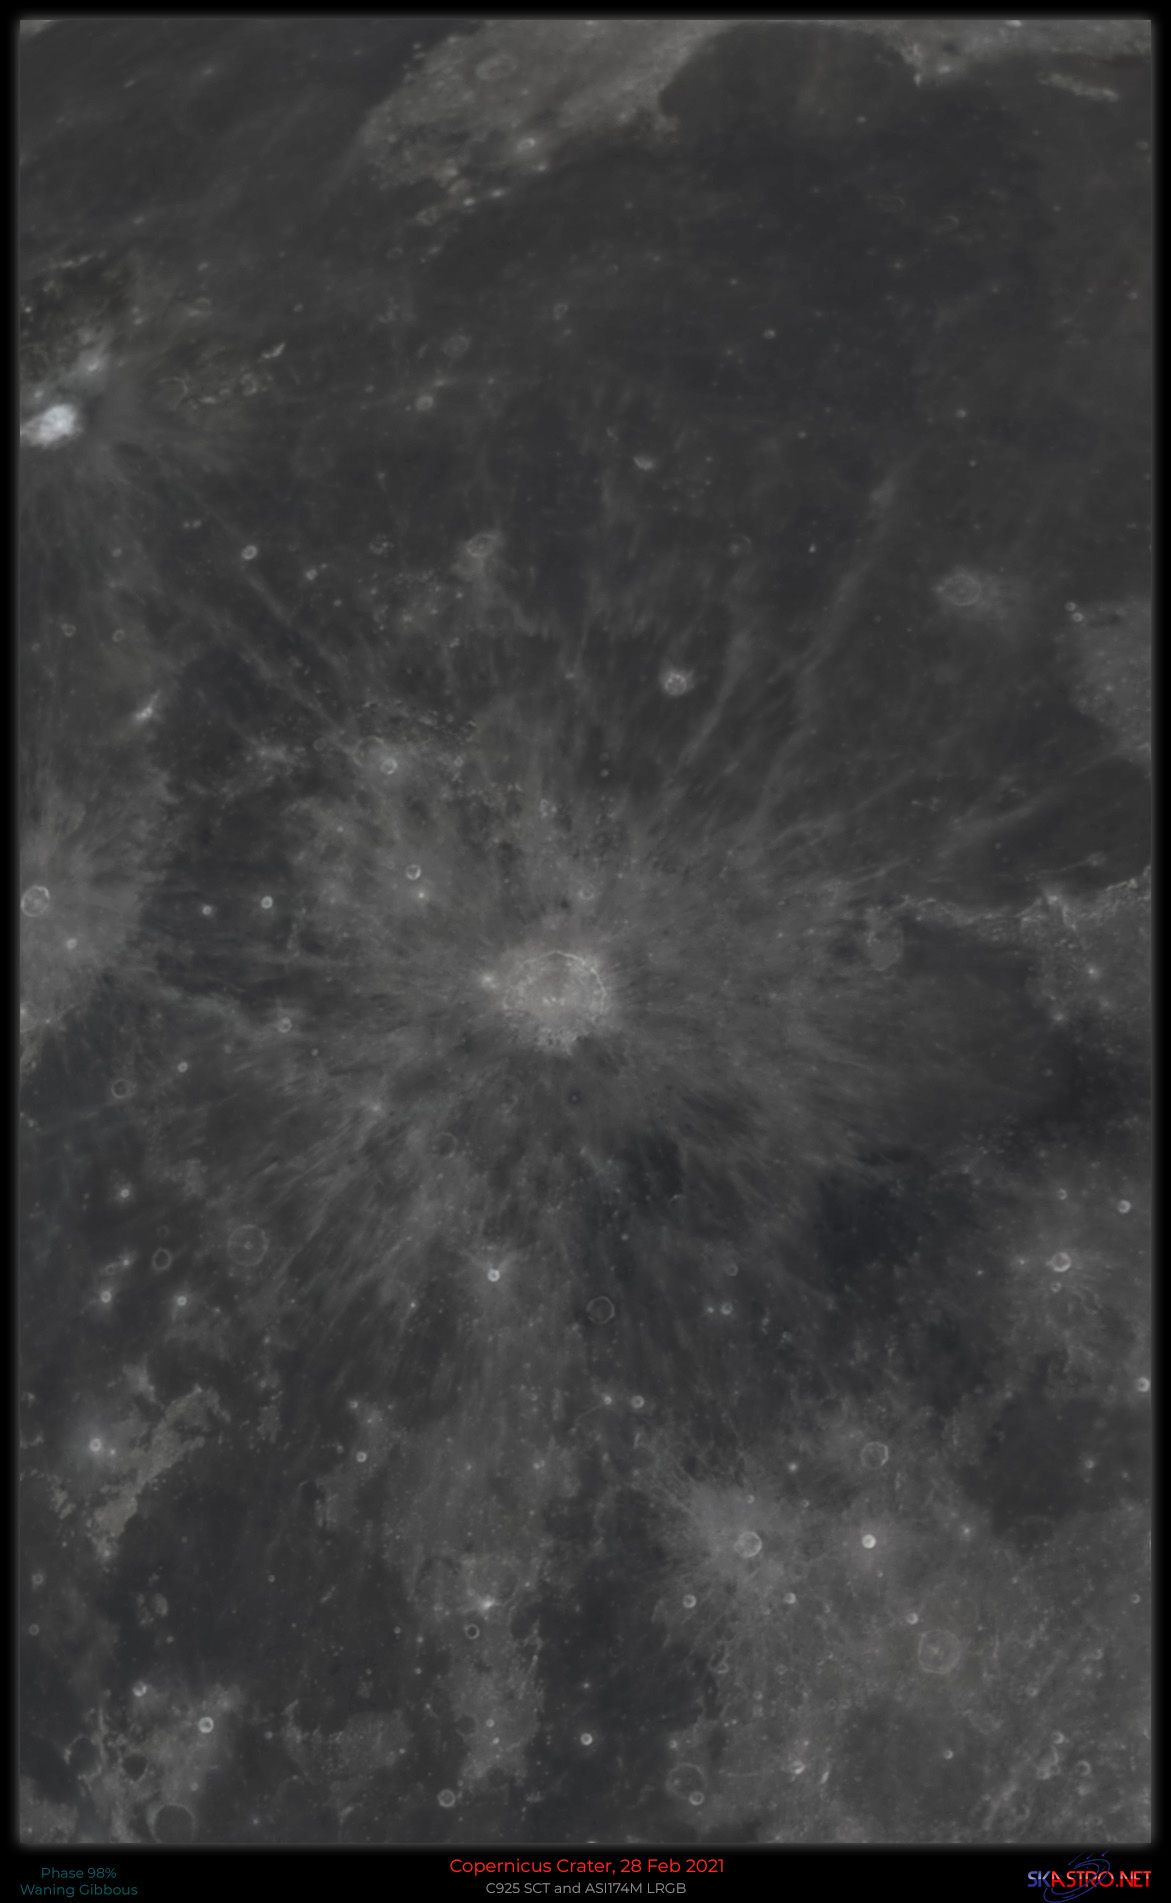
Above is Copernicus Crater and this time the best 15% of 3000 frames in each RGB filter. I used the same software and processes. However, you can see this does not quite have the same level of details as the top picture in this post due to lack of enough frames. There is always a balance of getting enough frames and the size of files and compute power to process them.