

The Pleiades (M45) with FSQ85 and G2-8300
The magnificent Pleiades, known to many as the Seven Sisters, is an open cluster in the constellation of Taurus. The Pleiades have been known since the dawn of antiquity and even some cave paintings from 30000 years ago depict them on cave walls.
The cluster is 442 light years away and they are about 20 light years across. The exact distance has been a source of debate amongst astronomers for many years but the matter was recently settled using parallax data from the Gaia satellite.
Technical Data
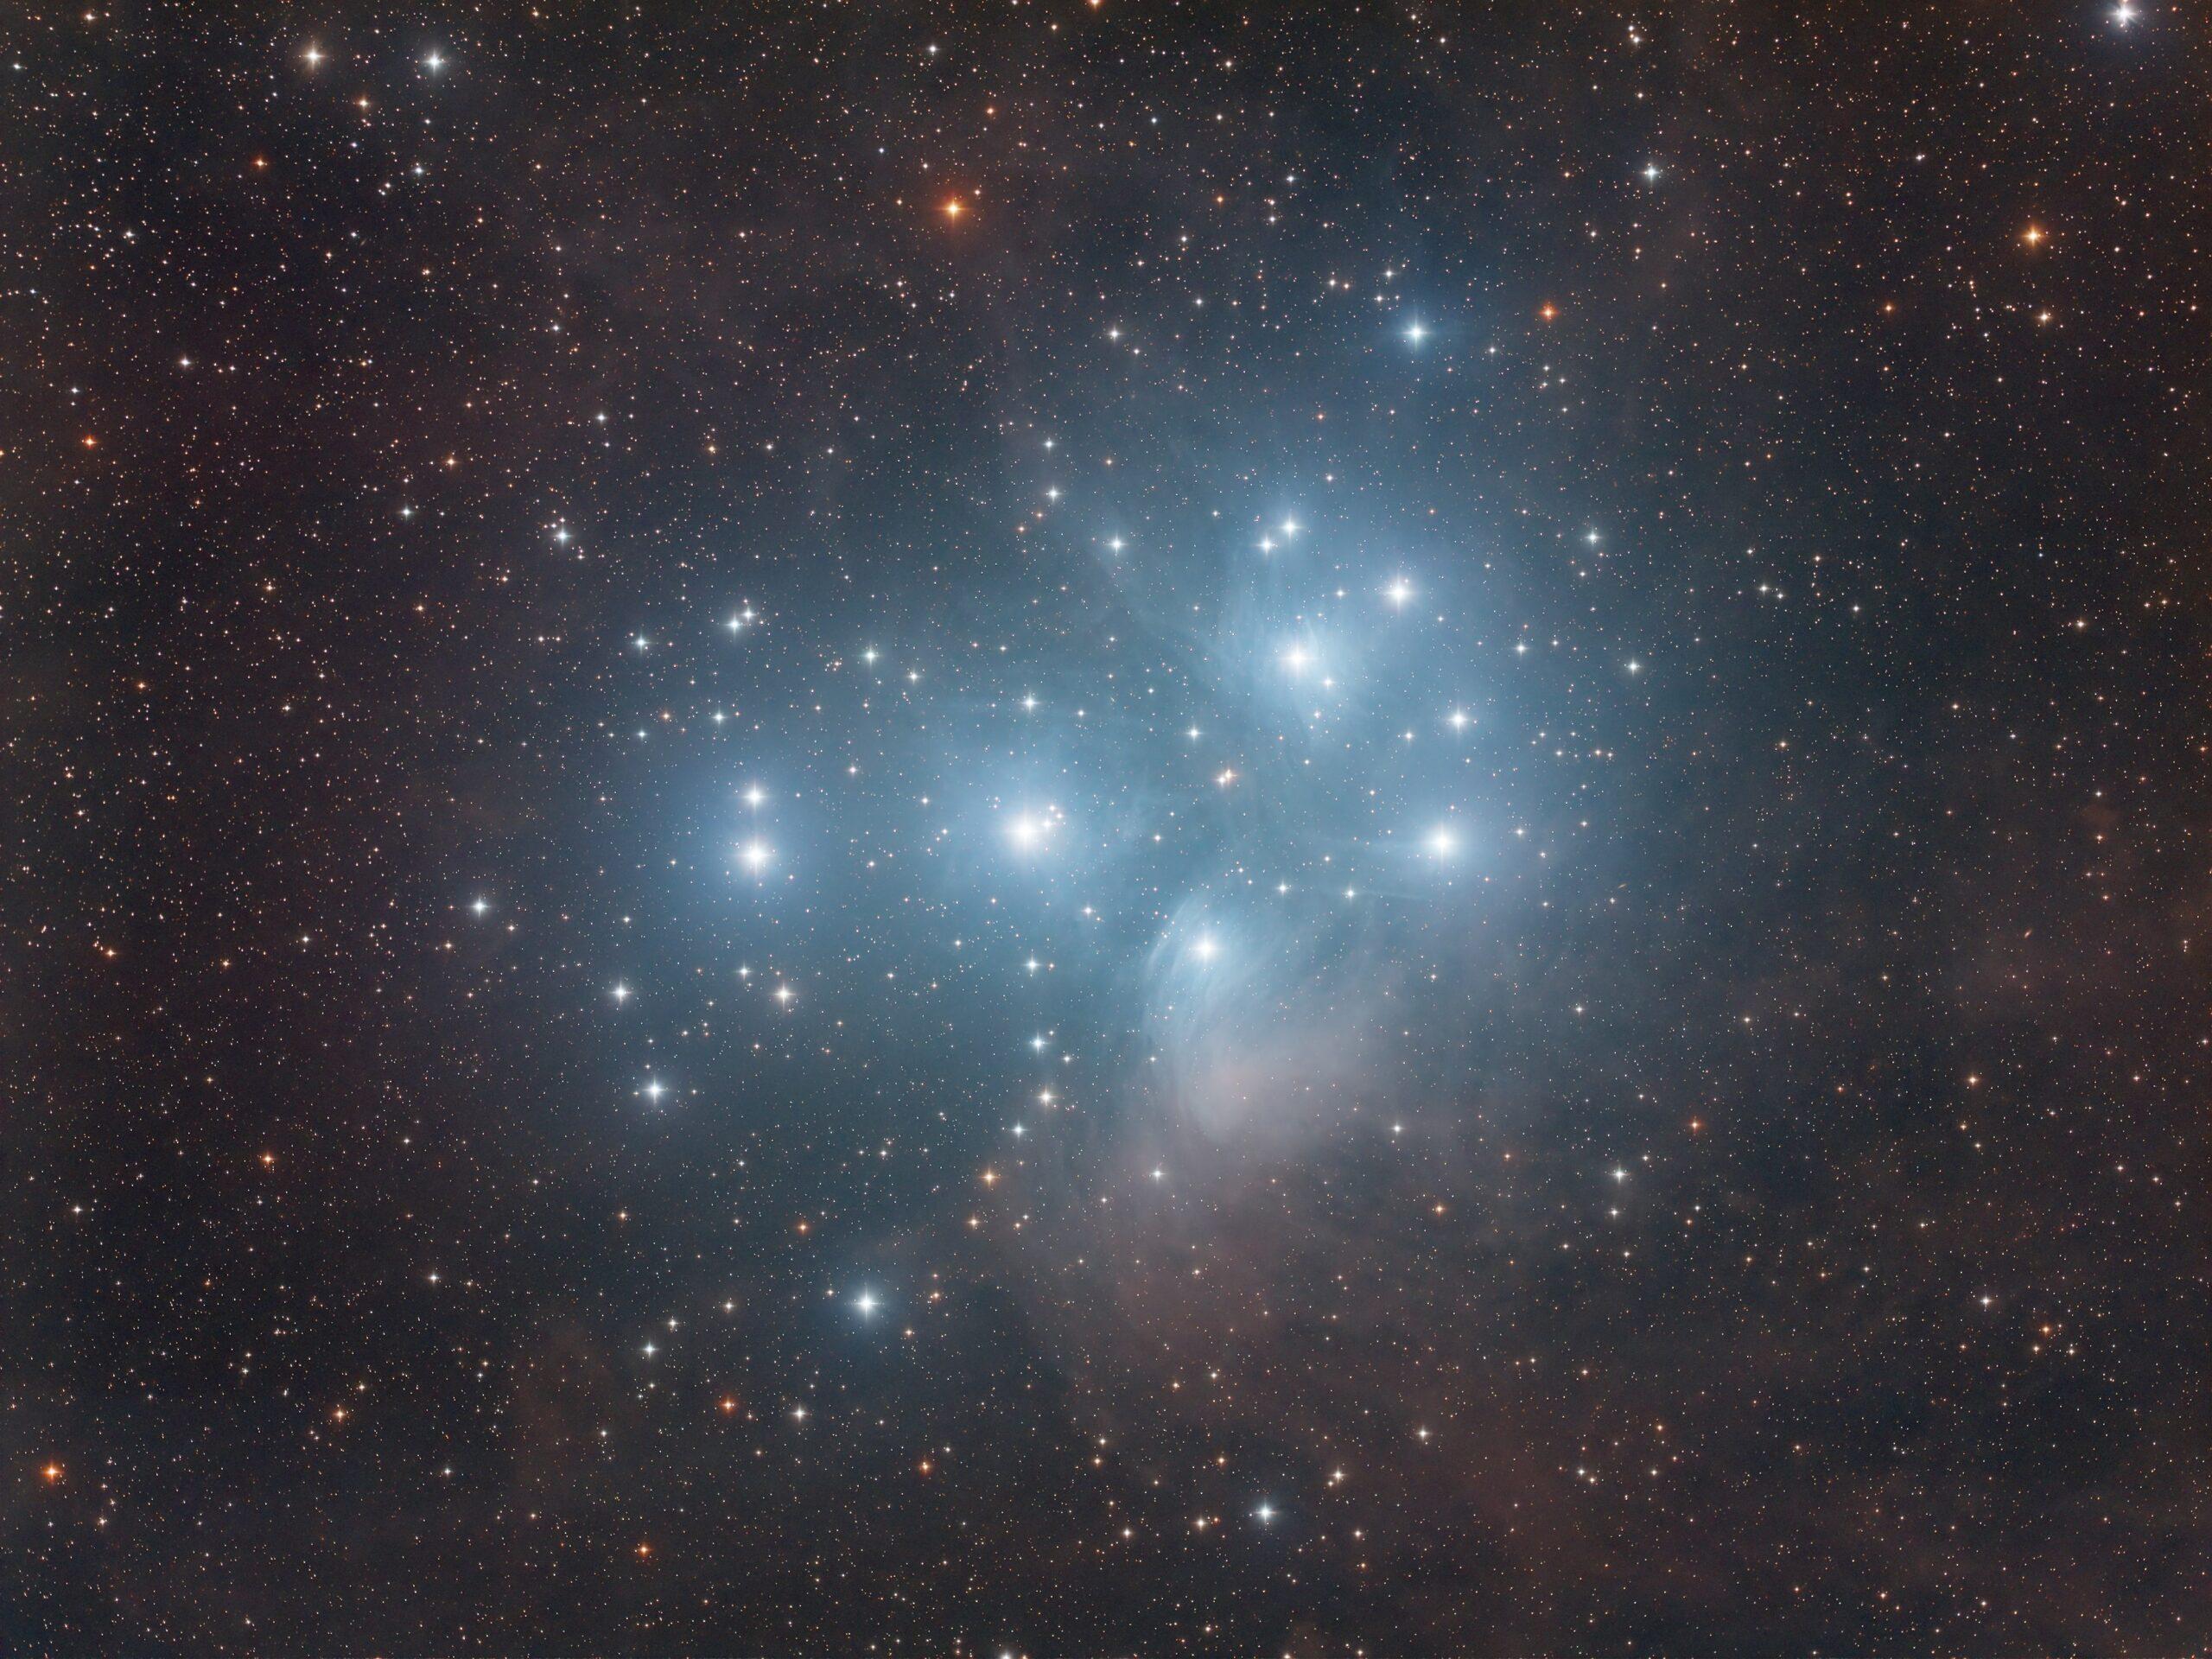
Imaged with Takahashi FSQ85 refractor and G2-8300 CCD camera with Astrodon E-series RGB filters. It consists of 20 x 300 second exposures in each of those filters to give over 90 minutes in each of the three channels for a combined integration of about four and a half hours. As is normal with any type of cluster, I did not bother with a separate luminance channel and instead bin the RGB all at 1x1. This amount of exposure is necessary to bring out the faint dust clouds through with the star cluster is moving.
Image data acquired on November 2021 with NINA imaging software and processing was done with PixInsight and Photoshop. Very little in the way of image processing was done on the image. After preprocessing all I did removed the background gradient, used a bit of deconvolution and then stretched the image. I then applied a bit of noise reduction and a tiny bit of colour saturation. This shows the importance of a good data set; you hardly need to push the data that hard in processing to get a good result.
I have imaged M45 before with the same equipment combination that you can see here. However, on that image my exposures were shorter and I did not get as much of the dusty background that I have managed to achieve with the picture on this page.
I hope you like it!
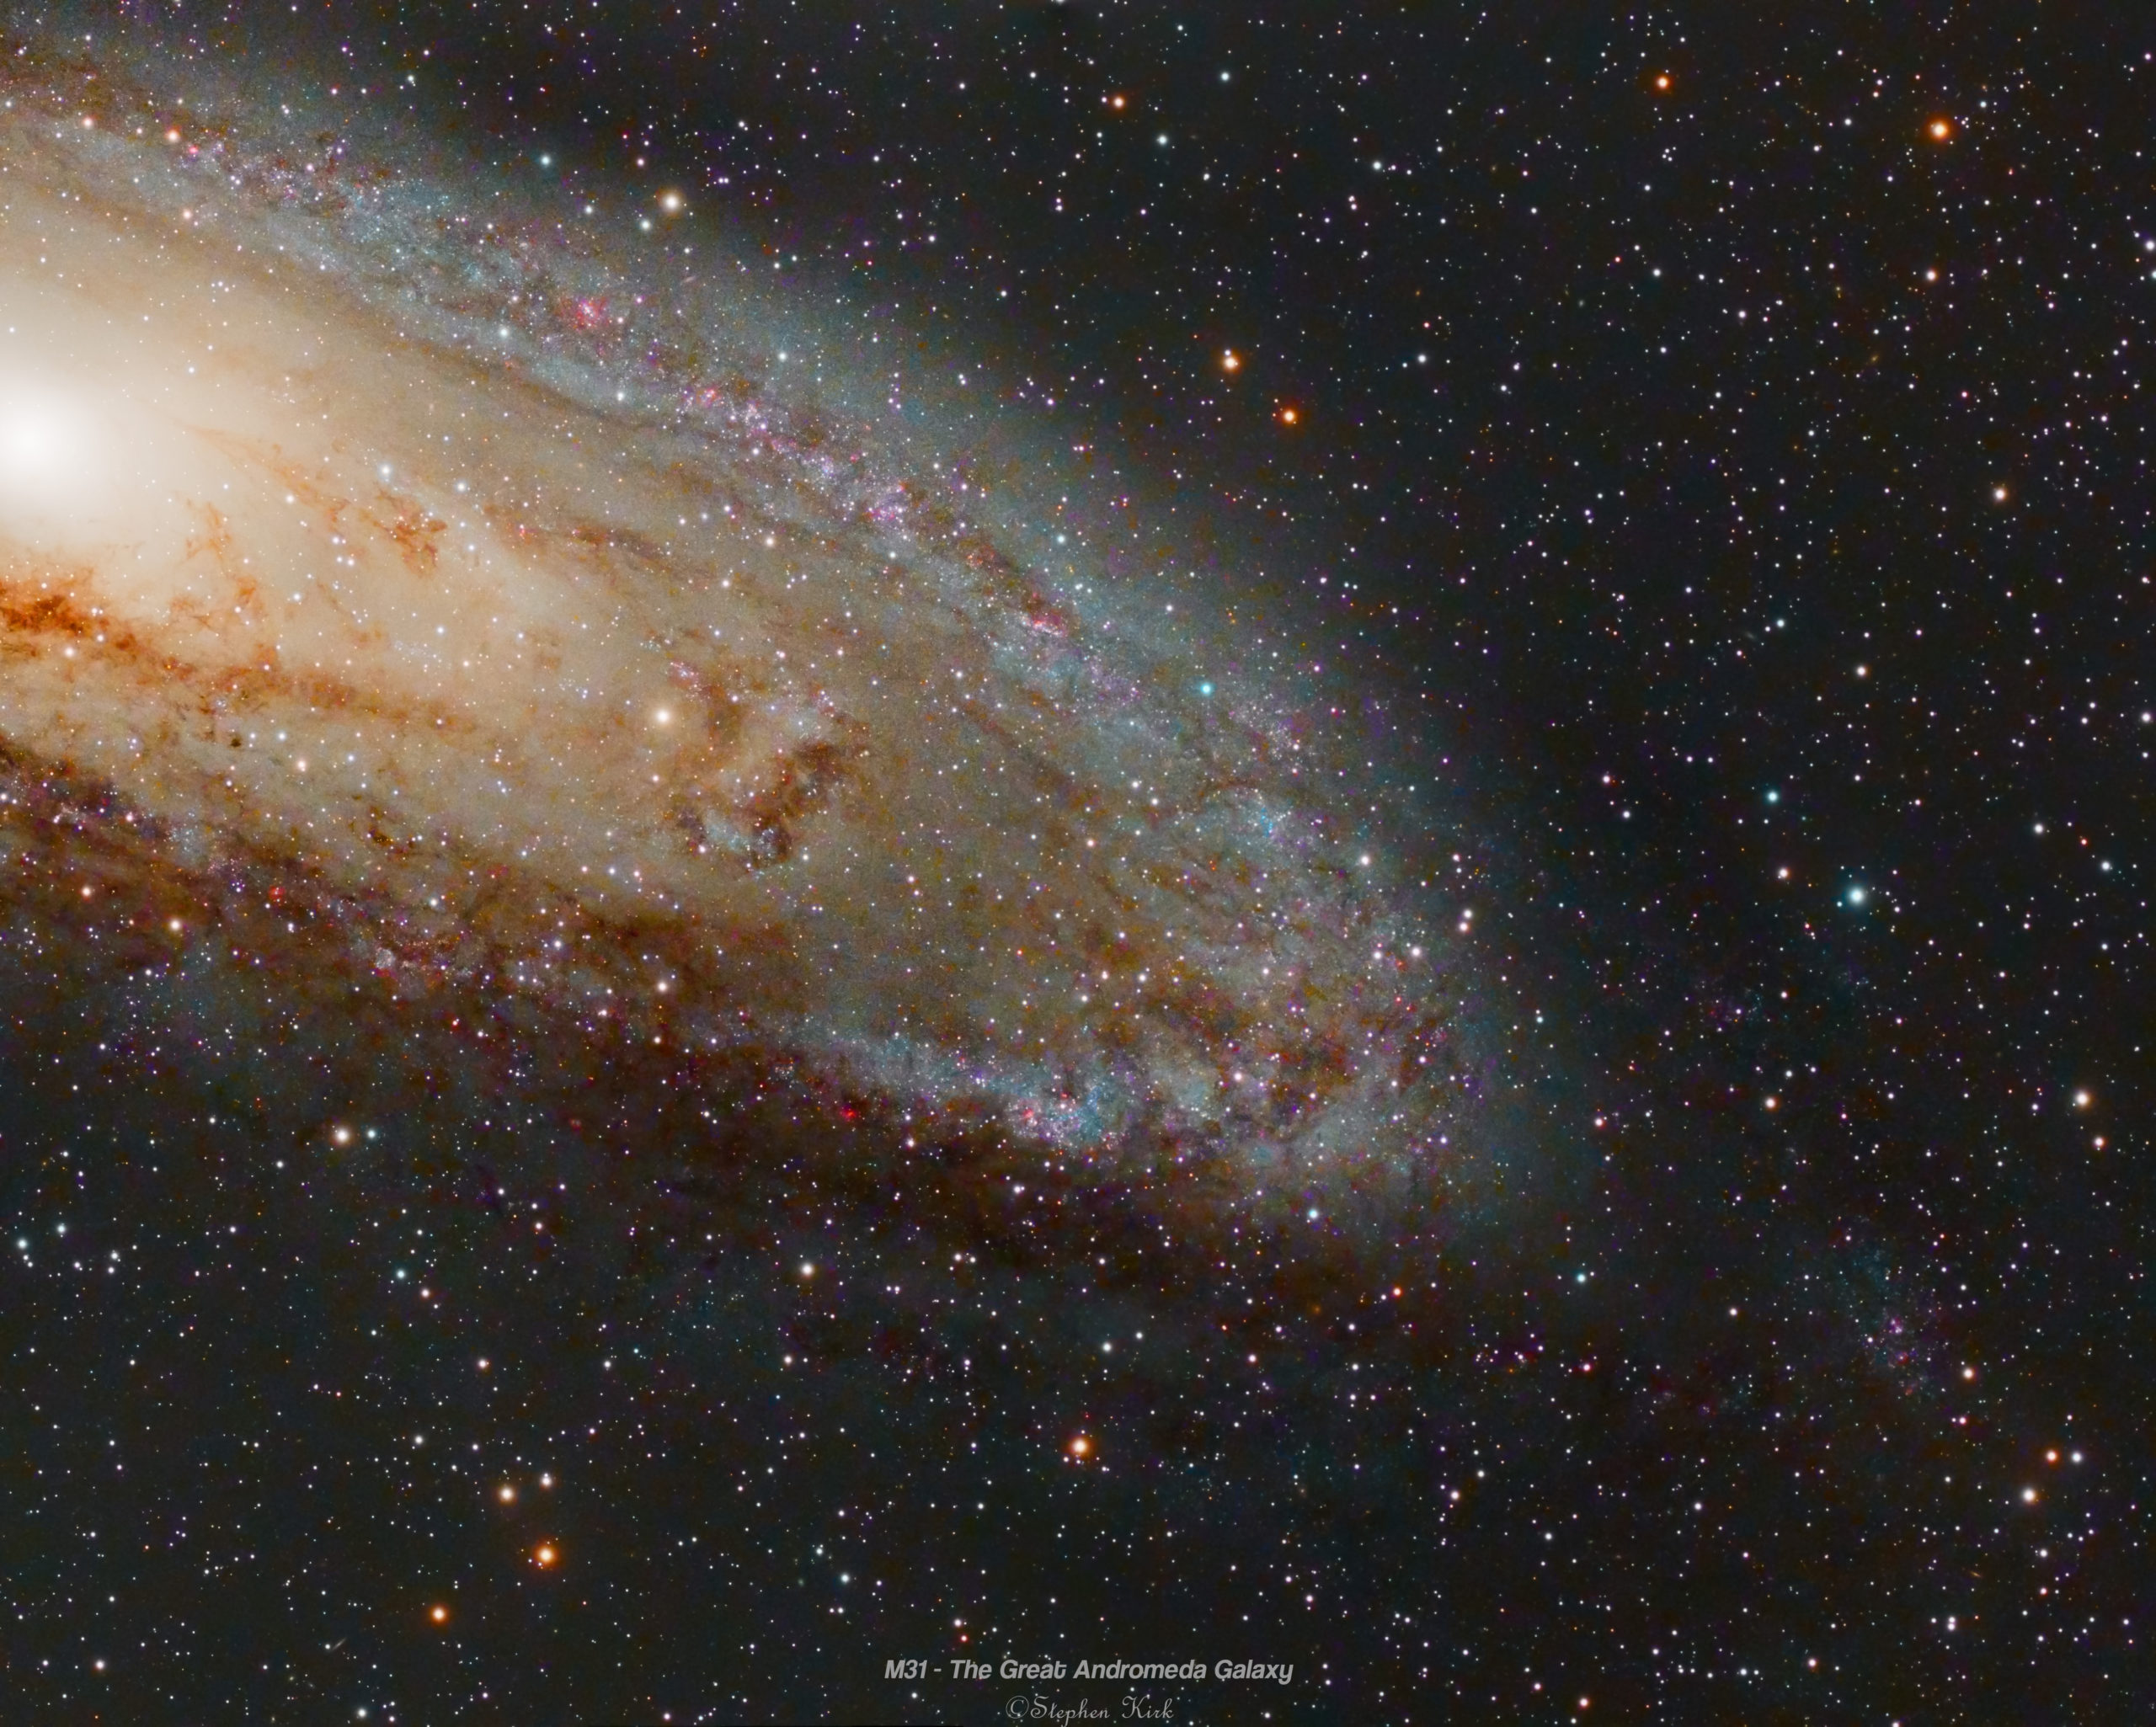
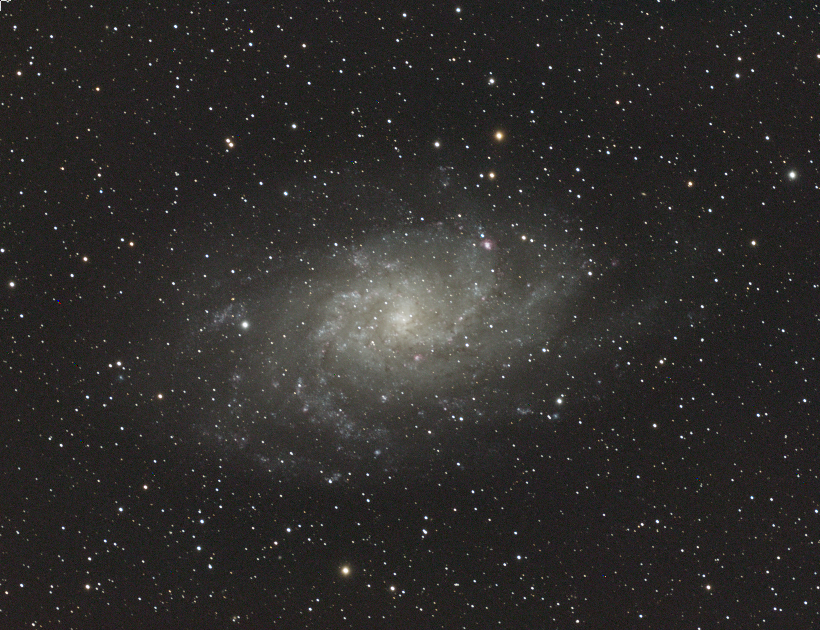
Close Up Study of The Great Andromeda Galaxy M31 with TEC140 and FSQ85
M31 is one of the most favoured and popular imaging targets in the night sky; it is bright, large and very photogenic. I have imaged this galaxy numerous times, for example, in this LRGB version and in this OSC version. Since the galaxy is so large, each of these images is set in a wide field, one of 3 degrees horizontally and 2 degrees vertically across the field of view which equates to six times the diameter of the full moon. Many newcomers do not appreciate how large these objects are in the sky. Large but VERY dim!

The above image is at a resolution of 4.16arcsec/pixel. On such a large object as M31 this allows the entire galaxy to be imaged in one field of view on a wide field refractor such as the FSQ85 but does not allow for a "closer in" and more detailed image.
In order to do the latter, I created a mosaic of four panels to image the right hand side "west" of the galaxy at the greater resolution with my TEC140 and Atik 460. All I needed is the luminance data and then I could use this to blend with the lower resolution OSC data at the top of this post in Photoshop.
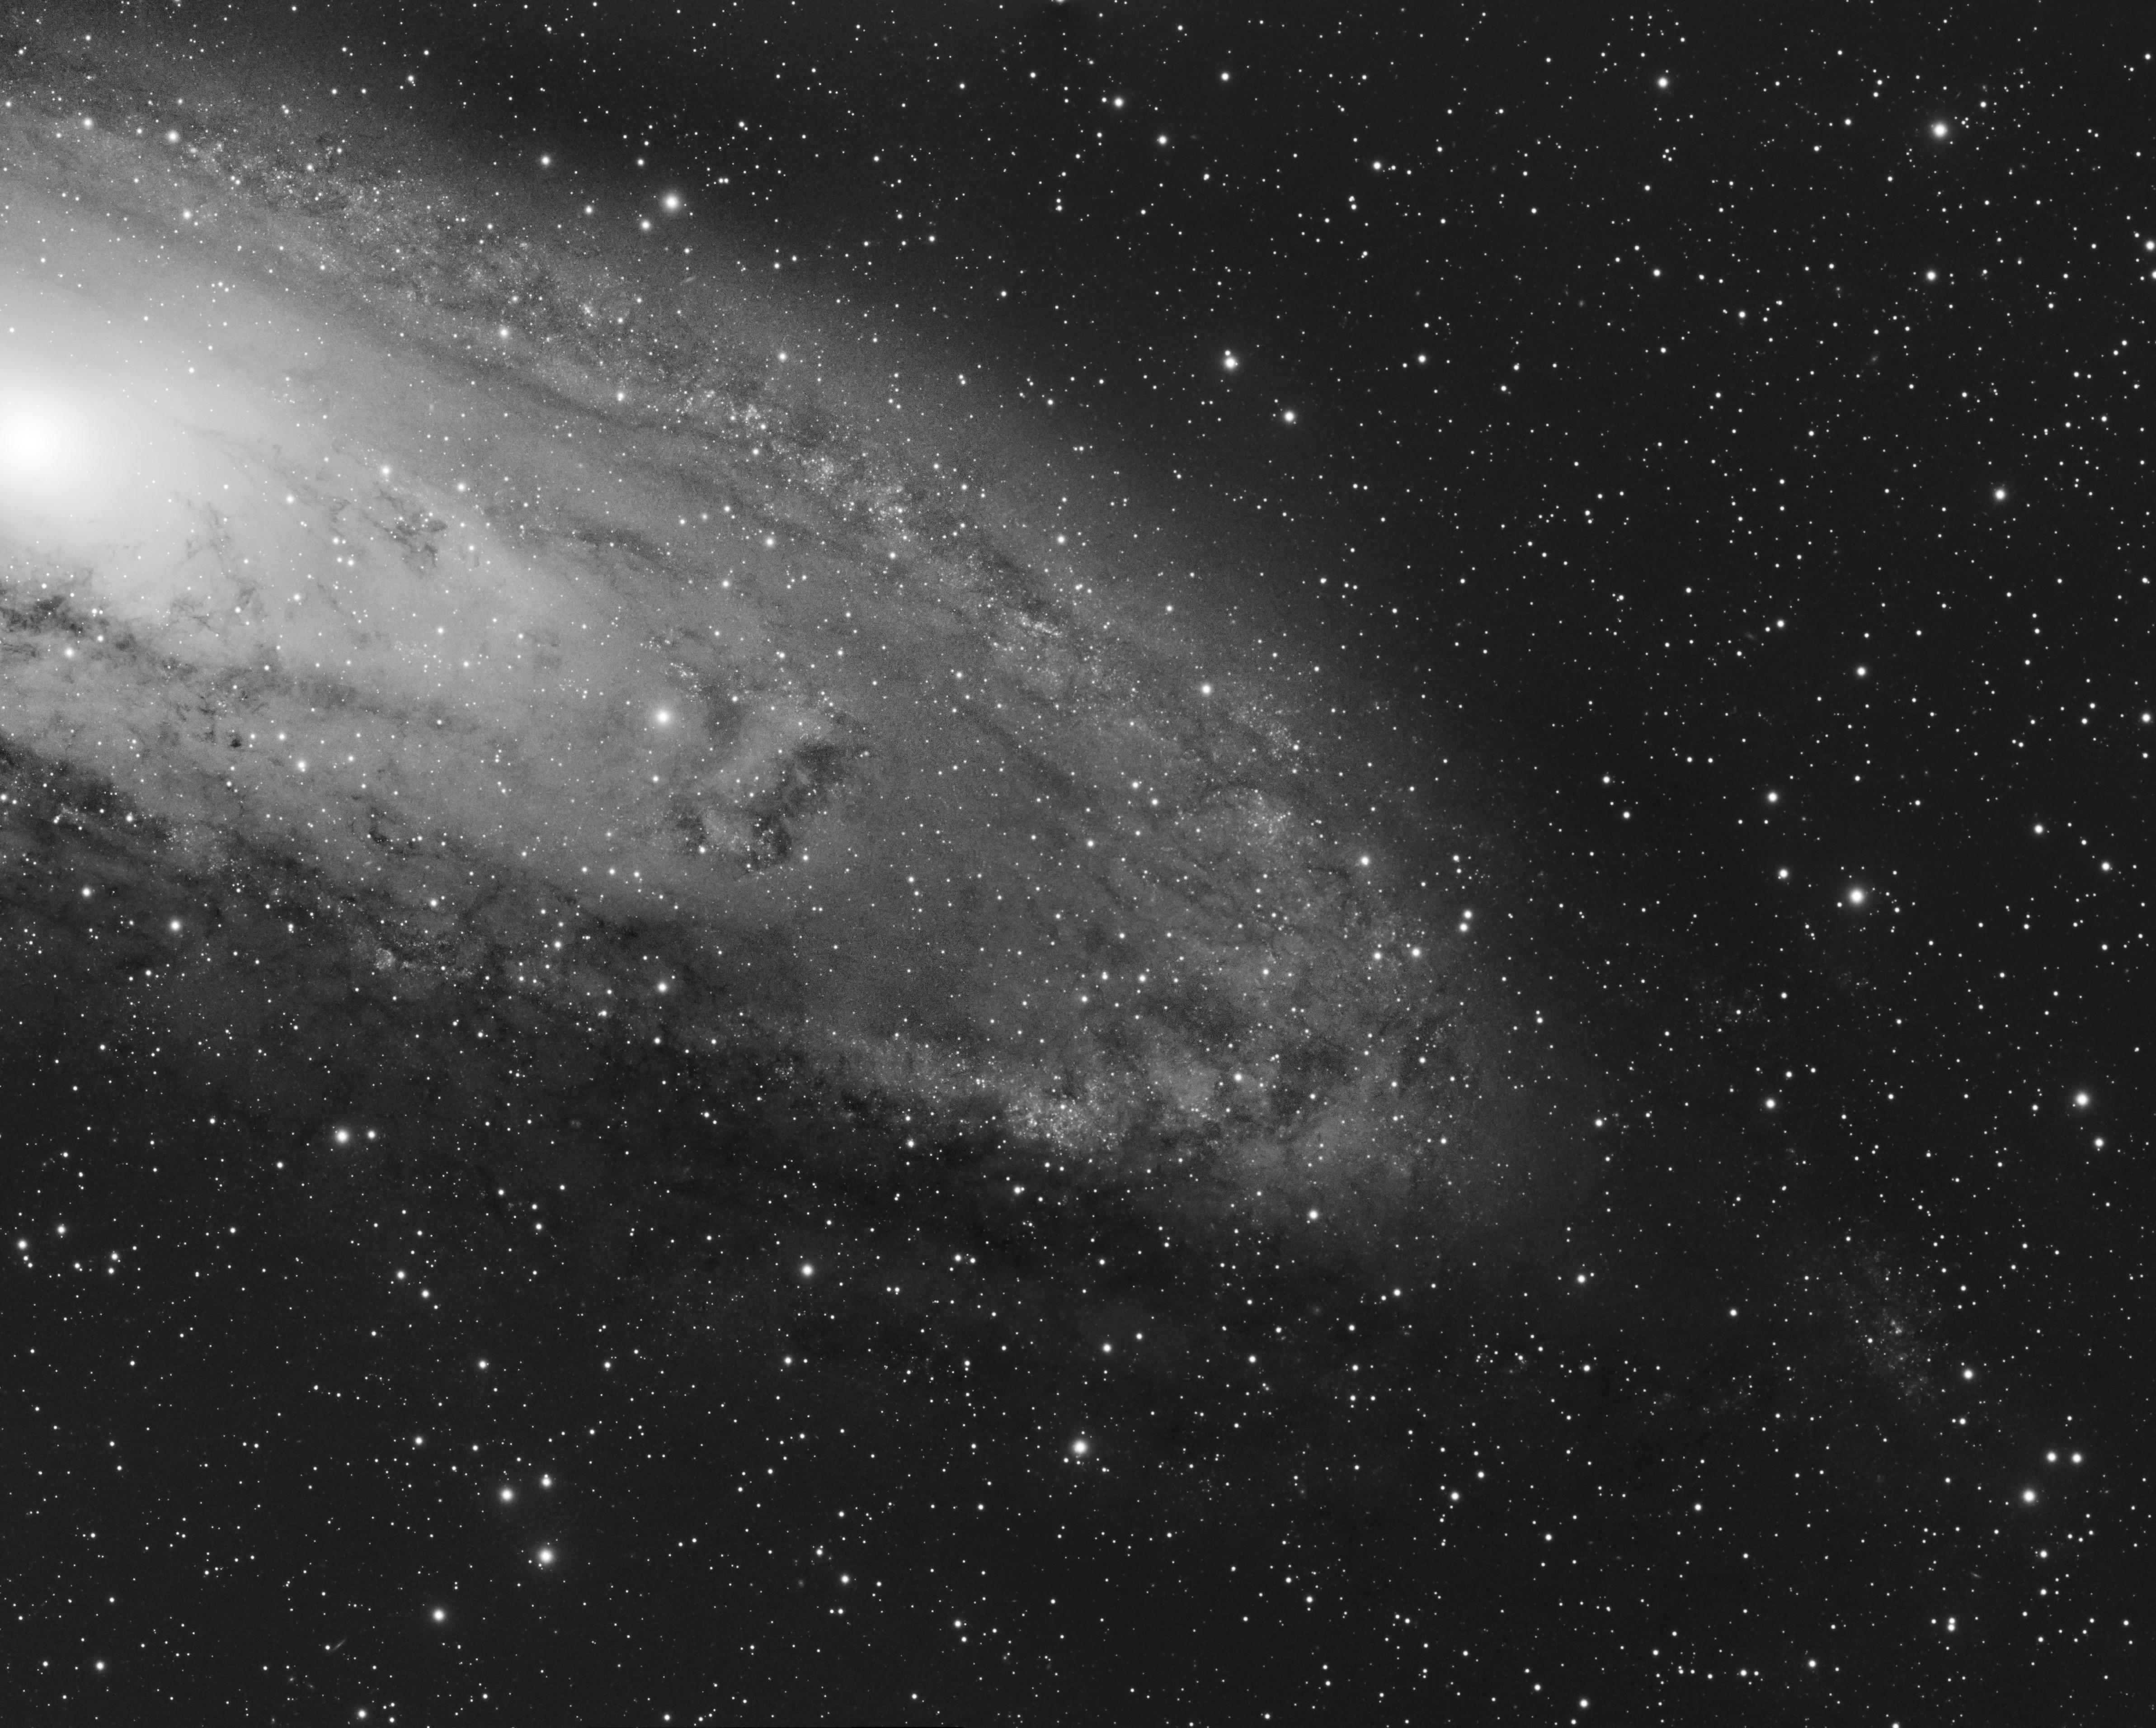
Each of the four luminance panels is a total of 90 minutes of 300 sec exposures captured with the TEC140 and Atik460 CCD camera with a Astrodon luminance filter. The luminance image above is a total of six hours of imaging time. I then processed these four images and knitted them together in PixInsight. I then registered this four-panel luminance with the OSC data at the top of the post and then used it as a luminance layer to give the best of both worlds; the colour of the OSC/FSQ85 wide field image with the detail of the TEC140/Atik460 image!

I hope you like it! :)
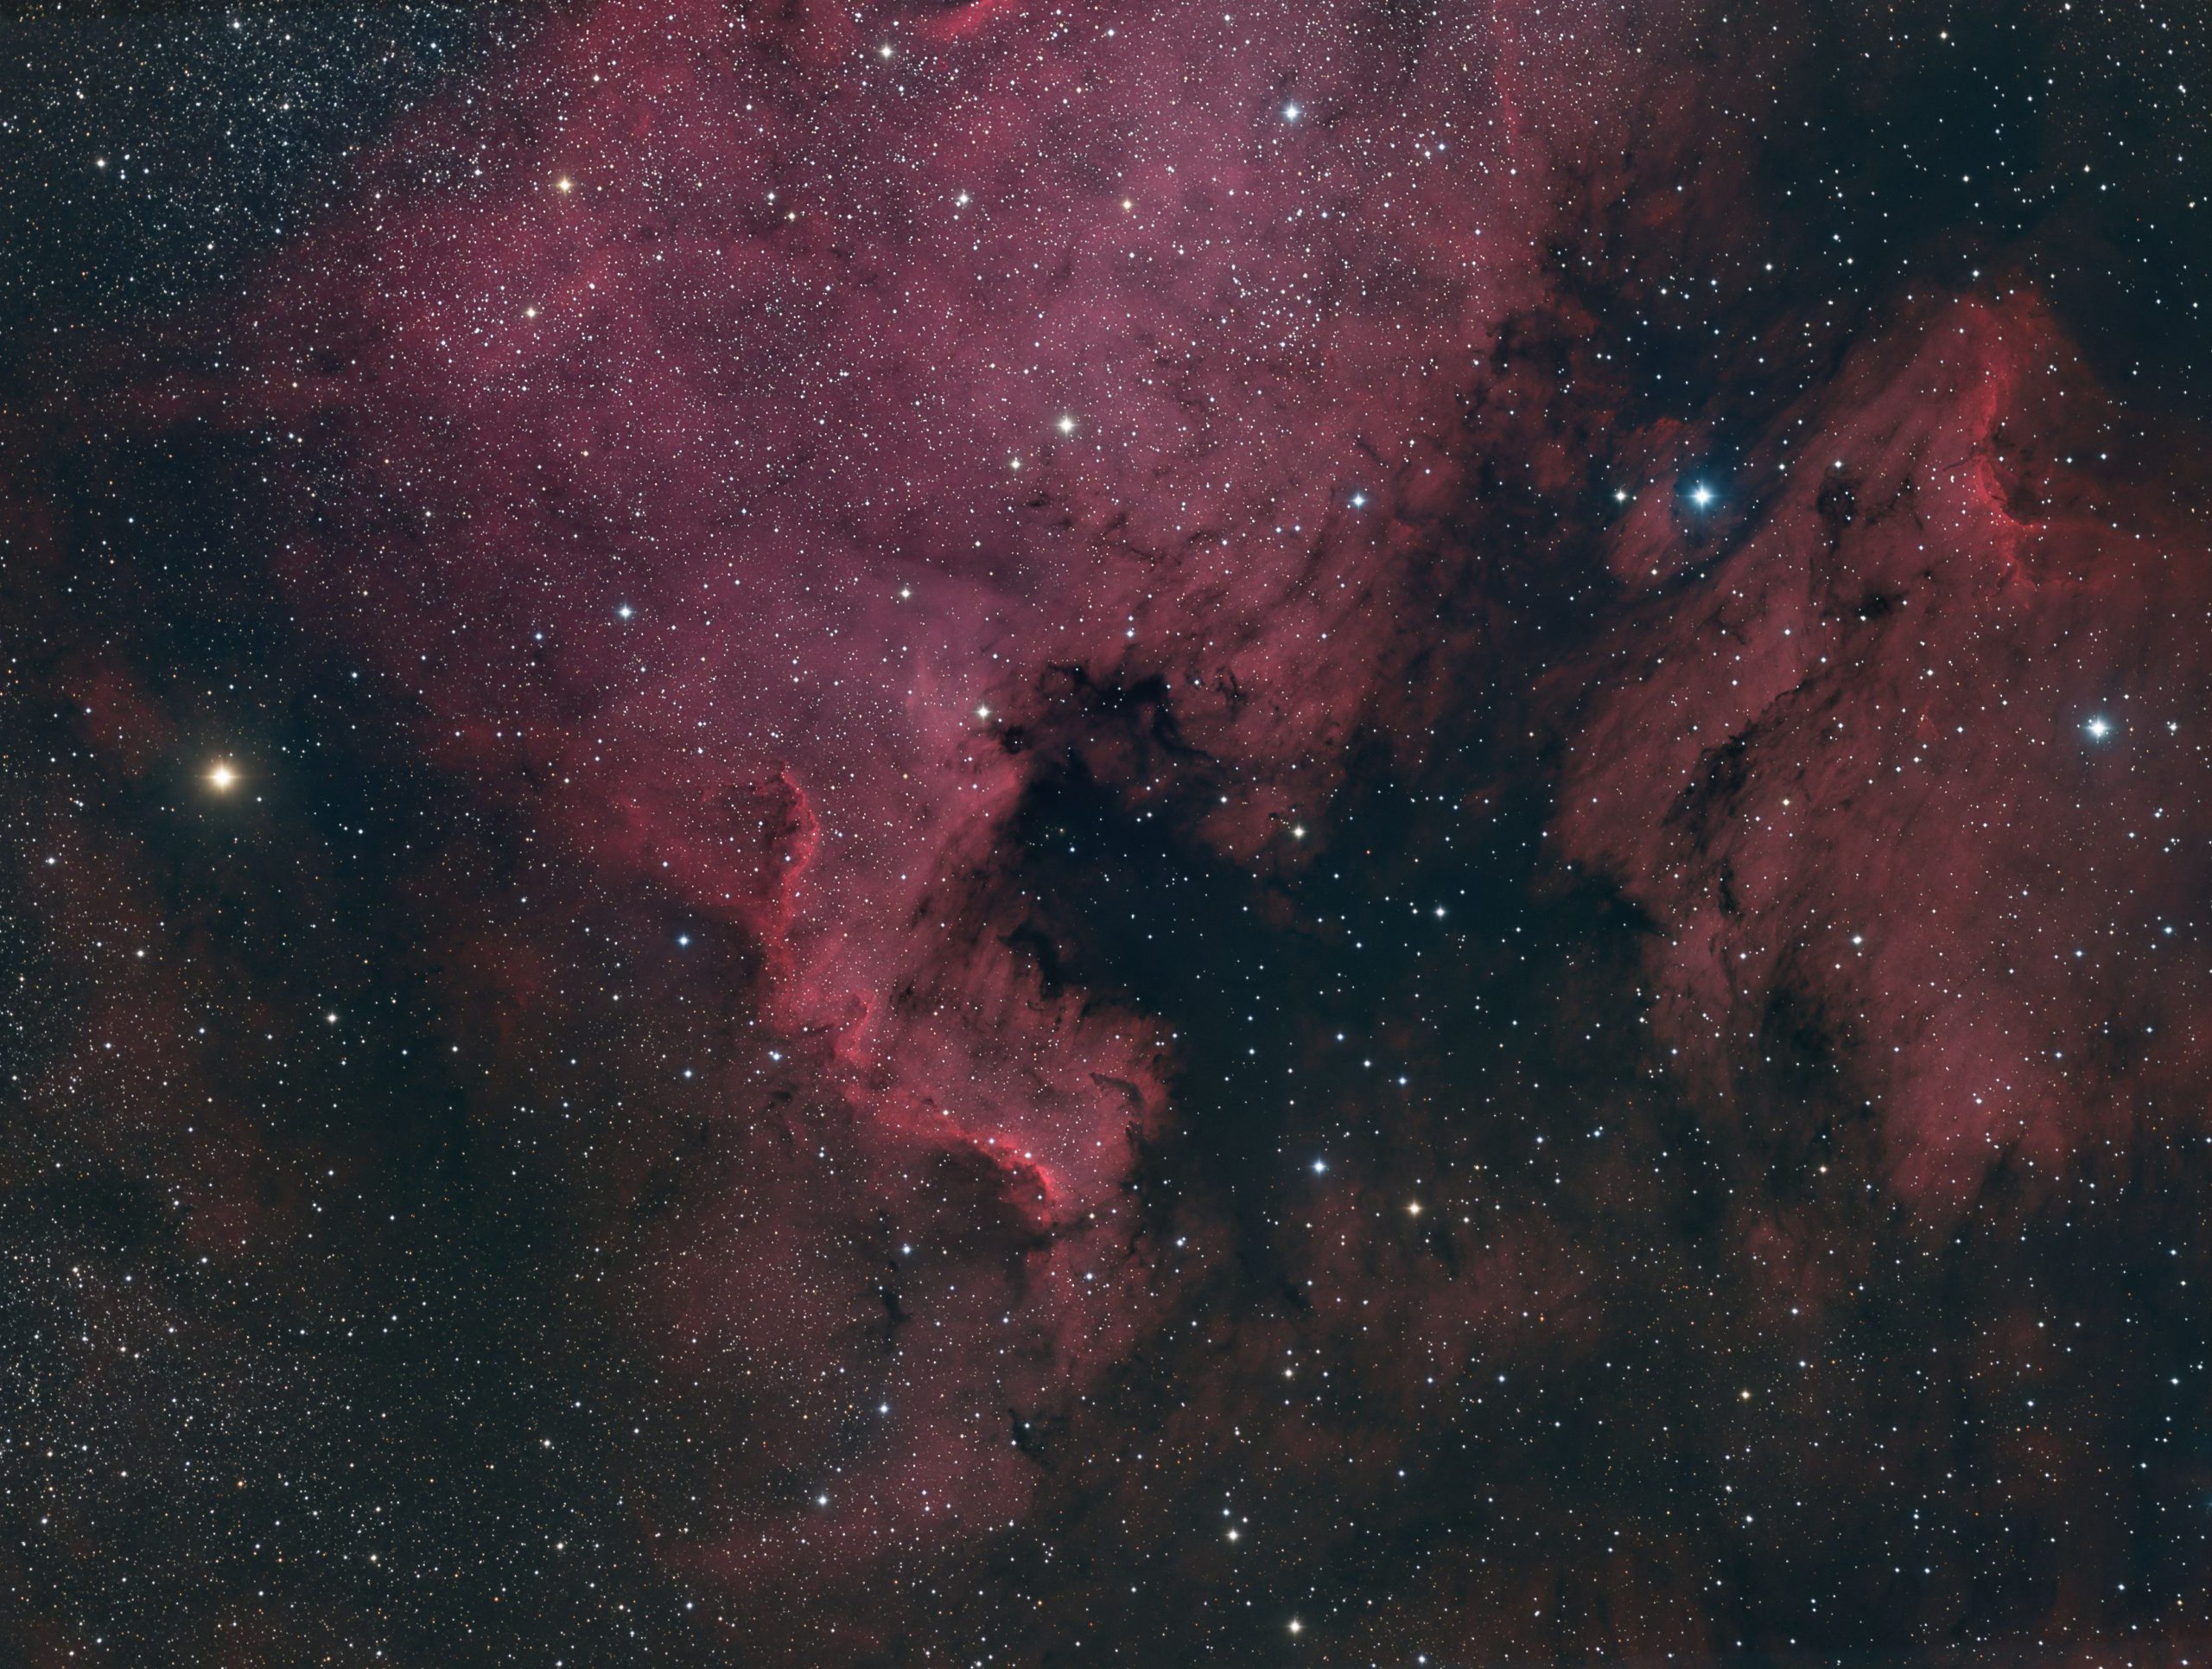
A Set of Images of NGC7000, The North American Nebula. Is Ha data worth it?
A perennial favourite object to image in the summer and autumn months in the Northern Hemisphere. I've imaged this target with multiple equipment combinations over the years. For example, in One Shot Colour (OSC), in widefield and in a very wide field.
As part of the image I used my existing Ha dataset from 2018/2019 which consists of 48 x 600 second exposures. I discuss capture of this image here.
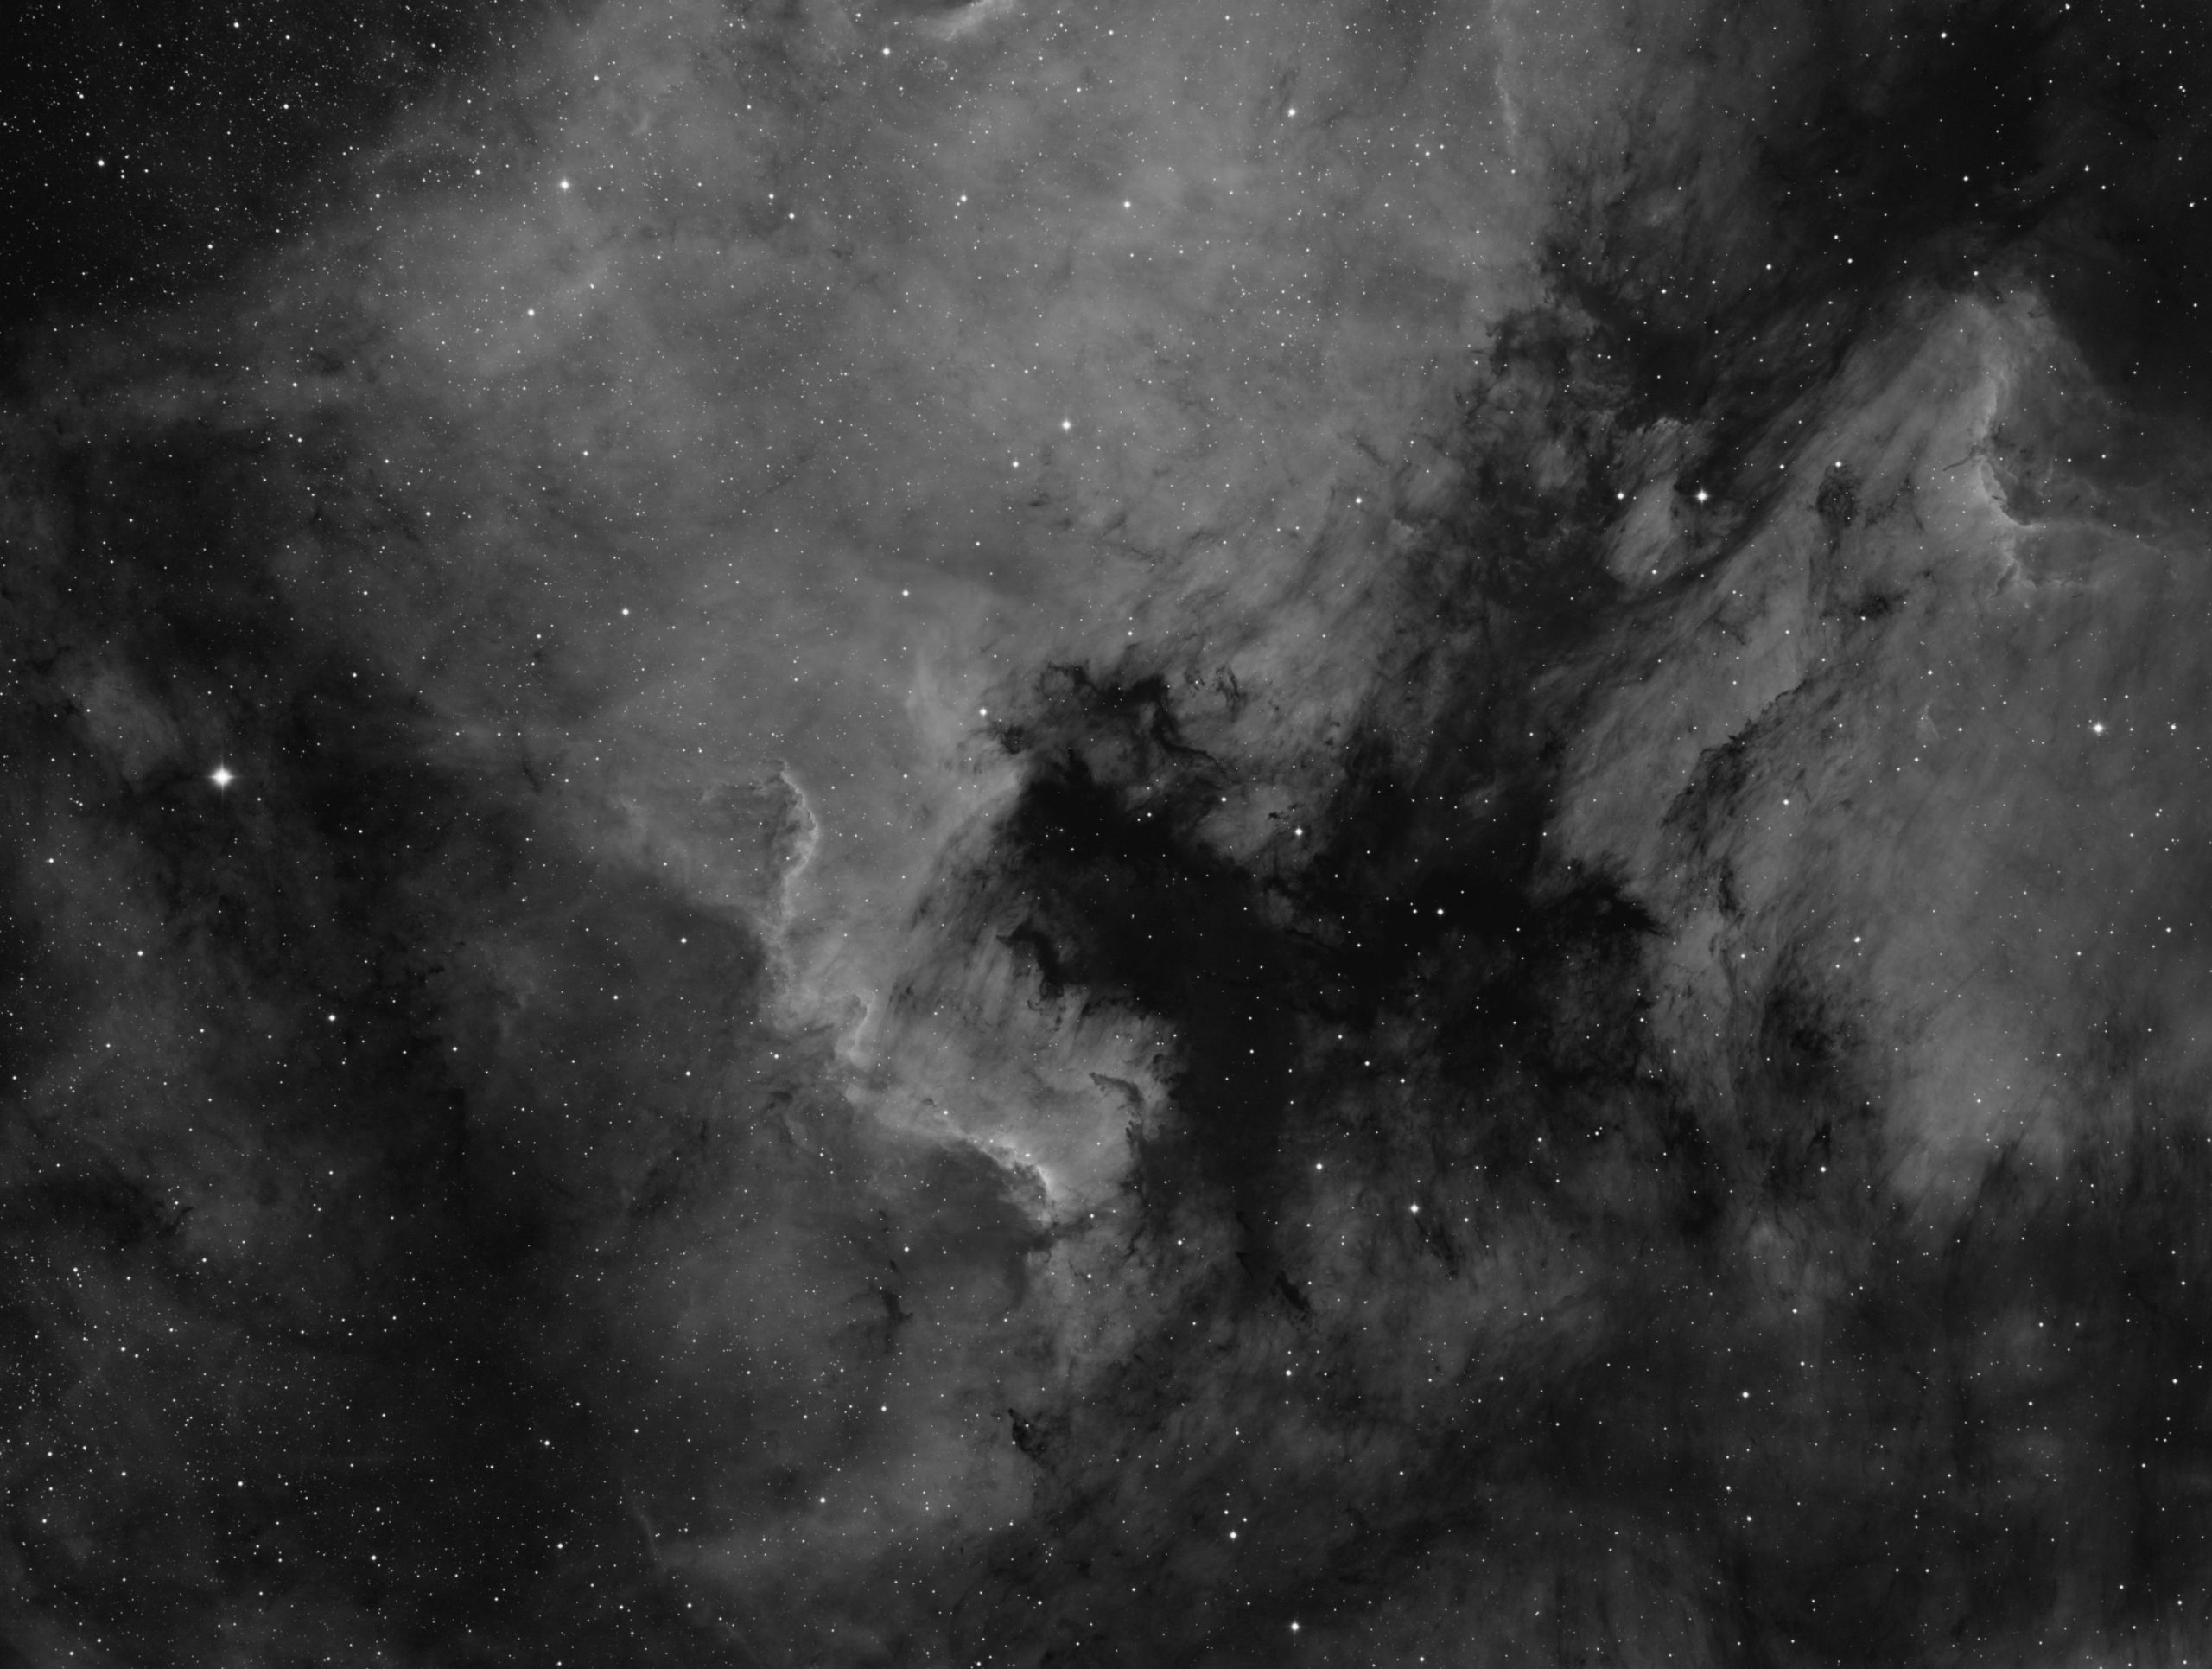
I then captured the RGB dataset in October 2021. This image is my first image set that I captured using the excellent NINA (Nighttime Imaging "N" Astronomy) imaging software. I captured four hours of RGB data through Astrodon 31mm E series Gen 2 filters binned at 1x1. This consisted of 300 second exposures. Seeing and transparency were not good but clear nights have been very infrequent in the UK in the past six months so I went for it regardless.
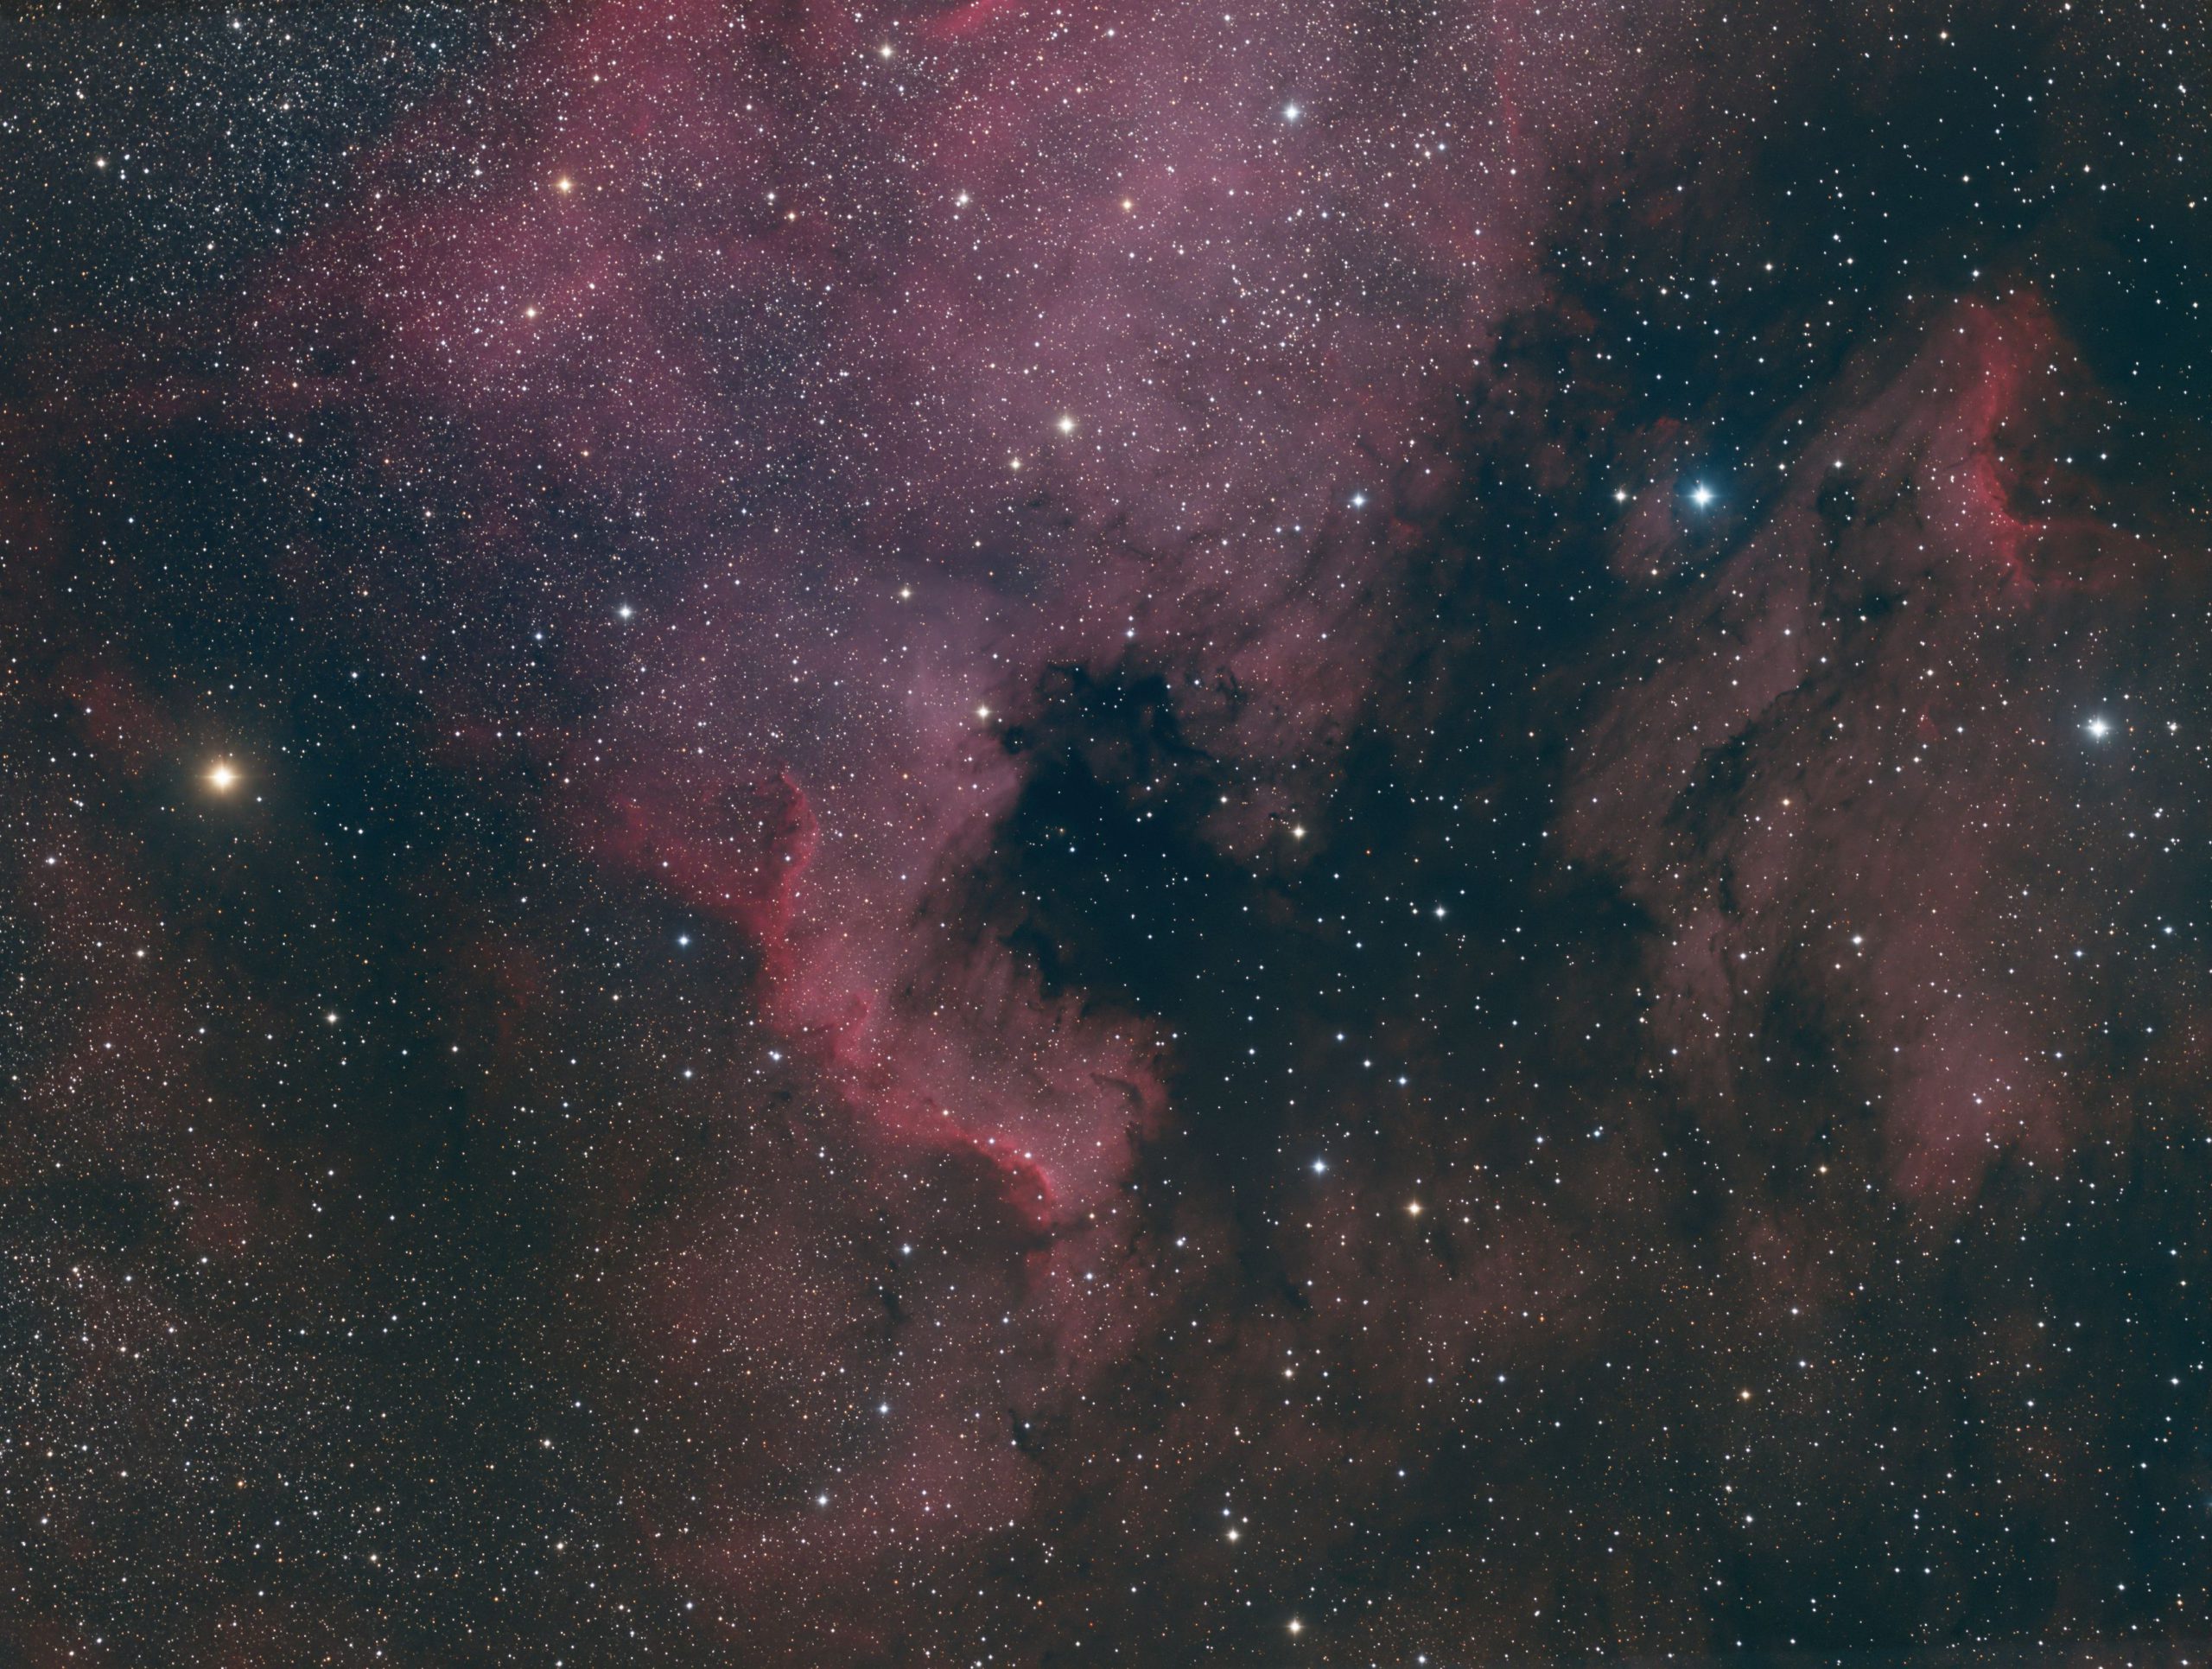
I am very impressed with the quality of the standard RGB image above. Since the data is binned 1x1, I did not feel the need to capture any luminance channel at all. Indeed the RGB alone is so good that the Ha data addition, whilst it does add some signal, adds so little to the final result that I question the time I spent capturing the Ha data. For sure, the Ha image is a pretty picture all on its own. However, it does add something to the picture as detailed below.
Despite the expense in time of gathering the Ha data, you can see that when it is blended with the RGB it brings out some fainter structures in the nebula. Whether or not a full eight hours is needed though, I doubt.
Howie Glatter Laser Collimator
In order to get the best from your observing and imaging sessions, your reflecting telescope needs to be properly collimated. In other words, the optical axis of the telescope must be optimised to reflect the light optimally. Newtonian and Ritchey- Chretien design scopes do not deliver a crisp and sharp image unless they are properly collimated. A laser collimator is a device that can aid in getting the telescope properly collimated.
I want to emphasise that I am not in any way paid in money or kind to write these words. I do this for the love of it and to help others and I have no connection whatsoever to the maker of these collimators.
Sadly, Howie Glatter himself passed away in 2016. He was a very kind man and was incredibly friendly, knowledgable and approachable. There was almost nothing he didn't know regarding the subject of collimation of telescopes! His company was taken over by Starlight Instruments. My review in the video below was made in 2013 and my example was made by the late Howie himself. However, the pedigree of Starlight Instruments, famous because of their focusers, would imply that the exactitude of Howie's methods are continued.
Rather than me type a novel here, please review the video. I think you will see that I am most impressed with my example!
Clear skies and happy collimating! :)
https://www.youtube.com/watch?v=I4YPT1aRf2U
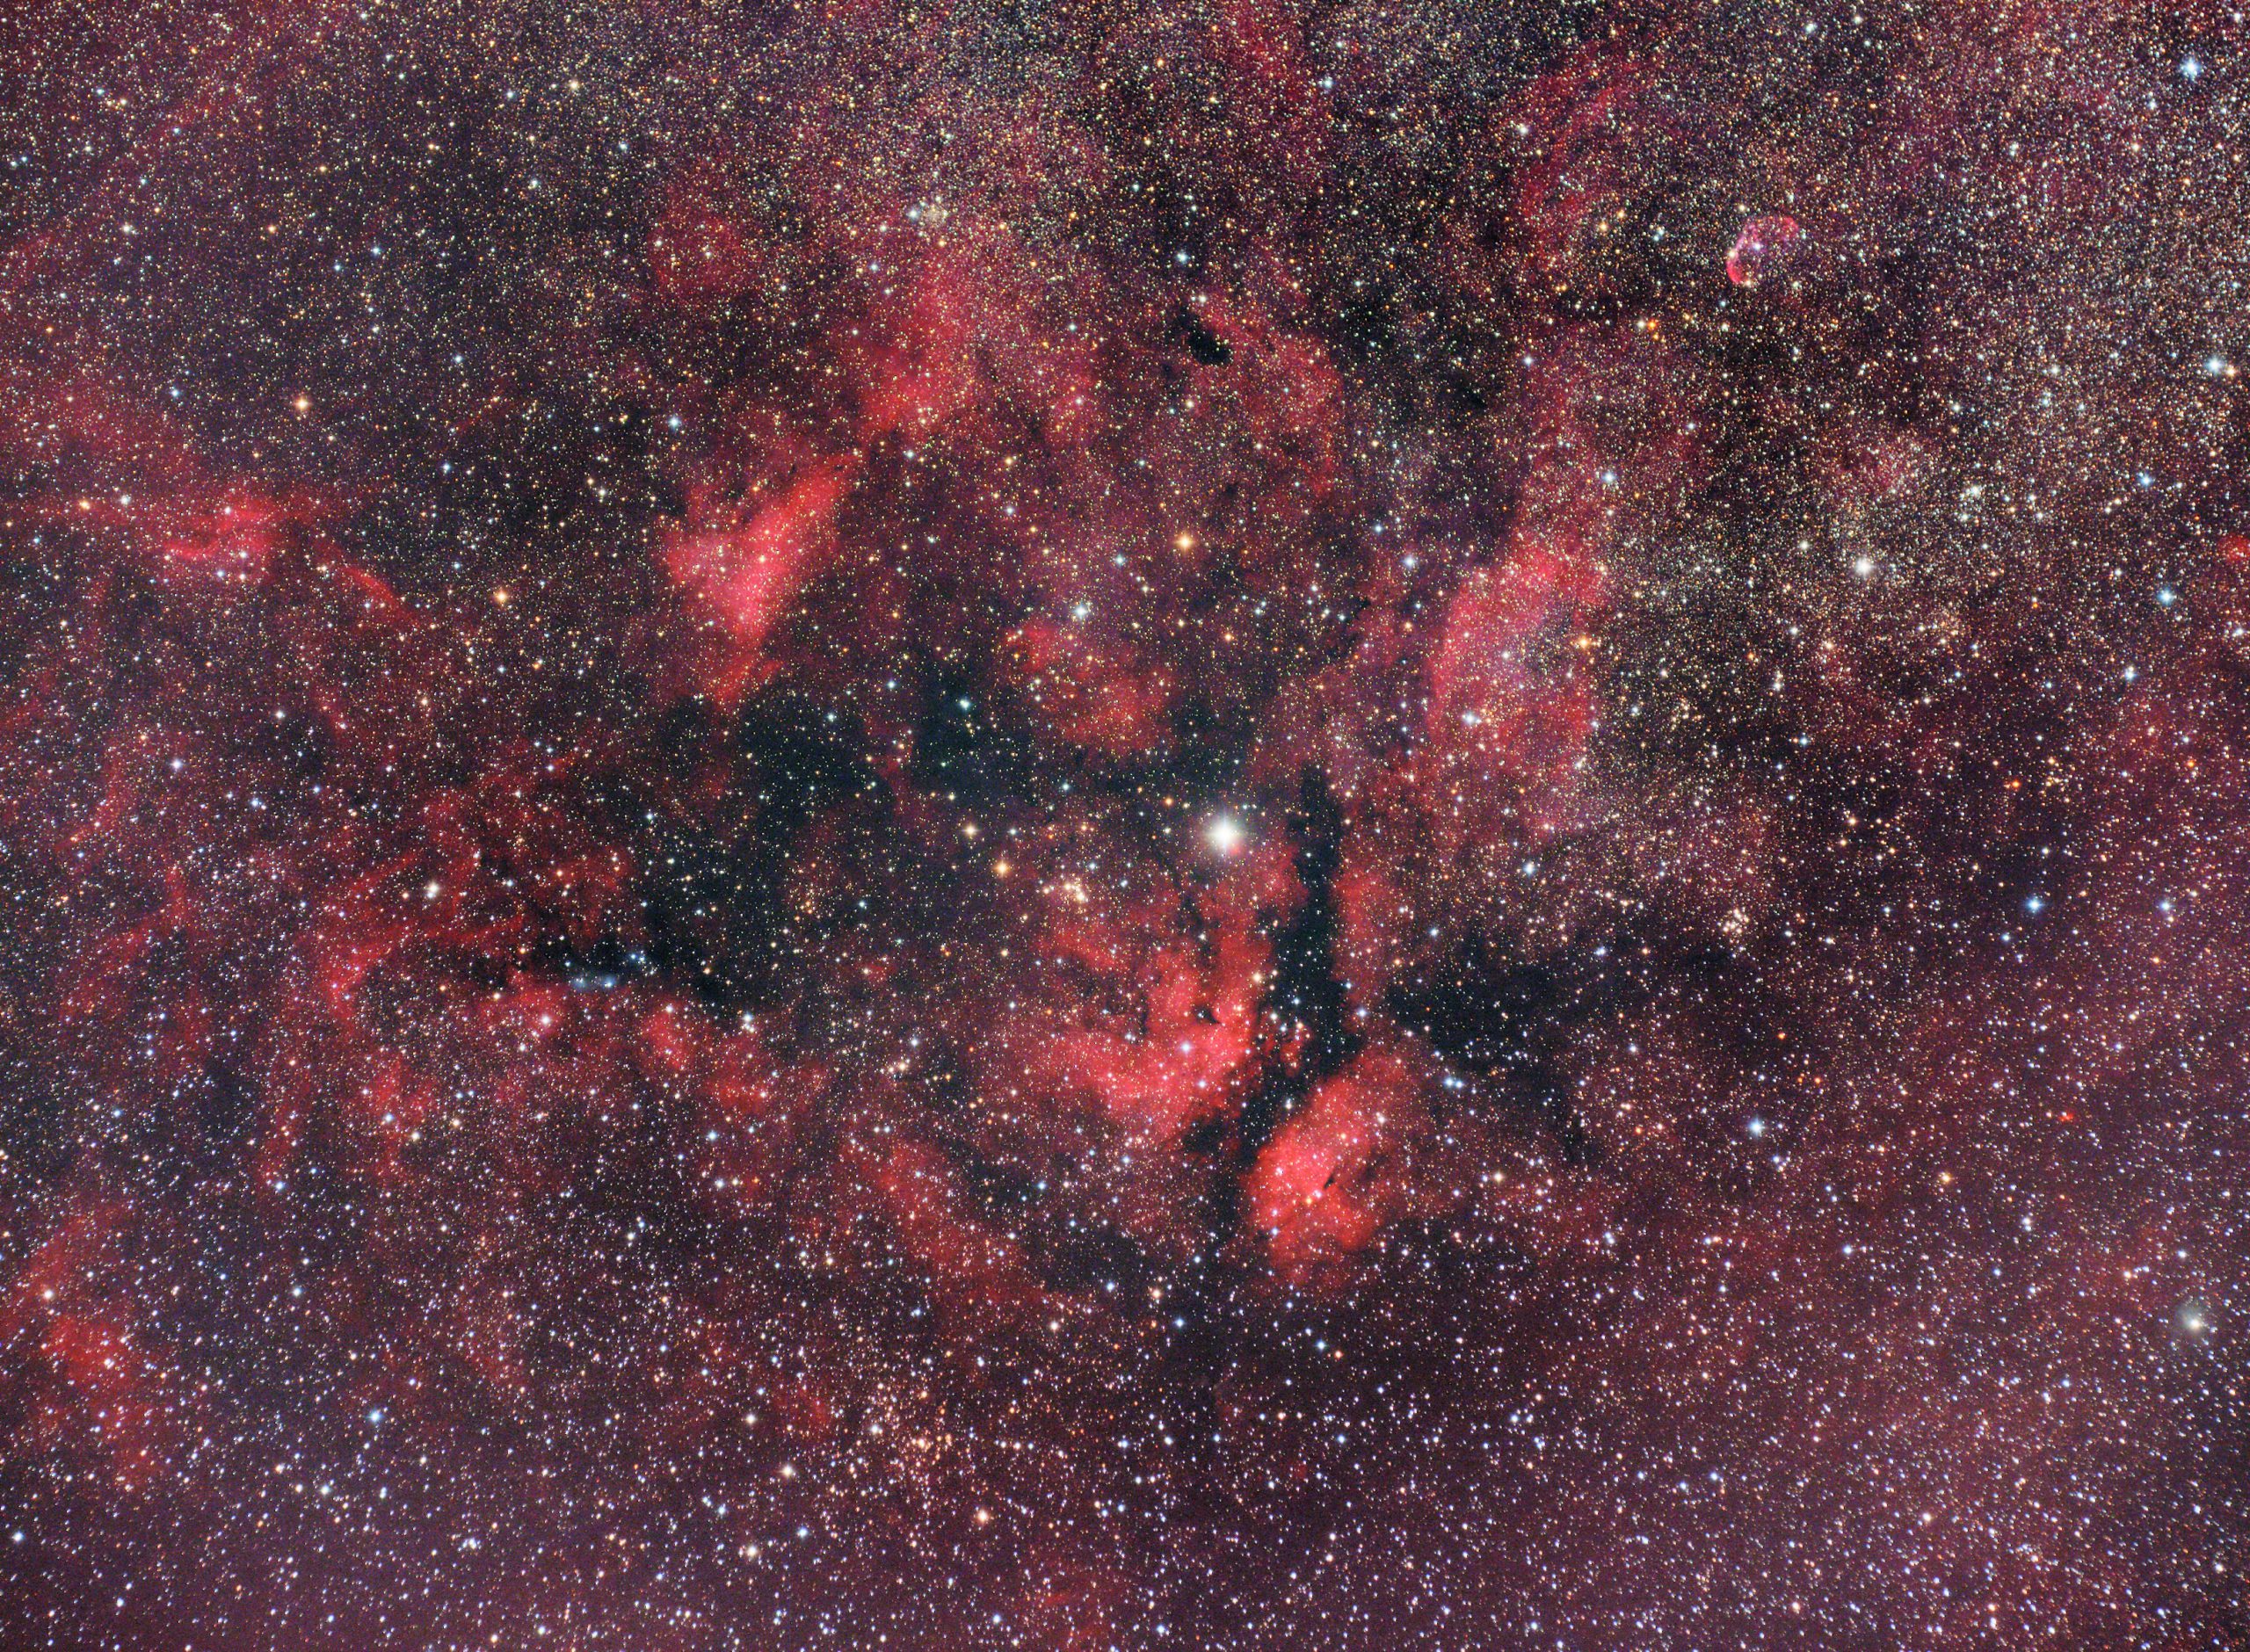
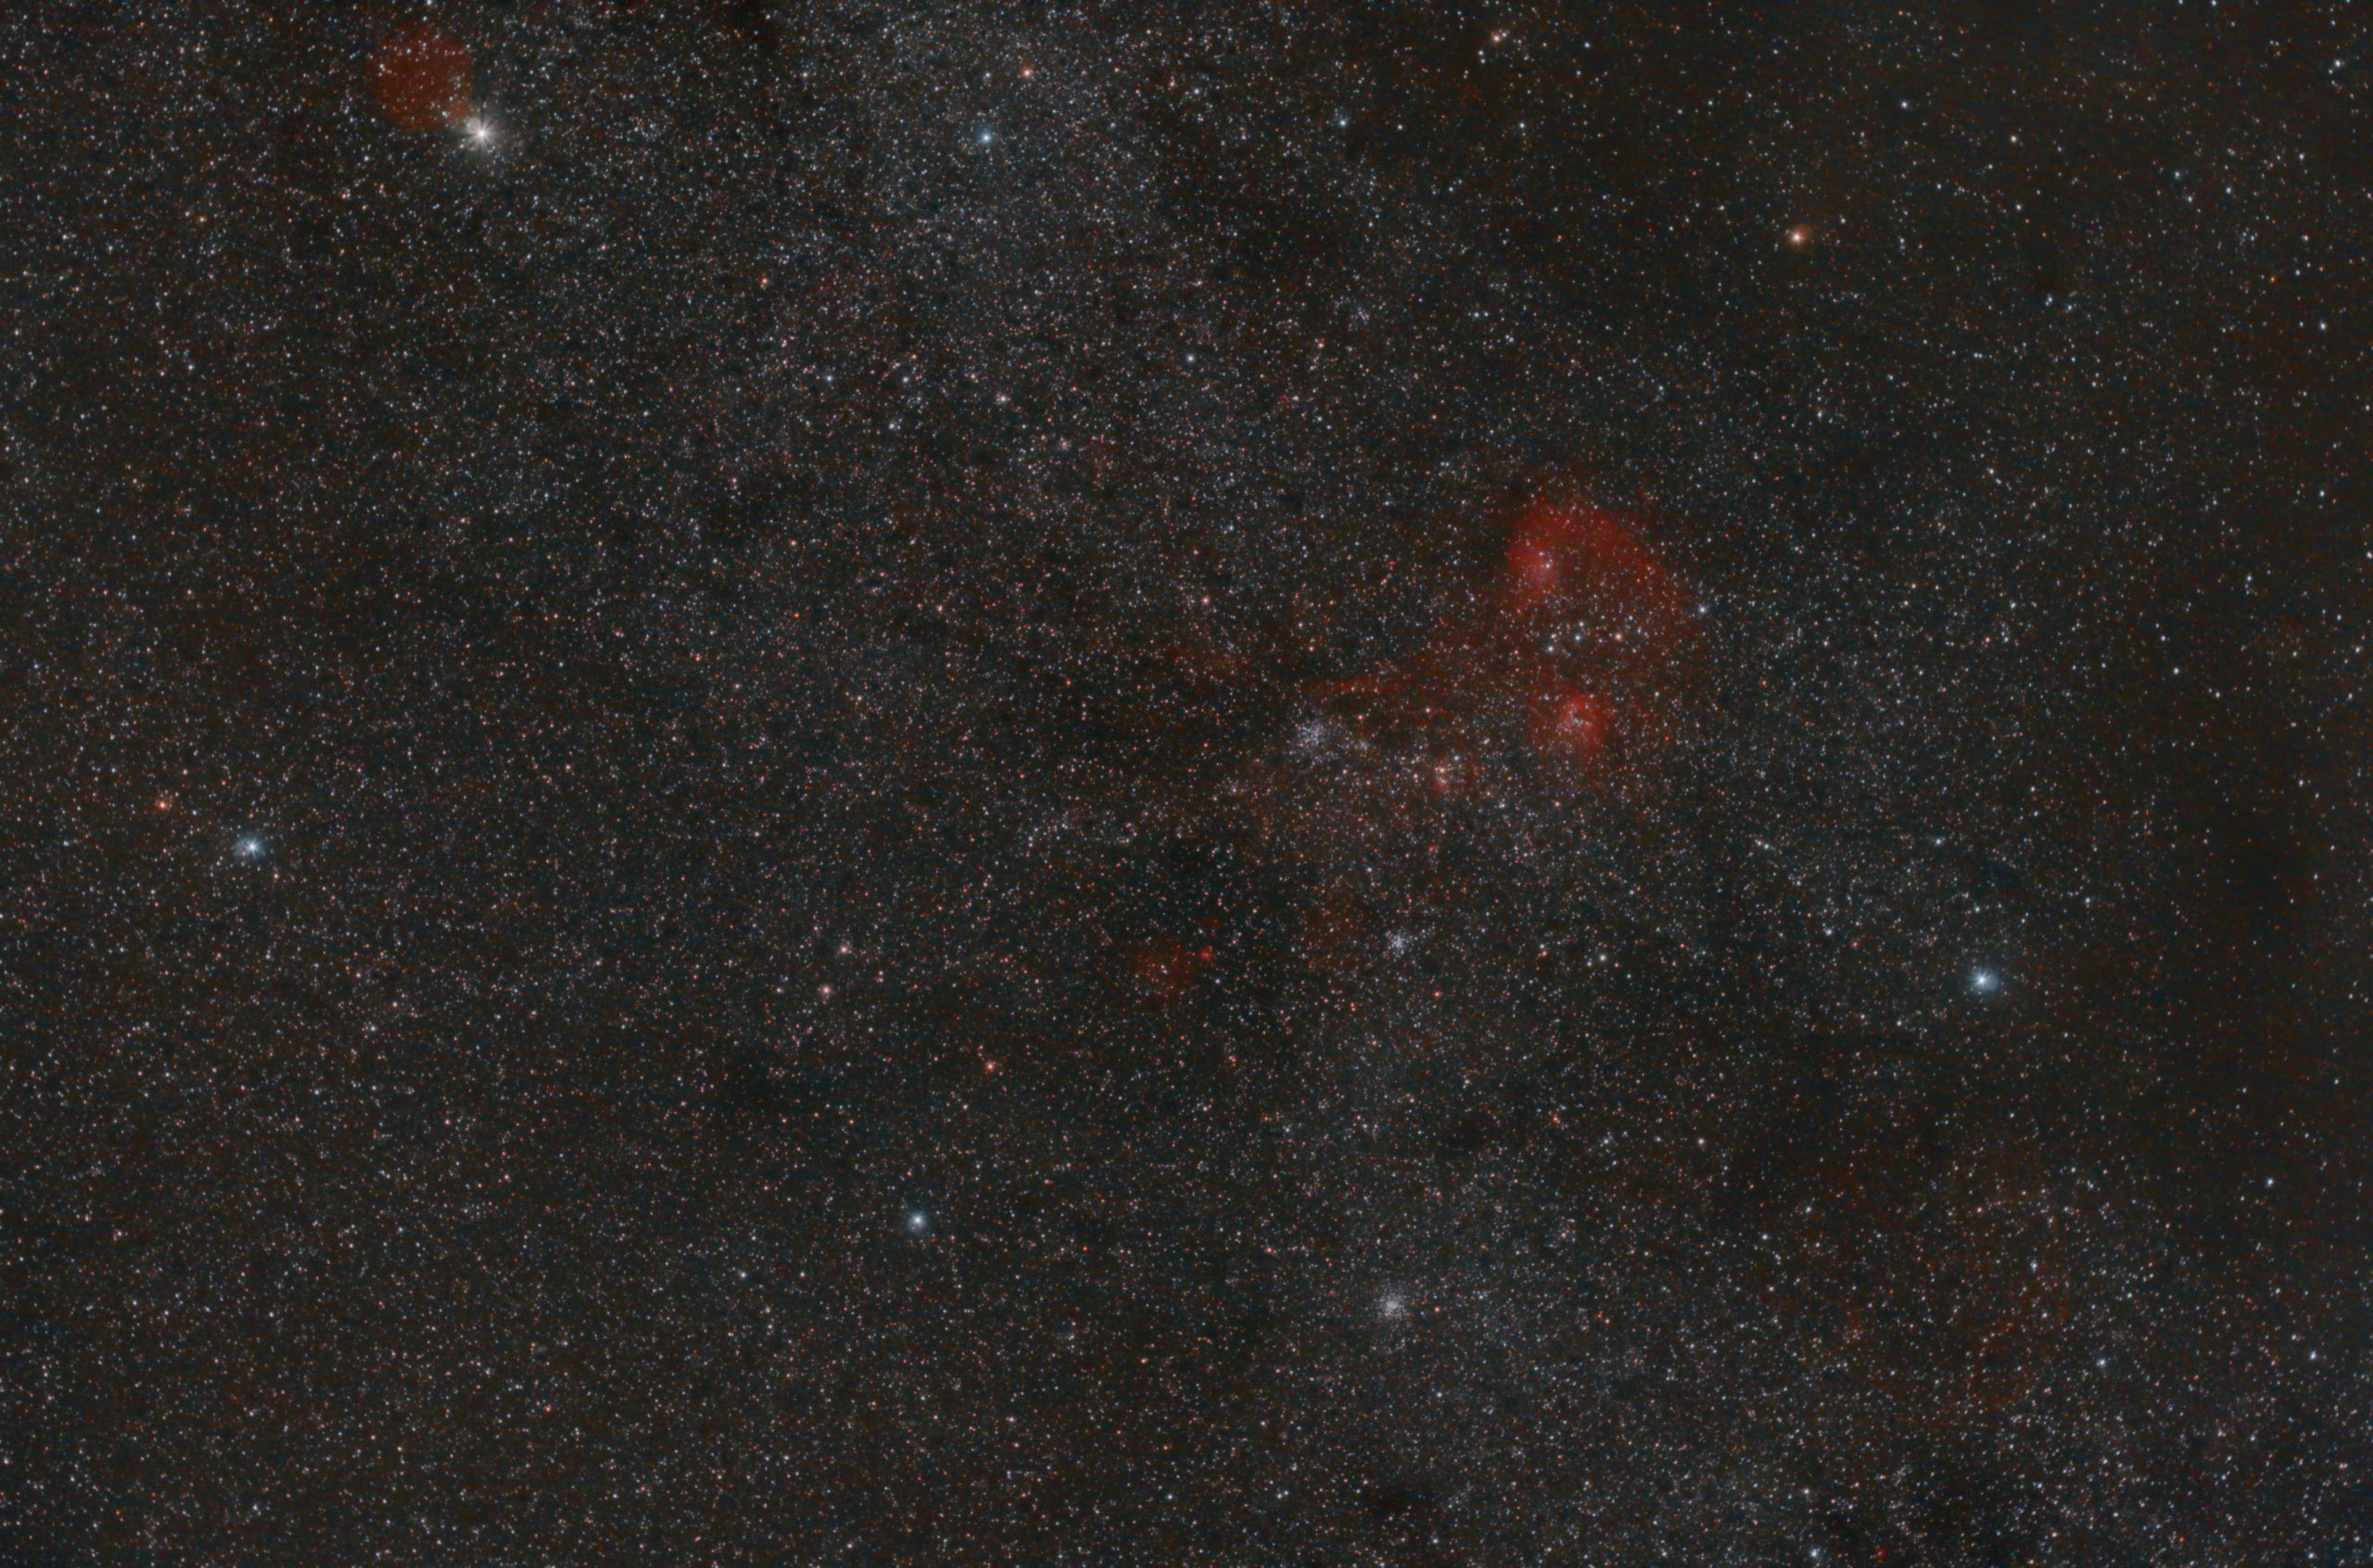
SADR Region of Cygnus
SADR is the central star of the Cross of Cygnus, between the arms of the cross. The constellation of Cygnus is supposed to represent a swan but to most people looks much more like a cross and consequently is often called The Northern Cross. The whole area abounds in nebulosity that is very easy to capture with a camera.
This image is taken with a Samyang 135mm DSLR lens and subtends a field of view of about 8 x 6 degrees across the sky and so the long axis of this image is about sixteen moon widths wide. This is a very large area of sky to capture in one image. It is was made from 12 x 3 minutes exposures in each of the Red, Green and Blue and also a luminance of 24 x 3 minute Hydrogen Alpha 3nm exposures to give a total integration (exposure) time of about three hours. The camera I used is the Moravian Instruments G2-8300 loaded with 31mm Astrodon LRGBHa3nm filters.
I captured it in my back yard on 26th April 2019 with my wide-area autofocus rig mounted atop a NEQ6 mount. The data was captured with SGP and processed with PixInsight and Photoshop.
I hope you like it! :)

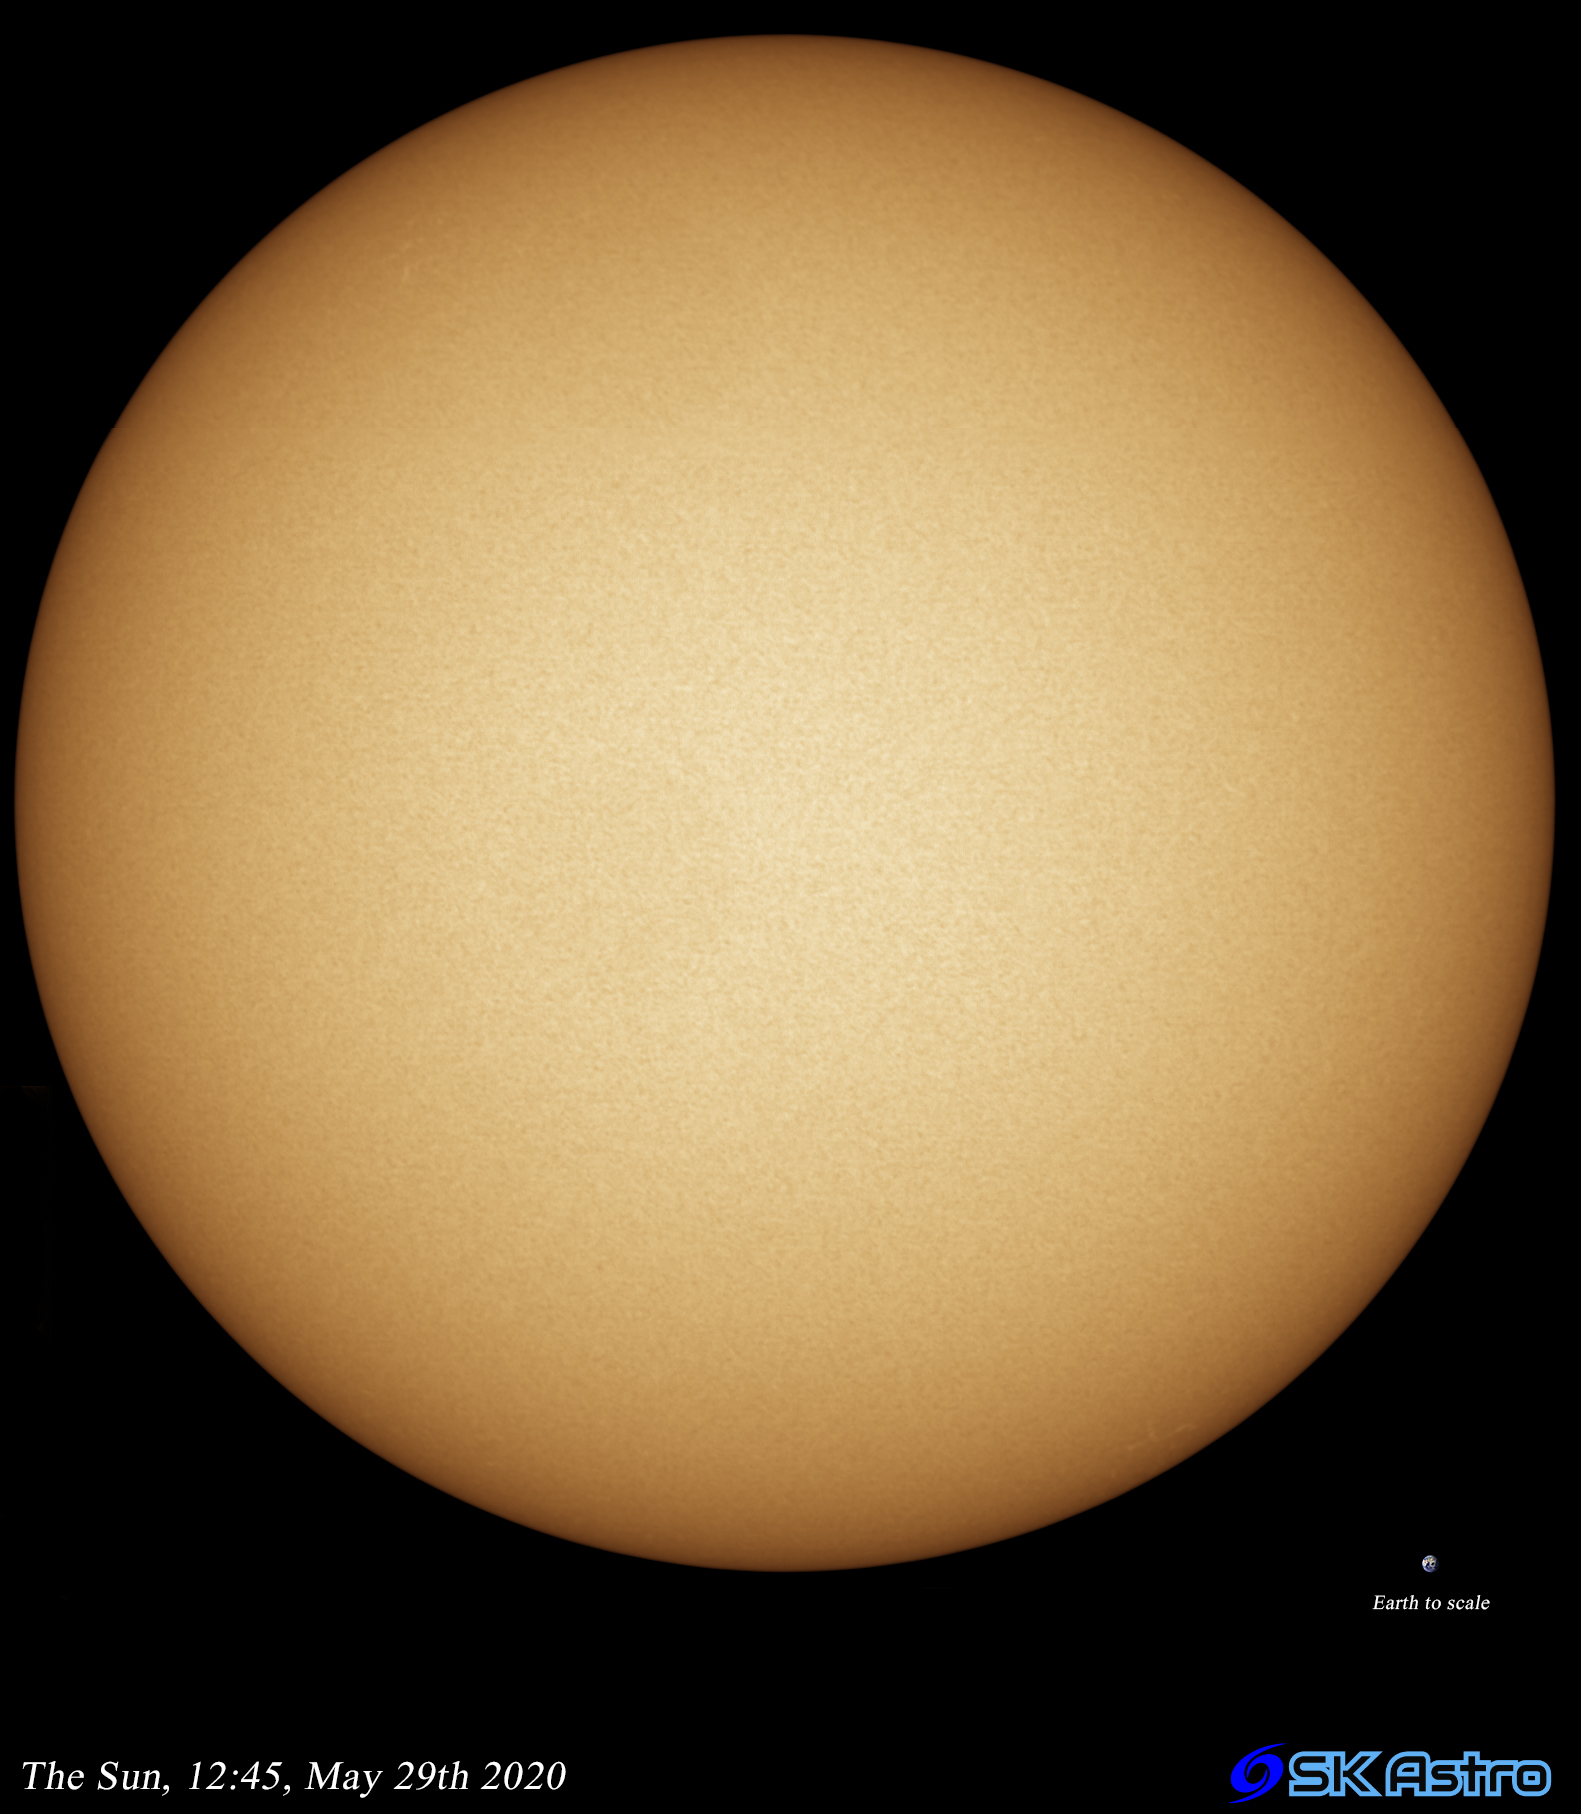
Sun 29th May 2020

TEC140 refractor, Baader Herschel Wedge, ASI 174MM camera. Captured with Firecapture, Stacked with AutoStakkert, developed with PixInsight and Photoshop.
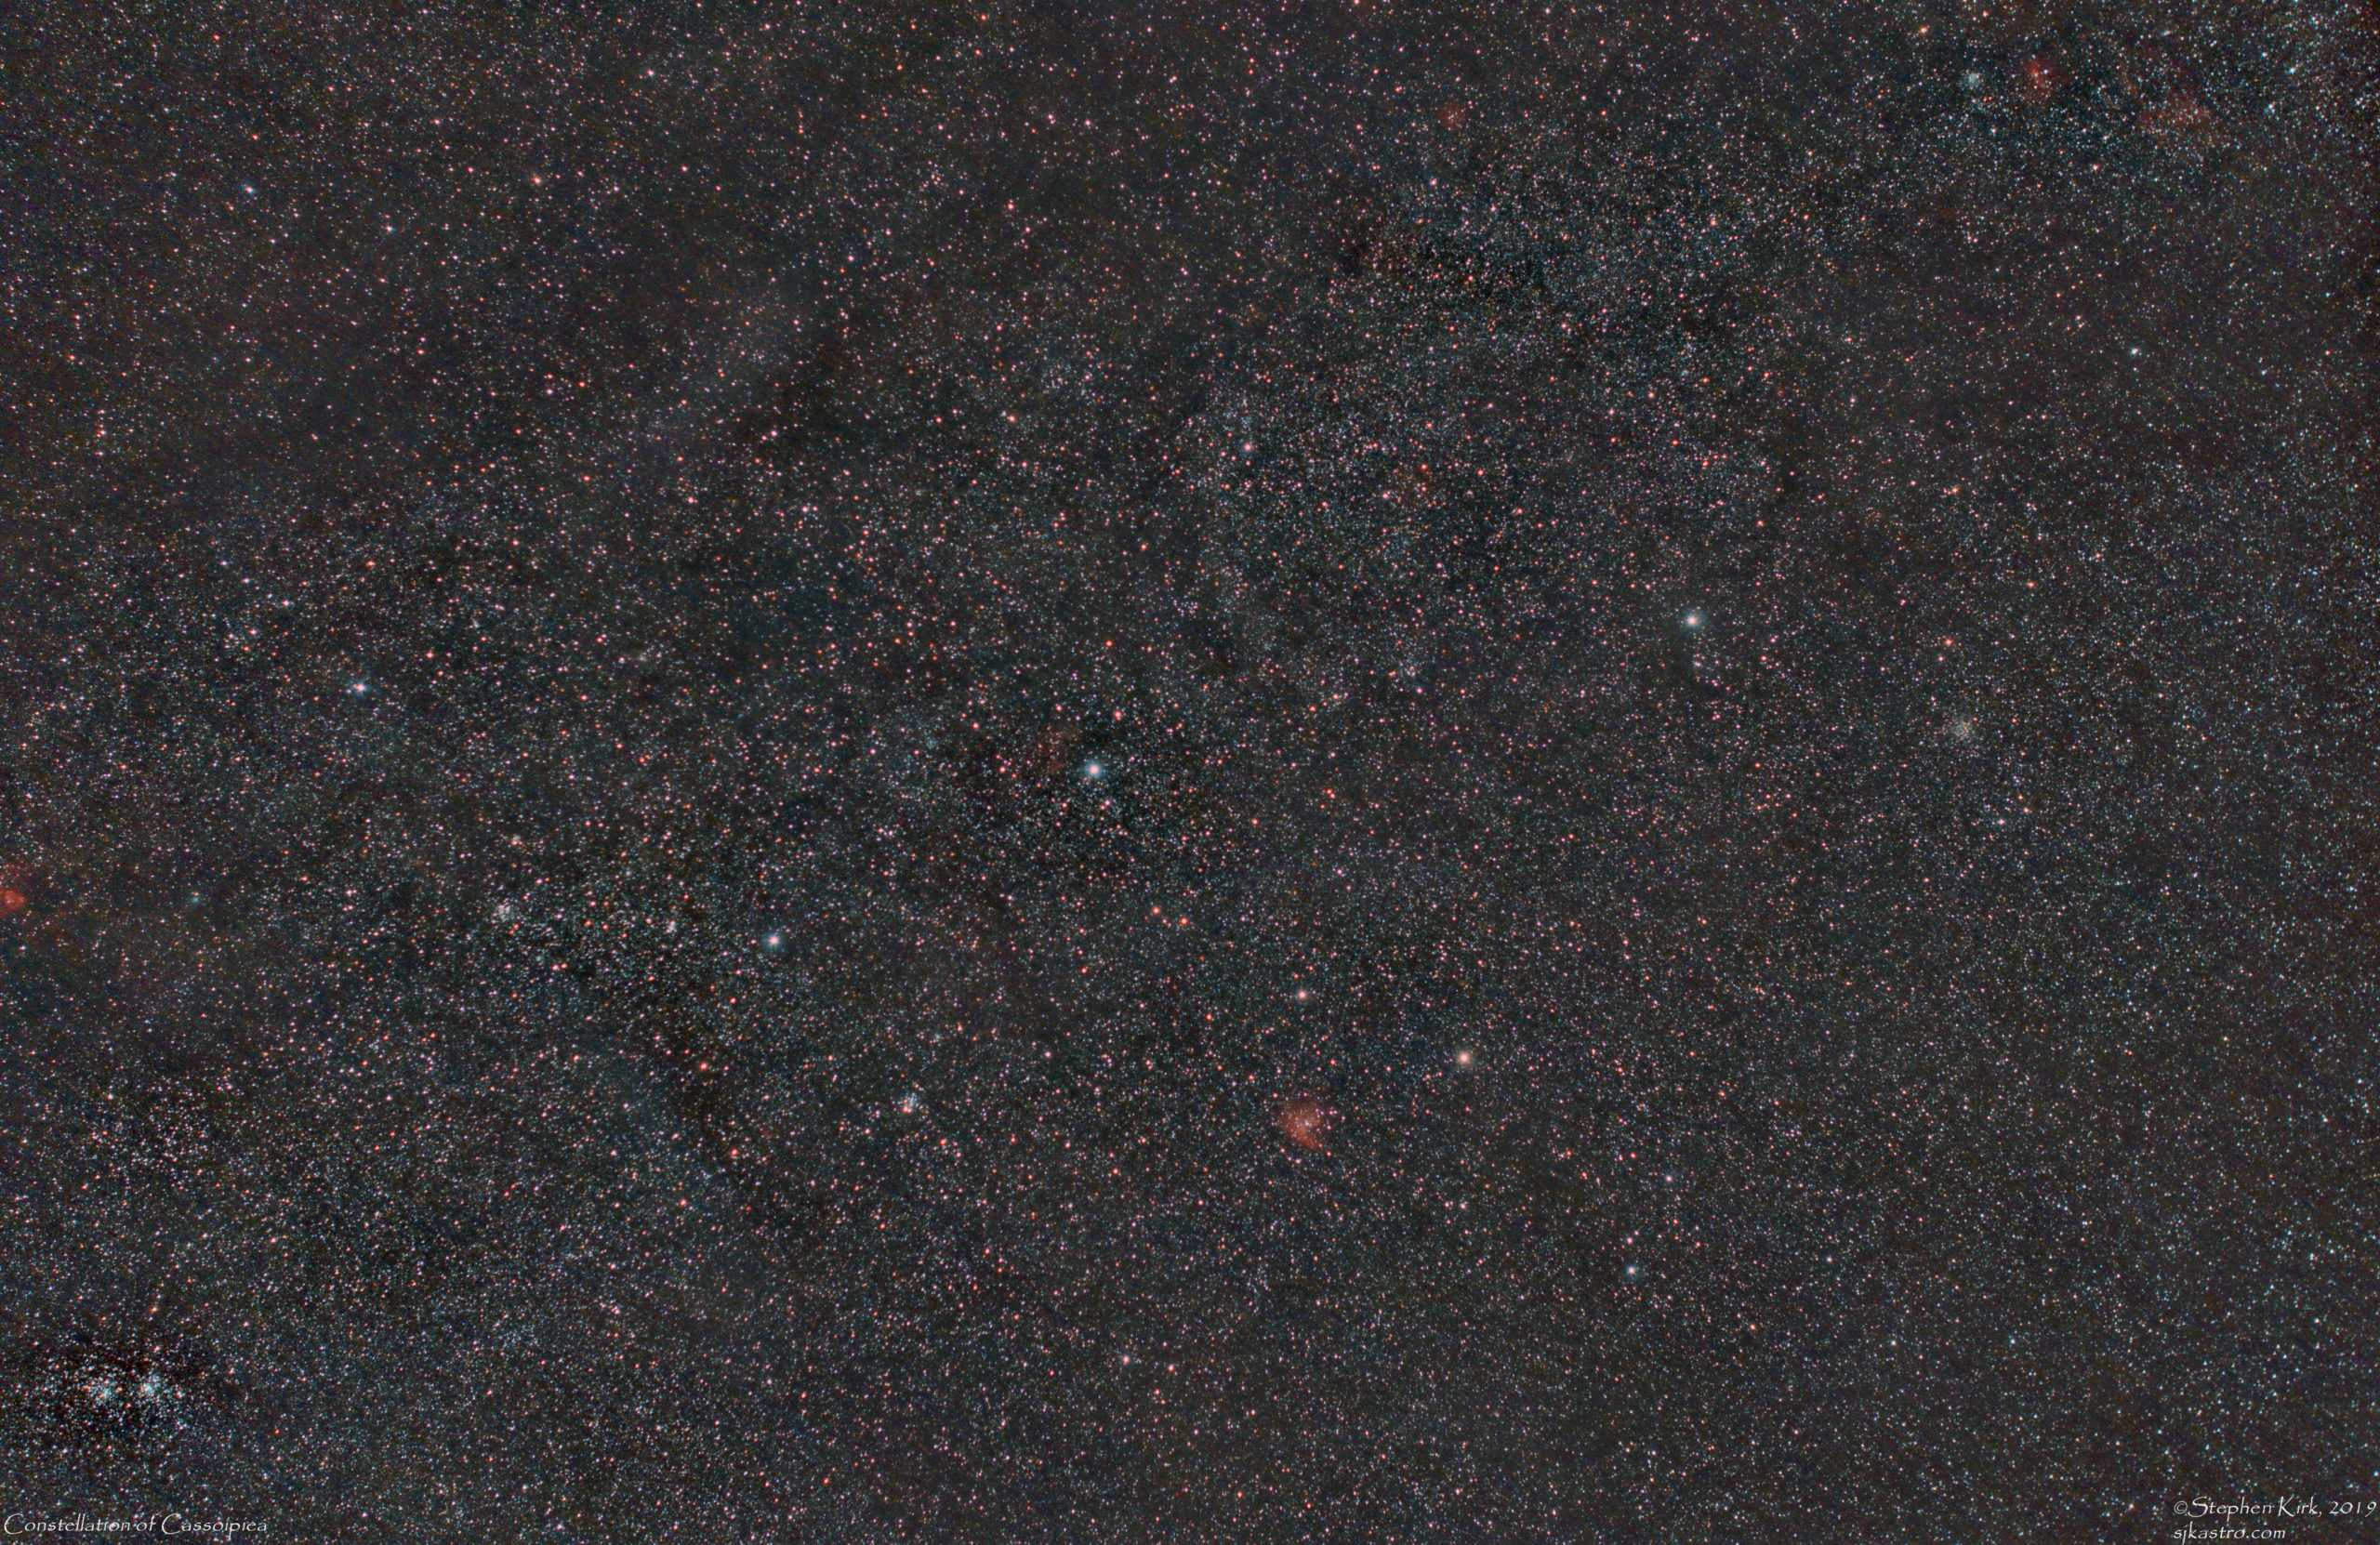
Cassiopeia
Share on facebook
Facebook
Share on twitter
Twitter
Share on pinterest
Pinterest
A far Northern constellation - circumpolar from my location in Nottingham - Cassiopeia lies in the middle of numerous star fields and nebulae fields, looking out from the core of the galaxy. The famous "W" shape is very recognisable and one of the first constellation that beginners to astronomy learn. It is rich in interesting nebulae, star clusters and other objects.

Image above was taken at the beginning of March 2020 when Cassiopeia was setting towards the North West. Conditions were not very good with the seeing and transparency being quite poor. Nevertheless, I managed to grab 45 x 60s exposures at ISO 800 and F4 with Canon 1100D and 50mm lens. Quite a quick and dirty picture and more exposure time would reveal much finer detail and nebulae details.Even in this image, you can see the huge number of objects withing the constellation, especially nebulae in the Sharpless Catalogue (Sh2).
Below is an annotated version of the above picture, showing some of the interesting objects and also an inverted view.


Auriga - The Charioteer
Auriga -
A famous constellation in the winter Northern Hemisphere sky, Auriga contains many very interesting objects and nebulae. Arguably the most important of these objects are the famous Open Clusters M36, M37 and M38, all of which I have imaged individually.
This image was taken in January 2020 from my backyard in Nottingham, UK on my modified (i.e. with the IR filter removed) Canon DSLR 1100D and a Canon 50mm lens. It is composed of 80 x 90s exposures at ISO 800 at F4, mounted on a Skywatcher Star Adventurer sky tracker mount. Astrophotography does not have to be expensive and you can achieve great things with a DSLR and a tracking mount!

Below, to the left, is an annotated version of the above picture and it shows many of the interesting objects present within the constellation of Auriga. You can see the many Sharpless catalog (Sh2) objects as well as the more famous Messier open clusters. To the right is a high contrast inverted view of the image.
I hope you like this page and found it useful.


Further Experience with Takahashi FSQ85 Baby Q
I have had the scope for three weeks now and have used it three times. That's good going in the UK in case you possibly thought that's bad; it's not uncommon to wait for six weeks for a first light in our cloudy climate! Anyway, leaving aside the usual British moans about our weather......
The FSQ is so easy to use. Just point it, focus and forget. I am using Baader LRGB filters in 1.25" guise in an Atik EFW2 filter wheel. These filters are stated to be parfocal. However, with my Skywatcher ED80 telescope I found they were not. The focus wandered slightly between the filters. I normally focus on the Luminance channel first. I then grab LRGB in that order. But by the time I got to the blue filter I found stars were becoming bloated, not massively - but enough to take the edge off the picture. This problem is definitely not an issue with the ED80 stock focuser - I could adjust that sufficiently to make it rock solid - but is more attributed to the differing light wavelengths coming to a minutely different focus with the ED80 primary objective, blue is always affected worse. This is hardly surprising at the ED80 price point and indeed, the ED80 is an excellent telescope for its price. When using the FSQ though the focus is perfect on all LRGB filters and is as perfect on all four corners of the image. It just makes the scope so easy to use. I sincerely hope this is also the case when I get some Baader narrowband filters as well. However. considering the FSQ is ten times the cost of the ED80 is it ten times better? Of course not. That is not the way of things - it is diminishing returns at this end of the market as is the case with any other premium product. You pay a massive amount more to make it 20% better.
The FSQ-85 focuser is heavy and robust. However, a slight word of caution here that knocks a mark off the score for the FSQ-85. I have found that with my filter wheel and camera attached (EFW2+Atik460 = just over 1kg so hardly that heavy) I find that I need to have some focus knob lock applied or else the focuser can start to very slowly slip when pointed at over 50 degrees or so above the horizon. This came as a bit of a surprise to me since I have read some web articles that state the focus lock can be fully undone and the focuser does not slip even when pointed vertically. This is not my finding; I need some focuser lock applied to "brake" the slip and can then use the fine focuser. That makes me give the scope 9/10. Otherwise it would have got a perfect 10/10. I penalise it a full mark since the focuser action is a critical part of using a scope and at this price point I should not be expected to start shelling out yet more money for after market focusers or fiddling with tightening screws etc. This is a Rolls-Royce scope; you don't buy a Roller and expect to be under the hood tinkering on day 1. I need to do some further research into this. Maybe the focuser can be "tightened" perhaps..... Or maybe my expectations are unrealistic and this is the whole point of having the focus lock. To be fair the use of the lock screw is pretty intuitive and easy. Had it not been I would have sent the scope back (EDIT 2016 - I now use a Lakeside autofocus system that prevents any wander of the focus)
What is very commendable about the FSQ is the accuracy of the Camera Angle adjuster and focuser working together. So, when I achieve precise focus and then need to turn the CAA to frame the subject (something that I will be doing all the time) the focus does not shift even a fraction. I checked it out by slewing the scope to a bright star and putting on the Bahtinov mask after so adjusting the CAA after previous focus - the focus had not moved at all. That shows how accurately the scope and its bits are made.
I have used the FSQ on two objects so far, in both cases at native focal length - I have yet to use it with the reducer even though I bought the reducer with the scope. I grabbed further data on M33 Triangulum galaxy to add to the image on my previous post and I also grabbed RGB on the Double Cluster.
This image of M33 in Triangulum (lower quality here as a jpeg) has two hours of Luminance and 90 minutes each of RGB. The Luminance was 1x1 binned and the RGB was 2x2. The data was captured on the evenings of 21 and 25 November 2013 from my back yard (semi light polluted). I also should really have been using my IDAS Hutech Light pollution filter! All processing was in Pixinsight. The image needs more data to really let the spiral arms and the HII regions jump out. It could use some Ha as well. Nevertheless, it is coming along nicely I think. The two data sets are closely aligned and that will allow me to grab a whole lot more data. Next time it is clear I will grab a lot more luminance and Red data. Indeed, I might push the subs out to 15 minutes. What stops me doing that normally is that Nottingham is under the flight path for US West Coast flights from Heathrow that tend to plague my exposures! It hurts throwing away otherwise perfect 15 minute subs! However, I have recently discovered that Pixinsight's Windsorised Sigma clipping routines are extremely effective at removing plane and satellite trails, especially if I use dithering during capture.
The important thing to note is the stars are nice and round in the corners so the scope is performing very well! You can see this image at higher resolution here.
Next up is the Double Cluster in Perseus. This data was captured on 4th December 2013, again from my back yard. This time though I used the IDAS LP filter and this has reduced light pollution light splatter very effectively.

Star field pictures show errors in an optical system all too readily and I am very pleased the FSQ came through this test very well, despite very mediocre seeing on the night. Here are 30 minutes per RGB channel at 5 minutes exposures, binned 1x1. Higher resolution of this image is here. There is no luminance here at all. Also, no flats here since I mistakenly captured the flats at 2x2 binning as I normally bin 2x2 on RGB! Doh... Oh well, it still came out quite well with Pixinsight's DBE tool to remove the vignetting.
So, to sum up, I am very pleased with the scope so far. It is optically wonderful. It looks the part and I have great pride in owning it. The build quality is superb. The focuser is good and robust but has slight slippage that has taken the edge off a tiny, weeny bit.
Would I buy again? Absolutely! This is scope for life and look forward to doing some great things with it. I might even buy a FSQ-106 to go with it as well ;)
Next blog entries will be how I connect all the bits together to connect to my Atik EFW2 at both native and reduced. Another blog entry will be about how I mounted the scope to my NEQ6 and guide-scope.